
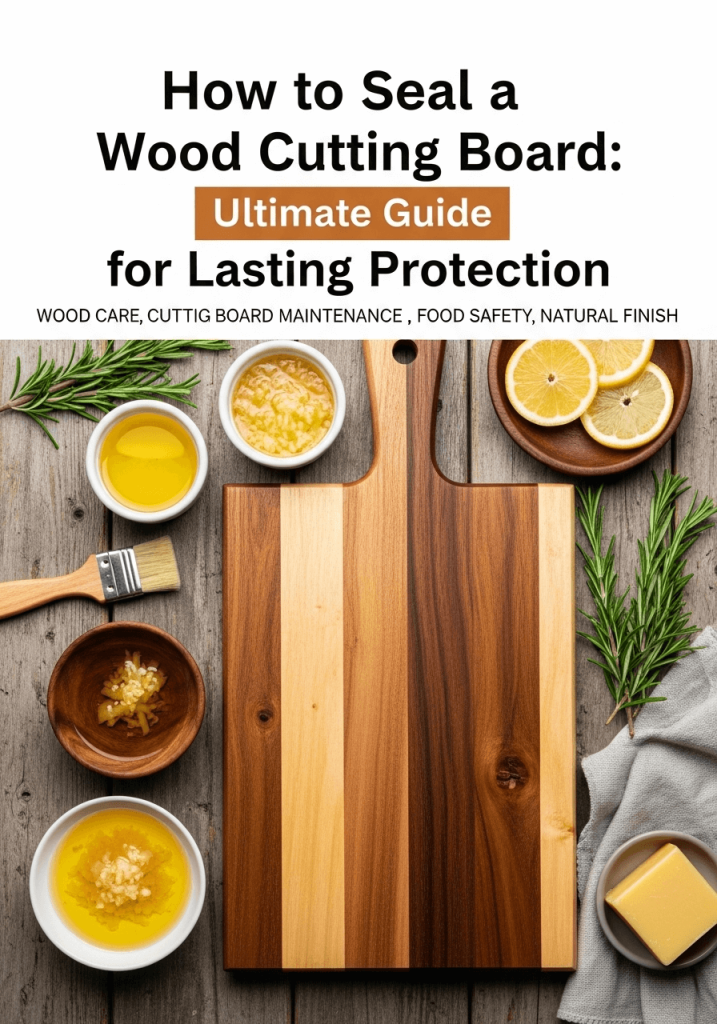
Wood cutting boards look great and perform well — but only if you protect them. Sealing a wood cutting board keeps moisture, odors, and bacteria out, prevents warping and cracking, and extends the life of the board. This guide gives step‑by‑step instructions, explains the best food‑safe finishes, shows how to repair and sanitize boards, and highlights common mistakes to avoid.
Why this matters: improperly sealed wood absorbs liquid and food particles, which accelerates wear and increases food‑safety risk. Follow these practical, tried‑and‑tested steps and maintenance tips to keep a board functional and attractive for years.
Quick overview: what sealing does and when to do it
Sealing means applying a penetrating, food‑safe oil or wax finish that soaks into the wood fibers and repels water rather than forming a brittle surface film. Proper sealing:
- Prevents water penetration that causes swelling, splitting, and mold.
- Makes the surface less prone to staining and odors.
- Reduces bacteria lodging in exposed wood pores (cleaning is still essential).
When to seal:
- New board: perform an initial “conditioning” (multi‑coat oiling) before first use.
- Regular maintenance: for typical home use, re‑oil when water no longer beads — often every 1–3 months. Heavy professional use may need weekly oiling.
For general food‑safety guidance on handling food contact surfaces, see the USDA and university food‑safety resources such as USDA FSIS and the University of Minnesota Extension.
 Typical maintenance routine for a wooden cutting board.
Food‑safe finishes: which one should you use?
Not all “oils” are equal. Choose finishes that are explicitly labeled food‑safe or USP/medical grade where appropriate.
Common, recommended finishes:
- Food‑grade mineral oil (USP): Inexpensive, odorless, non‑reactive, easy to apply. Penetrates and protects; does not polymerize, so requires regular reapplication.
- Beeswax + mineral oil blends (“board butter”): The oil soaks in while the beeswax adds surface resistance to liquids. Great for long‑term protection when used after oiling.
- Food‑safe polymerizing finishes (e.g., polymerized tung oil sold as “salad bowl finish”): Forms a more durable, slightly film‑forming layer; good for finished pieces that aren’t used for heavy chopping. Ensure product is labeled food‑safe for cutlery contact.
Avoid these for cutting surfaces:
- Vegetable oils (olive, sunflower, canola): can oxidize and go rancid, leading to odors and sticky residue.
- Raw linseed oil (boiled linseed oil often contains non‑food additives): unsafe unless explicitly marketed as food‑safe.
- Standard polyurethane or varnish on the top surface: while durable, these finishes are not appropriate for a working cutting surface because they will be damaged by knife cuts and can trap bacteria in scratches.
 Examples of finishes commonly used on food‑contact wood.
Pros and cons at a glance:
- Mineral oil: +safe, cheap, easy | –needs frequent reapplication
- Beeswax blend: +better surface beading | –builds up if overused; needs occasional stripping
- Polymerized “salad‑bowl” finishes: +durable | –may change cutting feel; costlier
For a full discussion of finishing techniques, see the board finishing notes and comparisons in our detailed finishing options guide.
Tools and materials you’ll need
Gather these before you start:
- Food‑grade mineral oil (USP / “food grade” labeled) or a commercial board oil.
- Optional: beeswax block (for making a board butter) or a commercial beeswax‑oil conditioner.
- Clean, lint‑free cloths, paper towels, or disposable shop towels.
- Sandpaper: 120, 180, and 220 grit (or a random‑orbit sander for large boards).
- Mild dish soap and warm water for washing.
- Optional: plastic scraper or bench scraper for removing gunk.
- Optional: 3% hydrogen peroxide or a diluted bleach solution for sanitizing (use sparingly).
If your board is bamboo or a dense hardwood, follow the specific oiling guidance for that species — see our notes on oiling bamboo boards for tips.
Step‑by‑step: how to seal a wood cutting board (detailed)
Follow these steps for a durable, food‑safe finish.
Clean the board
- Wash by hand with warm water and mild dish soap. Scrub gently and rinse.
- Do not soak the board or put it in the dishwasher.
- Dry upright or on a rack until surface is completely dry (a few hours).
Inspect and sand (only if needed)
- Lightly sand any rough patches, deep knife marks, or raised grain.
- Progress from 120 → 180 → 220 grit for a smooth surface. For very deep cuts, remove until the surface is even.
- Remove sanding dust with a damp cloth and allow to dry.
Tip: For species like teak, follow the grain and avoid excessive sanding; see our teak maintenance notes at teak board care.
Initial conditioning (first treatment on a new or freshly sanded board)
- Apply mineral oil liberally: pour a small puddle and rub into the surface with a cloth, working with the grain.
- Coat the entire surface, edges, and the end grain (end grain soaks oil quickly and needs more).
- Let the oil penetrate for 30–60 minutes. If the board soaks it up quickly, apply more until the surface no longer draws oil for that coat.
- Wipe off excess surface oil with a clean cloth after absorption.
For best initial results, repeat this process 2–3 times over the first 24 hours, allowing a few hours’ absorption time between coats. This deep‑conditions the wood.
Add beeswax (optional)
- If using a beeswax conditioner: warm the beeswax slightly and rub a thin layer over the oiled board, or use a prepared beeswax‑oil paste.
- Buff off excess; allow wax to harden for a few minutes then buff for a satin finish.
Final cure and use
- Let the board rest overnight before cutting on it.
- After initial conditioning, wipe with dry cloth to remove any oily residue before use.
 Applying surface oil to the cutting board during conditioning.
Maintenance schedule examples
- New board: 2–3 coats initial conditioning (24 hours).
- Home cook (moderate use): oil monthly, or when water no longer beads.
- Heavy use / professional: oil weekly or as needed.
Repairing cuts, stains, and structural damage
Small cuts and knife marks
- Lightly sand with 120 → 220 grit until smooth. Re‑oil the area.
Deeper gouges or cracks
- For surface cracks, sand and fill with a food‑safe epoxy or butcher block glue marketed as food‑safe, following the manufacturer’s curing instructions. Not all epoxies are safe — read labels carefully.
- If a board splits through, consider professional repair or replacement; deep structural repairs can be unsafe.
Stains and odors
- Rub coarse salt and a halved lemon over the surface, then rinse and re‑oil for mild stains.
- For persistent stains/odors, wipe with 3% hydrogen peroxide, let sit for a few minutes, then rinse. Avoid aggressive bleach use that can damage wood fibers — for sanitation alternatives see sanitizing guidance and our tips to remove stains.
If you discover mold, follow remediation guidance for wooden surfaces and our notes on how to remove mold.
Cleaning and sanitizing between uses
Daily cleaning
- Hand‑wash with warm, soapy water immediately after use. Rinse and dry upright.
- Avoid soaking or dishwasher cycles — heat and long exposure to water will warp and crack wood.
Sanitizing (occasional)
- For raw meat contact, wash first, then sanitize: common household sanitizers include 3% hydrogen peroxide or a brief wipe with a freshly prepared diluted bleach solution (use sparingly). After sanitizing, rinse thoroughly and re‑oil if the wood appears dry.
- For authoritative food‑safety guidance on handling food contact surfaces, consult the USDA FSIS and university extension resources such as University of Minnesota Extension.
A common mistake is skipping drying: leaving a board flat and wet traps moisture and accelerates rot or warp.
Common mistakes and troubleshooting
- Using vegetable oil: will oxidize and become rancid — avoid for sealing.
- Overbuilding wax: too much beeswax leaves a gummy surface that attracts food particles. Strip with mineral spirits or sand and recondition.
- Sealing with non‑food finishes: polyurethane or similar film finishes will chip with knife use and may hide damage; do not use them on working cutting surfaces.
- Not treating end grain: end grain soaks oil faster — neglecting it leads to splitting. Apply extra coats to the edges.
If a board feels sticky after oiling, you applied too much oil and didn’t wipe off the excess. Wipe surface with a clean cloth and let air dry for several hours; if stickiness persists, sand lightly and re‑oil sparingly.
Frequently asked questions
Q: How often should I seal my wood cutting board? A: Re‑oil when the board looks dry or dull, or when water stops beading — commonly every 1–3 months for typical home use; more often for end‑grain or heavy use.
Q: What is the best oil for sealing cutting boards? A: Food‑grade mineral oil (USP) is the go‑to choice because it’s stable, odorless, and safe. Beeswax combined with mineral oil adds surface resistance. Use only products labeled food‑safe.
Q: Can I use vegetable oil to seal my board? A: No. Most vegetable oils oxidize and go rancid, creating odors and sticky residues. Avoid them.
Q: Is polyurethane safe on cutting boards? A: Not for working surfaces. Polyurethane will wear and nick under knife use and is not practical for a cutting face. It can be used on decorative, non‑cutting faces.
Q: How do I sanitize my cutting board after raw meat? A: Wash with hot soapy water, rinse, and follow with a brief sanitize step such as wiping with 3% hydrogen peroxide. Rinse and dry. For detailed food‑safety practices, refer to USDA FSIS guidance.
Q: Can I build my own board and then seal it? A: Yes — when you make a board, finish sanding and perform the initial conditioning routine described above. See our build notes for more on how to build your own.
Q: How do I remove stuck grease or oil residue? A: Use a plastic scraper, coarse salt abrasive scrub, or our tips on how to remove greasy residue; then re‑sand and re‑oil the surface.
Final checklist before first use
- Board is clean and fully dry.
- Initial conditioning completed with 2–3 coats (first 24 hours).
- Excess oil wiped off and board rested overnight.
- You have a re‑oiling schedule (monthly or as needed).
 Close view of a well‑conditioned cutting board surface.
Conclusion
Sealing a wood cutting board with food‑grade mineral oil (and optionally a beeswax finish) is the most reliable way to protect it from moisture, stains, and damage. Clean carefully, sand only when necessary, and follow a simple conditioning routine: initial multiple coats, then routine re‑oiling when the wood looks dry. Avoid vegetable oils and non‑food finishes on cutting faces. For safe handling and sanitizing practices, consult authoritative food‑safety resources such as the USDA FSIS.
Ready to protect your board? Pick up USP‑grade mineral oil labeled “food grade” at your hardware or grocery store and perform an initial conditioning this weekend — your board will last much longer for it.

I’m Abby Lu, a passionate home cook who loves simplifying everyday meals. At PlugChef.com, I share product reviews and cooking guides to help you find the best tools for your kitchen.
Related posts:
 How to Organize a Corner Kitchen Cupboard: Expert Tips
 How to Grow Organic Kitchen Garden: Expert Tips
 How to Best Organize Kitchen Cabinets: Expert Tips
 How Can a Kitchen Renovation Boost Storage & Organization?
 What is Kitchen Plastic Wrapping Paper Made of: Unveiling Secrets
 How Should a Fridge Be Organized: Expert Tips

