
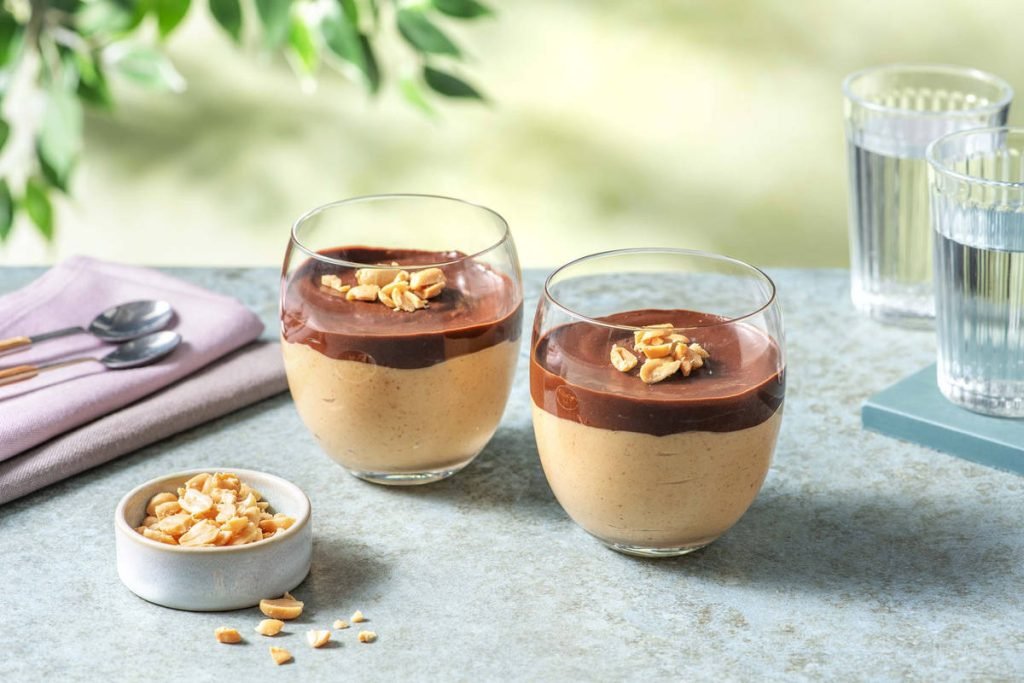
There’s a reason peanut butter and chocolate is one of the most beloved flavor combinations of all time: the salty, nutty depth of peanut butter cuts through rich, velvety chocolate for a perfectly balanced, indulgent treat. This no-bake peanut butter and chocolate mousse delivers that iconic pairing in a light, airy texture that feels far more special than its simple prep suggests. Ready in under 30 minutes of active work (plus a few hours of chilling time), it’s perfect for last-minute date nights, kid-friendly dessert spreads, or even a fancy addition to a charcuterie board. Below, you’ll find a tested, foolproof recipe, pro tips to avoid common texture mistakes, serving ideas, dietary variations, and safe storage guidance to make this decadent delight work for every occasion.
 Layered presentation highlights the distinct peanut butter and chocolate strata
Image source: food52.com
Layered presentation highlights the distinct peanut butter and chocolate strata
Image source: food52.com
Ingredients: Quality Matters First
The magic of this mousse comes from balancing three core components: rich peanut butter, high-quality chocolate, and light, whipped dairy (or dairy-free alternative). Choosing the right variants of each ingredient will make the difference between a dense, clumpy dessert and a silky, airy one that melts on your tongue.
Peanut Butter Selection
Opt for natural, no-stir creamy peanut butter with no added sugars, hydrogenated oils, or excess salt. No-stir varieties have a consistent fat content that emulsifies smoothly with whipped cream, while stir-prone natural peanut butter often separates, leading to lumpy mousse. If you love a bit of texture, blitz half of a crunchy peanut butter in a food processor for 10 seconds to break up large chunks before adding it to the base — this adds subtle crunch without compromising the mousse’s smooth texture. Lightly salted peanut butter works best, as the salt amplifies the chocolate’s sweetness, but you can always adjust to taste after mixing.
Chocolate Selection
Stick to 60-70% cocoa dark chocolate for the ideal balance of bitter depth and sweet richness. Chocolate below 60% cocoa will make the mousse overly sweet and mask the peanut butter flavor, while chocolate above 70% can taste bitter and overpower the nutty notes. Choose couverture or high-quality baking chocolate over standard supermarket chocolate chips: chips contain added stabilizers that create a waxy, dense texture, while pure baking chocolate melts into a glossy, smooth liquid that folds seamlessly into whipped cream. For a sweeter, creamier profile, milk chocolate works, but cut the added sugar in the recipe by 25% to avoid overwhelming sweetness.
Stabilizers & Flavor Boosters
While the base recipe only needs three core ingredients, a few small add-ins can elevate the flavor and texture:
- 1 teaspoon vanilla extract to round out the flavor profile and mask any bitter notes from the chocolate
- A pinch of flaky sea salt to finish, which amplifies both the peanut butter and chocolate flavors
- Optional stabilizers: If you live in a warm climate or are serving the mousse outdoors, add 1 teaspoon of unflavored gelatin dissolved in 2 tablespoons of warm water to the whipped cream before folding. This prevents melting without altering the flavor.
- Flavor twists: A ½ teaspoon of espresso powder or cinnamon adds warm, complex notes without overpowering the core flavors.
Pro tip: If you’re prepping this dessert with young children in the kitchen, secure lower cabinets with securing kitchen cabinets while cooking to keep little hands away from hot equipment and sharp utensils.
No-Bake Recipe: Step-by-Step Instructions
This recipe requires no baking, no special equipment, and comes together in under 30 minutes of active time. Follow these steps exactly to avoid common texture mistakes like runny mousse or deflated, dense results.
1. Prep the Peanut Butter Base
In a large mixing bowl, stir together 1 cup of creamy no-stir peanut butter and ¼ cup of sifted powdered sugar until fully combined and smooth. Sifting the sugar prevents lumpy texture in the finished mousse. Set this base aside while you prepare the other components.
2. Melt the Chocolate
Place 8 ounces of 60-70% dark chocolate (chopped into small, even pieces) in a microwave-safe bowl. Microwave in 30-second bursts, stirring thoroughly between each burst, until the chocolate is fully melted and glossy. Aim for a temperature of 105-110°F (40-43°C): if the chocolate is too hot, it will melt the whipped cream when folded, leading to a runny mousse. Let it cool slightly if it feels warm to the touch.
 Gentle folding is key to avoiding deflated, dense mousse
Image source: twobittart.com
Gentle folding is key to avoiding deflated, dense mousse
Image source: twobittart.com
3. Whip the Cream
Pour 1.5 cups of cold heavy cream (or cold coconut cream for a vegan swap) into a large mixing bowl. Whip on medium speed until the cream just holds soft peaks — this takes about 2 minutes. Stop as soon as a peak flops over when you lift the beaters: over-whipping creates stiff peaks that will make the mousse dense and heavy.
4. Fold Ingredients Together
Add ⅓ of the whipped cream to the peanut butter base and stir gently to lighten the mixture. Add the melted chocolate and stir until fully combined. Then, add the remaining whipped cream in two batches, folding gently with a silicone spatula: cut through the center of the mixture to the bottom of the bowl, then fold the mixture over the top, rotating the bowl as you go. Do not stir, as this will deflate the cream and create a dense mousse.
5. Chill to Set
Spoon the mousse into individual serving glasses or a large trifle dish. Cover with plastic wrap and chill in the refrigerator for at least 4 hours, or overnight for best results. This chilling time allows the flavors to meld and the mousse to set to a perfect, scoopable texture.
Cleanup tip: Scrub chocolate residue off bowls and utensils with a heavy-duty kitchen cleaning brush to avoid scrubbing scratches on non-stick surfaces.
Serving & Pairing Ideas
While this mousse is delicious straight from the fridge, a few small presentation tweaks can turn it into a restaurant-worthy dessert that feels extra special for gatherings.
Plating & Garnishes
For individual servings, layer the mousse with crushed graham crackers or chocolate cookie crumbs in clear mini glasses or mason jars to show off the distinct strata. For a shared dessert, serve it in a large trifle dish and let guests scoop their own portions. Top with any of the following for extra texture and visual appeal:
- A sprinkle of flaky sea salt or crushed pretzels for a sweet-salty crunch
- A dollop of whipped cream and chocolate shavings for an elegant finish
- Crushed peanuts or toasted almond slivers for extra nutty depth
- Fresh raspberries or mint leaves for a pop of bright color
Food & Drink Pairings
This mousse is incredibly versatile, pairing well with both sweet and savory items:
- For a casual treat, serve with a side of shortbread cookies or graham crackers for dipping.
- For a more elevated spread, pair it with properly cutting cheese for grazing boards like aged gouda or sharp cheddar for a sweet-savory contrast.
- Drink pairings include cold milk, dark roast espresso, tawny port, sparkling apple cider, or even a light lager for a unique sweet-salty match.
Custom Serving Touches
For a personal, giftable touch, serve the mousse on a custom engraved serving board alongside other homemade treats. This is perfect for holiday gifting or housewarming presents.
Custom Variations for Every Diet
The base recipe is incredibly flexible, and small swaps can make it work for almost any dietary need or flavor preference.
Crunch Add-Ins
Fold any of the following into the mousse before chilling for extra texture:
- Chopped pretzels or toffee bits for a sweet-salty crunch
- Crushed Oreos or gluten-free chocolate cookies for a cookies-and-creme twist
- Toasted coconut flakes or granola for a tropical, chewy contrast
- Stir in half of the add-ins after folding the cream if you want distinct, crunchy pockets rather than evenly distributed texture.
Fruit & Flavor Infusions
Brighten the rich mousse with fruity or spiced add-ins:
- Fold in ½ cup of fresh raspberry or strawberry puree for a berry-swirled effect
- Add 1 teaspoon of orange zest or a splash of orange liqueur for a citrusy twist
- Mix in ¼ cup of melted peanut butter chips for an extra intense peanut flavor
- Layer the mousse with sliced bananas or mango chunks for a fresh, tropical dessert.
Dietary Restriction Swaps
- Vegan: Use cold coconut cream instead of heavy cream, vegan dark chocolate, and maple syrup instead of powdered sugar if needed. Ensure your peanut butter is certified vegan (no added honey).
- Gluten-free: Use gluten-free chocolate and gluten-free cookie crumbs for garnishes or layers. The base recipe is naturally gluten-free as long as your add-ins are certified gluten-free.
- Low-sugar/Keto: Use powdered erythritol or monk fruit sweetener instead of powdered sugar, and 85% dark chocolate to cut added sugar content.
- Nut-free: Substitute creamy sunflower seed butter for peanut butter, but note that sunflower seed butter has a stronger, earthier flavor, so add an extra ½ teaspoon of vanilla to balance it.
Storage & Food Safety Guidelines
Proper storage keeps your mousse fresh, safe, and delicious for days (or even weeks, if frozen). Follow these guidelines to avoid spoilage and waste:
Refrigeration
Store leftover mousse in an airtight glass container in the coldest part of your refrigerator (not the door, where temperatures fluctuate more). For optimal flavor and texture, consume within 3 to 4 days. Never leave the mousse at room temperature for more than 2 hours, as the dairy (or coconut cream) can spoil quickly in warm conditions. For verified safe storage times for perishable desserts, refer to USDA food safety guidelines for perishable desserts.
Freezing
Peanut butter and chocolate mousse freezes exceptionally well for up to 2 months. Portion it into individual airtight containers to avoid thawing the entire batch at once. To prevent freezer burn, press a piece of plastic wrap directly onto the surface of the mousse before sealing the container lid. Thaw frozen mousse in the refrigerator overnight — never thaw it on the counter, as this can lead to bacterial growth.
Signs of Spoilage
Discard the mousse immediately if you notice any of the following:
- A sour, off-odor
- Discoloration or dark spots on the surface
- Separation, curdling, or a watery texture
- Mold growth of any kind
- A bitter, unusual taste
Safety tip: Keep sharp kitchen tools out of reach of young children with drawer safety latches to avoid accidental cuts while prepping or cleaning up.
Nutritional Profile & Balanced Enjoyment
While this mousse is a decadent treat, it does offer some nutritional benefits when enjoyed in moderation. A typical ½-cup serving made with dark chocolate and natural peanut butter contains:
| Nutrient | Amount per ½-cup serving |
|---|---|
| Calories | 320 kcal |
| Protein | 7 g |
| Total Fat | 22 g (8 g saturated) |
| Total Carbohydrates | 24 g (3 g fiber, 18 g sugar) |
| Sodium | 120 mg |
Peanut butter contributes healthy monounsaturated fats and plant-based protein, which support muscle health and sustained energy. Dark chocolate (with 60%+ cocoa) is rich in flavanols, antioxidants linked to improved cardiovascular health and reduced inflammation, per research from the Harvard T.H. Chan School of Public Health.
That said, this is still a high-sugar, high-fat dessert, so it’s best enjoyed as an occasional treat rather than a daily staple. To make it more balanced, pair a small portion with fresh fruit or a handful of nuts for added fiber and protein, which will help keep you full and avoid blood sugar spikes.
Frequently Asked Questions
Can I use crunchy peanut butter for this recipe?
Yes, but blitz it in a food processor for 10 seconds first to break up large chunks, which will keep the mousse smooth. If you prefer distinct crunchy pockets, stir in half of the chopped peanuts after folding the whipped cream, so they don’t get crushed during mixing.
Why is my mousse runny or dense?
Runny mousse is almost always caused by adding melted chocolate that is too hot to the whipped cream, which melts the cream and deflates the air pockets. Always let melted chocolate cool to 105-110°F (40-43°C) before folding. Dense mousse is usually the result of over-whipping the cream (stop at soft peaks) or stirring instead of folding the ingredients together, which deflates the air.
Can I make this mousse ahead of time?
Absolutely. It keeps in the refrigerator for up to 4 days, or in the freezer for up to 2 months. Thaw frozen mousse in the refrigerator overnight for the best texture — do not thaw it at room temperature, as this can cause spoilage.
Is this mousse safe for people with gluten intolerance?
The base recipe is naturally gluten-free, as long as you use gluten-free chocolate and avoid add-ins like cookie crumbs that contain gluten. Always check labels on all ingredients for cross-contamination warnings if you have celiac disease or a severe gluten intolerance.
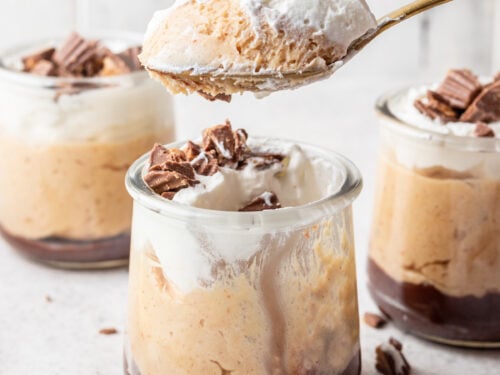 A single spoonful shows the light, airy texture of finished mousse
Image source: www.wellseasonedstudio.com
A single spoonful shows the light, airy texture of finished mousse
Image source: www.wellseasonedstudio.com
Conclusion
Peanut butter and chocolate mousse is the perfect no-fuss dessert for anyone craving a rich, indulgent treat without the hassle of baking. With just a few high-quality ingredients and simple folding technique, you can create a silky, flavorful dessert that works for weeknight treats, party spreads, or even homemade gifts. The flexible recipe also makes it easy to adapt for almost any dietary need or flavor preference, so you can make it your own with add-ins like crushed pretzels, fruit puree, or a splash of liqueur.
Once you master the base recipe, experiment with different flavor combinations to find your perfect version — and don’t forget to pair it with a curated charcuterie board for a next-level dessert experience that will impress any guest.

I’m Abby Lu, a passionate home cook who loves simplifying everyday meals. At PlugChef.com, I share product reviews and cooking guides to help you find the best tools for your kitchen.
Related posts:
 Seville Expandable Cabinet And Pantry Organizer: Space Savior
 Glideware Pull Out Cabinet Organizer for Pots & Pans: Space Saver
 Small 3-Tier Shelf Organizer: Maximize Space Effortlessly
 Trader Joe’S Spicy Lentil Wrap: Delicious, Healthy, and Quick Meal!
 Easy Way to Peel Pumpkin: Quick Tips for Effortless Prep
 How Long Do Grapes Last: Ultimate Freshness Guide Revealed

