
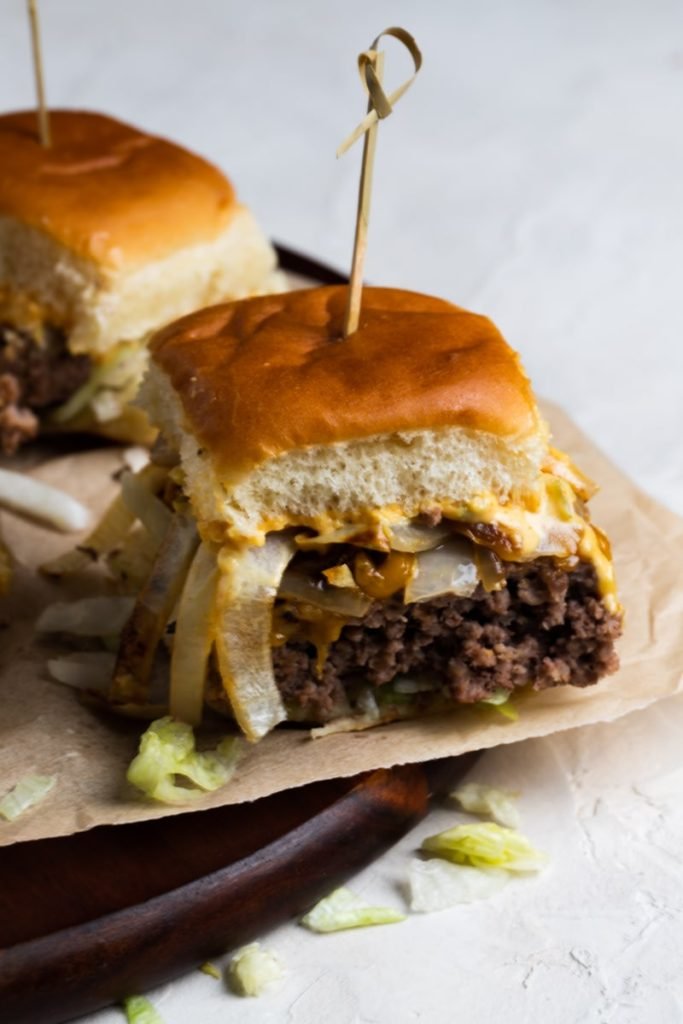
Looking for a no-fuss appetizer that actually tastes homemade, not like a store-bought freezer staple? Hawaiian Roll Ground Beef Sliders are the answer. These bite-sized sandwiches pair juicy, savory ground beef with soft, subtly sweet Hawaiian rolls for a flavor combination that appeals to kids and adults alike. They’re quick to assemble, easy to transport, and vanish from the serving platter in minutes at game days, potlucks, birthday parties, or casual weeknight dinners. Unlike traditional slider buns that can turn dry or tough, Hawaiian rolls stay soft even when filled with hot beef and melted cheese, making every bite consistently delicious. Keep reading for pro tips to make sliders that will have your guests asking for the recipe.
Why Hawaiian Roll Ground Beef Sliders Are a Must-Have Party Staple
The Sweet-Savory Flavor Balance That Works for Every Crowd
The mild, honeyed sweetness of Hawaiian rolls cuts through the rich, umami flavor of seasoned ground beef without clashing. This contrast eliminates the overly salty or one-note taste of many slider recipes, making them a hit even with picky eaters who turn up their noses at classic cheeseburgers. The soft, pillowy texture of the rolls also holds up to juicy patties and wet toppings without falling apart, a common pain point with crusty traditional slider buns.
 These sliders get their signature sweet-savory flavor from soft, lightly sweet Hawaiian rolls
No-Fuss Portability for Any Gathering
Sliders are designed to be eaten in one or two bites, no utensils required. This makes them ideal for crowded standing-room-only parties, backyard cookouts, or potlucks where guests are mingling and moving around. Their compact size also means you can fit dozens on a single serving platter, and they travel well without risk of spilling or getting squished, unlike larger sandwiches or messy dips.
Endless Customization for Every Dietary Need
These sliders are incredibly adaptable to different preferences and restrictions. Swap ground beef for ground turkey or a plant-based meat alternative for lower-fat or vegan options, use gluten-free Hawaiian rolls for guests with celiac disease, and load up on dairy-free cheese for lactose-intolerant diners. The base recipe is just a starting point: you can tailor toppings and seasonings to match any cuisine theme, from BBQ to Italian to spicy Mexican-inspired.
Selecting the Perfect Ground Beef for Juicy, Flavorful Sliders
The quality of your ground beef is the single biggest factor in how tasty your sliders turn out. Cheap, overly lean beef will dry out during cooking, while high-fat cuts can make your sliders greasy and cause the rolls to get soggy fast. Follow these guidelines to pick the best option every time.
Fat Content: The #1 Driver of Juiciness
For ideal results, opt for ground beef with a 15-20% fat content, labeled as 80/20 or 85/15 (lean-to-fat ratio). This balance renders enough fat during cooking to keep the patties moist and flavorful, without leaving a greasy aftertaste. If you need to use leaner beef for dietary reasons, mix in 1 teaspoon of olive oil or a splash of low-sodium beef broth per pound of meat to compensate for the lost moisture. In practice, 80/20 works best for most home cooks, as it delivers consistent results no matter your cooking method.
Freshness and Safety Checks
Always choose ground beef that is bright cherry-red in color (brown or gray patches indicate oxidation and reduced freshness) and has a mild, clean, slightly metallic scent—avoid any package with a sour, ammonia-like, or rotten smell. The meat should feel firm to the touch, not mushy or slimy. Buy from a grocery store with high meat turnover or a local trusted butcher, and use the beef within 1-2 days of purchase, or freeze it for up to 3 months to extend its shelf life. Always cook ground beef patties to the USDA’s recommended safe minimum internal temperature of 160°F (71°C) to eliminate harmful bacteria like E. coli and Salmonella. Using an instant-read meat thermometer is the only way to confirm doneness accurately, as color alone is not a reliable indicator, especially for pre-mixed ground beef with added fillers.
Shaping and Seasoning Patties for Consistent Results
Uniformly shaped, well-seasoned patties cook evenly and deliver the same juicy bite in every slider. Skipping these steps leads to some undercooked, some overcooked, and bland, uneven flavor.
Uniform Shaping for Even Cooking
Slider patties should be roughly 1.5 inches in diameter, slightly larger than the diameter of your Hawaiian rolls, as they shrink 20-25% during cooking. Use a 1.5-inch cookie scoop for perfectly consistent portions, then gently press each scoop of meat into a flat patty with smooth edges to avoid cracking. A common mistake many home cooks make is skipping the small indentation pressed into the center of each patty: this prevents the patty from puffing up into a ball while cooking, ensuring it stays flat and fits perfectly inside the roll.
Seasoning Blends That Elevate (Without Overpowering) the Beef
You don’t need a long list of fancy spices to make delicious sliders. For a classic, crowd-pleasing flavor, mix 1 teaspoon of kosher salt and ½ teaspoon of black pepper per pound of ground beef, plus ½ teaspoon each of garlic powder and onion powder if desired. For extra depth, add 1 teaspoon of Worcestershire sauce or a dash of low-sodium soy sauce per pound for an umami boost, or a pinch of smoked paprika for a subtle smoky note. Avoid over-seasoning: the goal is to enhance the natural flavor of the beef, not mask it. If you love heat, add a pinch of chipotle powder or a dash of hot sauce to the mix, but go easy at first to avoid overwhelming more sensitive palates.
Cooking Methods for Perfect Sliders Every Time
Both stovetop pan-searing and outdoor grilling produce delicious sliders, each with unique benefits. Choose the method that fits your cooking setup and flavor preferences.
Pan-Searing for Crispy Edges and Easy Cleanup
Pan-searing is the most accessible option for home cooks, as it requires no special equipment beyond a standard skillet. Heat a cast iron or nonstick skillet over medium-high heat, add a tiny splash of oil to prevent sticking, and cook patties for 2-3 minutes per side for medium doneness. This method creates a crispy, golden-brown crust on the outside of the patty while keeping the inside juicy, and you can cook all your patties at once in a large skillet for fast results.
Grilling for Smoky, Charred Flavor
Grilling adds a distinct smoky, charred flavor that pairs perfectly with the sweetness of the Hawaiian rolls. Preheat your grill to medium-high (375-400°F), and cook patties for 2-3 minutes per side, using a grill basket if your patties are small to avoid them falling through the grates. This method is ideal for backyard cookouts, and the slight char adds a depth of flavor that’s hard to replicate on the stovetop.
Pro Tip to Avoid Dry, Overcooked Patties
No matter your cooking method, never press down on the patties with your spatula while they cook. This squeezes out all the natural juices, leading to dry, tough sliders. Let the patties rest for 2 minutes after cooking before assembling, so the juices redistribute evenly throughout the meat.
Building the Ultimate Slider Assembly Line
Proper assembly is the key to sliders that don’t fall apart, don’t get soggy, and have balanced flavor in every bite. Follow these steps for foolproof results every time.
Toasting the Rolls: A Non-Negotiable Step
Skipping the toasting step is one of the most common reasons sliders turn soggy within minutes of assembly. Brush the cut sides of the Hawaiian rolls with a thin layer of melted butter (or garlic butter for extra flavor) and toast them cut-side down in a skillet over medium heat for 30 seconds per side, until golden brown but not burnt. The crisp barrier created by toasting prevents sauces and juicy beef from soaking into the soft roll, and adds a rich, nutty flavor that complements the sweetness of the bread.
Layering for Balanced, Non-Soggy Bites
Follow this order for perfect assembly every time:
- Place the bottom bun cut-side up on your work surface.
- Spread a thin layer of sauce (mayo, aioli, or BBQ sauce) on the bottom bun to create a moisture barrier that prevents sogginess.
- Add the cooked patty, then top with a slice of cheese and let it melt for 10 seconds on the hot patty.
- Add crunchy toppings (pickles, lettuce, red onion) on top of the cheese, so they stay crisp and don’t get soggy from the beef juices.
- Spread a thin layer of sauce on the cut side of the top bun, then place it on the toppings.
This order ensures every bite has the right balance of flavors and textures, with no soggy buns or sliding toppings.
Topping Ideas for Every Taste
Keep toppings simple to avoid overwhelming the slider, or load them up for a decadent treat. Popular options include:
- Cheese: Sharp cheddar, nutty swiss, creamy provolone, or pepper jack for a spicy kick
- Sauces and condiments: Garlic aioli, spicy mustard, honey BBQ, sriracha mayo, or ketchup for a classic touch
- Crunchy add-ins: Dill pickle slices, crispy fried onions, shredded lettuce, thinly sliced red onion, or banana peppers
- Decadent extras: Crispy bacon, sautéed mushrooms, or caramelized onions for a restaurant-quality twist
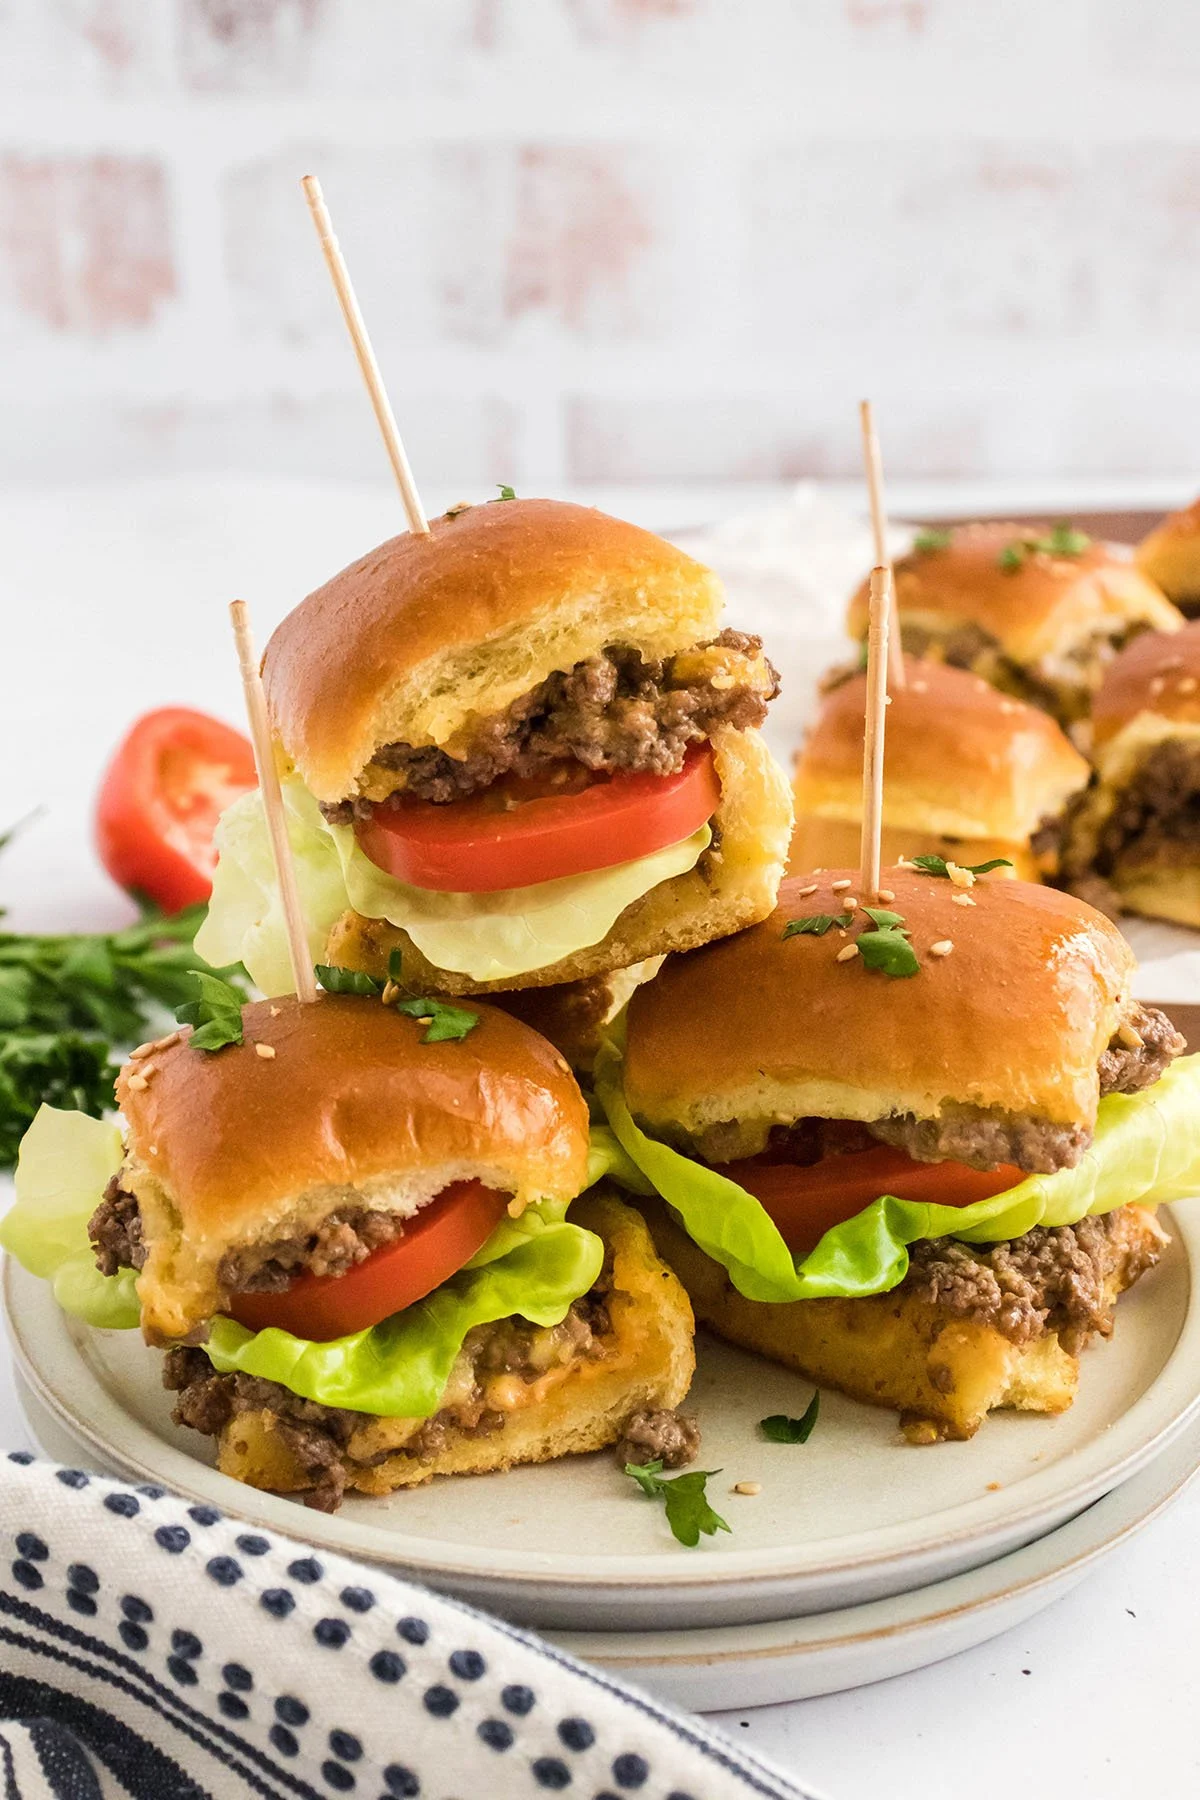 Toasting the rolls with a brush of butter prevents sogginess and adds a rich, nutty flavor
Serving and Storing for Maximum Flavor
Proper serving and storage ensure your sliders taste just as good at the end of the party as they did when they were first assembled.
Party Presentation That Wows Guests
Arrange sliders in neat rows on a large wooden serving board or colorful platter for an inviting spread. Insert decorative toothpicks or mini party flags into the top of each slider to hold them together, especially if you’ve added lots of layers of toppings. For buffets, keep sliders warm on a low warming tray set to 200°F for up to 2 hours, so they’re still warm when guests serve themselves. Garnish the platter with fresh parsley or sesame seeds for a pop of color. If you’re serving these sliders at a family gathering with toddlers in attendance, our range of childproofing hardware for kitchens helps keep little ones away from hot surfaces and cleaning supplies. If you’re building a full party spread to serve with these sliders, our tips for prepping round cheese for charcuterie presentations make hosting a breeze. For a personal touch, you can even add a custom design to your serving board using our tips for personalizing wooden kitchenware. If you’re making a fresh cucumber or tomato salad to pair with the sliders, a produce-scrubbing brush makes washing veggies quick and thorough.
Complementary Sides and Drinks
Pair your sliders with sides that balance their rich, savory-sweet flavor. Crispy sweet potato fries, kettle-cooked potato chips, or creamy mac and cheese bites add satisfying crunch and richness. Bright, acidic sides like coleslaw, cucumber salad, or pickled veggies cut through the beef’s richness and refresh the palate between bites. For drinks, sparkling lemonade, light lager, iced tea, or citrus-infused sparkling water all pair perfectly.
Storing and Reheating Leftovers (Or Pre-Made Sliders)
If you’re making sliders ahead of time for a party, assemble them up to 4 hours in advance, wrap them tightly in foil, and keep them on a low warming tray (200°F) until serving. For leftovers, store sliders in an airtight container in the refrigerator for up to 3 days, separating layers with parchment paper to avoid squishing the buns. To reheat, wrap sliders in foil and warm them in a 350°F (175°C) oven for 10-12 minutes, or place them in a skillet over low heat with a lid on for 5 minutes. Avoid microwaving, as it makes the rolls rubbery and the beef dry. For tough, stuck-on grease after cooking patties on the stovetop, a sturdy scrub brush for cookware cuts through grime without damaging nonstick or cast iron finishes. Once the party is over, a multi-surface cleaning scrub brush makes wiping down countertops and tackling greasy skillet spills a breeze.
 Decorative toothpicks hold sliders together and make them easy for guests to grab
Frequently Asked Questions
Can I use frozen Hawaiian rolls for sliders?
Yes! Thaw frozen rolls fully at room temperature for 1 hour before using, and toast them lightly to remove any frost and add a crisp, buttery texture. Pre-made frozen rolls work just as well as fresh, so they’re a great time-saver for last-minute parties.
Can I make these sliders ahead of time for a party?
Absolutely. Assemble the sliders up to 4 hours before your event, wrap them tightly in foil, and keep them on a low warming tray set to 200°F until serving. You can also pre-cook the patties and store them in an airtight container in the fridge for up to 2 days, then assemble and reheat them when you’re ready to serve.
What can I use instead of ground beef?
Ground turkey, ground chicken, or a plant-based ground meat alternative all work well as substitutes. If using leaner meat (90/10 or higher), add 1 teaspoon of olive oil per pound to the mix to keep the patties juicy during cooking.
How do I keep sliders from getting soggy?
Toast the rolls before assembling, spread a thin layer of sauce on the bottom bun as a moisture barrier, and pat any wet toppings (like fresh tomato slices) dry with a paper towel before adding them to the slider. Avoid overloading sliders with too many wet ingredients, as this will make the rolls soggy fast.
Are these sliders kid-friendly?
Yes! The sweet, mild flavor of the rolls and beef is a hit with even picky eaters, and the small size is perfect for little hands. Skip spicy toppings or strong cheeses for kids, and you can even cut sliders in half for toddlers to make them easier to hold.
Final Thoughts
Hawaiian Roll Ground Beef Sliders are the ultimate low-effort, high-reward party food. Their sweet-savory flavor profile appeals to every age group, their small size makes them perfect for gatherings of any size, and their customizable nature means you can adapt them to any dietary need or flavor preference. Whether you’re hosting a Super Bowl party, a backyard cookout, or a casual weeknight dinner, these sliders are guaranteed to be the first dish to disappear from the table. Try the recipe at your next gathering, and adjust the seasonings and toppings to match your favorite flavors—once you master the base, the possibilities are endless.

I’m Abby Lu, a passionate home cook who loves simplifying everyday meals. At PlugChef.com, I share product reviews and cooking guides to help you find the best tools for your kitchen.
Related posts:
 How to Make a Fruit Basket for a Gift: Easy DIY Guide
 Do You Need a Basket? Essential Guide for Air Fryers
 What Blenders Do Tropical Smoothie Use: Expert Insights
Stainless Steel Vs White Kitchen Appliances: Ultimate Showdown
What Blenders Do Tropical Smoothie Use: Expert Insights
Stainless Steel Vs White Kitchen Appliances: Ultimate Showdown
 Kitchen Appliances for Wedding Registry: Must-Have Essentials
 Top 10 Best Non-Toxic Cooking Utensils – Safe & Durable Choices for Healthy Homes

