
Grilling at a public park or shared facility can be one of the easiest ways to cook for a crowd—if you know how to plan, inspect, cook safely, and leave the grill better than you found it. This guide gives step‑by‑step, practical advice for beginners and experienced cooks alike: what to check before you arrive, how to set up heat zones, food‑safety targets, troubleshooting tips for faulty grills, and the etiquette that keeps shared spaces safe and enjoyable.
Whether you want reliably juicy burgers, perfectly charred vegetables, or a whole chicken done right, these expert, experience‑based tips will help you get consistent results on public grills.
Credit: www.msn.com
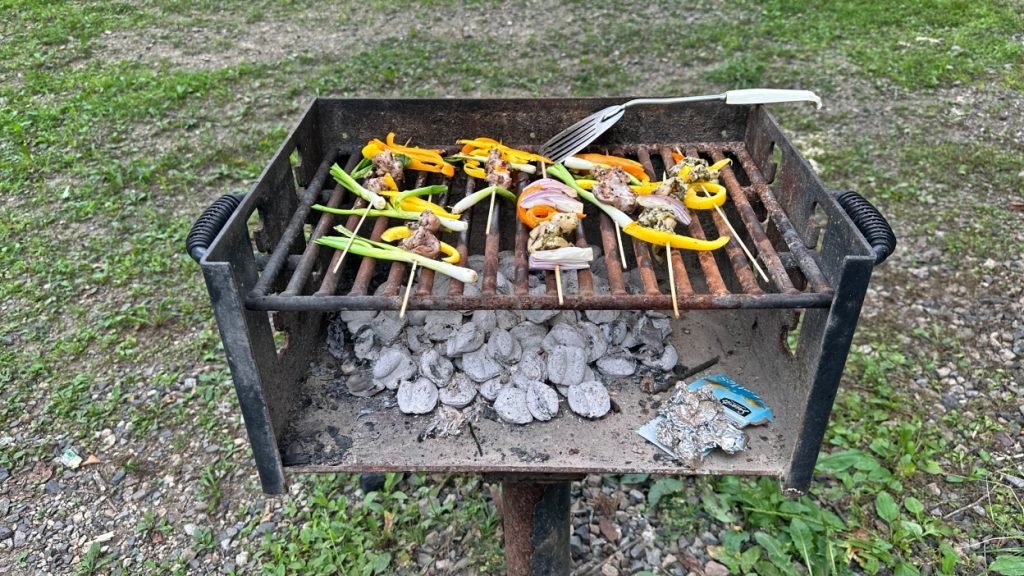
Example: a common fixed grill found in parks—inspect before you use it.
Before You Go: Check rules, weather, and what to bring
- Confirm park or facility rules. Many parks restrict charcoal, open flames, or require reservations and permits—check the managing agency (for national parks, see the National Park Service for guidance).
- Check current fire danger and local burn bans; seasonal restrictions change and must be obeyed.
- Pack a compact kit: instant‑read thermometer, long‑handled tongs and spatula, heat‑resistant gloves, grill brush, aluminum foil, paper towels, hand sanitizer, and a cooler for perishables.
- Bring fuel/spare tanks only if local rules allow it—some parks supply fuel or prohibit outside fuel.
- Plan a simple menu that matches the grill type: high‑heat, quick items for portable grills; mix of sear + indirect items for larger fixed grills.
A short checklist to save or print: thermometer, tongs, brush, gloves, sanitizer, trash bags, cooler, aluminum foil, and a spray bottle of water for small flare‑ups.
At the site: inspect the grill and set it up safely
- Visual inspection:
- Stable base and level placement? If the grill wobbles, do not use it.
- Grates intact (no large rust holes), lid opens/closes, and vents move.
- For gas grills: check hose for cracks; smell for gas before lighting.
- Clean before use:
- Scrape grates with a brush and heat briefly to burn off residue—this improves food release and reduces carryover flavors.
- Wipe food prep surfaces with sanitizing wipes if available.
- Fuel checks:
- Charcoal: assess remaining briquettes and have a chimney starter or approved lighter method; avoid excessive lighter fluid in public areas unless explicitly allowed.
- Propane: ensure the tank is secured upright and connections are snug; if you suspect a leak, do not use the grill.
- Safety positioning:
- Place grill away from tents, low branches, or picnic canopies and on a non‑combustible flat surface.
- Keep children and pets at a safe distance; have a water bucket or extinguisher nearby if allowed by the facility.
In practice, a common mistake is assuming "park grills are ready." Spend five minutes inspecting—this prevents ruined meals and safety hazards.
Creating heat zones and mastering temperature control
Good grilling is temperature management. Public grills vary widely, so your approach must adapt.
- Two‑zone setup (recommended for most cooks):
- Direct heat (high): for searing steaks, burgers, and thin vegetables.
- Indirect heat (medium/low): for thicker cuts, whole birds, or finishing after sear.
- Charcoal arrangement:
- Pile coals on one side for a two‑zone setup, leaving the other side with fewer or no coals.
- Use a chimney starter to get coals evenly lit—no chemical taste and faster, more reliable start.
- Gas grill approach:
- Preheat all burners on high for 8–12 minutes, then reduce one side to medium/low for indirect cooking.
- Use vent adjustments and lid position to stabilize temperatures.
- Use an instant‑read thermometer to verify grill surface or internal food temperatures rather than guessing by feel.
Practical tip: when searing, get the grate hot (450–550°F / 232–288°C), then move to the cooler side to finish. Many public grills run hotter or cooler than expected—monitor and adapt.
Cooking techniques and a simple timing chart
Choose technique by food type and thickness. Below are safe internal temperatures and typical approaches—use an instant‑read thermometer for accuracy.
- Safety temperatures (USDA guidance):
- Poultry (whole or pieces): 165°F (74°C)
- Ground meats (beef, pork, lamb): 160°F (71°C)
- Steaks, roasts, pork chops: 145°F (63°C) with a 3‑minute rest
- Fish: 145°F (63°C) or opaque and flakes easily
Sample timing (approximate; adjust for thickness and grill heat):
| Food | Technique | Quick timing example |
|---|---|---|
| Burger (¾ in / 2 cm) | Direct, flip once | 4–5 min per side |
| Chicken breast (boneless) | Sear then indirect | 3–4 min sear each side, finish 6–8 min indirect to 165°F |
| Whole chicken | Indirect, lid closed | 45–60 min at medium (finish to 165°F) |
| Salmon fillet | Direct then rest | 3–5 min skin side, 2–3 min flesh side |
| Veggies (bell pepper, zucchini) | Direct or grilling basket | 3–8 min, turning once |
Technique notes:
- Flip less often—frequent flipping prevents good crust formation.
- Rest cooked meat 3–10 minutes (depending on size) to let juices redistribute.
- For delicate fish, oil the grate and use a fish basket or foil to prevent sticking.
Food safety and hygiene (what to do, and why)
Food safety on public grills is non‑negotiable. Follow these practical steps—based on established food‑safety guidance—to prevent foodborne illness.
- Keep raw and cooked foods separate; use dedicated containers and utensils for raw meats.
- Store perishables in a cooler at or below 40°F (4°C) until ready to grill.
- Wash hands or use sanitizer before handling food; avoid touching your face or phone during prep.
- Cook to the USDA recommended internal temperatures above, and verify with an instant‑read thermometer.
- If a refrigeration failure or long transport occurs (food over 2 hours above 40°F, or 1 hour above 90°F), discard perishable items.
For broader food‑safety resources and official recommendations, consult the USDA.
A common oversight: people assume visual doneness equals safety. Always thermometer‑check ground meats and poultry.
Etiquette and shared-space responsibilities
Public grills are communal. Being courteous keeps the facility usable and pleasant.
- Leave the grill cleaner than you found it: scrape grates, remove charcoal/ash per park rules, and bag all trash.
- Time your cooking. If others are waiting, keep high‑demand items short and offer to share space (especially at busy picnic times).
- Avoid strong odors (excessive smoke) near other groups; move fatty, flare‑prone items to a controlled area or use a drip pan.
- Report problems to park staff and leave clear notes if the grill becomes unsafe (broken hinge, unstable leg, fuel leak).
Being a considerate user reduces conflicts and preserves the resource for everyone.

Credit: lifehacker.com
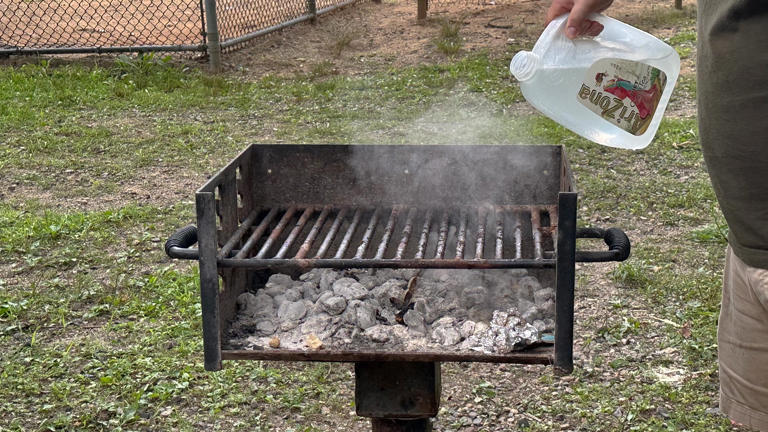
Setting up the grate and flame—great for searing when managed carefully.
Cleaning, ash disposal, and reporting broken equipment
Clean‑up is part of the job. Follow these steps each time:
- Final scrape: with the grates still warm, use a grill brush to remove residue. Warmth loosens stuck bits and reduces effort.
- Cool and collect: allow coals and ashes to cool fully. Follow posted rules for ash disposal—some parks require ashes be left on the grill until cooled; others provide a metal receptacle. Never dump hot ashes into a trash bag.
- Wipe surfaces: clean prep ledges and handles with soapy water or disinfecting wipe.
- Report issues: if you find structural damage, fuel leaks, or missing parts, notify the park office or maintenance team and leave a visible note for other users.
If you encounter a nonfunctioning or unsafe grill, do not attempt major repairs—report it. In emergency situations (smoke or uncontrolled fire), call emergency services immediately.

Credit: au.lifehacker.com
A quick scrape while warm reduces cleaning time for the next user.
Troubleshooting common public‑grill problems
- Weak or uneven heat (charcoal): add a fresh handful of lit coals on the cool side or rearrange briquettes; use chimney starter next time for evenness.
- Gas grill won't light: check tank valve, ensure the regulator is connected, and wait a minute if gas smelled before re‑trying. If you detect a gas smell, stop and report.
- Excessive flare‑ups: trim excess fat, use a drip pan, move food to indirect side, and have a spray bottle of water for small flames. Avoid covering vents—this can trap heat and cause dangerous conditions.
- Sticking food: preheat longer and oil the grate or the food, not the flame. Let meats form a crust before flipping.
In practice, patience and an instant‑read thermometer are the two best investments for reliable results on unpredictable public grills.
Frequently Asked Questions
Can I bring my own charcoal or propane to a public grill?
Rules vary by facility. Some parks provide fuel or ban outside fuel during high fire‑risk periods. Confirm with the park office or posted signage before bringing your own.
How do I know if the grill is safe to use?
Inspect for structural damage, rust holes in grates, and secure gas connections. If you smell gas or see major corrosion, do not use it—report the issue to staff.
How long should I preheat a public grill?
Charcoal: heat coals until mostly covered in white ash (typically 15–30 minutes, depending on method). Gas: preheat with the lid closed for 8–12 minutes on high, then adjust burners.
What's the best way to prevent cross‑contamination?
Use separate plates and utensils for raw and cooked foods, or wash utensils and plates between uses. Keep raw items in sealed containers and off prep surfaces.
Who enforces safety rules at public grills?
Park rangers, municipal park staff, or facility managers enforce rules. For national parks or federal lands, check with the National Park Service for specific guidance.
Conclusion
Using a public grill well is less about luck and more about preparation, inspection, temperature control, and respect for shared spaces. Arrive with the right tools, check the grill, create direct and indirect heat zones, and always verify internal temperatures with a thermometer. Clean up properly and report hazards so the grill is safe and ready for the next group.
Practice these steps a few times and you’ll reliably deliver safe, flavorful results—whether you’re cooking for two or a large picnic. Print or save the checklist above and make your next public grill session the best one yet.
Ready to grill smarter? Pack your thermometer and follow the checklist—your best outdoor meals start with preparation.

I’m Abby Lu, a passionate home cook who loves simplifying everyday meals. At PlugChef.com, I share product reviews and cooking guides to help you find the best tools for your kitchen.
Related posts:
 How to Make a Fruit Basket for a Gift: Easy DIY Guide
 Do You Need a Basket? Essential Guide for Air Fryers
 What Blenders Do Tropical Smoothie Use: Expert Insights
Stainless Steel Vs White Kitchen Appliances: Ultimate Showdown
What Blenders Do Tropical Smoothie Use: Expert Insights
Stainless Steel Vs White Kitchen Appliances: Ultimate Showdown
 Kitchen Appliances for Wedding Registry: Must-Have Essentials
 Top 10 Best Non-Toxic Cooking Utensils – Safe & Durable Choices for Healthy Homes

