

Old apples don’t have to be trash. Slightly soft, wrinkled, or extra-sweet apples are perfect for dozens of recipes and preservation methods. This guide shows how to tell which apples are still good, practical safety rules, and step‑by‑step ideas — from baked desserts and savory sides to drinks, preserves, snacks, and long‑term storage. Try one simple recipe today and stop wasting fruit.
How to tell if an apple is still usable
Not every limp or wrinkled apple is spoiled. Use these clear checks before deciding how to use it.
- Look: surface wrinkling and small bruises are OK; large mushy areas or visible mold are not.
- Smell: a fresh apple smell or faint sweetness is fine. Strong sour, fermented, or alcohol‑like odors mean discard.
- Cut it open: if the flesh is mostly firm with a few brown spots, you can cut out the spots and use the rest. If the core is discolored through the apple or the flesh is waterlogged and mushy, toss it.
- Taste test (small piece): if it tastes off, bitter, or fermented, discard it.
A common mistake is washing apples and returning them wet to storage — moisture accelerates mold. Only wash apples right before use.
Basic safety and composting guidance
When in doubt, safety first.
- Do not use apples with visible mold or a sticky, leaking surface. Mold can produce toxins that may penetrate the fruit.
- For home canning and preservation safety, follow official guidance from food‑safety authorities like the USDA; home canning requires correct heat‑processing times and procedures to avoid risk. (USDA)
- Compost spoiled fruit if you can, or discard if municipal rules prohibit composting food waste.
For fermenting into cider or alcoholic beverages, sanitation and controlled fermentation are critical. If you’re new to fermenting, consult a reliable extension or food‑safety resource for step‑by‑step instructions. (University of Minnesota Extension)
Quick categories: what to make depending on apple condition
- Slightly soft but not mushy: applesauce, muffins, quick breads, smoothies.
- Wrinkled and sweet: apple chips, baked apples, caramelized slices for toppings.
- Small bruises only: peel or trim bruised parts and use in pies, crisps, or chutney.
- Mushy, fermented, or moldy: compost or discard — do not eat.
Baking and sweet‑treat ideas (with recipes and tips)
Old apples are ideal for baking because heat softens them further and concentrates their sugars.
Classic apple crisp — simple recipe
Ingredients (serves 6):
- 6 medium old apples (peeled, cored, sliced)
- 2 tbsp lemon juice
- 1/2 cup granulated sugar (adjust)
- 1 tsp cinnamon
Topping: - 1 cup rolled oats, 1/2 cup brown sugar, 1/2 cup flour, 1/2 cup cold butter (cubed), pinch salt
Steps:
- Toss apple slices with lemon, sugar, and cinnamon; spread in a greased 9×13 pan.
- Mix topping ingredients until crumbly, sprinkle over apples.
- Bake at 350°F (175°C) for 40–50 minutes until topping is golden and juices bubble. Let rest 10 minutes before serving.
Tips: Use slightly under‑sweetened filling if your apples are very sweet. For a thicker filling, stir in 1–2 tablespoons quick tapioca or flour.
Muffins or quick bread — shredding technique
Grate or finely chop old apples and fold into batter for added moisture. Reduce added liquid slightly and add 1 tsp ground cinnamon or nutmeg. Use chopped nuts for texture. Bake muffins at 375°F (190°C) for 18–22 minutes.

Skillet‑fried spiced apples, good as a pie topping or side.
Credit: www.tasteofhome.com
Sauces, butters, and chutneys (step‑by‑step)
Turning old apples into preserves concentrates flavor and gives you versatile pantry items.
Easy stovetop applesauce
Ingredients (makes about 3 cups):
- 3 lbs apples, peeled, cored, and chopped
- 1/3–1/2 cup sugar (optional, adjust to taste)
- 1/2 cup water or apple juice
- 1 tsp cinnamon (optional)
Method:
- Combine apples, water/juice, and sugar in a pot.
- Simmer covered over medium heat 15–25 minutes, stirring occasionally, until apples are soft.
- Mash with a fork for chunky sauce or use an immersion blender for smooth texture. Cool and refrigerate.
Storage: Refrigerate up to 7–10 days, or freeze in portions for 6–12 months. For shelf‑stable jars follow official canning procedures and processing times (see USDA guidelines).
Apple butter and chutney
- Apple butter: Cook apples slowly with sugar and spices until thick and caramelized; finish with a blender for a smooth, concentrated spread. Simmer 2–3 hours on low.
- Chutney: Combine apples with vinegar, sugar, raisins, and spices (ginger, mustard seed) and simmer until jammy; cool and jar. Chutneys pair well with cheese and meats.
Savory uses: sides, mains, and salads
Apples balance savory dishes with brightness and sweetness.
- Pan‑fried apples with onions: cook sliced apples and onions in butter until caramelized; finish with a splash of apple cider vinegar for pork chops.
- Stuffing: add diced apples and walnuts to poultry stuffing for texture.
- Roasted vegetables: toss apple wedges with root vegetables and roast at 400°F (200°C) until caramelized.
- Salads: shred old apples into coleslaw or green salads for crunch.
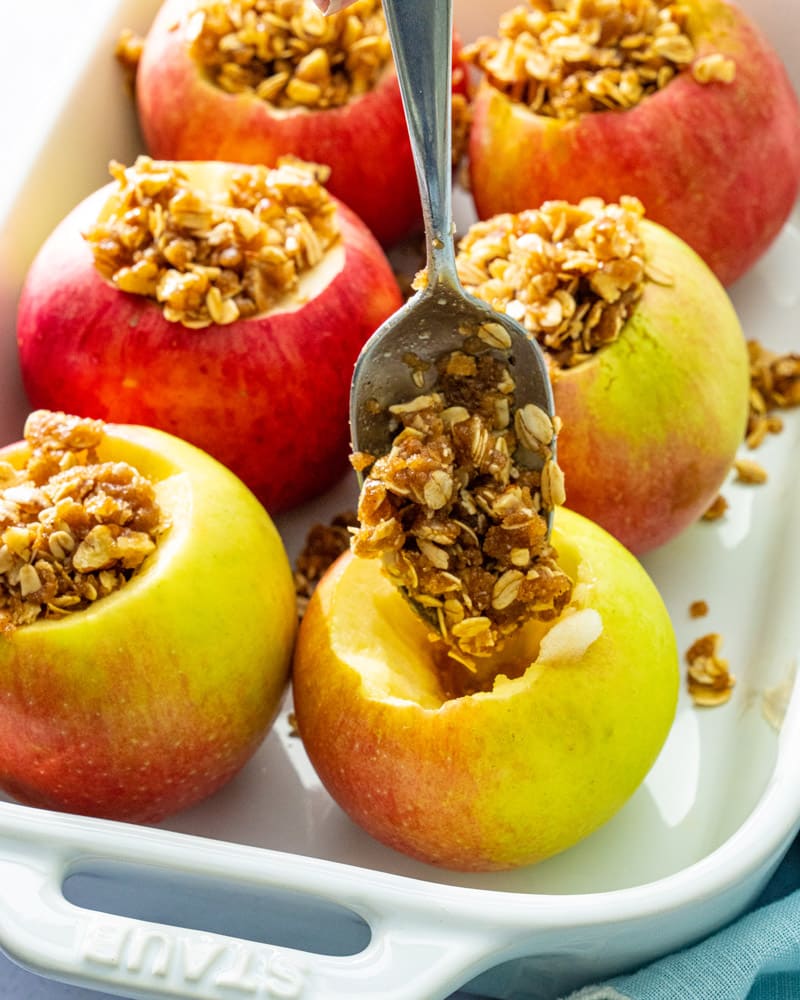
Baked apples make an easy warm dessert or side.
Credit: www.acouplecooks.com
Drinks and fermentation ideas
Old apples are excellent for drinks — from quick non‑alcoholic cider to smoothies or spiced mulled cider.
- Quick non‑alcoholic cider: simmer chopped apples with orange peel, cinnamon sticks, and water for 45–60 minutes, mash, and strain. Sweeten to taste.
- Smoothies: freeze chopped apples and blend with yogurt or milk for fiber and natural sweetness.
- Fermented hard cider: this requires sanitation, proper yeast, and fermentation control. Beginners should consult extension resources on fermentation safety before proceeding.
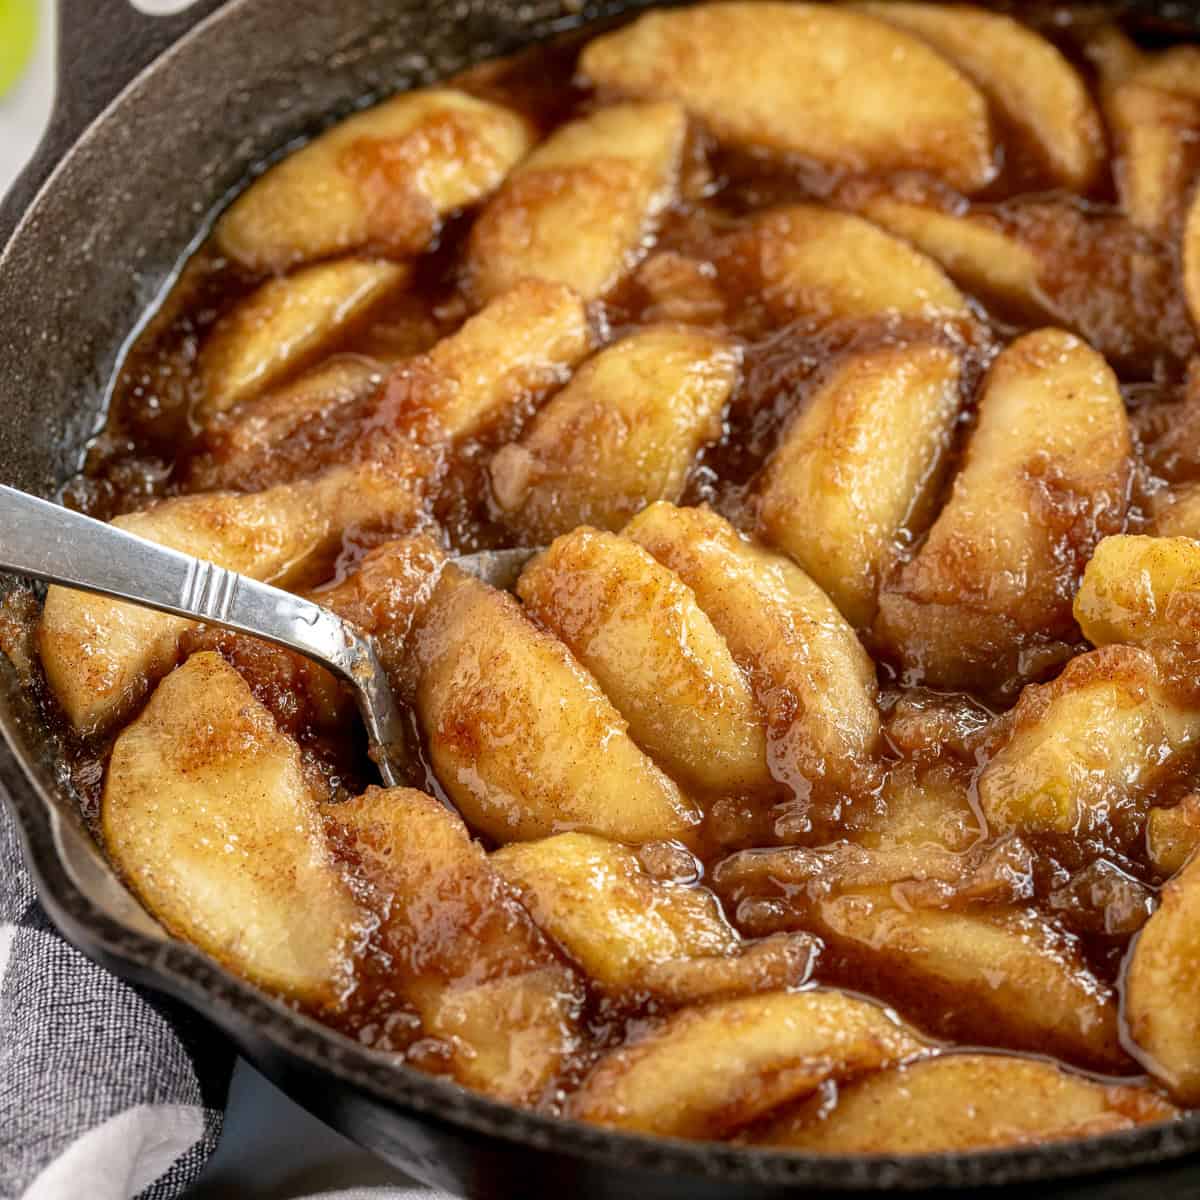
Southern‑style fried apples, sweet and spiced, served warm.
Credit: www.kyleecooks.com
Snacks: chips, pancakes, and quick bites
- Apple chips: Slice apples 1/8" thin, arrange on a dehydrator tray or a rimmed baking sheet, dry at 125–135°F in a dehydrator (6–12 hours) or in a low oven until crisp. Sprinkle cinnamon before drying.
- Pancakes: Fold grated apple into pancake batter; cook as usual. Old apples add moisture and caramelized flavor.
- Trail mix: Dice dried or fresh apple and mix with nuts and seeds for a portable snack.
Dehydrating times vary by thickness and humidity — test after 6 hours, then every 1–2 hours until crisp.
Preserving and long‑term storage
Choose a preservation method based on how you’ll use the apples later.
- Freezing: Peel and core if desired; slice and treat with lemon juice or commercial ascorbic acid to prevent browning (10–15 minutes in lemon water). Spread single layer on a tray and freeze, then transfer to airtight freezer bags. Use frozen apples within 6–12 months for best quality.
- Canning: Use tested recipes and correct processing methods (water‑bath or pressure canner as appropriate). Incorrect canning can cause spoilage and safety risks — follow official canning guidance from authorities like the USDA. (USDA)
- Drying: See dehydration temps above. Store dried apples in airtight containers in a cool, dark place.
For detailed, region‑specific preservation instructions (temperatures, processing times, and tested recipes), consult your local extension service or university resources; they have step‑by‑step, safety‑checked guides. (University of Minnesota Extension)
Storage tips to extend fresh apple life
- Refrigerator: Keep apples in the crisper drawer at about 32–40°F (0–4°C) if possible; cool storage slows ripening.
- Humidity: Use perforated plastic or a loosely closed bag to hold humidity without trapping moisture.
- Separation: Store apples away from high‑ethylene producers like bananas to slow over‑ripening.
- Inspect: Remove any bruised or damaged apples as they can accelerate spoilage of others.
Practical tip: wrap particularly good apples individually in paper if you need them to last an extra week — it reduces ethylene exposure from neighbors.
Common mistakes and troubleshooting
- Using moldy apples in preserves: discard any with mold — mycotoxins may remain.
- Storing wet apples: only wash before use, never before long‑term storage.
- Overfilling jars without headspace when canning: this can prevent safe seals; follow tested canning recipes.
- Not adjusting sugar in recipes: very sweet old apples may require less added sugar to avoid cloying results.
If a cooked batch tastes slightly fermented, discard it rather than trying to mask flavors.
Frequently asked questions
Q: Are slightly brown spots okay?
A: Yes — small brown spots and superficial internal browning can be trimmed away; the rest of the apple is usually fine for cooking or baking.
Q: Can I make apple cider from old apples?
A: Yes. Old apples can be sweeter and make good non‑alcoholic cider. For fermenting into hard cider, learn proper sanitation and fermentation steps from extension or fermentation guides first.
Q: How long will applesauce last in the fridge?
A: Homemade applesauce lasts about 7–10 days refrigerated. For longer storage, freeze in portions or follow safe canning methods for shelf stability.
Q: Can moldy apples be salvaged?
A: No — discard moldy apples. For small surface mold on a firm apple, some sources suggest cutting a generous margin around the mold, but because mold can send invisible threads into food, many food‑safety authorities recommend discarding soft fruit with mold.
Try one: 20‑minute applesauce (call to action)
Pick 4–6 old apples this afternoon, peel and chop them, simmer with 1/2 cup water and 1 tsp cinnamon for 15–20 minutes, mash, and enjoy warm with yogurt or ice cream. It’s fast, reduces waste, and tastes better than store bought.
Conclusion
Old apples are a resource, not waste. Evaluate their condition, follow basic safety rules, and choose a method — bake, simmer, dry, ferment, or freeze — that matches the apple’s texture. Small steps (trim bad spots, store correctly, try one easy recipe) save money and reduce food waste while producing delicious results. Try that quick applesauce recipe now and save the next batch for chips, chutney, or a cozy pie.

I’m Abby Lu, a passionate home cook who loves simplifying everyday meals. At PlugChef.com, I share product reviews and cooking guides to help you find the best tools for your kitchen.
Related posts:
 How to Make a Fruit Basket for a Gift: Easy DIY Guide
 Do You Need a Basket? Essential Guide for Air Fryers
 What Blenders Do Tropical Smoothie Use: Expert Insights
Stainless Steel Vs White Kitchen Appliances: Ultimate Showdown
What Blenders Do Tropical Smoothie Use: Expert Insights
Stainless Steel Vs White Kitchen Appliances: Ultimate Showdown
 Kitchen Appliances for Wedding Registry: Must-Have Essentials
 Top 10 Best Non-Toxic Cooking Utensils – Safe & Durable Choices for Healthy Homes

