
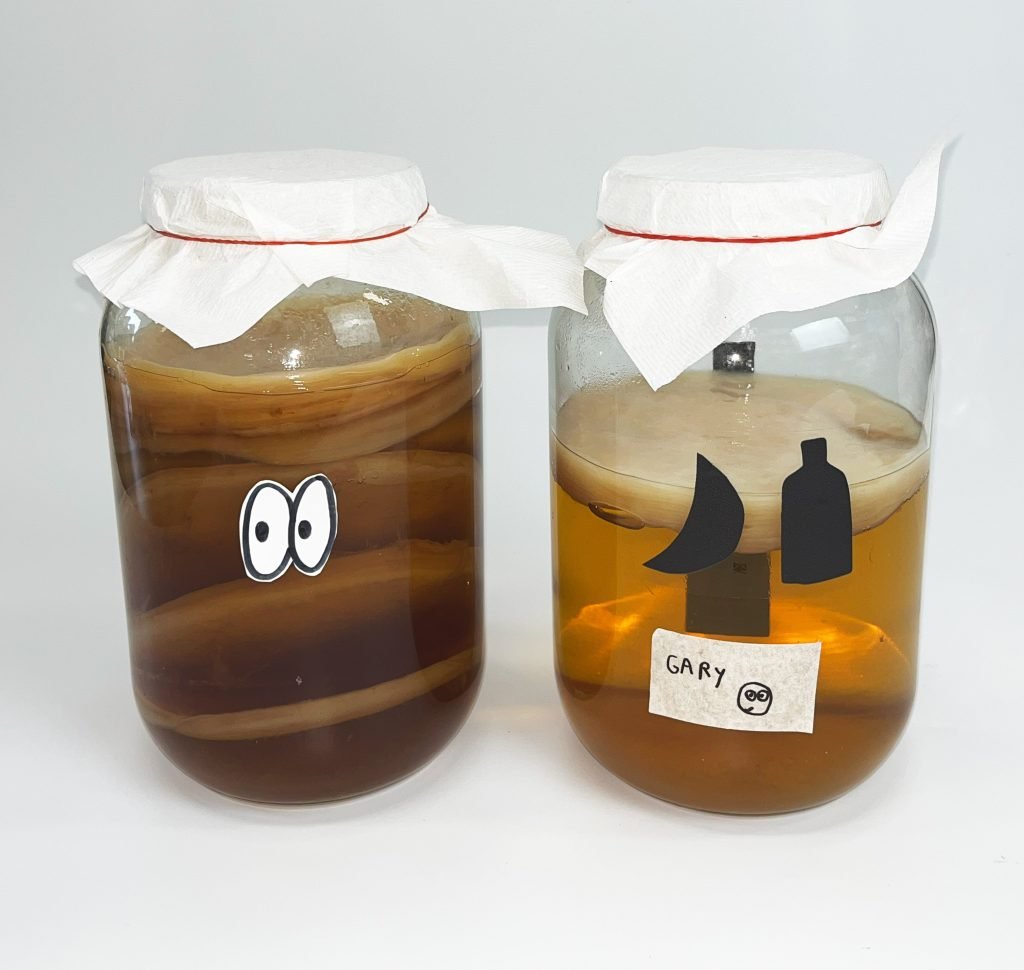
Homemade kombucha begins with a SCOBY — a Symbiotic Culture Of Bacteria and Yeast. Growing one from scratch is inexpensive, reliable, and surprisingly forgiving if you follow a few key rules: clean equipment, the right sweet tea recipe, warm stable temperature, and a source of live starter liquid. This guide walks you through everything from exact measurements and timelines to safety checks and common troubleshooting so you can confidently grow a healthy SCOBY and start brewing.
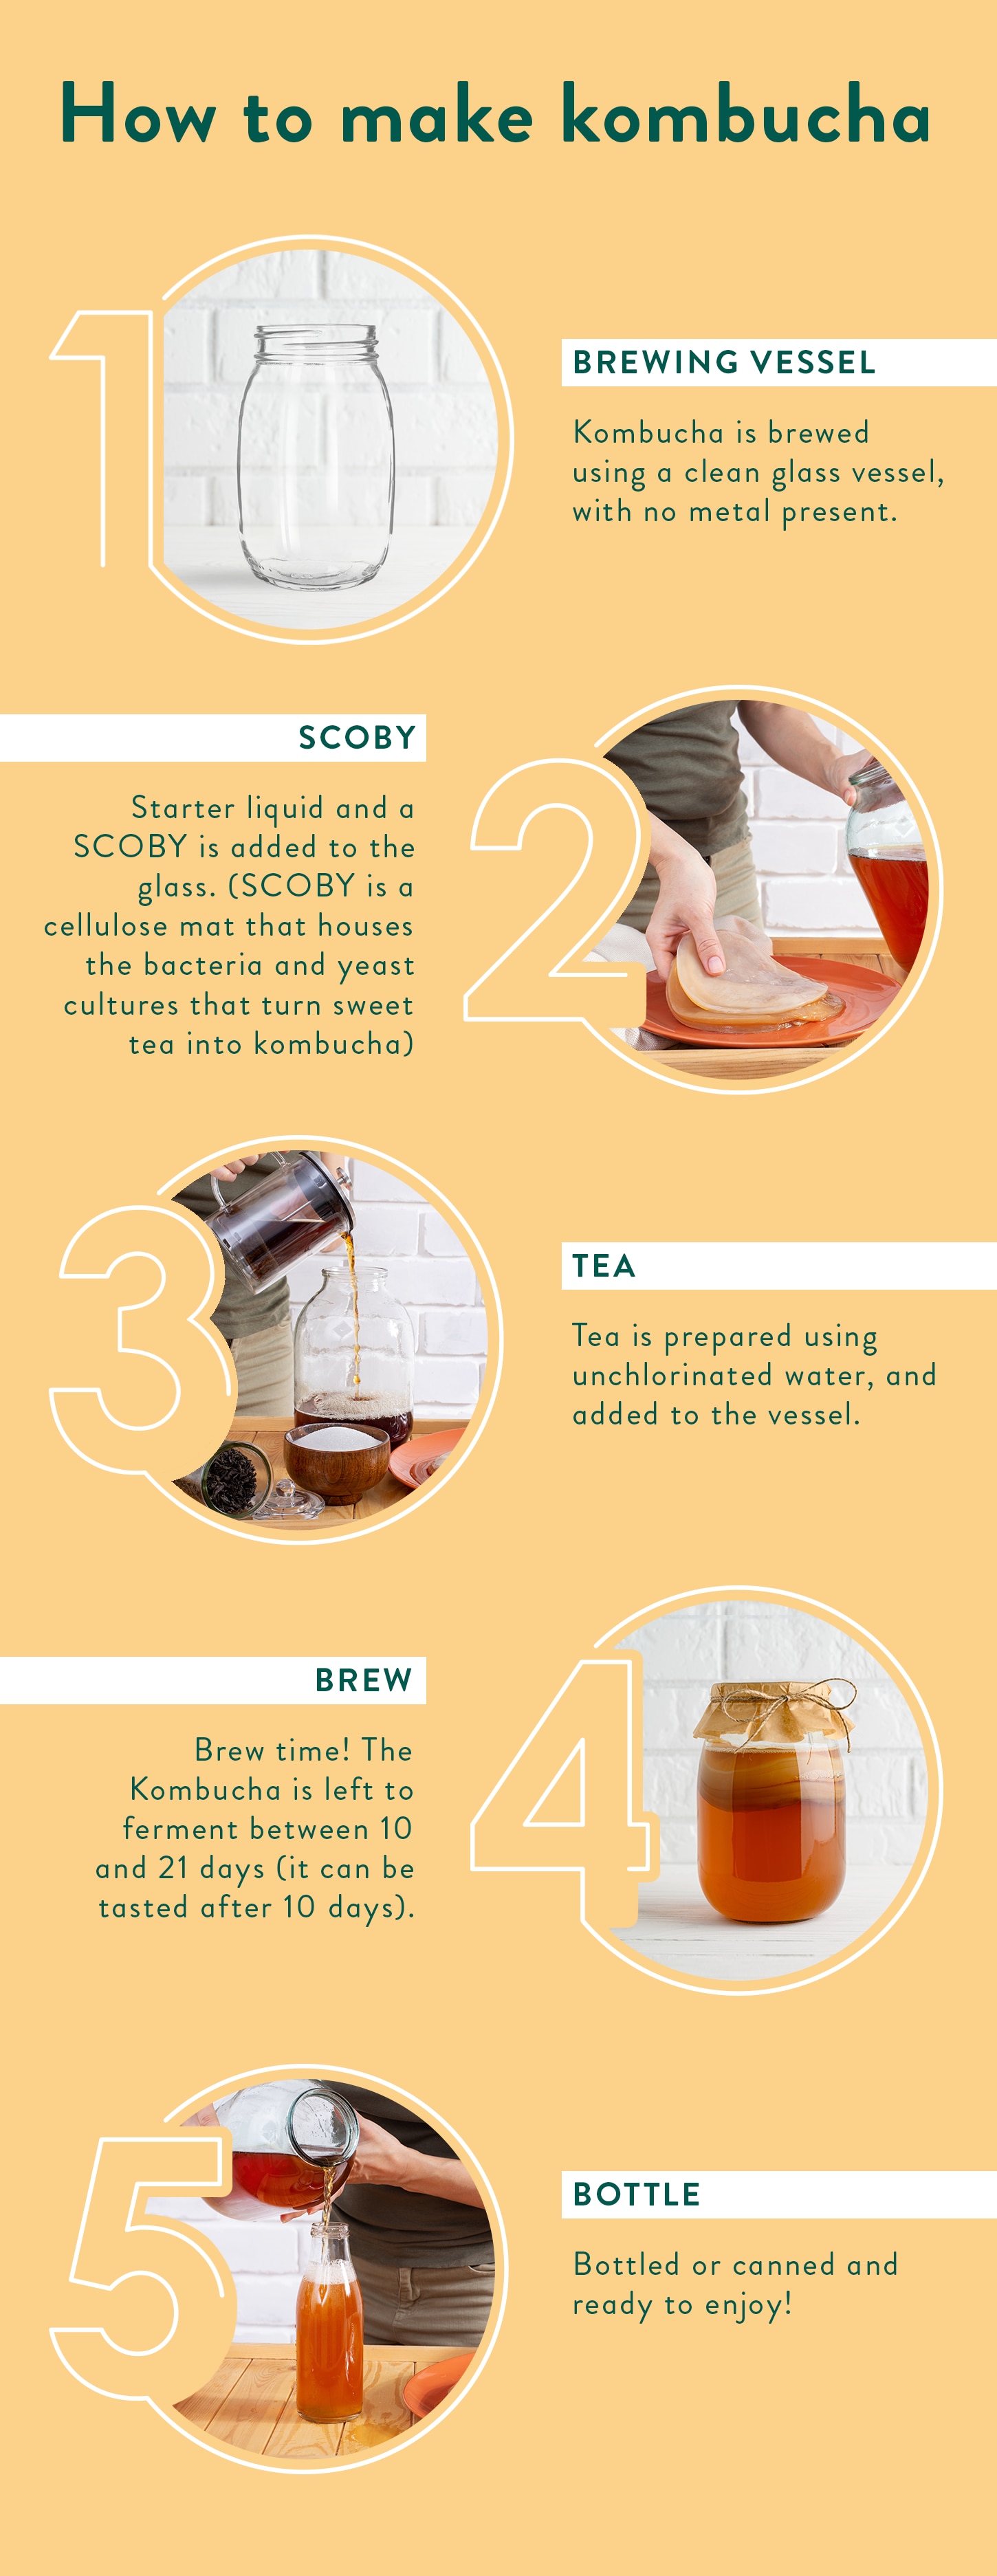 Credit: www.hollandandbarrett.com
Image: a forming SCOBY floating on the tea surface.
Quick overview: the core steps (1-minute glance)
- Brew sweet tea (non-herbal) and dissolve sugar.
- Cool to room temperature (<85°F / 29°C).
- Add 10–20% raw, unpasteurized kombucha as starter liquid.
- Cover jar with a breathable cloth and store at 70–80°F (21–27°C).
- Wait 7–21 days for a new SCOBY to form; check regularly for signs of healthy growth.
What you need (supplies and why they matter)
- Glass jar (1-gallon / 4 L is an easy size): non-reactive and easy to cover.
- Tea: black, green, or a mix (4–6 tea bags per gallon or 5–8 g loose tea per liter).
- Sugar: plain white sucrose (1 cup / 200–225 g per gallon).
- Starter liquid: 10–20% of total volume in raw, unpasteurized kombucha (see options below).
- Breathable cover: tight-weave cloth, paper coffee filter, or unbleached cheesecloth + rubber band.
- Optional: pH strips (or probe), thermometer, clean non-metal stirring utensil.
Why each matters: tea supplies nutrients (nitrogen and minerals) for the culture; sugar feeds yeast; starter liquid lowers pH immediately to protect against harmful microbes; glass prevents metallic off-flavors and contamination.
Best starter-liquid sources and alternatives
- Best: a cup or two of raw, unpasteurized kombucha from a recent batch (your own or a trusted friend).
- Store-bought: only use unpasteurized "raw" kombucha (pasteurized products have no live cultures).
- If you don’t have kombucha: obtain a SCOBY from a friend or reputable seller. Apple cider vinegar or plain distilled vinegar will not create a SCOBY reliably.
A common mistake is assuming any bottled kombucha will work. Check the label for “raw” or “live cultures” before using it as starter.
Detailed recipe: how to make the sweet tea (for 1 gallon / ~3.8 L)
- Bring ~4 quarts (3.8 L) of filtered water to a boil.
- Dissolve 1 cup (200–225 g) granulated white sugar into the hot water. Stir until fully dissolved.
- Add 4–6 black or green tea bags (or equivalent loose tea). Steep 5–10 minutes; remove tea to avoid bitterness.
- Cool the sweet tea to room temperature—important: do not add starter or SCOBY until below ~85°F (29°C).
- Pour into a clean 1-gallon glass jar. Add 1–2 cups (240–480 mL) raw kombucha (10–20% by volume) as starter liquid.
Tip: using very hot tea will kill the starter microbes. If you are in a hurry, set the kettle in an ice bath to speed cooling, but never add ice directly to the brew.
Step-by-step: starting the SCOBY
- Prepare sweet tea and cool below 85°F (29°C).
- Add starter kombucha (10–20% of the total volume). This lowers pH quickly and helps prevent harmful organisms from taking hold.
- Cover jar with a breathable material and secure with a rubber band. Do not seal airtight.
- Place jar somewhere with stable warmth (70–80°F / 21–27°C), out of direct sunlight and away from drafts.
- Wait patiently. Within 3–7 days you may see a thin translucent film; a visible SCOBY typically forms in 7–21 days depending on temperature and starter strength.
- When the SCOBY reaches ~1/4 to 1/2 inch (6–12 mm) thick and the tea tastes tangy, you have a usable SCOBY.
In practice: warmer, consistent temperatures speed formation. If your home is cooler in winter, consider a seedling heat mat set on low or a warm cabinet.
What a healthy SCOBY looks and smells like
- Appearance: cream to light brown, smooth, slightly rubbery, sometimes layered.
- Surface: may show brown yeast strands or spots (normal), but not fuzzy, powdery, or raised mold.
- Smell: pleasantly tangy, lightly vinegary; not putrid or rotten.
If you see fuzzy growth with green, blue, black, or white powdery patches — that’s mold. Discard the entire batch and sanitize equipment.
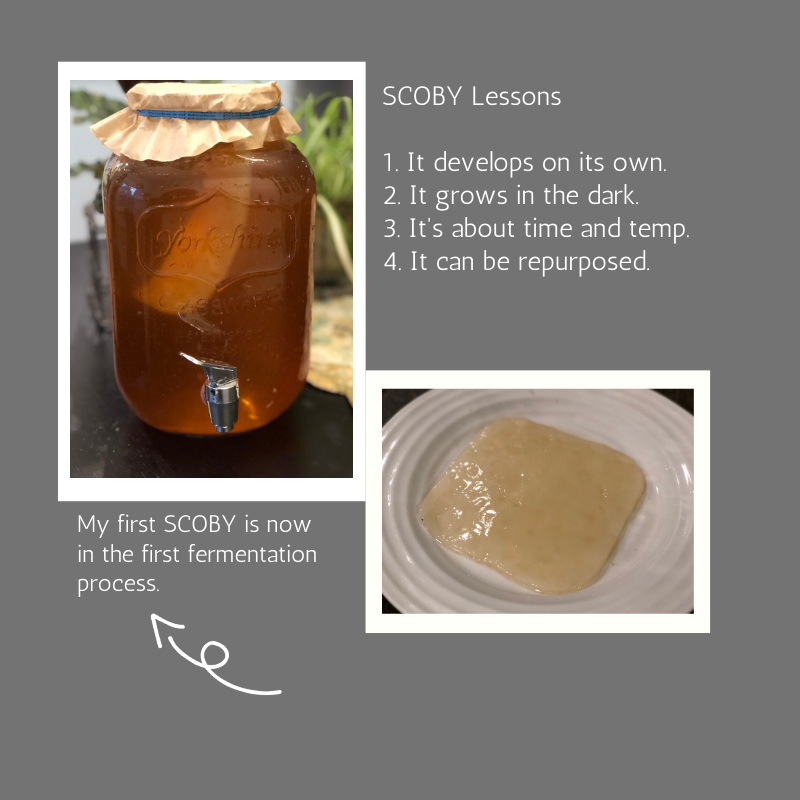 Credit: loismelkonian.medium.com
Image: multiple SCOBY layers forming in a jar.
Safety and pH: quick checks to reduce risk
- Aim to acidify the brew quickly: starter liquid and good hygiene accelerate this.
- Typical finished kombucha has a pH around 2.5–3.5. For safety, ensure your brew’s pH drops below 4.6 early in fermentation (4.6 is the upper limit where some dangerous bacteria can grow). If you use pH strips, test the liquid after 24 hours and again at 72 hours.
- Follow basic food-safety hygiene: wash hands, sanitize jars and utensils with hot soapy water (or a mild bleach solution followed by thorough rinsing), and keep the brewing area clean.
For general safe food-handling guidance, consult the USDA’s food safety resources and your local extension’s fermentation guidance for tips on safe home canning and fermenting practices (USDA, University extension resources).
Fermentation timeline and what to expect
- Days 1–3: thin film appears on the surface; smell is sweet-vinegary.
- Days 4–10: film thickens into a SCOBY; yeast strings may form underneath.
- Days 7–21: SCOBY becomes thicker and more opaque; base tea grows tangier.
- After ~2–4 weeks: you can use the SCOBY to brew kombucha or allow it to strengthen for future batches.
Ambient temperature is the main variable: at 75–80°F (24–27°C) expect faster growth; below 70°F (21°C) growth can be slow or stall.
Troubleshooting common problems
- No SCOBY forming: likely causes include starter liquid too weak (pasteurized), tea unknown (herbal), water treated with chloramine or heavy chlorine, or temperature too low. Fix: use a strong raw starter, switch to black/green tea, and move to a warmer spot.
- Mold: fuzzy, colored (green/black/blue) spots on the SCOBY surface = discard batch and SCOBY, clean everything, start over.
- Rotten or putrid smell: discard. Kombucha should smell tangy/vinegary, not rotten.
- SCOBY develops slimy brown patches or stringy film under the surface: usually normal yeast deposits; leave them intact.
- Overly slow acidification: increase starter percentage to 15–20% next time and ensure consistent warmth.
 Credit: www.dadshack.in
Image: example of contaminated kombucha surface — discard this batch.
Harvesting, storing, and the SCOBY hotel
- When to harvest: when SCOBY is 1/4–1/2 inch thick or when you want to start a new batch.
- To separate layers: wash hands, gently peel the new SCOBY from the older one and keep it moist in starter liquid.
- Short-term storage (up to 4 weeks): place SCOBYs in a clean jar with enough unflavored kombucha to cover; keep at room temperature, covered with a breathable cloth.
- Long-term storage: create a “SCOBY hotel” — a larger jar with multiple SCOBYs and starter liquid stored at room temp; feed with a small amount of sweet tea every few weeks. Refrigeration is not ideal for long-term storage because cold slows activity and can stress cultures.
When sharing a SCOBY, include at least 1 cup (240 mL) of starter liquid to help preserve the culture during transport.
Advanced tips and variations
- Use partial green tea to lighten flavor, or full black tea for stronger body. Avoid highly aromatic or flavored teas (e.g., Earl Grey, chai blends with oils) for primary fermentation; reserve those for flavoring during second fermentation.
- Stainless steel is generally safe for short contact, but avoid long-term contact with reactive metals (copper, aluminum).
- If you want a faster-forming SCOBY, increase starter liquid to 20–25% and maintain higher stable temperatures (within safe range).
- Second fermentation: after brewing kombucha, bottle and add fruit or juices to carbonate and flavor. Always leave some kombucha for a new batch’s starter.
FAQ
Q: How long does it take to grow a SCOBY from store-bought kombucha? A: With raw unpasteurized store-bought kombucha and proper conditions, visible SCOBY formation may start in 3–7 days and be well-developed in 7–21 days.
Q: Can I start a SCOBY from vinegar or apple cider vinegar? A: No — vinegar won’t create the symbiotic bacterial/yeast community needed for a SCOBY. Use raw kombucha or an existing SCOBY.
Q: Is a brown spot on the SCOBY bad? A: Small brown yeast spots/strands are normal. Fuzzy, colored (green, black, blue) patches indicate mold and require discarding the batch.
Q: How much starter liquid should I use? A: Use 10–20% of the batch volume as starter liquid (e.g., 1–2 cups per gallon). If microbiological risk is a concern, err toward 15–20%.
Conclusion — start brewing with confidence
Growing a SCOBY is a low-cost, high-reward step toward making your own kombucha. Keep it simple: quality tea and sugar, raw starter kombucha, clean glass, breathable cover, and stable warmth. Monitor pH and watch for visual signs (and mold), and you’ll be brewing in a few weeks. Ready to begin? Gather your supplies, follow the recipe above, and enjoy the process of cultivating your first SCOBY — then experiment with flavors once you’ve mastered the basics.
Ready to start? Assemble your ingredients and begin your first batch today — you’ll have kombucha in a few weeks.

I’m Abby Lu, a passionate home cook who loves simplifying everyday meals. At PlugChef.com, I share product reviews and cooking guides to help you find the best tools for your kitchen.
Related posts:
 How to Make a Fruit Basket for a Gift: Easy DIY Guide
 Do You Need a Basket? Essential Guide for Air Fryers
 What Blenders Do Tropical Smoothie Use: Expert Insights
Stainless Steel Vs White Kitchen Appliances: Ultimate Showdown
What Blenders Do Tropical Smoothie Use: Expert Insights
Stainless Steel Vs White Kitchen Appliances: Ultimate Showdown
 Kitchen Appliances for Wedding Registry: Must-Have Essentials
 Top 10 Best Non-Toxic Cooking Utensils – Safe & Durable Choices for Healthy Homes

