
Sprouting wheat berries at home is a fast, low-cost way to add fresh, crunchy nutrition to salads, smoothies, sandwiches and cooked dishes. In just 2–5 days you can turn shelf-stable whole wheat kernels into tender, enzyme-rich sprouts that taste mildly nutty and offer improved mineral availability compared with unsprouted grain. This guide gives clear, practical steps, safety notes, troubleshooting tips and everyday uses so you’ll get reliable results the first time.
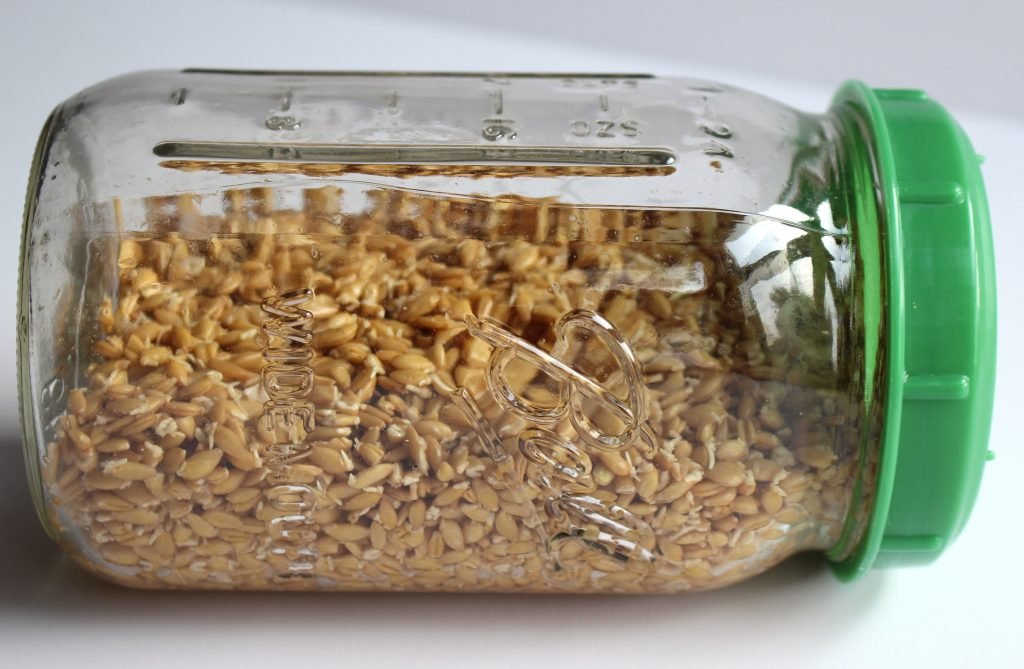
 Wheat berries beginning to germinate in a jar
Credit: m.youtube.com
Why sprout wheat berries?
Sprouting is the controlled germination of whole grains. The process activates enzymes, breaks down some starches and reduces compounds like phytic acid that can bind minerals. In practice, many people notice sprouted wheat tastes sweeter and is gentler on digestion than dry wheat berries.
Important safety note: fresh sprouts have a higher relative risk of harboring foodborne bacteria if contamination occurs during production or sprouting. The CDC advises people with weakened immune systems, pregnant people, young children and older adults to avoid eating raw sprouts; cook sprouts if you are in one of these groups. For general food-safety guidance about home food handling, consult your public health resources such as the CDC or your local university extension office (CDC, extension resources).
What you’ll need (quick checklist)
- Wheat berries: whole, dry kernels; ideally labeled “for sprouting” or food-grade, untreated.
- A container: wide-mouth glass jar with mesh/sprouting lid, a sprouting tray, or a breathable cloth and rubber band.
- Clean, potable water for soaking and rinsing.
- Optional: a sprouting bag, a small strainer, a tray to catch drips.
Buy from health food stores, bulk food sections, specialty grain suppliers or farmers markets. Avoid seeds treated with pesticides or labeled “for planting” unless also sold as food-grade.
Choosing wheat varieties
Different wheat types sprout similarly but vary in flavor and texture:
- Hard red wheat — robust, nutty flavor; good for cooking after sprouting.
- Hard white wheat — milder, sweeter; popular for fresh eating.
- Soft wheats — tender sprouts, less chew.
If you plan to make juice or very tender sprout salads, soft or hard white wheat often gives the mildest result.
 Dry wheat berries ready for cleaning and soaking
Credit: trulyconfidenthome.com
Step-by-step sprouting (jar method)
This is the most common, space-efficient method.
- Measure and rinse:
- Start with 1 cup dry wheat berries (yields roughly 2–3 cups sprouted). Rinse thoroughly to remove dust and broken bits.
- Soak:
- Cover the berries with 3–4 times their volume of cool water. Soak 8–12 hours or overnight at room temperature.
- Drain and place in jar:
- Drain completely. Transfer to a wide-mouth jar fitted with a mesh lid or cloth secured with a band. Store the jar tilted inverted in a bowl so excess water drains and air circulates.
- Rinse twice daily:
- Rinse with cool water and drain thoroughly every morning and evening. Keep the jar in a dark or dim spot at about 65–75°F (18–24°C). Good airflow and complete drainage are critical to prevent mold.
- Watch for tails:
- Small white shoots appear in 24–48 hours and grow over the next 1–3 days. Harvest when shoots are about 1/4–1/2 inch for tender crunch, or up to 1–2 inches for a leafier bite.
- Final rinse and dry:
- Give a final rinse, shake off excess water and spread on a clean towel or paper towel to air-dry briefly before storing.
Alternate options (pros/cons):
| Method | Pros | Cons |
|---|---|---|
| Jar with mesh lid | Simple, low-cost | Small batches only |
| Sprouting tray | Larger capacity, easy draining | Requires more countertop space |
| Automatic sprouter | Consistent water cycle | Cost, takes space |
Choose the method that fits your kitchen and batch size.
Timing and temperatures
- Soak: 8–12 hours.
- Sprouting: typically 2–5 days from the end of soaking, depending on temperature and variety.
- Ideal temperature: 65–75°F (18–24°C). Cooler slows germination; warmth speeds it but increases mold risk.
In practice, if you see smell, slime or fuzzy white/green patches, discard the batch and sanitize equipment.
Harvesting, washing and storing
- Harvest when shoots reach the size you prefer: 1/4–1/2 inch for crunchy garnish, 1–2 inches for more leafy use.
- Rinse well, remove loose hulls and any brown or un-sprouted kernels.
- Dry: spread on a towel until not dripping. Excess moisture shortens storage life.
- Refrigerate: store in an airtight container with a clean paper towel to absorb moisture; use within 3–7 days.
- Freezing: briefly blanch (10–20 seconds in boiling water), cool in an ice bath, drain and freeze in portions for cooked uses. Freezing raw sprouts will alter texture.
If you intend to keep sprouts longer, consider cooking or drying them into flakes — that requires different processing.
Using sprouted wheat berries (ideas and tips)
- Fresh salads: toss 1/2–1 cup sprouted wheat into mixed greens for texture.
- Smoothies: blend 1/4–1/2 cup sprouts with fruit and liquid; they add fiber without dominant flavor.
- Stir-fries & sautés: add sprouts at the end of cooking for crunch. Note: heat reduces some enzymes but retains nutrients.
- Baking: dry and mill sprouted berries into sprouted flour for breads (requires drying to safe moisture levels).
Quick recipe idea — sprout salad: combine 1 cup mixed greens, 1/2 cup sprouted wheat, 1/4 cup chopped nuts, sliced apple, lemon-olive oil dressing.
Call to action: start one jar this weekend—try sprouting 1 cup of wheat berries and use them in a salad by day 3.
Troubleshooting and safety (common problems)
- Mold or furry growth: means poor drainage or overcrowding. Discard the batch, clean all equipment with hot soapy water, rinse thoroughly and restart with fresh seeds.
- Slimy texture or off-odor: discard; do not taste to test. Proper rinsing and drying reduce risk.
- Bitter taste: caused by overexposure to light or delayed harvesting; harvest earlier or keep sprouts in low light during initial germination.
- Slow germination: use fresher seeds, ensure adequate soak time and warmer room temperature. Age and seed lot quality matter.
Food-safety reminders:
- Use potable water for all rinses.
- People at higher risk of foodborne illness should avoid raw sprouts or cook them thoroughly. For general safe handling information, follow guidance from public health authorities such as the CDC.
- Clean and dry equipment between batches.
 Clean sprouted wheat berries spread to dry before storage
Credit: food52.com
FAQ
Q: How long do sprouted wheat berries last in the fridge?
A: When rinsed, well-drained and stored in an airtight container, expect 3–7 days. Discard if slimy or off-smelling.
Q: Can I eat sprouted wheat raw?
A: Yes, but raw sprouts can carry pathogens. People in higher-risk groups should cook sprouts before eating.
Q: Can I dry and mill sprouted wheat into flour?
A: Yes—that requires fully drying the sprouted berries (low oven or dehydrator) until brittle, then grinding. Fully dry to safe moisture levels to avoid spoilage.
Q: Do sprouted wheat berries turn into wheatgrass?
A: If you continue to grow sprouts in light after initial sprouting, they will develop green shoots (wheatgrass). Typical sprouted berries for eating are harvested earlier before much greening.
Final notes
Sprouting wheat berries is inexpensive, easy and rewarding. With basic equipment, regular rinses, good drainage and attention to cleanliness you’ll reliably produce fresh sprouts in a few days. Start small, observe each batch, and adjust soak/rinse timing and harvest size to match your taste. Enjoy the bright texture and nutrient boost sprouted wheat can bring to everyday meals.

Hi, I’m Daniel Brooks—a food lover and kitchen gear enthusiast. I enjoy testing cookware, utensils, and gadgets to see what really works in everyday cooking. At PlugChef.com, I share honest reviews, comparisons, and simple guides to help you choose the best tools for a safer, smarter, and more enjoyable kitchen.
Related posts:
 How to Make a Fruit Basket for a Gift: Easy DIY Guide
 Do You Need a Basket? Essential Guide for Air Fryers
 What Blenders Do Tropical Smoothie Use: Expert Insights
Stainless Steel Vs White Kitchen Appliances: Ultimate Showdown
What Blenders Do Tropical Smoothie Use: Expert Insights
Stainless Steel Vs White Kitchen Appliances: Ultimate Showdown
 Kitchen Appliances for Wedding Registry: Must-Have Essentials
 Top 10 Best Non-Toxic Cooking Utensils – Safe & Durable Choices for Healthy Homes

