How to Make End Grain Cutting Board: Ultimate DIY Guide for Durability

Do you love cooking? Then you need a good cutting board. A cutting board helps you chop veggies and meat. An end grain cutting board is the best. It is strong and looks pretty. Let’s learn how to make one.

Materials You Need

First, gather all materials. Here is a list:

  • Wood pieces (maple, oak, or cherry)
  • Wood glue
  • Clamps
  • Sandpaper (80, 120, 220 grit)
  • Mineral oil
  • Saw
  • Brush

These items are easy to find. You can buy them in a hardware store.

Tools You Need

Now, let’s talk about tools. You will need:

  • Table saw or miter saw
  • Planer
  • Router (optional)
  • Square
  • Sanding block

These tools help you cut and shape wood. Ask an adult to help if needed.

Step 1: Cut the Wood

First, cut the wood into strips. Each strip should be 1 to 2 inches wide. Use the saw to cut them straight. Be careful! Safety is important. Ask for help if you are not sure.

Step 2: Glue the Strips

Lay the wood strips side by side. Make sure they fit well. Apply wood glue to the edges. Press them together. Use clamps to hold them tight. Leave the glue to dry overnight.

 
How to Make End Grain Cutting Board: Ultimate DIY Guide for Durability

Credit: www.youtube.com

Step 3: Flatten the Surface

Once dry, remove the clamps. The surface might be uneven. Use a planer to flatten it. Move the board through the planer. This step makes it smooth.

Step 4: Cut and Glue Again

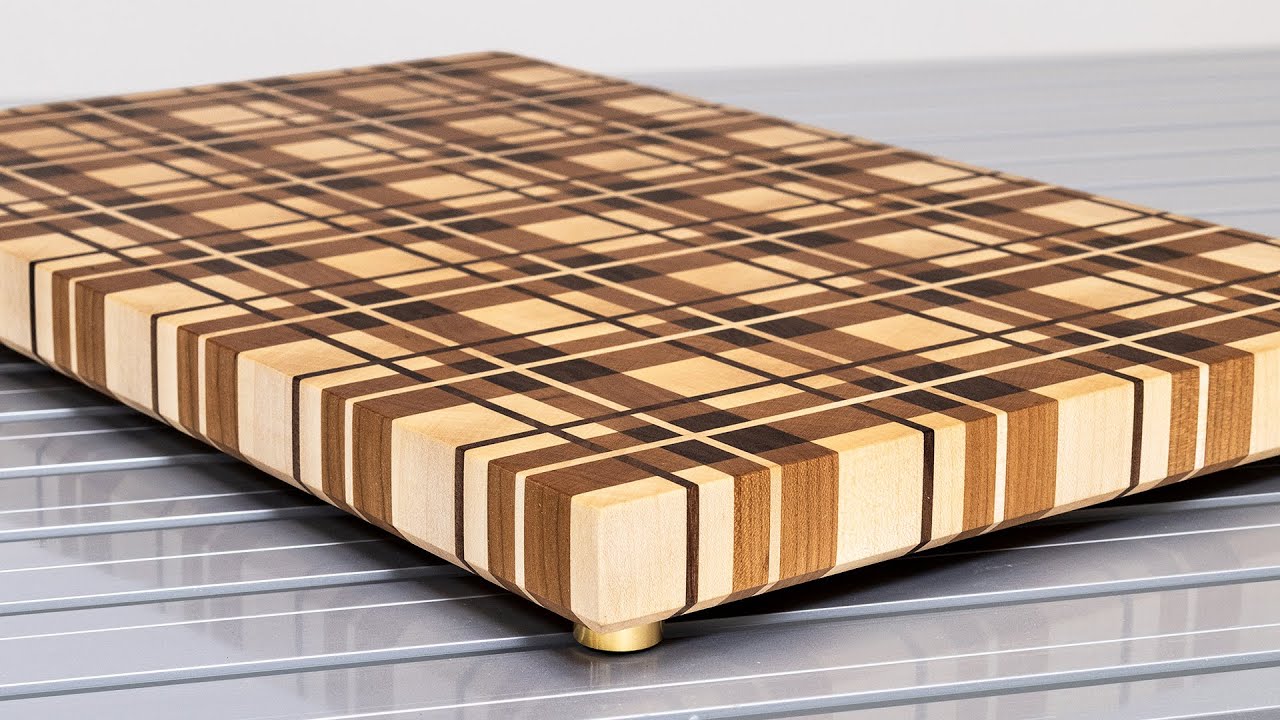
Next, cut the board into new strips. Turn each strip 90 degrees. This shows the end grain. Glue these strips together. Clamp them tight. Let the glue dry again.

Step 5: Sand the Board

Remove the clamps once more. The board is almost ready. Now, sand the surface. Start with 80 grit sandpaper. Then use 120 grit. Finish with 220 grit. Sanding makes it smooth.


How to Make End Grain Cutting Board: Ultimate DIY Guide for Durability

Credit: m.youtube.com

Step 6: Oil the Board

Your board is sanded and smooth. Now, apply mineral oil. Use a brush or cloth. Cover the whole board. Let it soak for a few hours. This keeps the wood healthy.

Step 7: Clean Up

Wipe off extra oil. Use a clean cloth. Your board is finished. It looks good and works well.

Caring for Your Board

Your board needs care. Wash it after each use. Use warm water and mild soap. Do not soak it in water. Dry it with a towel. Apply mineral oil every month. This keeps it strong.

Why Choose End Grain?

End grain boards are special. They are durable. They are also gentle on knives. The wood fibers close after cutting. This means less wear on your knives.

Frequently Asked Questions

What Type Of Wood Is Best For An End Grain Cutting Board?

Hardwoods like maple, walnut, and cherry are best for durability and knife safety.

How Long Does It Take To Make An End Grain Cutting Board?

It usually takes a few hours to a day, depending on skill and tools.

Do I Need Special Tools To Build An End Grain Board?

Basic woodworking tools like saws, clamps, and sanders work well for beginners.

How Should I Glue The Wood Pieces For The Board?

Use food-safe wood glue and clamp tightly for at least 24 hours.

Conclusion

Making an end grain cutting board is fun. It is also useful. You will have a strong board for cooking. It is a great project for beginners. Remember to ask for help if needed. Now, enjoy your new cutting board!