
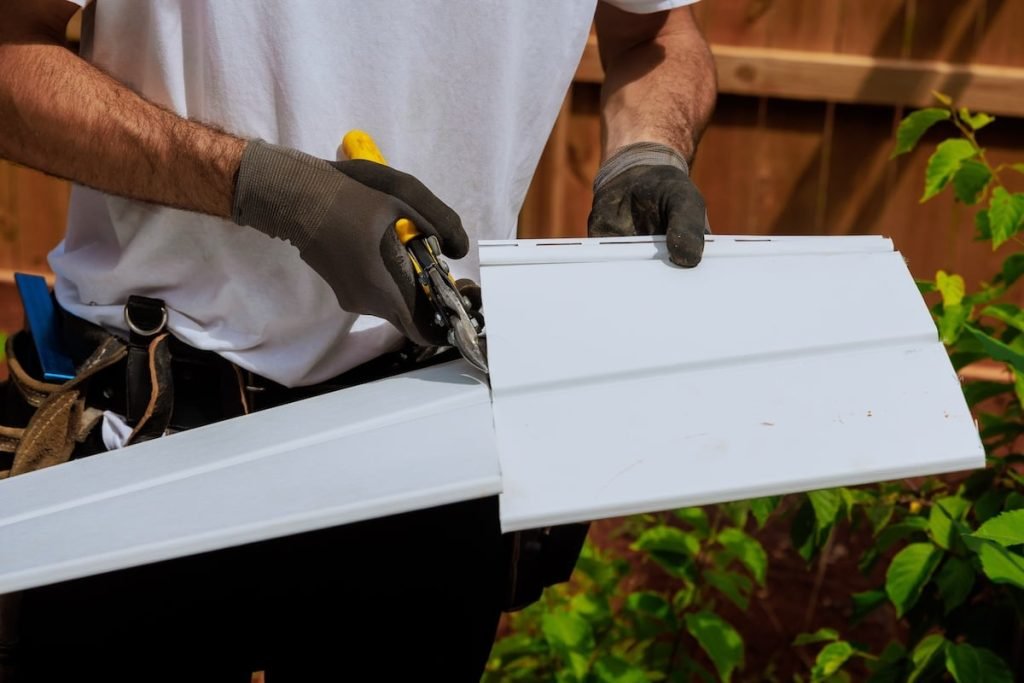
Hardie board (fiber cement siding) is one of the most popular residential siding options in 2026, prized for its wood-like aesthetic, Class A fire resistance, and 30+ year lifespan with minimal maintenance. Unlike wood, its dense cement-sand composite requires specific cutting tools and techniques to avoid chipped edges, wasted material, and poor-fitting planks that lead to water intrusion. Whether you’re a DIY homeowner tackling a small siding repair or a new contractor learning the trade, this field-tested guide walks through expert methods for clean, precise cuts every time.
What Makes Hardie Board Siding Unique
Hardie board is a cement-based composite made of Portland cement, sand, and cellulose fibers, engineered to replicate the look of wood without the risk of rotting, warping, or insect damage. Unlike wood, it has no grain, so it cuts cleanly in any direction without tearout, but its high density means standard wood saw blades dull in 1-2 cuts and produce ragged, splintered edges if used incorrectly. For material-specific cutting best practices, refer to James Hardie’s official installation recommendations to ensure compliance with warranty requirements. Understanding these material properties is the first step to avoiding common cutting pitfalls.
Essential Tools for Clean, Precise Cuts
Gathering the right tools before you start will save you time, reduce waste, and ensure consistent results. You’ll need:
- 25-foot locking measuring tape for accurate measurements of installation spaces
- Weather-resistant permanent marker to mark cut lines (use a marker that won’t fade if it gets damp)
- 7 1/4-inch circular saw with a carbide-tipped fiber cement blade (4-6 teeth per inch for minimal chipping)
- Speed square to draw straight crosscut lines and set bevel angles for gable cuts
- 2+ bar clamps to secure planks to a stable work surface
- Pair of rated sawhorses to elevate planks off the ground for safe, stable cutting
- Anti-fog impact-resistant safety glasses
- N95 or P100 respirator (standard dust masks do not filter fine crystalline silica particles)
- Cut-resistant work gloves to protect against sharp plank edges
- 120-grit sandpaper for smoothing minor rough spots on cut edges
If you don’t own a circular saw, a utility knife or scoring tool works for straight cuts on 1/2-inch or thinner Hardie trim pieces using the score-and-snap method.
Step-by-Step Guide to Cutting Hardie Board Siding
Follow these steps to achieve professional-grade cuts, even if you’re new to working with fiber cement:
Step 1: Measure and Mark Accurately
First, measure the installation space twice to avoid costly measurement errors — a single wrong cut can waste a $30+ Hardie plank. Account for a 1/8-inch expansion gap between adjacent planks to allow for thermal movement in warm weather. Mark the cut line on the back of the plank whenever possible, so any minor chipping from cutting is hidden on the installed side of the siding. Use your speed square to draw a perfectly straight line across the full width of the plank for crosscuts, or set the square to the correct angle for miter cuts on gable ends.
Step 2: Set Up a Safe Work Area
Work outdoors in a well-ventilated area on a calm day to avoid silica dust drifting to neighboring properties or enclosed spaces. Set up your sawhorses on a flat, stable surface, and lay down a drop cloth to catch dust and debris for easier cleanup. If you must cut in an enclosed area, attach a HEPA vacuum to your saw’s dust port to capture 99% of dust particles.
Step 3: Prepare Your Saw
Install a carbide-tipped fiber cement blade on your circular saw — never use a standard wood blade, as it will dull quickly and cause excessive chipping. Tighten the blade arbor nut firmly to avoid wobble during cutting. Adjust the saw depth so the blade extends only 1/8 to 1/4 inch below the plank when the saw is fully lowered: this reduces kickback risk and minimizes splintering on the bottom side of the cut. If using a corded saw, route the power cord away from the cut line to avoid accidentally cutting it.
Step 4: Make the Cut
Secure the plank firmly to the sawhorses with bar clamps to prevent shifting during cutting. Align the notch in the saw’s base plate with your marked cut line, start the saw before the blade touches the plank to avoid stalling, and use a steady, even pace — do not force the saw, as this causes chipping and puts excess strain on the motor. For perfectly straight cuts, clamp a straight edge guide to the plank and run the saw’s base plate along it for consistent results.
Step 5: Inspect and Adjust the Cut
After cutting, inspect the edge for chips, splinters, or unevenness. Minor rough spots can be smoothed with 120-grit sandpaper, but avoid over-sanding, which can thin the plank edge and weaken it. If the cut is significantly uneven, recut the plank: it is far easier to waste a small piece of material now than to deal with a poorly fitting plank that causes water intrusion after installation.
 A carbide-tipped fiber cement blade and steady cutting pace produce clean, chip-free edges on Hardie planks.
Credit: voyagerexteriors.com
A carbide-tipped fiber cement blade and steady cutting pace produce clean, chip-free edges on Hardie planks.
Credit: voyagerexteriors.com
Expert Tips for Perfect Cuts Every Time
These field-tested tips will help you avoid common mistakes and achieve professional results:
- Use a blade with 4-6 teeth per inch for most cuts: lower tooth counts cut faster but increase chipping, while higher tooth counts produce smoother edges but take longer to cut.
- For small, straight cuts on trim pieces, use the score-and-snap method: score the cut line firmly with a utility knife 2-3 times, then snap the plank along the scored line by hand for a clean, dust-free edge.
- Cut with the decorative side facing up for crosscuts: this ensures any minor chipping from the saw blade occurs on the back (hidden) side of the plank.
- Replace your saw blade after 10-15 hours of cutting: dull blades are the leading cause of chipped edges and kickback.
- In practice, most DIYers find that using a straight edge guide for all cuts eliminates uneven edges, even for novice users.
Safety Protocols You Can't Skip
Cutting Hardie board siding releases respirable crystalline silica dust, a known carcinogen that can cause silicosis, lung cancer, and other chronic respiratory diseases with prolonged exposure, per OSHA’s silica exposure safety guidelines. Skipping safety gear is not worth the risk: always wear an N95 or P100 respirator (not a standard dust mask, which does not filter fine silica particles), impact-resistant safety glasses with side shields, cut-resistant work gloves, long sleeves, and pants. If using a circular saw for more than 15 minutes at a time, wear hearing protection to avoid long-term hearing damage. Never cut Hardie board in an enclosed space without proper industrial-grade dust extraction.
Troubleshooting Common Cut Issues
Even with careful preparation, you may run into minor issues. Here’s how to fix them quickly:
| Issue | Cause | Fix |
|---|---|---|
| Chipped, splintered edges | Dull blade, cutting too fast, blade with incorrect tooth count | Replace with a 4-6 TPI fiber cement blade, slow your cutting pace, score the cut line lightly before making the full cut |
| Uneven, wavy cuts | Unsecured plank, misaligned saw base plate, warped plank | Clamp the plank firmly, check that the saw base plate is straight, discard warped planks (they will not fit properly during installation) |
| Blade dulling after 1-2 cuts | Using a standard wood blade, cutting through embedded metal fasteners | Always use a fiber cement-rated blade, inspect planks for nails or metal before cutting |
| Excessive dust buildup | Cutting indoors, no dust extraction, blade with too many teeth | Cut outdoors on a calm day, attach a HEPA vacuum to the saw’s dust port, use a 4-6 TPI blade |
Post-Cut Finishing and Installation Prep
The steps you take after cutting will have a huge impact on the long-term performance of your siding. First, inspect every cut edge for chips or splinters, and smooth any rough spots with 120-grit sandpaper. Next, apply a coat of exterior-grade primer to all cut edges: this seals the porous cement, preventing moisture intrusion that can cause cracking or rot over time. Finally, test fit the plank in its installation location before securing it: ensure there are no gaps larger than 1/8 inch between adjacent planks, and that the plank sits flush against the house sheathing. If the fit is off, recut the plank before installation to avoid time-consuming adjustments later.
Cleaning Up After Cutting
Fiber cement dust is fine and can spread quickly, so proper cleanup is critical for health and safety. First, use a HEPA vacuum to pick up all visible dust from the work area, then wipe down all tools and surfaces with a damp cloth to remove any remaining fine particles. Dispose of offcuts and dust in a sealed plastic bag to prevent dust from spreading to other areas of your property. If you used a drop cloth, fold it carefully to contain dust, then shake it out outdoors before storing. Clean your saw blade and base plate with a dry cloth to remove cement residue, which can corrode metal parts if left to sit. Store leftover Hardie planks in a dry, elevated space using elevated material storage solutions to prevent moisture damage before your next project.
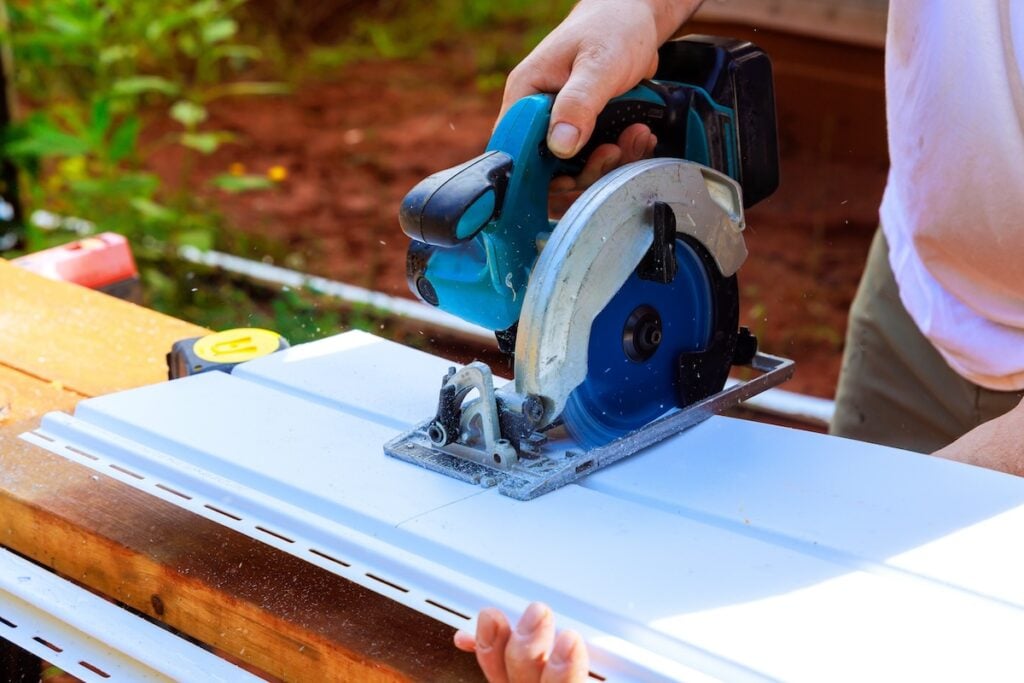 Always secure planks with bar clamps to a stable work surface to prevent shifting during cutting.
Credit: bestexteriorsinc.com
Always secure planks with bar clamps to a stable work surface to prevent shifting during cutting.
Credit: bestexteriorsinc.com
Frequently Asked Questions
What tools do I need to cut Hardie board siding?
For straight crosscuts, a 7 1/4-inch circular saw with a carbide-tipped fiber cement blade is the fastest, most precise option. For small, detailed cuts on trim pieces, a utility knife or scoring tool works well for score-and-snap cuts. You’ll also need a measuring tape, permanent marker, speed square, bar clamps, safety glasses, an N95 or P100 respirator, and work gloves.
Can I cut Hardie board siding with a hand saw?
Yes, but only for small, detailed cuts. A standard hand saw will take significant effort to cut through fiber cement, and will produce a much rougher edge than a power saw. Use a hand saw with a blade rated for cement or masonry, and take your time to avoid chipping.
How do I reduce dust when cutting Hardie board siding?
The score-and-snap method produces far less dust than power cutting: score the cut line firmly with a utility knife 2-3 times, then snap the plank along the scored line by hand. If using a circular saw, attach a HEPA vacuum to the saw’s dust port, and cut outdoors on a calm day to prevent dust drift.
Do I need to prime cut edges of Hardie board siding?
Yes. The cut edge of fiber cement is porous and can absorb moisture, leading to cracking or rot over time. Apply a coat of exterior-grade primer to all cut edges before installation to seal the material and extend its lifespan.
Can I use the same blade for multiple cutting projects?
Yes, as long as the blade is rated for fiber cement and remains sharp. Dull blades will cause chipping and increase kickback risk, so inspect the blade before each use, and replace it if you notice it struggling to cut through planks or producing rough edges.
Conclusion
Cutting Hardie board siding doesn’t have to be a frustrating, messy project — with the right tools, safety protocols, and technique, you can achieve clean, precise cuts that fit perfectly every time. Remember to always use a fiber cement-rated saw blade, secure planks firmly before cutting, wear proper respiratory protection to avoid silica dust exposure, and prime cut edges before installation to protect your siding long-term.
If you’re tackling other DIY siding projects, check out our cement board cutting techniques guide for tips on working with comparable cement-based materials, or our scoring rigid composite materials guide for step-by-step score-and-snap instructions for small trim cuts. For more step-by-step home improvement guides, browse our full DIY project library for instructions on everything from siding installation to interior renovations. Regular cleaning and maintenance of your saw and blades will extend their lifespan and ensure consistent cuts — our cutting tool care basics guide covers simple upkeep steps that apply to all cutting equipment.

I’m Abby Lu, a passionate home cook who loves simplifying everyday meals. At PlugChef.com, I share product reviews and cooking guides to help you find the best tools for your kitchen.
Related posts:
 How to Make a Fruit Basket for a Gift: Easy DIY Guide
 Do You Need a Basket? Essential Guide for Air Fryers
 How to Adjust Syrup Dispenser Pressure: Expert Tips
 Some Kitchen Appliances Crossword Clue: Solve Now!
Pictures of Appliances in a Kitchen: Captivating Designs
Some Kitchen Appliances Crossword Clue: Solve Now!
Pictures of Appliances in a Kitchen: Captivating Designs
 Some Kitchen Appliances for Short Kitchens: Must-Have Essentials

