
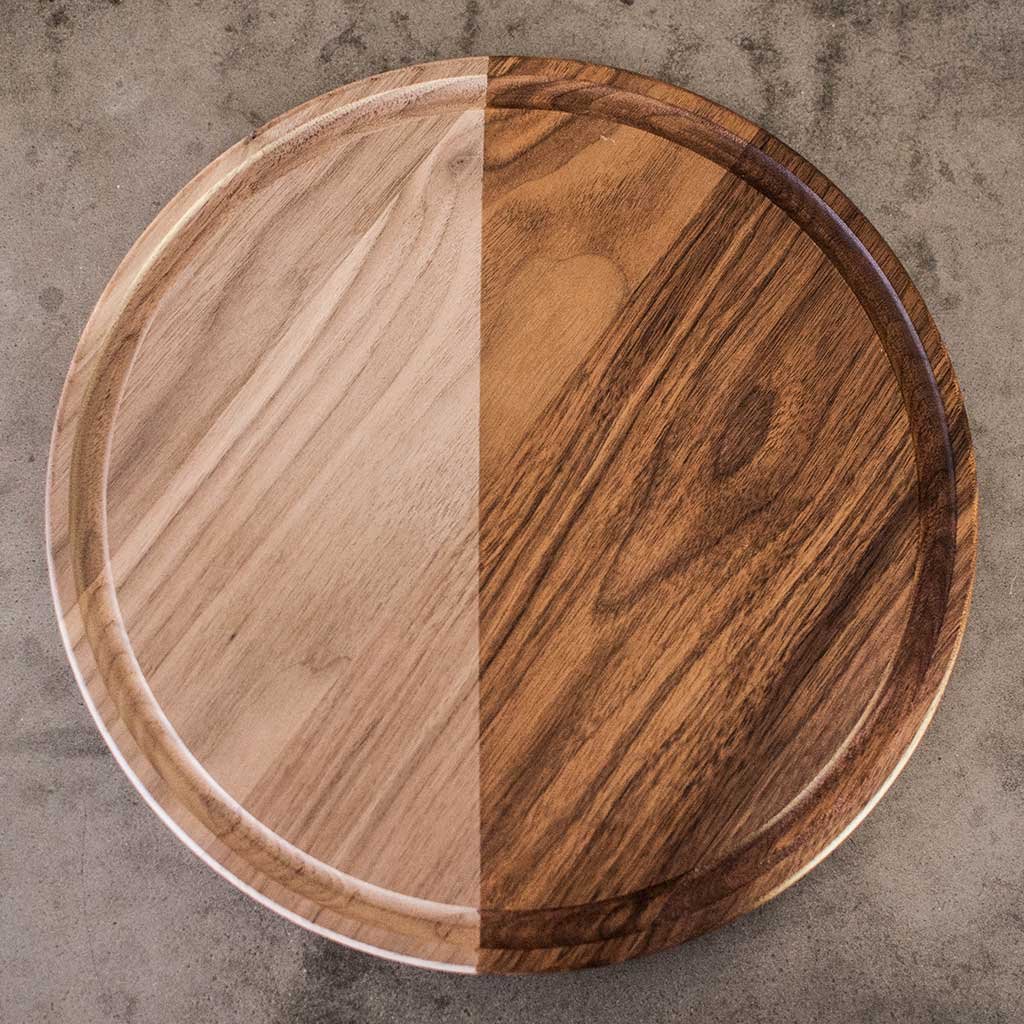
A well-seasoned wood cutting board resists moisture, stays smooth under your knife, and can last for decades. This guide gives step-by-step, practical advice — what oils to use (and why), exact application and curing steps, sanding and repair techniques, sanitizing tips, troubleshooting, and a realistic maintenance schedule you can actually follow.
Why seasoning matters
Seasoning (also called oiling or conditioning) replenishes the wood’s natural oils, seals pores against moisture, reduces bacteria harboring, and prevents cracking, warping, and unattractive drying. End-grain, edge-grain, and face-grain boards all benefit, but end-grain boards require more frequent attention because they absorb oil faster.
In practice: a neglected board will show white grain lines, splintering at cuts, or dark water stains. Proper seasoning keeps the board safer and more pleasant to use — fewer crumbs, smoother cuts, less knife dulling, and less risk of structural damage.
What oils and finishes to use (and which to avoid)
- Food-grade mineral oil (refined, USP grade): the most recommended because it’s colorless, odorless, food-safe, and does not go rancid. Best for regular maintenance.
- Butcher-block or “cutting board” oil blends: typically mineral oil with added food-safe waxes; convenient and often better long-term protection than oil alone.
- Beeswax or beeswax + mineral oil blends: add a protective, water-resistant top layer and make the surface more resilient to spills.
- Polymerized tung oil / walnut oil (commercially cured): can give longer-lasting protection but choose products labeled food-safe for cutting boards — avoid raw plant oils that can go rancid.
- Oils to avoid: unrefined vegetable oils (olive, sunflower, canola) — they oxidize and become rancid, causing odor and sticky residue. If you use a nut oil, be mindful of nut-allergy risks.
A common trade-off: mineral oil is inert and safe but offers limited surface water repellency; wax or polymerized finishes add surface protection but require correct curing and may change the board’s look slightly.
Tools & materials you’ll need
- Food-grade mineral oil (USP) or a dedicated cutting-board conditioner
- Beeswax or a beeswax-based paste (optional)
- Lint-free cloths or paper towels (reusable cotton towels preferred)
- Soft-bristle brush (optional for end-grain)
- Fine-grit sandpaper (120–220 grit) and optional sanding block
- Clean sponge, dish soap, white vinegar, baking soda
- Plastic scraper or bench scraper (for wax removal)
- Rubber gloves (optional)
Preparation: cleaning and inspection (step-by-step)
- Wash: scrub the board with warm water and mild dish soap; never soak or put a wooden board in the dishwasher.
- Sanitize when needed: for a quick kitchen-safe option, wipe with white vinegar or a dilute bleach solution only when necessary — see the safety section below. Rinse after sanitizing.
- Dry completely: pat off excess water, then stand the board upright with airflow until fully dry (a few hours). Oil won’t penetrate well into wet wood.
- Inspect: look for deep cut grooves, stains, or rough patches. If the surface is uneven or has embedded stains, plan sanding or resurfacing before oiling.
Place the board on a stable, clean surface before the next step.
(Include image)

Credit: www.youtube.com
Close-up showing wood grain ready for oiling.
Sanding and resurfacing (when and how)
When to sand:
- Deep grooves, knife marks, or splinters
- Heavy staining or sticky residue that won’t scrub out
- If the surface feels rough after many years of use
How to sand:
- Start with 120–150 grit to level and remove grooves.
- Progress to 180–220 grit for a smooth finish. Always sand with the grain when possible.
- Remove dust with a vacuum and a damp lint-free cloth; let dry completely.
- After sanding, apply oil promptly — sanding opens the wood pores and improves oil absorption.
Tip: For end-grain boards, use sharper sanding and more frequent oiling afterward because end grain soaks up oil quickly.
How to season a wood cutting board — step-by-step
- Choose your oil/conditioner (food-grade mineral oil or a mineral oil + beeswax conditioner).
- Place the dry board on a protected surface.
- Pour a small amount (1–2 tablespoons per side for a 12"x18" board) — you can adjust: heavier boards or very dry boards may need more.
- Rub the oil into the wood with a lint-free cloth or soft brush, working with the grain and paying extra attention to edges and end grain.
- For end-grain boards, use a brush or let oil sit longer to penetrate.
- Let the oil absorb for 4–12 hours or overnight. If the board appears dry after 1 hour, apply another light coat.
- Wipe off excess oil with a clean cloth so the surface isn’t tacky.
- (Optional) If using beeswax paste: after oiling and once the board is mostly dry, melt/apply a thin layer of wax and buff to a sheen for water resistance. Follow product instructions for curing if specified.
Practical note: Freshly sanded boards will drink oil aggressively; plan for multiple thin coats spaced out over a day rather than one thick coat.
Curing and multi-coat technique
- Initial deep conditioning: for brand-new or very dry boards, apply 3–5 thin coats over 24–48 hours — apply, wait 1–4 hours, wipe, repeat.
- Regular maintenance coats: 1 light coat is usually enough.
- Beeswax finish: buff the wax after application; allow it to harden for a few hours. Reapply wax every few months for heavy use.
In practice, you want the wood to feel nourished but not sticky. Too much oil leaves a gummy surface that attracts debris.
Maintenance schedule (realistic and practical)
- Heavy use (daily chopping): oil every 2–4 weeks; wax monthly.
- Moderate use (several times/week): oil every 6–8 weeks.
- Light use (occasional): oil every 3 months or when the wood looks dry, dull, or lightens in color.
A quick test: sprinkle water on the board — if it beads, the finish is active; if it soaks in, it’s time to oil.
Call to action: pick up a bottle of food-grade mineral oil and a tin of beeswax conditioner — a short 10–15 minute session will keep your board protected for months.
Sanitizing and food-safety best practices
- Routine cleaning: soap, warm water, scrub, rinse, dry.
- For tougher sanitizing: wipe with white vinegar or 3% hydrogen peroxide. These are safer for the wood than frequent bleach use.
- Occasional bleach treatment: if you must sanitize after raw poultry contamination, a dilute bleach solution (follow reputable official guidance) can be used sparingly — avoid routine bleach exposure which degrades wood and finishes. For authoritative food-contact safety guidance, see the FDA’s food safety resources.
- Avoid prolonged wetting and soaking, which promotes warping and microbial growth.
For further maintenance tips and research-backed recommendations on food-contact surfaces, check resources such as the University of Minnesota Extension.
Troubleshooting common problems
- Sticky gumminess after oiling: you used too much oil or didn’t wipe off excess. Solution: wipe with a clean cloth, then lightly sand (220 grit) and reapply a thin coat.
- Persistent dark stains: try a paste of baking soda + water or coarse salt + lemon rubbed into the stain; sand if needed.
- Odors (onion/garlic): scrub with coarse salt and half a lemon, let sit, rinse, then re-oil once dry.
- Deep cracks/splits: small cracks can be filled with food-safe epoxy or wood filler and sanded smooth; large structural cracks may mean it’s time to replace the board.
- Warping: often irreversible. Prevent by storing upright with good ventilation and avoiding soaking.
Environmental and allergy considerations
- Mineral oil is petroleum-derived but widely recommended for safety and non-rancidity. If you prefer plant-based or wax finishes, choose polymerized or cured products labeled food-safe to reduce rancidity risk.
- Nut oils (walnut) pose allergy concerns — don’t use them in kitchens serving people with nut allergies.
- Use reusable cotton towels and avoid single-use paper where possible to reduce waste.
When to replace your cutting board
Replace when:
- Deep cracks/splits that trap food and cannot be safely cleaned
- Severe warping that makes it unstable
- Surface worn down beyond resurfacing (you’ve sanded to an unsafe thinness)
- Persistent odors or bacterial issues you can’t remedy
A well-maintained board can last many years, but safety comes first.
FAQ
Q: How long should I let oil soak in?
A: Typically 4–12 hours or overnight for deeper conditioning. Multiple thin coats spaced over 24–48 hours work better than one heavy coat.
Q: Can I use mineral oil and beeswax together?
A: Yes — oil penetrates and hydrates, while beeswax provides a surface seal. Many conditioners combine both.
Q: Does oiling make the board slippery?
A: Excess oil can make it slippery. Wipe off any excess and buff; a properly oiled board should feel smooth, not greasy.
Q: Can I season an oiled board too often?
A: Over-oiling can cause a gummy surface. Follow the use-based schedule above and do thin coats.
Q: Is sanding okay for a laminate or composite board?
A: No — sanding applies to solid wood boards. Laminates and plastics require different care.
Conclusion
Seasoning a wood cutting board is simple but makes a major difference: fewer stains, less cracking, and a more sanitary, knife-friendly surface. Use a food-grade mineral oil as your baseline, add beeswax for extra protection, sand only when necessary, and follow a realistic oiling cadence based on how often you use the board. With a little routine care you’ll enjoy a durable, beautiful cutting surface for years.
Pick a food-grade mineral oil or a beeswax conditioner this week and spend 10–20 minutes to condition your board — small, regular care prevents big repairs later.

Hi, I’m Daniel Brooks—a food lover and kitchen gear enthusiast. I enjoy testing cookware, utensils, and gadgets to see what really works in everyday cooking. At PlugChef.com, I share honest reviews, comparisons, and simple guides to help you choose the best tools for a safer, smarter, and more enjoyable kitchen.
Related posts:
 How to Make a Fruit Basket for a Gift: Easy DIY Guide
 Do You Need a Basket? Essential Guide for Air Fryers
 How to Choose Kitchen Appliances: Expert Tips Revealed
 Kitchen Cabinets With Black Stainless Steel Appliances: Modern Elegance
 White Kitchen Cabinets Stainless Steel Appliances: Timeless Elegance
 Top 10 Best Non-Toxic Cooking Utensils – Safe & Durable Choices for Healthy Homes

