
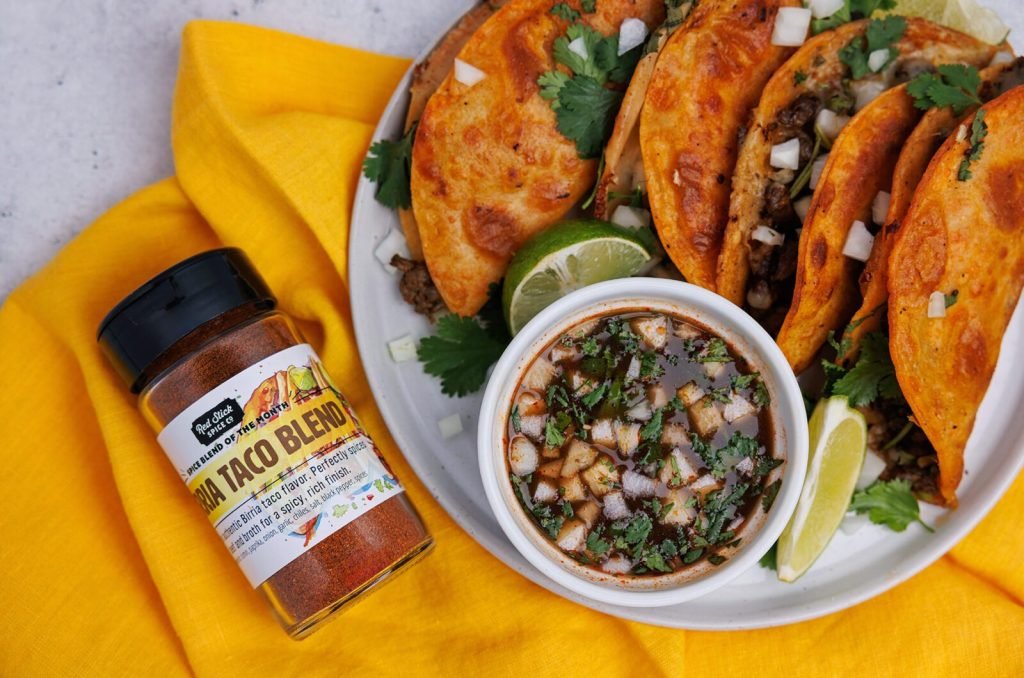
Craving the rich, melt-in-your-mouth flavor of restaurant-quality birria tacos without spending hours simmering a pot on the stove? This Instant Pot birria recipe delivers tender, spice-infused beef, a deeply flavorful consommé, and perfectly crispy tacos in under 90 minutes total time, with most of that hands-off. Unlike traditional birria that requires 3+ hours of slow cooking, the Instant Pot’s high-pressure environment breaks down tough connective tissue in beef chuck in a fraction of the time, locking in moisture and deepening chili flavor for a result that tastes like it cooked all day. If you’re cooking with young children in the home, secure hazardous cooking areas with child proof cabinet locks no drilling to keep little ones safe while you work. Whether you’re a first-time birria maker or a seasoned taco enthusiast, this step-by-step guide covers pro tips for avoiding common mistakes (like soggy tortillas or bland sauce) and customization options to match your spice preference.
Why Instant Pot Birria Beats Traditional Cooking Methods
Traditional birria, a slow-simmered Mexican stew originating from Jalisco, relies on hours of low, gentle heat to tenderize tough cuts of meat and develop complex chili flavors. The Instant Pot eliminates that long wait time without sacrificing taste or texture, making it the ideal tool for weeknight birria nights. Key benefits include:
- Time savings: Pressure cooking cuts total cook time from 3-4 hours to 45-60 minutes of active pressure cooking, plus just 15 minutes of prep.
- Consistent tenderness: High, even pressure breaks down collagen in tough cuts like chuck or short ribs evenly, eliminating the risk of overcooking or dry meat from prolonged stovetop simmering.
- Deeper flavor development: The sealed pressure environment forces chili and spice flavors into the meat faster than open-pot cooking, while the natural steam bastes the meat as it cooks.
- Built-in consommé: The Instant Pot produces a rich, flavorful dipping broth as a byproduct of cooking the meat, no extra steps required.
- Less active work: No need to monitor the pot for hours, adjust heat, or skim foam—just set it and walk away. For food safety, always follow USDA safe cooking guidelines for beef to ensure your meat reaches a safe internal temperature, especially when using pressure cooking methods. For best results and safe pressure cooking, follow official Instant Pot best practices for your specific model.
Core Ingredients for Juicy, Flavor-Packed Birria
The secret to authentic birria lies in using the right combination of meat, chilies, and spices—no fancy equipment required. Below is a breakdown of every ingredient you’ll need, plus swaps for dietary restrictions or ingredient availability.
Meat Cuts: What Works Best
The right cut is non-negotiable for juicy, tender results: you need a cut with enough intramuscular fat and connective tissue to break down during pressure cooking. Avoid lean cuts like sirloin or round, as they will dry out no matter how long you cook them. Your best options are:
- Beef chuck roast (2-3 lbs, boneless or bone-in): The gold standard for birria, with marbling that keeps meat juicy and a rich beef flavor that stands up to bold chili spices. Boneless is easier to shred, but bone-in adds extra depth to the consommé.
- Beef short ribs (2 lbs, bone-in): Adds extra richness and a buttery texture from the bone marrow, perfect for a more luxurious taco filling.
- Goat shoulder (traditional choice): Has a leaner, gamey flavor that pairs beautifully with the sweet and smoky chilies, though it can be harder to find at standard grocery stores.
- Lamb shoulder: A great alternative for a deeper, earthier flavor profile, with similar fat content to chuck. If you’re short on time, pre-cut stew meat from the grocery store works, but trim any large, hard fat chunks before cooking to avoid greasy results.
Chilies & Spices: The Flavor Foundation
The chili blend is the soul of birria, and using dried (not powdered) chilies is non-negotiable for authentic, complex flavor. Each chili contributes a unique note to the sauce:
- Dried guajillo chilies (4-6, deseeded): The base of most birria sauces, with mild heat, bright fruity notes, and a subtle smoky finish. They provide the signature red color of the consommé.
- Dried ancho chilies (2-3, deseeded): Sweet, raisin-like, with mild heat, they add depth and balance the guajillo's brightness.
- Optional chipotle chilies in adobo (1-2): For a smoky, spicy kick, perfect if you prefer more heat. Use sparingly, as adobo adds extra saltiness.
- Spices: 2 tsp ground cumin, 1 tsp dried oregano (Mexican oregano if available, for more citrusy depth), 1/2 tsp ground cinnamon, 2 bay leaves, 1 tsp black pepper, 4 garlic cloves (minced), 1 tsp salt. A common mistake is skipping the chili soaking step, which leads to gritty, uneven sauce and underdeveloped chili flavor—always soak dried chilies in hot water for 20 minutes before blending. If you can’t find dried guajillo or ancho chilies, substitute with an equal mix of paprika, chili powder, and a pinch of smoked paprika, but expect a less complex, sweeter flavor profile.
Build-Your-Own Sauce Base
The sauce base ties all the flavors together, and small swaps can adjust the profile to your taste:
- 1 cup low-sodium beef broth: Use homemade broth for extra depth, or a high-quality store-bought brand. Avoid broths with added herbs or spices that will clash with the birria blend. For a vegan version, swap for vegetable broth and add 1 tbsp soy sauce for umami depth.
- 1/2 cup unsweetened tomato puree: Provides a rich, tangy base for the sauce. Fresh ripe tomatoes work too, but puree yields a smoother, more consistent texture.
- 2 tbsp apple cider vinegar (or white vinegar): Balances the rich, savory flavors with bright acidity, and helps tenderize the meat during cooking.
- Optional 1 tbsp adobo sauce from chipotle cans, for extra smoky heat.
Step-by-Step Instant Pot Birria Recipe
Follow these steps for foolproof, juicy birria every time, with notes for avoiding common pitfalls.
Step 1: Prep the Meat & Marinade
- Trim your chosen beef cut: remove any large, hard fat chunks, but leave 1/4 inch of fat marbling on the meat to keep it juicy during cooking. Cut the meat into 2-inch uniform chunks for even cooking.
- In a large bowl, mix 1 tbsp of the chili-spice blend (from the sauce ingredients) with 2 tbsp of vinegar and 1 tsp salt. Add the meat chunks, toss to coat thoroughly, then cover and marinate:
- Minimum: 30 minutes at room temperature (for busy weeknights, no overnight marinating needed)
- Ideal: 4 hours in the refrigerator, or overnight for maximum flavor penetration. Pro tip: Poke a few small holes in each meat chunk with a fork before marinating to let the spices seep deeper into the meat. If you prep ingredients on a wooden cutting board, you can personalize it with custom cutting board designs for a fun, functional kitchen upgrade.
Step 2: Make the Birria Consommé
- While the meat marinates, prepare the chili base: place deseeded dried guajillo and ancho chilies in a heatproof bowl, cover with boiling water, and soak for 20 minutes until soft. Drain, reserving 1/2 cup of the soaking liquid.
- Add the softened chilies, tomato puree, vinegar, garlic, cumin, oregano, cinnamon, bay leaves, pepper, and 1 tsp salt to a high-powered blender. Blend on high for 60 seconds, adding reserved chili soaking liquid 1 tbsp at a time until the sauce is completely smooth, with no visible chili skin or seeds.
- Strain the sauce through a fine-mesh sieve into a bowl, pressing on the solids to extract all flavorful liquid. Discard the solids (or save them to add to chili for extra heat later). Pro tip: For extra silky consommé, blend the sauce twice, or pass it through a cheesecloth after straining. Skipping the straining step leads to gritty chili skin in the sauce, which ruins the smooth taco texture.
Step 3: Pressure Cook the Meat
- Pour the strained consommé into the inner pot of your Instant Pot, then add the marinated meat chunks. Stir gently to coat all meat in sauce. Add the beef broth, then stir to combine.
- Secure the lid on the Instant Pot, making sure the sealing ring is properly seated and the valve is set to "Sealing". A misaligned sealing ring is the most common cause of failed pressure builds, so double-check it before starting.
- Select the "Pressure Cook" or "Manual" setting, set to high pressure for 45 minutes for boneless chuck roast, or 50-55 minutes for bone-in cuts or short ribs.
- Once the cook time ends, let the pressure release naturally for 10 minutes, then carefully turn the valve to "Venting" to release any remaining pressure. Natural release for the first 10 minutes keeps the meat juicy and prevents it from toughening from a sudden steam release.
Step 4: Shred & Rest the Meat
- Carefully open the Instant Pot lid, away from your face to avoid steam burns. Use a slotted spoon to transfer the meat chunks to a large bowl, reserving all the consommé in the Instant Pot for dipping tortillas.
- Use two forks to shred the meat into bite-sized pieces, discarding any large, inedible fat or bone pieces.
- Let the shredded meat rest for 5 minutes before serving, which allows the juices to redistribute throughout the meat, so every bite is juicy, not dry. Pro tip: If you prefer extra saucy tacos, toss the shredded meat with 1/2 cup of the reserved consommé before assembling, so it stays moist even after crisping.
 Credit: instantpot.com
Birria tacos get their signature crispy, juicy texture from a quick dip in rich consommé before searing
Credit: instantpot.com
Birria tacos get their signature crispy, juicy texture from a quick dip in rich consommé before searing
Perfect Birria Tacos: Assembly & Crisping
The assembly process is what transforms tender birria meat into the iconic crispy, juicy taco. Follow these steps for perfect results every time.
Choosing & Prepping Tortillas
Corn tortillas are the traditional choice for birria, as their earthy flavor pairs perfectly with the rich, spiced beef. Look for small, 6-inch tortillas made with just corn, water, and lime (no added preservatives) for the best flavor and pliability. If you can only find flour tortillas, choose thin, soft ones with a bit of elasticity to avoid tearing when folding. Pro tip: Warm tortillas in a dry skillet for 10 seconds per side before dipping to make them more pliable and less likely to crack.
Dipping & Crisping for the Perfect Texture
- Working one at a time, dip each warm tortilla into the reserved warm consommé for 2-3 seconds, just until lightly coated. Do not soak for longer than 5 seconds, or the tortilla will become soggy and fall apart when folding.
- Place the dipped tortilla on a hot, lightly oiled skillet over medium-high heat. Cook for 30 seconds per side, until the edges are lightly crispy and golden.
- Add 1-2 tbsp of shredded meat, 1 tbsp of shredded Oaxaca or mozzarella cheese, then fold the tortilla in half. Press gently with a spatula for 10 seconds to melt the cheese and crisp the edges further. Common mistake to avoid: Overfilling the tacos, which leads to spillage and soggy tortillas. Stick to 2-3 oz of meat and cheese per taco for the best texture.
Essential Toppings for Authentic Flavor
Keep toppings simple to let the birria flavor shine:
- Diced white onion and fresh cilantro: for bright, fresh crunch
- Lime wedges: a squeeze of fresh lime cuts through the richness of the beef and cheese
- Pickled jalapeños or radishes: for a tangy, spicy kick that balances the savory flavors
- Sour cream or Mexican crema: for extra creaminess if you prefer milder tacos Avoid heavy toppings like chunky salsa or sour cream that will overpower the delicate chili flavor of the consommé.
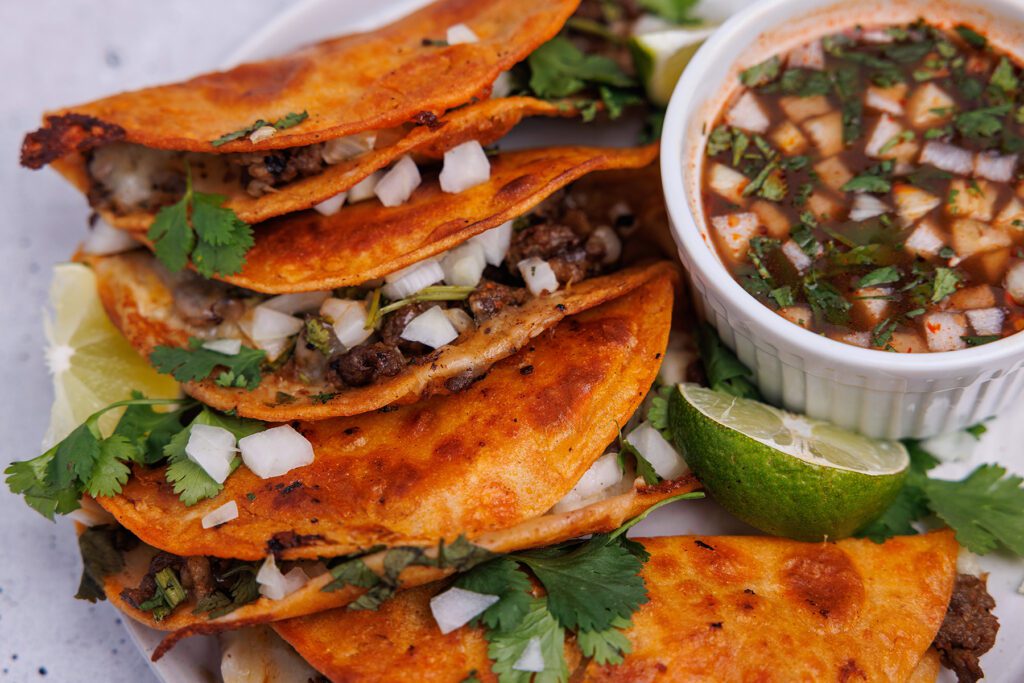 Credit: blog.redstickspice.com
Fresh cilantro, diced onion, and a squeeze of lime finish these authentic birria tacos perfectly
Credit: blog.redstickspice.com
Fresh cilantro, diced onion, and a squeeze of lime finish these authentic birria tacos perfectly
Serving & Pairing Ideas
Birria’s rich, savory flavor pairs best with light, fresh, or tangy sides to cut through the richness, making it perfect for casual weeknight meals or weekend gatherings.
Side Dishes to Complement Birria Tacos
- Cabbage slaw with lime juice and a pinch of salt: Adds a crisp, refreshing crunch that balances the juicy tacos.
- Pickled red onions or jalapeños: Tangy, bright, and easy to make ahead for meal prep.
- Mexican street corn (elote): Creamy, smoky, and slightly sweet, it’s a classic pairing that rounds out the meal.
- Cilantro-lime rice or black beans: For a hearty, filling option that’s perfect for feeding a crowd.
- For a shareable appetizer, arrange pickled veggies, cheese, and tortilla chips on a board using tips from our guide on perfect cheese prep for charcuterie boards.
Beverage Pairings
- Alcoholic: A cold Mexican lager or crisp pilsner cleanses the palate between bites, while a smoky mezcal or reposado tequila complements the deep chili flavors of the consommé. A classic lime margarita or paloma adds bright acidity to cut through the richness.
- Non-alcoholic: Agua fresca made with hibiscus, tamarind, or pineapple is refreshing and lightly sweet, perfect for balancing spicy tacos. Sparkling lime water with a pinch of salt is also a great, low-sugar option.
 Credit: iamafoodblog.com
Tender, slow-pressure-cooked beef birria simmering in its signature spiced consommé
Credit: iamafoodblog.com
Tender, slow-pressure-cooked beef birria simmering in its signature spiced consommé
Pro Tips for Foolproof, Juicy Results
Small tweaks during cooking and assembly can make the difference between good birria tacos and unforgettable ones.
Boost Tenderness & Flavor
- Always choose a cut with at least 10% fat content: lean cuts will dry out during pressure cooking, no matter how long you cook them.
- Don’t skip the natural release: letting the pressure drop naturally for 10 minutes before quick releasing keeps the meat juicy, as a sudden steam release can cause meat fibers to tighten and squeeze out moisture.
- Toast whole spices (cumin, oregano, cinnamon) in a dry skillet for 1 minute before blending into the sauce, to deepen their aromatic flavor. A common mistake is using pre-ground spices that have sat in the pantry for months, which lose their potency and lead to bland sauce.
- Taste and adjust the consommé before serving: add a pinch of salt, a squeeze of lime, or a dash of vinegar to brighten the flavor if it tastes flat.
Troubleshooting Common Issues
- Dry meat: Almost always caused by using a lean cut, skipping the natural release, or overcooking. Stick to chuck or short ribs, set the natural release for 10 minutes, and don’t exceed 60 minutes of pressure cook time for boneless cuts.
- Bland sauce: Make sure you’re using dried chilies (not chili powder) for the base, and don’t skip the marinating step. Toasting spices and using low-sodium broth also helps build deeper flavor.
- Soggy tortillas: Don’t soak the tortillas in consommé for longer than 5 seconds, and make sure the skillet is hot enough before crisping to create a barrier that keeps the tortilla from getting soggy from the filling.
Storage & Reheating
Leftover birria meat and consommé taste even better the next day, as the flavors continue to meld. Store leftovers in airtight containers in the refrigerator for up to 4 days, or freeze for up to 3 months for meal prep. To reheat, place the meat and a splash of consommé in the Instant Pot and select the "Sauté" setting, stirring occasionally until heated through. Avoid microwaving, as it will dry out the meat and make the tortillas soggy if assembling ahead of time. For cleanup, use a precision cleaning brush to scrub the Instant Pot's inner pot, sealing ring, and lid crevices to remove stubborn, dried-on consommé residue without scratching non-stick surfaces. For a deeper clean, scrub the inner pot and lid with a heavy-duty kitchen cleaning brush to lift stuck-on sauce without damaging the non-stick coating.
Frequently Asked Questions
What ingredients are needed for Instant Pot birria tacos?
You’ll need 2-3 lbs of beef chuck roast (or alternative cut), 4-6 dried guajillo chilies, 2-3 dried ancho chilies, garlic, onion, cumin, oregano, cinnamon, bay leaves, vinegar, tomato puree, low-sodium beef broth, corn tortillas, and optional cheese (Oaxaca or mozzarella) and toppings (cilantro, onion, lime).
How long does Instant Pot birria tacos take?
Total time is roughly 75-90 minutes: 15 minutes of prep, 45-60 minutes of pressure cook time, plus 10 minutes of natural release and 5 minutes of shredding/assembly. This is a fraction of the 3-4 hours required for traditional stovetop birria.
Can I freeze leftover birria taco meat?
Yes, cooked birria meat and consommé freeze perfectly for up to 3 months. Store in airtight, freezer-safe containers or heavy-duty freezer bags, leaving 1 inch of space at the top for expansion. Thaw in the refrigerator overnight before reheating.
What is the best cheese for birria tacos?
Oaxaca cheese is the traditional choice, as it melts smoothly into a stretchy, creamy layer that complements the spicy beef without overpowering it. Mozzarella or mild Chihuahua cheese work as easy substitutes if Oaxaca is unavailable.
Can I make birria without dried chilies?
While dried chilies are required for authentic flavor, you can substitute with 2 tbsp of chili powder, 1 tsp smoked paprika, and 1 tsp ground cumin in a pinch. The sauce will be less complex and lack the bright, fruity notes of dried chilies, but it will still be flavorful.
Can I use frozen beef for this recipe?
Yes, you can use frozen beef chuck, but you will need to extend the pressure cook time by 10-15 minutes to ensure the meat cooks through evenly. For best results, thaw the meat in the refrigerator overnight before marinating and cooking.
How do I keep tortillas from getting soggy?
Only dip tortillas in consommé for 2-3 seconds, not longer, and make sure your skillet is fully preheated over medium-high heat before adding the dipped tortilla. The high heat creates a crispy barrier that prevents the tortilla from absorbing excess moisture from the filling.
Can I make the consommé ahead of time?
Yes, you can make the consommé up to 3 days in advance and store it in the refrigerator in an airtight container. Reheat it gently on the stovetop or in the Instant Pot on the "Sauté" setting before using to dip tortillas.
Conclusion
This Instant Pot birria taco recipe delivers the rich, complex flavor of traditional Jalisco-style birria without the hours of active cooking time, making it perfect for weeknight meals, meal prep, or feeding a crowd on a budget. With tender, spice-infused beef, a silky consommé for dipping, and perfectly crispy tacos, it’s a crowd-pleaser that even beginner cooks can pull off with ease. The recipe is also highly customizable: adjust the spice level, swap the meat for goat or lamb, or add extra toppings to match your taste. For more easy, tested weeknight recipes that pack big flavor with minimal effort, browse our full recipe blog for crowd-pleasing meals for every occasion.

I’m Abby Lu, a passionate home cook who loves simplifying everyday meals. At PlugChef.com, I share product reviews and cooking guides to help you find the best tools for your kitchen.
Related posts:
 How to Make a Fruit Basket for a Gift: Easy DIY Guide
 Do You Need a Basket? Essential Guide for Air Fryers
 What Blenders Do Tropical Smoothie Use: Expert Insights
Stainless Steel Vs White Kitchen Appliances: Ultimate Showdown
What Blenders Do Tropical Smoothie Use: Expert Insights
Stainless Steel Vs White Kitchen Appliances: Ultimate Showdown
 Kitchen Appliances for Wedding Registry: Must-Have Essentials
 Top 10 Best Non-Toxic Cooking Utensils – Safe & Durable Choices for Healthy Homes

