
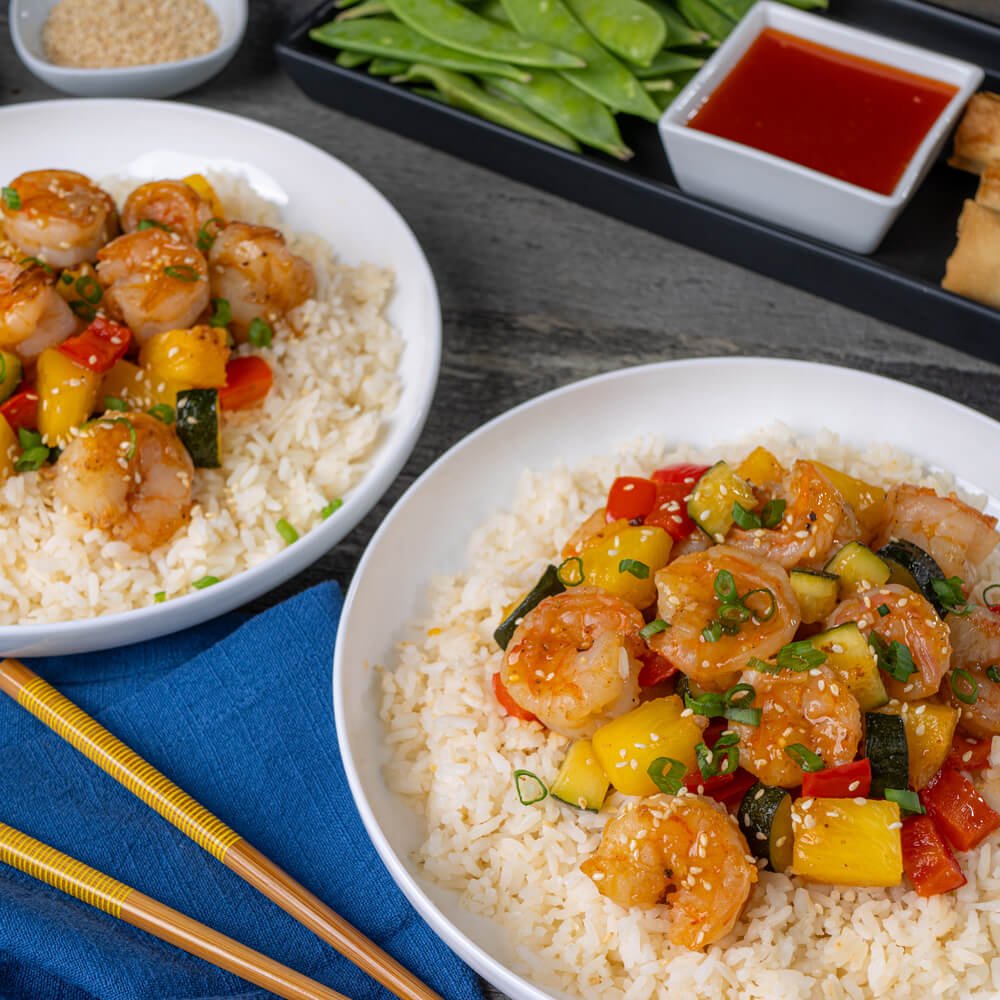
Craving restaurant-quality sweet and sour shrimp without the takeout markup or 45-minute wait? This easy, delicious, and quick sweet and sour shrimp recipe delivers the perfect balance of tangy, sweet, and savory flavors in just 25 minutes flat, no specialized equipment or advanced cooking skills required. Unlike takeout versions that are often overloaded with sugary sauce or chewy, overcooked shrimp, this guide walks you through every step to get crispy, juicy shrimp coated in a glossy, perfectly balanced sauce every time. It’s ideal for busy weeknights, last-minute dinner parties, or even meal prep for the week ahead, and customizable to fit dietary needs and flavor preferences.
Why This Sweet And Sour Shrimp Recipe Beats Takeout
Most takeout sweet and sour shrimp is loaded with excess sodium, uses low-quality, frozen shrimp, and features a sauce that’s cloyingly sweet with barely any tang. This homemade version lets you control every ingredient, adjust the sweet-sour balance to your exact taste, and use high-quality, fresh or properly thawed frozen shrimp for the best texture. It’s also far more budget-friendly per serving, and you can tweak it to fit dietary restrictions without sacrificing flavor. Even picky eaters who turn up their noses at takeout will love this bright, flavorful version.
Ingredients You’ll Need
This recipe serves 4 as a main dish, and uses pantry staples you likely already have on hand, plus fresh shrimp and produce for the best flavor.
Shrimp Selection Tips
- 1 pound medium (21-25 count per pound) or large (16-20 count per pound) shrimp, peeled and deveined (tails on optional for presentation)
- Fresh or frozen shrimp work equally well; if using frozen, thaw in the fridge overnight (never in the microwave, which creates mushy texture)
- Look for shrimp that are firm, translucent, and have no strong fishy or ammonia-like odor—discard any that smell off
- Pat shrimp completely dry with paper towels before cooking to ensure a crisp sear instead of steaming
Homemade Sweet And Sour Sauce Components
For a perfectly balanced sauce that coats every shrimp evenly, use these exact measurements:
- ½ cup ketchup (use no-added-sugar ketchup for a lower-sugar version)
- ¼ cup unseasoned rice vinegar (white vinegar works for a sharper tang, apple cider vinegar for a milder flavor)
- 3 tbsp granulated sugar (swap for honey, maple syrup, or monk fruit sweetener as needed)
- 2 tbsp low-sodium soy sauce (use tamari for a gluten-free option)
- ¼ cup pineapple juice (fresh pressed is best, canned works in a pinch)
- 1 tbsp cornstarch mixed with 2 tbsp cold water (slurry for thickening)
Each component plays a key role: ketchup provides the base sweetness and classic red hue, rice vinegar adds bright, clean tang without harshness, soy sauce adds umami depth that balances the sweet and sour, pineapple juice adds natural fruity sweetness that cuts through sharp vinegar, and the cornstarch slurry gives the sauce its glossy, clingy texture that coats shrimp evenly.
Flavor Boosters & Add-Ins
These ingredients add layered flavor and texture so the dish doesn’t taste one-note:
- 2 cloves garlic, minced
- 1 tsp fresh grated ginger
- 1 cup diced red and green bell pepper
- 1 cup fresh or canned pineapple chunks (drained)
- 2 sliced scallions (green parts only, for garnish)
- ¼ tsp red chili flakes (optional, for gentle heat) Optional add-ins for extra flavor: 1 tbsp chili crisp for heat and crunch, a splash of orange juice for fruity depth, ½ tsp toasted sesame oil for nutty aroma.
Step-by-Step Preparation
Proper prep is the key to avoiding common pitfalls like mushy shrimp or lumpy sauce. Follow these steps for perfect results every time.
Cleaning and Deveining Shrimp
- Rinse shrimp under cold running water to remove any residual ice or debris.
- Use a small paring knife to make a shallow cut along the back curve of each shrimp, then pull out the dark digestive tract (vein) with the tip of the knife or your fingers.
- Pat shrimp completely dry with paper towels—this non-negotiable step ensures excess moisture doesn’t steam the shrimp instead of searing it. If you’ve ever bitten into shrimp and felt a gritty, sandy texture, that’s almost always from a leftover vein. Taking 5 extra minutes to devein properly eliminates that unpleasant surprise entirely.
Quick Marinating (Optional)
In a small bowl, mix 1 tbsp soy sauce, 1 tsp minced garlic, 1 tsp lemon juice, and a pinch of black pepper. Add shrimp, toss to coat, and marinate for 15 minutes at room temperature at most. The acid in the lemon juice breaks down shrimp proteins over time, leading to a mushy texture if marinated longer than 20 minutes. If you’re short on time, skip marinating entirely and season shrimp with a pinch of salt and pepper right before cooking—the sauce will add plenty of flavor.
Cooking Methods for Perfect Texture
Shrimp cook extremely quickly, so high heat and short cooking times are non-negotiable to avoid rubbery texture. Choose one of two methods:
- Pan-Seared (faster, less oil): Heat 1 tbsp neutral oil (canola, vegetable, or avocado) in a large skillet over medium-high heat until shimmering. Add shrimp in a single layer (cook in batches if your pan is too small to avoid overcrowding) and cook for 2 minutes per side, until opaque and lightly golden. Overcrowding the pan drops the oil temperature, leading to steamed, soggy shrimp instead of a nice sear.
- Deep Fried (extra crispy): Heat 2 cups of neutral oil in a heavy-bottomed pot to 375°F. Toss dried shrimp in ¼ cup cornstarch, shake off excess, and fry for 1-2 minutes until golden and crispy. Drain on a wire rack set over a paper towel-lined plate to remove excess oil (draining on paper towels alone can make the bottom of the shrimp soggy). Per USDA food safety guidelines, shrimp are safe to eat when they reach an internal temperature of 145°F and turn opaque and firm to the touch. Carryover cooking will bring shrimp to this temperature in the 1-2 minutes after you pull them from the heat, so avoid overcooking.
How to Make Perfect Sweet And Sour Sauce Every Time
A balanced, glossy sauce is what separates good sweet and sour shrimp from great. Follow these steps to avoid common sauce mistakes.
Balancing Sweet and Tangy Flavors
In a small saucepan, combine ketchup, rice vinegar, sugar, soy sauce, and pineapple juice. Bring to a simmer over medium heat, stirring constantly. The base ratio of 2 parts sweet (ketchup + sugar + pineapple juice) to 1 part tang (vinegar) is a foolproof starting point, but taste as you go: add 1 tsp of vinegar at a time if the sauce is too sweet, or 1 tsp of sugar if it’s too sharp. Vinegar sweetness varies by brand, so adjusting to your taste is the only way to get the perfect balance. Hold off on adding extra salt until you’ve adjusted the sweet and tang, as soy sauce already adds significant saltiness.
Thickening the Sauce Without Lumps
Once the sauce is simmering and balanced to your taste, slowly pour in the cornstarch slurry while whisking constantly. Continue to simmer for 1-2 minutes, stirring frequently, until the sauce thickens to a glossy, syrup-like consistency that coats the back of a spoon. A common mistake is adding cornstarch directly to the hot sauce without making a slurry first, which causes lumpy, uneven texture. If the sauce gets too thick, thin it out with a splash of water or pineapple juice.
Final Flavor Adjustments
Turn off the heat, then stir in any optional add-ins: garlic, ginger, chili flakes, sesame oil, etc. Let the sauce sit for 1 minute to let the flavors meld before tossing with shrimp. For a richer, silkier finish, stir in 1 tsp of unsalted butter at the end.
 Freshly made sweet and sour shrimp served over steamed rice, ready to eat.
Credit: therecipecritic.com
Freshly made sweet and sour shrimp served over steamed rice, ready to eat.
Credit: therecipecritic.com
Combine Shrimp and Sauce for Best Results
The way you toss shrimp and sauce makes a huge difference in the final texture and flavor.
Proper Tossing Technique
Add the cooked shrimp to the saucepan with the sauce, or pour the sauce over the shrimp in a large bowl. Use a silicone spatula to gently fold the shrimp into the sauce, ensuring every piece is evenly coated. Avoid over-mixing, as this can break delicate shrimp and make them mushy. If you’re adding bell peppers and pineapple, toss them in the sauce for 30 seconds before adding shrimp, so they stay crisp-tender instead of turning mushy from over-exposure to heat and acid.
Timing to Avoid Soggy Shrimp
Toss the shrimp in the sauce right before serving, and let them sit for no more than 1-2 minutes. The acid in the sauce will break down the shrimp’s proteins over time, leading to rubbery, soggy texture if left to sit for too long. If you’re meal prepping, store the sauce and shrimp in separate airtight containers in the fridge for up to 3 days, and toss together right before reheating gently on the stovetop (avoid microwaving, as it will make the shrimp rubbery and cause the sauce to separate).
Serving Suggestions & Pairings
This dish pairs well with almost any Asian-inspired side, and a few simple garnishes take it to the next level.
Best Side Dishes
- Steamed jasmine or white rice: the neutral flavor absorbs extra sauce perfectly, and is the classic pairing for sweet and sour dishes.
- Fried rice: add leftover rice, egg, peas, and carrots for a hearty, filling meal that uses up leftover ingredients.
- Stir-fried garlic green beans or bok choy: the crisp, savory veggies balance the sweet and sour shrimp for a well-rounded meal.
- Lo mein or chow mein noodles: a carb-heavy option that pairs well with the saucy shrimp.
- Fresh cucumber salad: the cool, crisp, tangy salad cuts through the richness of the sauce for a refreshing contrast.
Garnish Ideas for Extra Flavor
- Toasted sesame seeds: add a nutty crunch and visual appeal.
- Sliced scallions: add a mild onion flavor and bright green color.
- Fresh cilantro: adds a fresh, herbal note that balances the sweetness of the sauce.
- A sprinkle of red chili flakes: for extra heat, if desired.
- Lime or lemon wedges: serve on the side for an extra burst of tang right before eating. For a fun appetizer version, serve the shrimp on a custom engraved board with toothpicks for easy grabbing.
 Crispy fried version of sweet and sour shrimp, perfect for a crunchy texture.
Credit: nolimitcooking.com
Crispy fried version of sweet and sour shrimp, perfect for a crunchy texture.
Credit: nolimitcooking.com
Time-Saving Hacks for Busy Cooks
If you’re short on time, these simple tricks will help you get this dish on the table in under 20 minutes without sacrificing flavor:
- Use pre-peeled, deveined frozen shrimp: thaw in the fridge overnight for zero prep work, no need to clean and devein yourself.
- Pre-chop bell peppers, pineapple, and aromatics on the weekend and store in airtight containers in the fridge for up to 5 days, so you can skip chopping on busy weeknights. For tips on getting consistent, uniform ingredient cuts every time, check out our prep guide.
- Make the sauce ahead of time: store it in an airtight container in the fridge for up to 1 week, or freeze for up to 3 months. Reheat gently on the stovetop before tossing with freshly cooked shrimp.
- Cook in batches if you’re feeding a crowd: overcrowding the pan lowers the oil temperature and leads to soggy shrimp, so cook ½ pound at a time for perfect texture.
- Use a non-stick or well-seasoned carbon steel wok for faster cooking and easy cleanup—no stuck-on sauce or shrimp bits. If you’re cooking with little helpers, install childproof cabinet locks to keep cleaning supplies and sharp tools out of reach while you work.
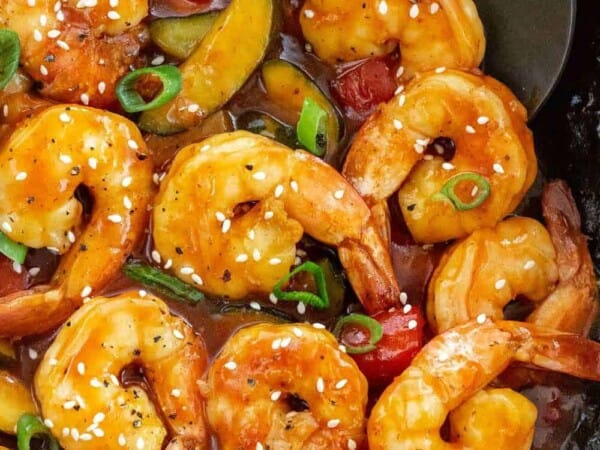
 Shrimp and veggies tossed in glossy sweet and sour sauce in a wok, the classic cooking vessel for this dish.
Credit: thewoksoflife.com
Shrimp and veggies tossed in glossy sweet and sour sauce in a wok, the classic cooking vessel for this dish.
Credit: thewoksoflife.com
Dietary Modifications
This recipe is easy to tweak to fit almost any dietary need:
- Gluten-free: Swap regular soy sauce for tamari or certified gluten-free soy sauce, and confirm your ketchup and cornstarch are gluten-free (most standard versions are, but check labels for hidden wheat additives). Avoid any pre-made sweet and sour sauce, as most contain gluten.
- Low-sugar: Reduce granulated sugar to 1 tbsp, and add 2 tbsp of extra pineapple juice for natural sweetness, or swap sugar for monk fruit sweetener for a zero-sugar option.
- Low-sodium: Use low-sodium soy sauce, reduce ketchup by ¼ cup (ketchup is high in sodium) and add extra pineapple juice and a splash of orange juice for sweetness.
- Vegan/vegetarian: Swap shrimp for 1 pound of extra-firm tofu (pressed and fried until crispy) or king oyster mushroom strips, which have a similar meaty texture. Adjust cooking time as needed to get a crispy exterior.
Common Mistakes to Avoid
Even experienced home cooks run into these issues when making sweet and sour shrimp. Avoid these pitfalls for perfect results every time:
- Overcooking the shrimp: Shrimp cook in just 2-3 minutes total, and go from perfectly tender to rubbery in 30 seconds. Pull them off the heat when they are just opaque and firm to the touch, as carryover cooking will finish them to the safe 145°F internal temp.
- Skipping the pat-dry step: Wet shrimp will steam instead of searing, leading to a soft, mushy texture instead of a nice golden crust. Always pat shrimp completely dry with paper towels before cooking.
- Adding sauce to soggy shrimp: If you fry your shrimp, drain them thoroughly on a wire rack before tossing in sauce—excess oil will make the sauce greasy and slide off the shrimp instead of coating it evenly.
- Overbalancing the sauce: Too much sweetness or tang will overpower the shrimp. Always taste your sauce as you adjust it, and make small changes (1 tsp at a time) to avoid overcorrecting.
- Overcrowding the pan: Cooking too many shrimp at once drops the pan’s temperature, leading to steamed, soggy shrimp instead of a crisp sear. Cook in batches if your pan is too small to fit all the shrimp in a single layer. Once you’re done cooking, a quick scrub with a heavy-duty kitchen cleaning brush will dissolve stuck-on sauce from your pan in seconds, no harsh scrubbing needed. Store leftover prepped veggies in sealed containers in the kitchen drawer, secured with childproof drawer latches if you have young kids in the home.
Frequently Asked Questions
Can I use frozen shrimp for this recipe?
Absolutely! Frozen shrimp are a budget-friendly, just-as-tasty option as fresh, as long as you thaw them properly. Thaw shrimp in the fridge overnight, or under cold running water for 15-20 minutes if you’re short on time. Never thaw shrimp in the microwave, as it will make the texture mushy and uneven.
How do I make sweet and sour shrimp extra crispy?
For the crispiest results, pat shrimp completely dry, toss in a light coating of cornstarch, and deep fry at 375°F for 1-2 minutes until golden. Drain on a wire rack (not paper towels, which can make the bottom soggy) before tossing in sauce. Pan-seared shrimp will have a lighter sear, but not the full crispy crust of fried shrimp.
Can sweet and sour shrimp be made gluten-free?
Yes, easily. Swap regular soy sauce for tamari or certified gluten-free soy sauce, and confirm your ketchup and cornstarch are gluten-free (most standard versions are, but check labels for hidden wheat additives). Avoid any pre-made sweet and sour sauce, as most contain gluten.
How long does it take to cook sweet and sour shrimp?
Active prep time is 10 minutes, cooking time is 10-15 minutes, for a total of 20-25 minutes from start to finish. If you use pre-peeled shrimp and pre-chopped veggies, you can have the dish on the table in under 20 minutes, making it perfect for busy weeknights.
Can I store leftover sweet and sour shrimp?
Yes! Store leftover shrimp and sauce in separate airtight containers in the fridge for up to 3 days. Reheat gently on the stovetop over low heat, tossing to coat in sauce—avoid microwaving, as it will make the shrimp rubbery and cause the sauce to separate.
What can I serve with sweet and sour shrimp besides rice?
This dish pairs well with almost any Asian-inspired side: fried rice, lo mein noodles, stir-fried bok choy or green beans, cucumber salad, or even as an appetizer on its own with toothpicks for dipping.
Final Thoughts
This sweet and sour shrimp recipe is the perfect combination of easy, fast, and packed with bold, balanced flavor that puts takeout to shame. With just a few simple ingredients and 25 minutes of active time, you can whip up a meal that’s customizable to your taste, fits most dietary needs, and is sure to become a weeknight staple. The key to success is patting your shrimp dry, tasting and adjusting your sauce as you go, and not overcooking the shrimp—follow these simple tips, and you’ll get perfect results every time. Ready to try it for yourself? For more quick, delicious, and budget-friendly weeknight dinner recipes, browse our full collection of quick weeknight dinner recipes to find your next favorite meal.

I’m Abby Lu, a passionate home cook who loves simplifying everyday meals. At PlugChef.com, I share product reviews and cooking guides to help you find the best tools for your kitchen.
Related posts:
 How to Make a Fruit Basket for a Gift: Easy DIY Guide
 Do You Need a Basket? Essential Guide for Air Fryers
 How to Adjust Syrup Dispenser Pressure: Expert Tips
 What Blenders Do Tropical Smoothie Use: Expert Insights
Stainless Steel Vs White Kitchen Appliances: Ultimate Showdown
What Blenders Do Tropical Smoothie Use: Expert Insights
Stainless Steel Vs White Kitchen Appliances: Ultimate Showdown
 Kitchen Appliances for Wedding Registry: Must-Have Essentials

