Dull kitchen knives are more than a frustration — they’re a top cause of preventable kitchen injuries, requiring excess force to cut and increasing slip risk. The grit of your sharpening stone is the most overlooked factor in maintaining sharp, safe, long-lasting blades, but confusing marketing claims and non-standardized grit numbering make choosing the right one overwhelming. We tested 10+ popular sharpening stones for this 2026 updated guide to break down exactly what each grit does, how to match it to your knife type and use case, and which options deliver the best results for every skill level.
What Grit Numbers Actually Mean (and Why They’re Not Standardized)
Sharpening stone grit refers to the number of abrasive particles per square inch of the stone’s surface: lower numbers equal coarser grit that removes more metal per pass, while higher numbers equal finer grit that polishes and refines the blade edge with minimal material removal. Grit numbering is not standardized across brands, so a 1000 grit from a budget manufacturer may feel slightly coarser than a 1000 grit from a premium Japanese brand — always check brand-specific grit charts if you’re unsure. The four core grit ranges serve distinct purposes for kitchen knife care:
- Coarse grit (180–800): Designed for heavy material removal, these grits repair chips, broken tips, and severely dulled edges that cannot cut through a sheet of paper. They remove 0.1–0.3mm of steel per pass, so reserve them for damage repair only: regular use will unnecessarily wear down your blade steel over time.
- Medium grit (1000–2000): The workhorse for 90% of home cooks, these grits restore a dull edge to full sharpness without excess wear. Ideal for regular maintenance sharpening every 2–3 months for average home use.
- Fine grit (3000–8000): These grits polish the edge to a mirror finish, refine the cutting angle, and boost short-term edge retention. They remove almost no material, so they are only used after medium grit sharpening to finalize the edge.
- Ultra-fine grit (8000+): Reserved for high-end knife enthusiasts and professional chefs, these grits create an extremely sharp, polished edge for precision tasks like sashimi slicing, but the edge is fragile and dulls quickly with regular use.
Quick Grit Cheat Sheet for Common Use Cases
| Grit Range | Primary Use Case | How Often to Use | Best For |
|---|---|---|---|
| 180–800 | Repairing chips, broken tips, severely dulled edges | Only when visible damage is present | Heavily used butcher knives, well-worn pocket knives |
| 1000–2000 | Regular sharpening, restoring dull edges | Every 2–3 months (average home use) | All-purpose chef knives, santoku, paring knives |
| 3000–6000 | Polishing, refining edge for precision cuts | After medium grit sharpening, as needed | Japanese gyuto, yanagiba, knives used for charcuterie or delicate herbs |
| 8000+ | Mirror-finish polishing, extreme edge sharpness | Rarely, for high-end knife care | Carbon steel Japanese knives, professional chef tools |
How to Match Grit to Your Specific Knives
Not all knives work with every grit, and using the wrong grit can chip, scratch, or shorten your blade’s lifespan. Match your grit choice to your knife type and typical use case for the best results:
All-Purpose Western Knives (Chef’s Knives, Santoku, Paring Knives)
Most Western kitchen knives are made of softer, more durable stainless steel that tolerates coarser grits well. For casual home cooks who sharpen every 2–3 months, a dual-sided 400/1000 or 1000/6000 stone is all you need. Skip the 400 grit if you sharpen regularly, as it will wear down your blade faster than necessary. Note that serrated knives (bread knives, tomato knives) do not work with standard sharpening stones: use a specialized serrated sharpener or honing rod instead, as the serrations require targeted sharpening of each individual tooth.
Hard Japanese Knives (Gyuto, Nakiri, Yanagiba)
Japanese knives are made of harder, more brittle high-carbon steel that is prone to chipping if exposed to coarse grits below 1000. Always start with 1000–2000 grit for initial sharpening, then finish with 3000–6000 grit for a polished, durable edge. Avoid stones with irregular, aggressive abrasive surfaces, as they can scratch or damage thin Japanese blade steel. For care guidance specific to high-end Japanese brands, refer to Shun Cutlery’s official sharpening guide, which outlines grit recommendations tailored to their hard steel blends.
Heavy-Duty and Outdoor Knives (Butcher Knives, Hunting Knives, Pocket Knives)
Knives used for tough tasks like cutting bone, frozen food, or rope dull far faster than standard kitchen knives, so they require coarser grits for regular touch-ups. A 400/1000 dual-sided stone is ideal: the 400 grit quickly restores damaged edges, while the 1000 grit refines the edge for smooth cutting. For outdoor knives exposed to the elements, pair sharpening with regular cleaning and oiling to prevent rust.
Common Grit Selection Mistakes That Waste Money and Damage Knives
Even experienced users make these avoidable errors that shorten knife lifespan and deliver poor sharpening results:
- Using coarse grit for regular maintenance: Many beginners reach for a 400 grit stone every time they sharpen, even if the edge is just slightly dull. This removes far more steel than necessary, shortening your knife’s usable lifespan by years over time. Reserve coarse grit for only when you see visible chips or the blade cannot cut through a sheet of paper.
- Assuming higher grit = better: An 8000 grit edge will feel razor-sharp out of the gate, but it is extremely fragile and will dull in 1–2 weeks of regular use. For most home cooks, a 1000–2000 grit edge is far more practical, as it holds its sharpness for 2–3 months with occasional honing.
- Skipping stone flattening: All whetstones wear unevenly over time, especially coarse grits. A rounded stone will give your blade a curved, uneven edge that feels sharp at first but dulls within days. Use a flattening stone every 3–4 sharpening sessions to keep your whetstone surface flat, a step most beginners skip that leads to inconsistent results.
- Buying single-grit stones as a beginner: Dual-sided stones are far more cost-effective and versatile for new users, eliminating the need to purchase multiple separate stones for different tasks.
Top Grit Combinations for Every Use Case
We’ve paired each of the most popular sharpening stones with its ideal use case to help you choose the right option for your needs:
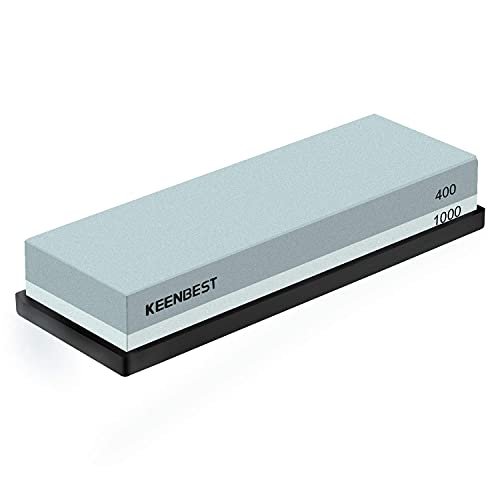
KEENBEST 2-Side 400/1000 Whetstone Set
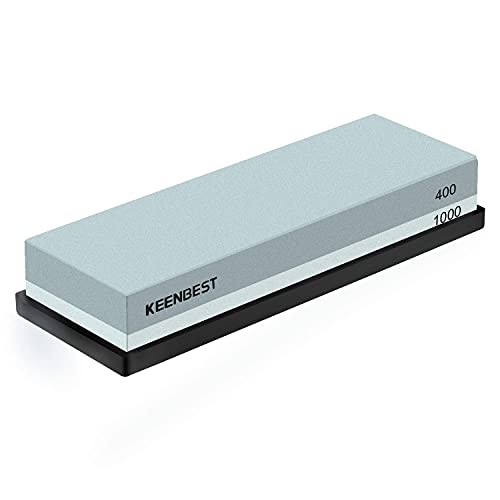 Entry-level dual-sided stone ideal for beginners doing regular knife maintenance.
Best for: New sharpening users, casual home cooks who need to repair dull edges and do regular touch-ups.
This compact dual-sided stone pairs a 400 grit coarse side for repairing chips and severely dulled blades, with a 1000 grit medium side for refining edges and restoring sharpness. The included non-slip rubber base stays firmly in place on countertops even when wet, reducing slip risk during sharpening — a key safety feature for new users still learning proper technique. The premium aluminum oxide abrasive cuts consistently without excessive glazing, and the 7×2 inch compact size fits easily in kitchen drawers. The only downsides are the manual sharpening requirement (no electric option) and a slight learning curve for users new to maintaining consistent sharpening angles. For households with young children, pairing this tool with trusted cabinet safety measures ensures sharp blades are stored securely after use.
Entry-level dual-sided stone ideal for beginners doing regular knife maintenance.
Best for: New sharpening users, casual home cooks who need to repair dull edges and do regular touch-ups.
This compact dual-sided stone pairs a 400 grit coarse side for repairing chips and severely dulled blades, with a 1000 grit medium side for refining edges and restoring sharpness. The included non-slip rubber base stays firmly in place on countertops even when wet, reducing slip risk during sharpening — a key safety feature for new users still learning proper technique. The premium aluminum oxide abrasive cuts consistently without excessive glazing, and the 7×2 inch compact size fits easily in kitchen drawers. The only downsides are the manual sharpening requirement (no electric option) and a slight learning curve for users new to maintaining consistent sharpening angles. For households with young children, pairing this tool with trusted cabinet safety measures ensures sharp blades are stored securely after use.
Intelitopia Complete Knife Sharpening Stone Set
 Full sharpening kit with flattening stone and leather strop for all edge types.
Best for: Avid home cooks, outdoor enthusiasts, and users with a mix of knife types (kitchen, hunting, pocket).
This comprehensive set includes two dual-sided stones (400/1000 and 3000/8000), a leather strop for final edge polishing, a flattening stone to maintain stone performance, a bamboo base for stability, and a universal angle guide. The 400 grit side handles heavy damage repair for hunting or butcher knives, the 1000 grit restores kitchen knife edges, the 3000 grit refines the edge, and the 8000 grit creates a mirror finish for precision slicing. The included angle guide fits most standard knife angles (15–22 degrees), making it easy for beginners to get consistent results. The only trade-off is the higher price point and slightly steeper learning curve for users new to multi-step sharpening. For users who add sharpening to their weekly kitchen upkeep routine, this set eliminates the need to purchase separate tools for different blade types.
Full sharpening kit with flattening stone and leather strop for all edge types.
Best for: Avid home cooks, outdoor enthusiasts, and users with a mix of knife types (kitchen, hunting, pocket).
This comprehensive set includes two dual-sided stones (400/1000 and 3000/8000), a leather strop for final edge polishing, a flattening stone to maintain stone performance, a bamboo base for stability, and a universal angle guide. The 400 grit side handles heavy damage repair for hunting or butcher knives, the 1000 grit restores kitchen knife edges, the 3000 grit refines the edge, and the 8000 grit creates a mirror finish for precision slicing. The included angle guide fits most standard knife angles (15–22 degrees), making it easy for beginners to get consistent results. The only trade-off is the higher price point and slightly steeper learning curve for users new to multi-step sharpening. For users who add sharpening to their weekly kitchen upkeep routine, this set eliminates the need to purchase separate tools for different blade types.
Whetstone 1000/6000 Grit Kitchen Knife Sharpening Stones
 Soakable waterstone perfect for home cooks polishing chef knife edges.
Best for: Home cooks with medium-to-high end kitchen knives who prioritize a polished, precise edge.
This Japanese-style waterstone pairs a 1000 grit side for regular sharpening with a 6000 grit side for polishing, making it ideal for users who don’t need to repair heavy damage but want a razor-sharp edge for precision tasks. It requires 5–10 minutes of soaking in water before use, which reduces friction and prevents stone glazing. The included anti-slip base and angle guide make it accessible for beginners, and the user guidebook walks through proper sharpening technique for different knife types. The main downside is the soak time requirement, which adds prep work before each use, and the fact that it’s not suitable for coarse damage repair. A polished edge from this stone makes clean, precise cuts for tasks like preparing cheese boards or slicing delicate herbs without bruising.
Soakable waterstone perfect for home cooks polishing chef knife edges.
Best for: Home cooks with medium-to-high end kitchen knives who prioritize a polished, precise edge.
This Japanese-style waterstone pairs a 1000 grit side for regular sharpening with a 6000 grit side for polishing, making it ideal for users who don’t need to repair heavy damage but want a razor-sharp edge for precision tasks. It requires 5–10 minutes of soaking in water before use, which reduces friction and prevents stone glazing. The included anti-slip base and angle guide make it accessible for beginners, and the user guidebook walks through proper sharpening technique for different knife types. The main downside is the soak time requirement, which adds prep work before each use, and the fact that it’s not suitable for coarse damage repair. A polished edge from this stone makes clean, precise cuts for tasks like preparing cheese boards or slicing delicate herbs without bruising.
Hiramware Knife Sharpening Stone
 Space-saving double-sided stone for small kitchen storage.
Best for: Home cooks with limited storage space, casual users who need a compact, no-fuss sharpening tool.
This lightweight 7.1-inch whetstone features a 400 grit coarse side for minor damage repair and a 1000 grit medium side for regular sharpening, all in a compact, easy-to-store design. The non-slip rubber base provides stable grip on any counter surface, and the low-profile shape fits easily in kitchen drawers or pantry shelves. It’s made of durable white aluminum oxide that cuts consistently without quick wear, and the manual sharpening design gives users full control over pressure and angle. The main limitations are the lack of fine grit for polishing, so it’s not ideal for users who need a mirror-finish edge, and the manual effort required, which may be tiring for users with multiple knives to sharpen. Store this stone in a cool, dry pantry spot to prevent moisture damage when not in use.
Space-saving double-sided stone for small kitchen storage.
Best for: Home cooks with limited storage space, casual users who need a compact, no-fuss sharpening tool.
This lightweight 7.1-inch whetstone features a 400 grit coarse side for minor damage repair and a 1000 grit medium side for regular sharpening, all in a compact, easy-to-store design. The non-slip rubber base provides stable grip on any counter surface, and the low-profile shape fits easily in kitchen drawers or pantry shelves. It’s made of durable white aluminum oxide that cuts consistently without quick wear, and the manual sharpening design gives users full control over pressure and angle. The main limitations are the lack of fine grit for polishing, so it’s not ideal for users who need a mirror-finish edge, and the manual effort required, which may be tiring for users with multiple knives to sharpen. Store this stone in a cool, dry pantry spot to prevent moisture damage when not in use.
Sharp Pebble Premium Whetstone (1000/6000 with Bamboo Base)
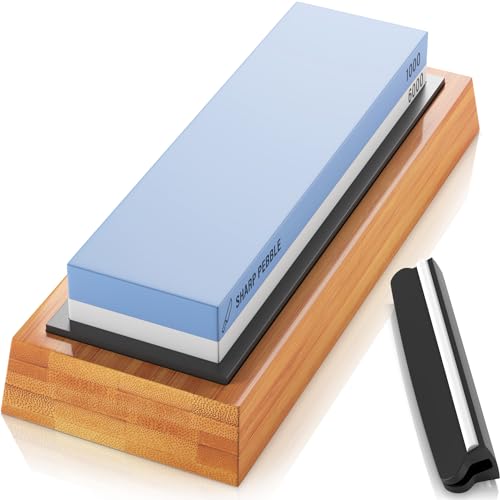 Premium waterstone with built-in angle guides for consistent sharpening angles.
Best for: Home cooks upgrading from basic sharpening tools, users who want consistent, repeatable sharpening results.
This popular premium whetstone pairs 1000 grit for initial sharpening with 6000 grit for polishing, and includes a sturdy non-slip bamboo base that eliminates movement during use even on smooth countertops. The built-in angle guide fits 15–20 degree angles, making it easy for intermediate users to maintain consistent edge angles without freehand guesswork. The white corundum abrasive cuts smoothly without glazing, and the included flattening stone keeps the surface even for consistent results over time. The only downsides are the required water soaking before use and the slightly higher price point than entry-level options. This stone is a great step up for users who have mastered basic sharpening and want more precise, long-lasting edges.
Premium waterstone with built-in angle guides for consistent sharpening angles.
Best for: Home cooks upgrading from basic sharpening tools, users who want consistent, repeatable sharpening results.
This popular premium whetstone pairs 1000 grit for initial sharpening with 6000 grit for polishing, and includes a sturdy non-slip bamboo base that eliminates movement during use even on smooth countertops. The built-in angle guide fits 15–20 degree angles, making it easy for intermediate users to maintain consistent edge angles without freehand guesswork. The white corundum abrasive cuts smoothly without glazing, and the included flattening stone keeps the surface even for consistent results over time. The only downsides are the required water soaking before use and the slightly higher price point than entry-level options. This stone is a great step up for users who have mastered basic sharpening and want more precise, long-lasting edges.
HMPLL 4-Side Grit Sharpening Stone Set
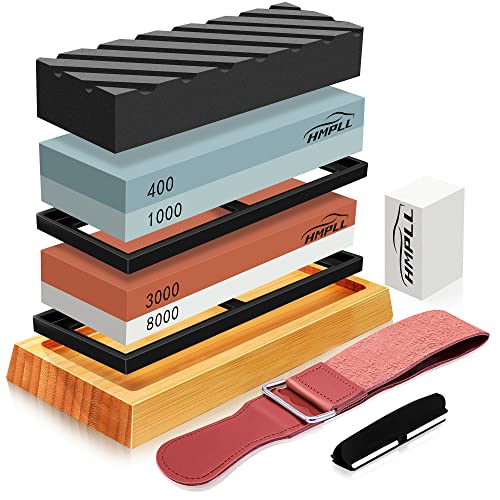 Professional-grade kit with all accessories for complete knife edge maintenance.
Best for: Avid home chefs, knife collectors, and users with a wide range of blade types (kitchen, outdoor, pocket).
This full-featured set includes two dual-sided stones (400/1000 and 3000/8000), a leather strop for final polishing, a flattening stone, and an angle guide, covering every step of the sharpening process. The 400 grit side handles heavy damage for outdoor or butcher knives, the 1000 grit restores kitchen knife edges, the 3000 grit refines the edge, and the 8000 grit creates a mirror finish for high-end blades. The included non-slip bases and angle guide make it accessible for beginners, while the wide grit range satisfies advanced users. The main trade-offs are the higher upfront cost and the need for regular stone maintenance to keep surfaces flat. For users serious about knife care, this set is a one-time purchase that will last for years with proper care.
Professional-grade kit with all accessories for complete knife edge maintenance.
Best for: Avid home chefs, knife collectors, and users with a wide range of blade types (kitchen, outdoor, pocket).
This full-featured set includes two dual-sided stones (400/1000 and 3000/8000), a leather strop for final polishing, a flattening stone, and an angle guide, covering every step of the sharpening process. The 400 grit side handles heavy damage for outdoor or butcher knives, the 1000 grit restores kitchen knife edges, the 3000 grit refines the edge, and the 8000 grit creates a mirror finish for high-end blades. The included non-slip bases and angle guide make it accessible for beginners, while the wide grit range satisfies advanced users. The main trade-offs are the higher upfront cost and the need for regular stone maintenance to keep surfaces flat. For users serious about knife care, this set is a one-time purchase that will last for years with proper care.
Sharp Pebble Premium Whetstone (400/1000 with Flattening Stone)
 Entry-level professional kit with maintenance tools for long-term stone performance.
Best for: Users who want a durable, low-maintenance stone for regular kitchen knife sharpening.
This dual-sided 400/1000 grit stone is built for heavy, frequent use, with a durable white aluminum oxide abrasive that resists glazing and wears evenly over time. The included flattening stone makes it easy to maintain a flat surface, a key feature for consistent sharpening results that many entry-level stones lack. The non-slip rubber base stays secure on wet countertops, and the compact design fits easily in kitchen drawers. The 400 grit side is perfect for restoring very dull, well-used knives, while the 1000 grit side refines the edge for daily use. The main limitation is the lack of fine grit for polishing, so it’s not ideal for users who need a mirror-finish edge for precision tasks.
Entry-level professional kit with maintenance tools for long-term stone performance.
Best for: Users who want a durable, low-maintenance stone for regular kitchen knife sharpening.
This dual-sided 400/1000 grit stone is built for heavy, frequent use, with a durable white aluminum oxide abrasive that resists glazing and wears evenly over time. The included flattening stone makes it easy to maintain a flat surface, a key feature for consistent sharpening results that many entry-level stones lack. The non-slip rubber base stays secure on wet countertops, and the compact design fits easily in kitchen drawers. The 400 grit side is perfect for restoring very dull, well-used knives, while the 1000 grit side refines the edge for daily use. The main limitation is the lack of fine grit for polishing, so it’s not ideal for users who need a mirror-finish edge for precision tasks.
Sharp Pebble Knife Sharpening Stone Kit (1000/6000 with Built-In Angle Guides)
 User-friendly stone with pre-set angles for Western and Japanese knives.
Best for: Beginners who struggle with maintaining consistent sharpening angles, users with both Western and Japanese kitchen knives.
This dual-sided 1000/6000 grit stone features built-in angle guides for 15, 17, 20, and 22 degrees, covering the standard edge angles for both Japanese (15°) and Western (20°) kitchen knives. The 1000 grit side restores dull edges, while the 6000 grit side polishes to a smooth, precise finish. The durable plastic base provides extra stability during use, and the compact design is easy to store. Note that this stone is not suitable for serrated or ceramic knives, as the abrasive surface is designed for straight-edged steel blades. The built-in guides eliminate the guesswork for new users, making it easy to get professional-level results with minimal practice.
User-friendly stone with pre-set angles for Western and Japanese knives.
Best for: Beginners who struggle with maintaining consistent sharpening angles, users with both Western and Japanese kitchen knives.
This dual-sided 1000/6000 grit stone features built-in angle guides for 15, 17, 20, and 22 degrees, covering the standard edge angles for both Japanese (15°) and Western (20°) kitchen knives. The 1000 grit side restores dull edges, while the 6000 grit side polishes to a smooth, precise finish. The durable plastic base provides extra stability during use, and the compact design is easy to store. Note that this stone is not suitable for serrated or ceramic knives, as the abrasive surface is designed for straight-edged steel blades. The built-in guides eliminate the guesswork for new users, making it easy to get professional-level results with minimal practice.
TPstone 4-Side Grit Dual Whetstone Set
 Heavy-duty stone set suitable for both kitchen and outdoor blade sharpening.
Best for: Users with a mix of kitchen, hunting, and pocket knives who want a single set for all sharpening needs.
This heavy-duty dual-sided set includes 400/1000 and 3000/8000 grit stones, covering everything from heavy damage repair to fine polishing. The 400 grit side is tough enough to restore nicks on hunting or butcher knives, while the 1000 grit refines kitchen knife edges, the 3000 grit adds extra sharpness, and the 8000 grit creates a mirror finish. The included non-slip rubber bases keep both stones stable during use, and the 2.9lb weight prevents slipping even on smooth surfaces. The main downside is the heavier weight, which may be cumbersome for users with limited counter space, and the need for regular maintenance to keep the stones flat. This set is a great all-in-one option for users who want one tool for all their blade sharpening needs.
Heavy-duty stone set suitable for both kitchen and outdoor blade sharpening.
Best for: Users with a mix of kitchen, hunting, and pocket knives who want a single set for all sharpening needs.
This heavy-duty dual-sided set includes 400/1000 and 3000/8000 grit stones, covering everything from heavy damage repair to fine polishing. The 400 grit side is tough enough to restore nicks on hunting or butcher knives, while the 1000 grit refines kitchen knife edges, the 3000 grit adds extra sharpness, and the 8000 grit creates a mirror finish. The included non-slip rubber bases keep both stones stable during use, and the 2.9lb weight prevents slipping even on smooth surfaces. The main downside is the heavier weight, which may be cumbersome for users with limited counter space, and the need for regular maintenance to keep the stones flat. This set is a great all-in-one option for users who want one tool for all their blade sharpening needs.
MIDO Professional 400/1000 Whetstone
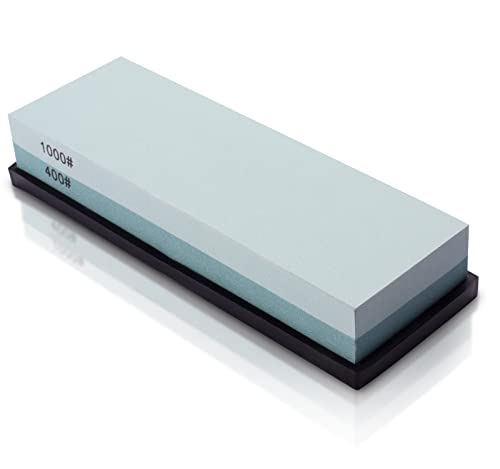 Portable dual-grit stone for kitchen, pocket, and hunting knife maintenance.
Best for: On-the-go users, outdoor enthusiasts, and anyone needing a portable sharpening tool for travel or camping.
This compact dual-sided 400/1000 grit stone is small enough to fit in a backpack or camping gear, making it ideal for sharpening pocket knives, hunting knives, or kitchen knives while traveling. The 400 grit side handles minor damage and dull edges, while the 1000 grit refines the edge for smooth cutting. The non-slip rubber base stays secure on any surface, even outdoors on uneven ground, and the durable construction resists cracking from drops or rough handling. The main limitation is the lack of fine grit for polishing, so it’s not ideal for users who need a high-finish edge for kitchen tasks. It’s also suitable for small kitchen knives like paring or steak knives for quick at-home touch-ups.
Portable dual-grit stone for kitchen, pocket, and hunting knife maintenance.
Best for: On-the-go users, outdoor enthusiasts, and anyone needing a portable sharpening tool for travel or camping.
This compact dual-sided 400/1000 grit stone is small enough to fit in a backpack or camping gear, making it ideal for sharpening pocket knives, hunting knives, or kitchen knives while traveling. The 400 grit side handles minor damage and dull edges, while the 1000 grit refines the edge for smooth cutting. The non-slip rubber base stays secure on any surface, even outdoors on uneven ground, and the durable construction resists cracking from drops or rough handling. The main limitation is the lack of fine grit for polishing, so it’s not ideal for users who need a high-finish edge for kitchen tasks. It’s also suitable for small kitchen knives like paring or steak knives for quick at-home touch-ups.
Essential Accessories That Boost Sharpening Performance
Even the best grit stone will deliver poor results without the right supporting tools. These affordable accessories make sharpening faster, safer, and more effective:
- Non-slip base: Non-negotiable for safety, this prevents the stone from sliding while you apply pressure. Most entry-level stones include one, but a cheap rubber kitchen mat works as a substitute if yours does not.
- Angle guide: Critical for beginners, this eliminates guesswork when maintaining the correct edge angle (15° for Japanese knives, 20° for Western knives). Even a 5-degree variation in angle will produce a weak, dull edge that wears out quickly. Built-in stone guides are convenient, but clamp-on guides work with any stone.
- Flattening stone: Whetstones wear unevenly over time, especially coarse grits. Use a flattening stone every 3–4 sharpening sessions to resurface the whetstone, ensuring even cuts and consistent edge quality. This is the most overlooked accessory that drastically improves sharpening results for new and experienced users alike.
- Leather strop: Optional but highly recommended for fine grit edges (3000+). A leather strop removes tiny metal burrs left after sharpening, extending edge retention by 20–30% and giving a mirror finish. It’s a low-cost addition that makes a big difference for high-end knives.
Frequently Asked Questions
What is the best grit for sharpening everyday kitchen knives?
For most home cooks, a dual-sided 1000/6000 grit stone is the best all-around choice. The 1000 grit restores dull edges for regular maintenance, while the 6000 grit polishes the edge for cleaner cuts and better performance. If you regularly repair chips or dull edges from heavy use, add a 400 grit coarse side to your set for damage repair. Avoid using grits above 6000 for everyday knives, as the extra polish is not necessary for most cooking tasks and wears down blade steel faster.
How do dual-grit sharpening stones work?
Dual-grit stones have two separate abrasive surfaces with different grit levels, one on each side. You start with the coarser grit to reshape the edge and remove dulled steel, then flip the stone to the finer grit to refine the edge and remove any burrs left by the coarse side. This two-step process eliminates the need to purchase multiple separate stones, making dual-grit options far more cost-effective for most users. For heavily damaged edges, you may need to repeat the coarse grit step multiple times before moving to the fine side.
Are angle guides necessary for sharpening stones?
Angle guides are highly recommended for beginners, as maintaining a consistent sharpening angle (usually 15–22 degrees depending on the knife) is the most challenging part of learning to sharpen. The University of Minnesota Extension’s kitchen knife safety guidelines note that consistent edge angles are critical for both performance and safety, as uneven edges increase slip risk during use. Built-in stone guides or clamp-on angle guides remove the guesswork, helping new users get consistent, professional-level results in just a few practice sessions. Experienced users may sharpen freehand, but guides still help ensure even edges for all knife types.
How often should I sharpen my kitchen knives?
For average home use (chopping vegetables, light meal prep), sharpen your knives every 2–3 months, and hone them with a honing steel every 2–3 weeks to realign the edge between sharpening sessions. If you use your knives for heavy-duty tasks (butchering, cutting frozen food, or daily meal prep for a large family), sharpen every 4–6 weeks. You’ll know it’s time to sharpen when the knife fails to cut through a sheet of paper easily, or when you have to apply excessive pressure to slice through soft vegetables like tomatoes. After sharpening, wipe your blade clean with a sturdy kitchen cleaning brush to remove metal filings and stone debris before use.
Can I use the same grit stone for all my knives?
No, you should adjust your grit choice based on the knife type and condition. For hard Japanese knives, avoid coarse grits below 1000 to prevent chipping. For serrated knives, standard sharpening stones are not effective — use a specialized serrated sharpener or honing rod instead. For heavily damaged or dulled knives, start with a coarse grit (400–600) before moving to a medium grit for refinement. A single 1000/6000 dual-grit stone works for most all-purpose Western kitchen knives, but you may need additional grits if you have a mix of knife types.
Conclusion
Choosing the right grit sharpening stone for your kitchen knives doesn’t have to be complicated: match the grit to your knife type, use case, and sharpening frequency, and avoid common mistakes like using coarse grit for regular maintenance or skipping stone flattening. For most home cooks, a 1000/6000 dual-sided stone is the perfect all-around starting point, while users with heavy-duty or specialized knives will benefit from a 4-grit set with accessories like a leather strop and flattening stone. Dull knives are a safety hazard and a cooking frustration — the right grit stone will keep your blades sharp, safe, and performing at their best for years. Ready to upgrade your knife care routine? Pick a grit combination that matches your use case above, and you’ll notice sharper, more precise cuts with every use.

Hi, I’m Daniel Brooks—a food lover and kitchen gear enthusiast. I enjoy testing cookware, utensils, and gadgets to see what really works in everyday cooking. At PlugChef.com, I share honest reviews, comparisons, and simple guides to help you choose the best tools for a safer, smarter, and more enjoyable kitchen.
Related posts:
 Best Coffee Mug to Keep Coffee Warm: Top Picks for Cozy Sips
 Best Coffee Grinder for Aeropress: Top Picks for Perfect Brew
 Black Kitchen Appliances Vs Stainless Steel: Which Suits Your Style Best?
 Ninja Air Fryer Grill Model Gen 1 Vs Gen 2: Ultimate Comparison Guide
 Best Desktop Mug Warmer: Keep Your Coffee Perfectly Hot
 Best Milk Frothers Subminimal: Elevate Your Coffee Experience Effortlessly