
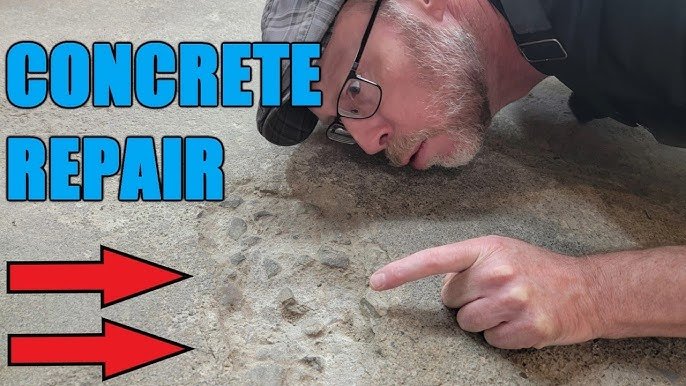
Durock cement board, manufactured by USG, is the industry standard for tile backer in wet areas like showers, tub surrounds, and kitchen backsplashes. Made of a Portland cement core reinforced with fiberglass mesh, it contains no organic materials, so it won’t rot, mold, or degrade when exposed to water, and is code-approved for all residential wet area installations per the International Residential Code. Unlike drywall, it can’t be cut with a standard utility knife alone, and poor cuts lead to uneven tile, gaps for water intrusion, and cracked grout lines over time. Whether you’re a DIYer tackling a small bathroom Reno or a professional contractor working on a full home build, these step-by-step tips will help you make straight, clean cuts every time, no special training required.
What Is Durock Cement Board (and Why Cut Quality Matters)
Durock is available in ¼-inch and ½-inch thicknesses, with a smooth, textured side designed for thinset mortar adhesion and a rough side that faces the subfloor. Its dense cement core makes it far more durable than drywall or green board, but also harder to cut cleanly. Cut quality directly impacts the longevity of your tile installation: rough or uneven cut edges create gaps where thinset can’t adhere properly, leading to tile popping, water seeping behind tile to damage subfloors, and uneven grout lines that look unprofessional. A clean, straight cut ensures even thinset coverage and a seamless, long-lasting tile finish. Durock is the most widely used cement backer board in North America, and its installation is covered under all major residential building codes, per the manufacturer’s official USG Durock product guidance. It’s most often installed in showers, tub surrounds, and kitchen backsplashes, where its water resistance prevents mold and rot behind tile. If you’re completing a full bathroom renovation, you may also want to install under-sink child safety locks on cabinets to store cleaning supplies safely once the project is done.
Essential Tools for Cutting Durock (No Fancy Equipment Needed)
You don’t need an expensive wet saw for most Durock cuts – the right basic tools will get the job done faster and with far less mess. Below is a breakdown of the must-have tools for every cut type:
| Tool | Best Use Case | Pro Tip for Perfect Results |
|---|---|---|
| Carbide-tipped utility knife or scoring tool | Straight, full-length cuts | Replace blades after 2–3 full cuts to avoid dull scoring that tears the board |
| 4-foot aluminum straightedge | Guiding scoring cuts for long, straight lines | Clamp the straightedge to the board to prevent shifting during scoring |
| Circular saw with carbide-tipped masonry blade | Fast straight cuts for large sheets, rough sizing | Set blade depth to ½ inch deeper than your Durock thickness to avoid cutting into the subfloor |
| Jigsaw with carbide-grit blade | Curved cuts, notches, and cutouts for pipes/fixtures | Use a low speed setting to prevent blade overheating and excess dust |
| HEPA shop vac | Capturing silica dust during power cuts | Attach the vac directly to your saw’s dust port if it has one for maximum dust capture |
| Cut-resistant gloves, N95/P100 respirator, safety glasses | All cutting tasks | Cement dust contains crystalline silica, a known carcinogen, and cut edges are as sharp as broken glass |
For deep cleaning of work surfaces after power cutting, a heavy-duty grout and surface brush works well to remove embedded cement dust without damaging countertops or floors.
Step-by-Step Guide to Perfect Straight Cuts (The Most Common Cut)
Scoring and snapping is the most reliable method for straight cuts, producing cleaner edges and far less dust than power saws. Follow these steps for consistent results:
Step 1: Measure and Mark with Precision
Start by measuring your cut line with a tape measure, adding ⅛ inch to your final measurement if you plan to sand the edge smooth later to account for material removal. Mark the cut line with a dark pencil or chalk line so it remains visible even when covered in cement dust. Clamp your straightedge to the board along the mark – holding it by hand will almost always lead to a crooked cut, even with a steady hand. In practice, most DIYers find that marking the cut line on the rough side of the Durock (the side that will face the subfloor) makes the score line easier to see.
Step 2: Score the Board Deeply
Place the carbide utility knife at the start of your marked line, hold it at a 45-degree angle, and apply firm, even pressure as you drag it along the straightedge. Repeat this 3–4 times, pressing hard enough that you can see the fiberglass mesh inside the board when you look at the score line. A common mistake here is using a dull utility knife, which only scratches the surface of the board and makes snapping impossible, leading to ragged, uneven breaks.
Step 3: Snap the Board Cleanly
Lift the board so the score line is facing you, and rest it on the edge of a workbench or sawhorse with the overhanging piece aligned exactly with the score line. Apply quick, firm downward pressure on the overhang – the board will snap cleanly along the score line with minimal effort. For ½-inch Durock, have a helper hold the larger piece steady to avoid cracking the board beyond the cut line. If the board doesn’t snap easily, your score line isn’t deep enough – go back and score it 1–2 more times.
 A deep, even score line is the key to a clean snap without ragged breaks
Step 4: Smooth Rough Edges
Even a clean snap will leave small, sharp cement fragments and frayed fiberglass on the cut edge. Use a 60-grit sanding block or carbide hand rasp to smooth the edge, removing all sharp debris. This step is critical for even thinset adhesion – rough edges will cause tile to lift or crack over time. For large jobs, a rotary tool with a sanding attachment cuts down on time significantly.
 Smoothing cut edges removes sharp cement fragments and ensures thinset adheres evenly
How to Cut Irregular Shapes (Notches, Cutouts, and Curves)
Straight cuts are the most common, but most tile installations require notches for plumbing pipes, electrical boxes, or curved cuts for niche shelves. For square notches: mark the outline of the notch with a pencil, then use a jigsaw with a carbide-grit blade to cut along the lines. For circular cutouts (like for a toilet flange): drill a ½-inch hole inside the cutout line, insert the jigsaw blade, and cut carefully along the mark. Pro tip: cut all notches 1/16 inch smaller than the pipe or flange diameter to leave room for caulk, preventing water leaks around fixtures.
Critical Safety Guidelines You Can’t Skip
Cutting Durock carries two primary risks: respiratory damage from silica dust, and lacerations from sharp edges. Per OSHA’s silica safety guidelines, all workers must use a NIOSH-approved N95 or P100 respirator when cutting cement board, as crystalline silica in the cement can cause silicosis, a permanent and fatal lung disease, with even short-term unprotected exposure. Always wear cut-resistant gloves when handling fresh cuts – the edges of Durock are sharper than broken glass, and many DIYers require stitches from accidental cuts. Work in a well-ventilated area, and use a HEPA shop vac to capture dust at the source rather than sweeping, which kicks dust back into the air. After cutting, store all sharp Durock cutoffs and tools out of reach of children, using no-drill child safety locks on lower storage cabinets if needed to keep small kids safe. Sweep up all cement dust and debris immediately after cutting, using a heavy-duty multi-surface brush to dislodge dust from cracks in work surfaces where it could be inhaled later.
Common Cutting Mistakes (And How to Fix Them)
Even experienced DIYers run into these avoidable errors that waste material and lead to poor results:
- Dull cutting tools: A dull utility knife or saw blade will tear the board instead of cutting cleanly, leading to ragged edges and wasted material. Replace utility knife blades after every 2–3 full cuts, and swap saw blades when you notice cuts taking longer or producing excess dust.
- Skipping the straightedge clamp: Holding a straightedge by hand leads to even 1/16 inch of deviation, which adds up over long cuts and causes tiles to not sit flush. Always clamp your straightedge to the board before scoring.
- Cutting too fast with power tools: Rushing a circular saw or jigsaw cut will overheat the blade, cause kickback, and produce more silica dust than necessary. Cut at a steady, moderate pace, letting the blade do the work.
- Ignoring board orientation: Durock has a smooth, textured side designed for thinset adhesion, and a rough side that faces the subfloor. Cutting and installing the board backwards means you’ll have to sand the rough cut edge smooth before applying mortar, adding hours of extra work.
- Setting saw blades too deep: Setting your circular saw blade deeper than ½ inch below the Durock will cut into the subfloor, leading to costly repairs. Always measure your board thickness and adjust the blade depth accordingly before cutting. After cutting, store all sharp tools and Durock pieces in a locked or latched cabinet, using child-resistant drawer latches to prevent accidental injuries to kids or pets.
Frequently Asked Questions
Can I cut Durock cement board with a regular utility knife?
No. A standard steel utility knife will dull almost immediately when scoring cement board, and will only scratch the surface rather than creating the deep score line needed for a clean snap. Always use a carbide-tipped utility knife or dedicated cement board scoring tool for straight cuts.
Do I need to wear a respirator when cutting Durock?
Yes, without exception. Durock contains crystalline silica, a carcinogen that causes permanent lung damage (including silicosis) when inhaled, even during short 5-minute cuts. Use a NIOSH-approved N95 or P100 respirator for all cutting tasks, and work in a well-ventilated area.
What saw blade is best for cutting Durock?
For circular saws, use a carbide-tipped masonry blade designed for cement or concrete. For jigsaws, use a carbide-grit blade intended for abrasive materials. Avoid standard wood blades, which will dull within a few cuts and produce ragged edges.
How deep should I set my circular saw blade when cutting Durock?
Set the blade depth to ½ inch deeper than the thickness of your Durock board (e.g., 1 inch for ½-inch thick Durock) to avoid cutting into the subfloor or underlayment below. Cutting too deep will damage your subfloor and require costly repairs.
Can I cut Durock without scoring it first?
For straight cuts, scoring and snapping is the most reliable method for clean, straight edges with minimal dust. Power saws work for fast rough cuts, but will produce rougher edges that require more sanding and generate far more silica dust.
Is Durock cement board the same as drywall?
No. Drywall is made of a gypsum core with paper facing, and is not water-resistant. Durock is made of cement and fiberglass, with no organic materials that can rot or mold when exposed to water, making it the only code-approved backer board for wet area tile installations.
Conclusion
Cutting Durock cement board doesn’t require professional training or expensive equipment – with the right tools, a steady hand, and attention to safety, you can make clean, precise cuts that will make your tile installation look professional and last for decades. Remember to score deeply for straight cuts, smooth all rough edges for even thinset adhesion, and always wear proper PPE to avoid respiratory damage or lacerations. If you’re planning a full tile renovation, be sure to follow code requirements for subfloor preparation and thinset application to ensure your finish is as durable as it is beautiful.

Hi, I’m Daniel Brooks—a food lover and kitchen gear enthusiast. I enjoy testing cookware, utensils, and gadgets to see what really works in everyday cooking. At PlugChef.com, I share honest reviews, comparisons, and simple guides to help you choose the best tools for a safer, smarter, and more enjoyable kitchen.
Related posts:
 Seville Expandable Cabinet And Pantry Organizer: Space Savior
 Glideware Pull Out Cabinet Organizer for Pots & Pans: Space Saver
 Small 3-Tier Shelf Organizer: Maximize Space Effortlessly
 Trader Joe’S Spicy Lentil Wrap: Delicious, Healthy, and Quick Meal!
 Easy Way to Peel Pumpkin: Quick Tips for Effortless Prep
 How Long Do Grapes Last: Ultimate Freshness Guide Revealed

