
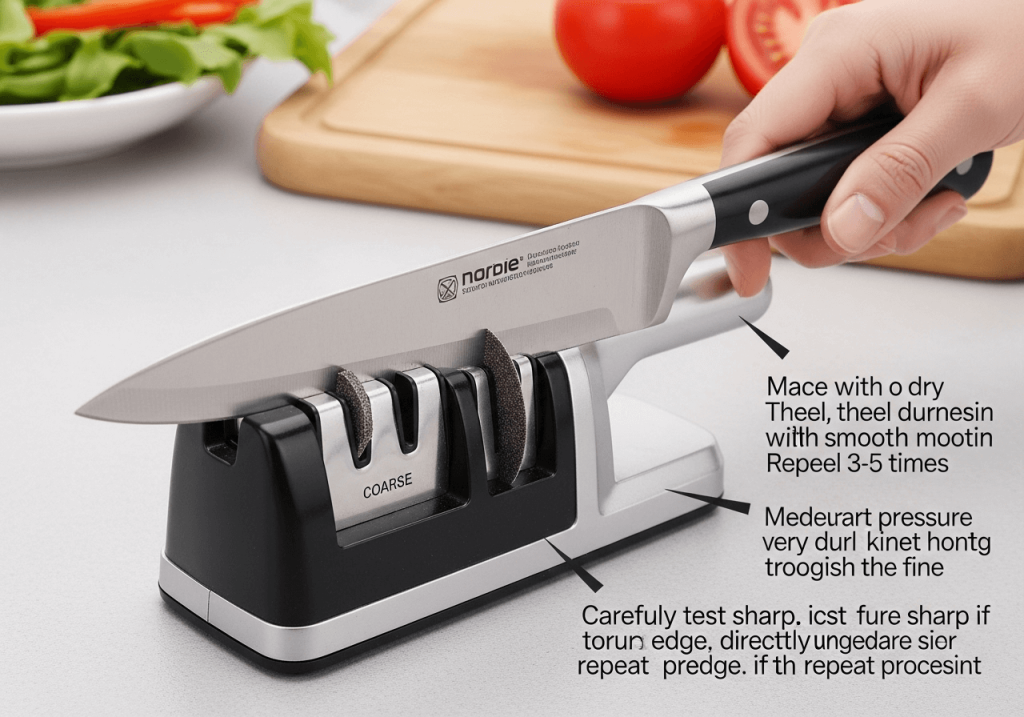
A sharp knife is safer, faster, and more enjoyable to use. This guide gives clear, expert-tested steps for the common sharpeners (pull-through/manual, electric, whetstone/diamond, and honing/stropping), plus practical diagnostics, troubleshooting, and maintenance so you can sharpen like a pro — quickly and safely.
Why keeping knives sharp matters
Sharp blades require less force, give cleaner cuts, and reduce the chance your knife will slip. In practice that means faster prep, less bruising of delicate foods, and fewer accidents. A well-maintained edge also preserves expensive knives longer by avoiding unnecessary grinding.
Also care for the cutting surface: a dry, well-sealed board reduces edge wear — consider how to seal your cutting board to protect both wood and blades. Use safe, compatible kitchen tools too — avoid abrasive surfaces and consult advice on non-toxic utensils when planning your workstation.
For workplace-style safety recommendations about hand and tool handling, follow basic guidance from OSHA and for food-handling hygiene see the USDA’s food-safety resources: OSHA and USDA.
Key concepts: what sharpening actually does
- Edge vs. bevel: the bevel is the sloped surfaces that form the cutting edge. Sharpening re-profiles the bevel; honing straightens it.
- Burr: a tiny fold of metal that indicates you’ve reached the edge on one side — a useful sharpening sign.
- Edge angle: the angle between blade face and the edge. Typical ranges:
- Japanese knives: ~15° per side (thin, sharper).
- Western knives: ~20°–22° per side (hardier).
- Grit: coarser grits remove metal faster; finer grits refine polish.
- Honing rod vs. sharpening: honing realigns the edge (does not remove much metal); sharpening removes and reshapes metal to recreate the edge.
Understanding these helps you pick the right tool and the right finishing steps.
Choosing the right sharpener
Which sharpener to use depends on your knife, experience, and how dull the blade is.
- Pull-through/manual sharpeners — easy, fast, consistent angle; good for light to moderate sharpening of common stainless steels.
- Electric sharpeners — quick and repeatable; powerful, but can remove metal aggressively if overused.
- Whetstones (waterstones/oilstones) — best control and edge quality; steep learning curve but ideal for high-end knives and re-profiling.
- Diamond stones — cut fast, stay flat, work dry; good for very hard steels and quick stock removal.
- Guided systems/strops — guided jigs maintain angle; strops polish and remove burr for razor-like edges.
- Professional sharpening service — use when you need re-profiling, major repair, or consistent factory edges.
If you’re unsure which method matches your knife chemistry (ceramic, very hard steels, laminated blades), consult the knife maker or a pro.
Quick diagnostic: how dull is the blade?
- Tomato test: a sharp knife slices a ripe tomato skin without pushing.
- Paper test: a sharp edge slices cleanly through printer paper.
- Thumb nail feel: gently (and safely) drag the edge across your thumbnail lightly — a burr or catch means it’s sharp; a smooth slide indicates dull. Do this only if you’re experienced and careful.
If the blade fails these tests, decide whether honing, a light sharpen, or full re-profiling is needed.
Step-by-step techniques
Below are practical, experience-based steps for each common method. In practice, many cooks combine methods: a quick hone before use and a whetstone session monthly or a few times per year.
Manual (pull‑through) sharpeners — fast and foolproof for moderate needs
- Place the sharpener on a stable surface and hold it steady with one hand.
- Identify the coarse slot (often carbide) and the fine slot (ceramic or fine abrasive).
- Start with the coarse slot only if the blade is noticeably dull. Place the heel of the blade into the slot and pull toward you, keeping motion smooth. Use light-to-moderate pressure.
- Repeat 3–6 passes depending on dullness. Do not saw back and forth — single-direction pulls work best.
- Move to the fine slot and make 3–6 light pulls to refine the edge.
- Rinse and dry the blade; test on tomato or paper.
Common mistakes: forcing the blade, too many passes, or using the coarse slot every time (causes excessive wear).
Place image here for visual context:

Credit: www.youtube.com
Electric sharpeners — quick, repeatable, but use with care
- Use for very dull blades or frequent maintenance in busy kitchens.
- Align the blade, start with the coarsest stage only when needed, and pull the blade slowly; let the machine do the work.
- Limit passes: typically 2–4 passes per coarse stage, then 2–4 on fine stages. Follow the manufacturer’s instructions for your model.
- Don’t overheat temper-sensitive steels; pause between passes if the unit or blade gets hot.
- Avoid for thin Japanese blades or fragile specialty edges — they can remove too much metal.
Tip: in practice, many home cooks use electric sharpeners sparingly — for fast rescue jobs rather than routine edge care.
Whetstone (waterstone/oilstone) — best edge quality (recommended for long-term care)
Whetstones give the most control and the best, longest-lasting results once you learn the technique.
Preparation:
- Select grit progression: coarse (240–600) for very dull edges, medium (800–1000) to rebuild bevel, fine (3000–8000) to polish.
- Waterstones typically soak or be wetted briefly; follow manufacturer guidance (some require only a splash). Diamond stones are used dry or with light oil and do not require soaking.
- Secure the stone on a non-slip mat.
Sharpening steps (typical):
- Hold the knife at the target angle (e.g., 15° for Japanese, 20° for Western). A visual trick: angle half the distance between handle and blade thickness.
- Push the blade across the stone as if slicing a thin layer off the surface — from heel to tip, maintaining angle, using the whole stone surface.
- Make 6–15 strokes per side on a coarse stone until you feel a burr along the opposite edge.
- Switch to a finer stone and repeat with lighter pressure to refine and remove the burr. Use increasing stroke counts on finer grits for a mirror finish.
- Finish with a light strop to remove the last burr and polish the edge.
Practical tips:
- Count strokes but prioritize burr formation as the true indicator.
- Keep angle consistent — small angle shifts cost time and quality.
- Flatten waterstones as they wear — a lapping plate or flattening stone restores a flat surface.
Place image here where stone technique is described:

Credit: www.familyhandyman.com
Honing rods and strops — daily finishing and polish
- Honing (steel/ceramic rod): realigns edge. Use before or after every cooking session if you like a consistently keen edge. Technique: hold rod vertically, angle 15°–20°, sweep each side 5–10 times with light pressure.
- Ceramic rods remove small amounts of metal and can be used when honing fails to restore the edge.
- Strops (leather with compound): final polishing step. Pull the blade away from the edge along the strop 10–20 times per side. Strops remove burrs and impart shaving-level sharpness.
Important: do not rely on a honing rod to fix a seriously dull edge — use sharpening stones or other abrasive methods.
Common mistakes and troubleshooting
- Pressing too hard: leads to uneven edge and excessive metal removal.
- Wrong angle: a too-steep angle makes the edge blunt quickly; too-flat angle weakens it.
- Over-sharpening with coarse abrasives: shortens blade life.
- Ignoring burrs: not building or removing the burr means incomplete sharpening.
- Using the wrong tool for the steel: some high-hardness steels require diamond abrasives.
If you create a secondary bevel or the edge feels rounded: return to a coarse stone and re-establish the primary bevel with controlled angles.
Maintenance schedule (practical guidance)
- Hone: before each use or at least weekly for home cooks.
- Light sharpening (stones/pull-through): every 1–3 months for moderate home use, depending on how often you cook and what you cut.
- Full reprofile / professional service: yearly or when the edge shape is degraded or chipped.
If you own multiple knives, rotate maintenance: high-use knives need attention more often than specialty blades.
Safety checklist
- Work on a stable surface; clamp stones or use non-slip mats.
- Keep fingers behind the cutting edge. Move slowly and deliberately.
- Wear cut-resistant gloves if you’re learning new techniques.
- Store sharpened knives safely — a knife block, magnetic strip (mounted high), or blade guards.
- Keep sharpeners and knives away from children.
For workplace best practices, consult OSHA’s tool-handling guidance at OSHA.
FAQs
Q: How often should I sharpen my kitchen knives? A: Hone frequently (every use or weekly). Sharpen with abrasive tools when honing no longer restores a keen edge — commonly a few times per year for home cooks, or more often for heavy use. If you need help choosing gear, look at recommended chef knife sets to match maintenance to blade types.
Q: What angle should I use on a sharpener? A: Match blade origin and purpose: 12°–15° per side for thin Japanese-style slicers, 18°–22° per side for heavier Western chefs’ knives. If you want guidance when buying or replacing knives, consult a knife selection guide.
Q: Can I use any sharpener on any knife? A: Not always. Ceramic and some hard-steel blades can be damaged by aggressive electric systems; very delicate blades don’t tolerate high pressure. For specialty work or uncertainty, use a stone or a pro. For general safety tips and to avoid cuts while practicing sharpening, review ways to prevent cuts and protect your hands.
Q: Should I oil my whetstone? A: Use water for waterstones (or follow the stone maker’s guidance). Oil stones use oil. Diamond stones usually run dry or with water. Always follow the maker’s recommendations.
Final checklist before you start
- Decide method by knife type and skill level.
- Gather safety gear, a stable surface, and a way to test sharpness (tomato/paper).
- Use progressive grits if re-profiling.
- Keep sessions short, focused, and finish with a strop or fine stone.
Conclusion
Sharpening is a skill that pays back in safety, speed, and food quality. Start with honing at home, practice a few whetstone sessions to learn angle consistency, and use pull-through or electric sharpeners for quick touch-ups. Take one dull knife, follow a method above, and you’ll notice a big difference in minutes.
Pick one method and sharpen a knife today to feel the improvement — then make a simple maintenance routine to keep that edge.

I’m Abby Lu, a passionate home cook who loves simplifying everyday meals. At PlugChef.com, I share product reviews and cooking guides to help you find the best tools for your kitchen.
Related posts:
 How to Organize a Corner Kitchen Cupboard: Expert Tips
 How to Grow Organic Kitchen Garden: Expert Tips
 How to Best Organize Kitchen Cabinets: Expert Tips
 How Can a Kitchen Renovation Boost Storage & Organization?
 What is Kitchen Plastic Wrapping Paper Made of: Unveiling Secrets
 How Should a Fridge Be Organized: Expert Tips

