

There’s nothing quite like the sweet-tart, umami-packed burst of a sun-dried tomato, but store-bought versions are often tough, chewy, and loaded with preservatives and excess sodium. Making home made sun dried tomatoes at home is simpler than you think, lets you control the flavor and ingredients, and cuts your grocery bill significantly compared to pre-packaged options. Whether you have a sunny patio, a standard oven, or a small countertop dehydrator, you can preserve peak-season tomatoes for months of flavorful meals, no special skills required. If you’re prepping ingredients with little ones underfoot, secure lower cabinets with child-safe latches to keep hazardous items out of reach while you cook; for renters or anyone who doesn’t want to drill into cabinetry, no-drill child locks offer the same protection without permanent modifications. Below, we’ll walk through every step, from choosing the right tomatoes to storing your batch perfectly, with pro tips to avoid common mistakes and get restaurant-quality results every time.
Why Make Homemade Sun Dried Tomatoes?
Store-bought sun-dried tomatoes are convenient, but homemade versions win on flavor, cost, and ingredient quality. Commercial varieties are often treated with sulfites to preserve color and shelf life, which can cause digestive issues for sensitive eaters, and packed with excess salt to mask bland, off-season tomatoes. When you make your own, you can use peak-season tomatoes grown locally or from your garden, which have far more complex, sweet flavor than tomatoes shipped across the country. A 5-pound bag of Roma tomatoes costs roughly $3, and yields 2–3 jars of sun-dried tomatoes, compared to $15+ for the same amount of pre-packaged product. You also get full control over seasoning: add garlic, rosemary, crushed red pepper, or leave them plain for maximum versatility. For home gardeners or CSA subscribers, sun drying is also a perfect way to reduce food waste when you have a surplus of ripe tomatoes at the height of summer.
Choosing the Best Tomatoes for Drying
Not all tomatoes dry well, and picking the right variety is the first step to avoiding mushy, uneven results. The best tomatoes for drying have thick flesh, low water content, and few seeds, so they dry evenly and retain their chewy, tender texture.
Best Tomato Varieties
- Roma (plum) tomatoes: The gold standard for home drying, Roma tomatoes have thick, meaty flesh, very few seeds, and low water content, so they dry 30% faster than high-moisture varieties. They’re widely available year-round, and affordable, making them ideal for beginners.
- San Marzano tomatoes: If you can find them (often at farmers markets or specialty grocery stores in late summer), San Marzano tomatoes are even sweeter and thicker than Romas, with almost no seeds. They’re perfect for Italian-inspired dishes, and dry to a rich, deep red color.
- Grape tomatoes: Small, sweet, and low in water, grape tomatoes dry evenly with minimal prep. Slice them in half lengthwise to cut drying time by 20%, and you’ll have perfect, bite-sized sun-dried tomatoes in no time.
- Cherry tomatoes: A good option if you don’t have access to plum varieties, but slice them in half first to avoid excessive drying time.
Avoid high-water-content varieties like beefsteak, heirloom Brandywine, or Early Girl tomatoes, which take twice as long to dry, often turn mushy before the interior is fully dehydrated, and are far more prone to mold growth during storage.
Ripeness and Quality Tips
Only use tomatoes that are fully ripe but firm to the touch: overripe tomatoes have excess water, take far longer to dry, and are at high risk of spoiling before they’re fully dehydrated. Underripe tomatoes are tart, have a mealy texture, and dry unevenly, with hard spots mixed with soft, moist sections. Look for bright, consistent color, no soft spots, bruises, or mold on the skin. If you’re using the tomato skin (which holds most of the flavor and lycopene), opt for organic varieties or wash conventional tomatoes thoroughly with a produce brush to remove pesticide residue.
Prep Work for Perfect Dried Tomatoes
Proper prep ensures even drying, better flavor, and a lower risk of mold or spoilage. A common mistake new dryers make is rushing through prep, which leads to inconsistent results and wasted produce.
Washing and Slicing for Even Drying
Rinse tomatoes under cool running water to remove dirt and debris, then pat them completely dry with a clean kitchen towel—excess surface water will extend drying time and increase mold risk. Use a sharp chef’s or serrated knife to slice tomatoes into uniform ¼-inch thick pieces. Uniformity is non-negotiable: slices thinner than ⅛ inch will turn brittle and crispy, while slices thicker than ⅜ inch will take days longer to dry, and may develop mold in the center before the exterior is fully dehydrated. If you want to cut drying time by 15–20% and reduce sogginess, slice tomatoes in half lengthwise and scoop out the seeds and gel with a small spoon. Leave a ½-inch gap between slices on your drying trays to allow air to circulate fully—overcrowding causes slices to steam each other, leading to mushy, unevenly dried tomatoes. Prep your workspace with a custom prep surface to keep tomatoes steady while you slice, and protect your countertops from stains. After slicing, scrub down your cutting board and countertops with a heavy-duty kitchen brush to remove any sticky tomato residue without scratching surfaces.
Seasoning Options for Custom Flavor
Seasoning is optional, but it adds depth and makes your sun-dried tomatoes far more versatile. Toss slices with 1–2 tablespoons of extra virgin olive oil per pound of tomatoes, 1 teaspoon of kosher salt, and any dried herbs or spices you love: basil, oregano, thyme, crushed red pepper, and garlic powder are all popular choices. Avoid over-seasoning: flavor concentrates as tomatoes dry, so a mild seasoning blend fresh will taste much more intense in the final product. For a subtle, savory twist, you can also toss slices with a splash of balsamic vinegar before drying, which adds a tangy, caramelized note.
3 Proven Methods to Dry Tomatoes at Home
Every drying method produces delicious results, but the best choice depends on your climate, equipment, and timeline. Follow the temperature and timing guidelines below to avoid over-drying or under-drying your batch.
Traditional Sun Drying (Zero Energy Cost, Authentic Flavor)
Sun drying is the oldest method, and uses the sun’s UV rays to break down tomato cell walls, resulting in a more complex, sun-ripened flavor that oven or dehydrator drying can’t fully replicate. This method only works in climates with consistent 85°F (29°C)+ temperatures and humidity below 60% for 3–5 consecutive days.
- Arrange slices on a baking sheet, or a dedicated solar dryer if you have one.
- Cover with a cheesecloth or mesh screen to keep out bugs, dust, and birds.
- Place in a sunny, well-ventilated spot (south-facing patio, balcony, or rooftop).
- Rotate slices every 2–3 hours to ensure even drying.
- Bring trays inside at night to avoid dew forming, which can cause mold.
- Test for doneness after 3 days: a slice should be leathery, pliable, and have no moist spots when torn. Pro tip: On hot, sunny days, you can dry tomatoes on your car’s dashboard (crack the window slightly for ventilation) — the interior of a parked car can reach 120°F, making it a perfect makeshift dryer for small batches.
Oven Drying (Fast, All-Weather Option)
Oven drying is ideal for cloudy, rainy climates, or if you don’t have outdoor space. It’s faster than sun drying, and requires no special equipment beyond a standard kitchen oven.
- Preheat your oven to 200°F (93°C). Place a wooden spoon in the door to keep it cracked 1–2 inches, which lets moisture escape and prevents tomatoes from steaming instead of drying.
- Line baking sheets with parchment paper or silicone mats, arrange slices in a single layer with no overlapping.
- Bake for 4–6 hours, flipping slices every 2 hours to ensure even drying.
- Test for doneness the same way as sun drying: leathery, pliable, no moisture when torn. A common mistake: Turning the oven temperature up to speed up drying will cause the exterior of the tomatoes to harden before the interior is dry, leading to mold growth during storage. Stick to 200°F for consistent results.
Dehydrator Drying (Consistent, Hands-Off Results)
A dehydrator is the best option for frequent dryers, or anyone who wants consistent, predictable results every time. Set the temperature to 135°F (57°C), the recommended setting for vegetable drying per National Center for Home Food Preservation guidance to lock in flavor and prevent spoilage.
- Arrange slices on dehydrator trays, leaving space between slices for air circulation.
- Set the temperature to 135°F, and run for 8–12 hours, depending on slice thickness and ambient humidity.
- Rotate trays halfway through if your dehydrator has uneven heating.
- Test for doneness the same way as other methods. Pro tip: If you don’t have a dedicated dehydrator, most air fryers have a low-temperature setting (130–140°F) that works perfectly for small batches of tomatoes, with a drying time of 3–4 hours.
| Drying Method | Ideal Temperature | Total Time | Pros | Cons | Best For |
|---|---|---|---|---|---|
| Sun Drying | 85°F+ (29°C) outdoor temp | 3–5 days | Zero energy cost, most authentic flavor, no equipment needed | Weather-dependent, risk of mold in high humidity, requires daily rotation | Warm, dry climates, large batches |
| Oven Drying | 200°F (93°C) | 4–6 hours | Works in any weather, no extra equipment, faster than sun drying | Heats up kitchen, requires periodic checking | Small batches, cloudy climates, occasional use |
| Dehydrator Drying | 135°F (57°C) | 8–12 hours | Most consistent results, hands-off, doesn’t heat kitchen | Upfront cost of $30–$100 | Frequent dryers, year-round use, small kitchens |
Storing Sun Dried Tomatoes for Maximum Freshness
Proper storage is the final step to ensuring your batch stays fresh and safe to eat for months. The right storage method depends on how long you plan to keep your tomatoes.
Short-Term Storage (1–2 Weeks)
For unseasoned, fully dry tomatoes, store in an airtight glass jar or resealable plastic bag in a cool, dark pantry, away from heat and direct sunlight. They’ll stay fresh for 2–3 weeks. For oil-packed tomatoes, pack fully dry tomatoes in a sterilized glass jar, cover completely with extra virgin olive oil, and add a sprig of fresh rosemary or a crushed garlic clove for extra flavor if desired. Seal tightly, and store in the refrigerator: never store oil-packed tomatoes at room temperature, as this creates a botulism risk per USDA food safety guidelines. If you acidify the tomatoes by soaking them in a 10% vinegar solution for 5 minutes before packing them in oil, they’ll keep in the refrigerator for up to 3 months. Without acidification, use them within 2 weeks to avoid spoilage. To clean sticky oil and tomato residue from storage jars, a dish scrub brush with dispenser lets you add soap directly to tough stains for fast cleanup.
Long-Term Storage (3–12 Months)
For storage longer than 2 weeks, freezing is the easiest, safest option. Spread fully dry tomatoes in a single layer on a baking sheet, freeze for 2 hours until solid, then transfer to a freezer-safe bag or container, squeezing out as much air as possible. They’ll stay fresh for 6–12 months with no loss of flavor; to use, just thaw at room temperature for 10 minutes, no cooking required. If you want to store tomatoes at room temperature for up to 12 months, you can pressure can them following tested recipes from the National Center for Home Food Preservation (water bath canning is not safe for low-acid dried tomatoes). For the longest possible shelf life, vacuum seal dry tomatoes in portion-sized bags and store in a cool, dark pantry for up to 12 months. Always label all storage containers with the date you made them, so you can track freshness easily.
Delicious Ways to Use Homemade Sun Dried Tomatoes
Sun-dried tomatoes add a sweet-tart, umami pop to almost any dish, and are far more versatile than you might think. Here are our favorite easy ways to use them:
Quick Weeknight Meals
- Toss ¼ cup of chopped sun-dried tomatoes with warm pasta, olive oil, garlic, and fresh basil for a 10-minute vegetarian meal.
- Add chopped tomatoes to your favorite pasta sauce during the last 5 minutes of cooking for an extra layer of depth.
- Scatter sliced sun-dried tomatoes on pizza before baking, paired with mozzarella and prosciutto for a classic Italian flavor.
Snacks and Appetizers
- Blend sun-dried tomatoes, kalamata olives, capers, garlic, and olive oil in a food processor for a 5-minute savory tapenade, perfect for crusty bread or crackers.
- Stuff chicken breasts with chopped sun-dried tomatoes, goat cheese, and fresh spinach, then bake for 25 minutes for a flavorful, protein-packed dinner.
- Pair whole or chopped sun-dried tomatoes with fresh mozzarella, basil, and perfect cheese cuts arranged on a wooden board for a fast, impressive charcuterie spread.
Troubleshooting Common Homemade Sun Dried Tomato Issues
Even with careful prep, you may run into a few common issues. Here’s how to fix them, and avoid them next time:
Mold and Spoilage
Mold usually appears when tomatoes are not dried enough (moisture content above 20%), stored in a humid environment, or kept at room temperature in oil. If you see small spots of mold, cut off the affected area plus 1 inch of surrounding tomato; if the rest of the batch is fully dry, it’s still safe to use. If mold is widespread, throw the entire batch out to avoid foodborne illness. Prevention is key: always dry tomatoes until they are leathery with no moist spots when torn, store in airtight containers, and keep oil-packed tomatoes refrigerated.
Texture Problems (Too Chewy or Mushy)
If your tomatoes are too tough or chewy, they were likely sliced too thin, dried at too high a temperature, or over-dried. You can rehydrate them by soaking in warm water or olive oil for 10–15 minutes before using; they’re still safe to eat, just not ideal for snacking plain. If tomatoes are soggy or mushy, they were sliced too thick, overcrowded on trays, or dried at too low a temperature. Slightly soggy batches can be finished drying in the oven or dehydrator for 1–2 hours; fully mushy tomatoes can be blended into tomato paste or sauce, but should not be stored.
Frequently Asked Questions
How long does it take to make homemade sun dried tomatoes?
Drying time varies by method: sun drying takes 3–5 days of consistent sun, oven drying takes 4–6 hours, and dehydrator drying takes 8–12 hours. Thicker slices will take longer, so adjust based on your cut.
Can I sun dry tomatoes indoors without a dehydrator or oven?
Yes! If you have a sunny windowsill that gets 6+ hours of direct sun a day, you can lay slices on a baking sheet covered with cheesecloth, and dry them in 4–7 days, rotating every few hours. Just make sure humidity is low, otherwise they may mold.
Do I need to blanch tomatoes before drying?
No, blanching is not required for sun drying, but it can help reduce drying time by 10–15% if you’re using high-moisture tomato varieties. To blanch, score the bottom of each tomato with an X, drop in boiling water for 30 seconds, then shock in ice water, and peel off the skin before slicing.
Are homemade sun dried tomatoes healthy?
Yes! They’re packed with lycopene, vitamin C, and potassium, and have no added preservatives or excess sodium if you season them lightly. They’re a great low-calorie snack, or a way to add flavor to meals without extra sugar or processed ingredients.
Can I use sun dried tomatoes that have crystallized on the surface?
Yes, the white crystallized spots are just natural sugars that have risen to the surface during drying—they’re completely safe, and add a subtle sweetness. Just brush them off if you don’t like the texture, or leave them on for extra flavor.
Conclusion
Home made sun dried tomatoes are one of the easiest, most rewarding kitchen projects you can try, with endless uses for weeknight meals, snacks, and entertaining. By choosing low-moisture tomato varieties, prepping slices evenly, and following tested drying and storage guidelines, you’ll end up with a batch of tender, flavorful tomatoes that last for months, no additives required. Even if you only have a small kitchen and no outdoor space, the oven or dehydrator method delivers perfect results in just a few hours. Once you’ve mastered the basics, experiment with seasoning blends like garlic and rosemary, or try rehydrating tomatoes in olive oil for a quick tapenade. For more easy, budget-friendly kitchen hacks and fresh recipes, browse our latest kitchen guides to keep your cooking routine exciting all year long.
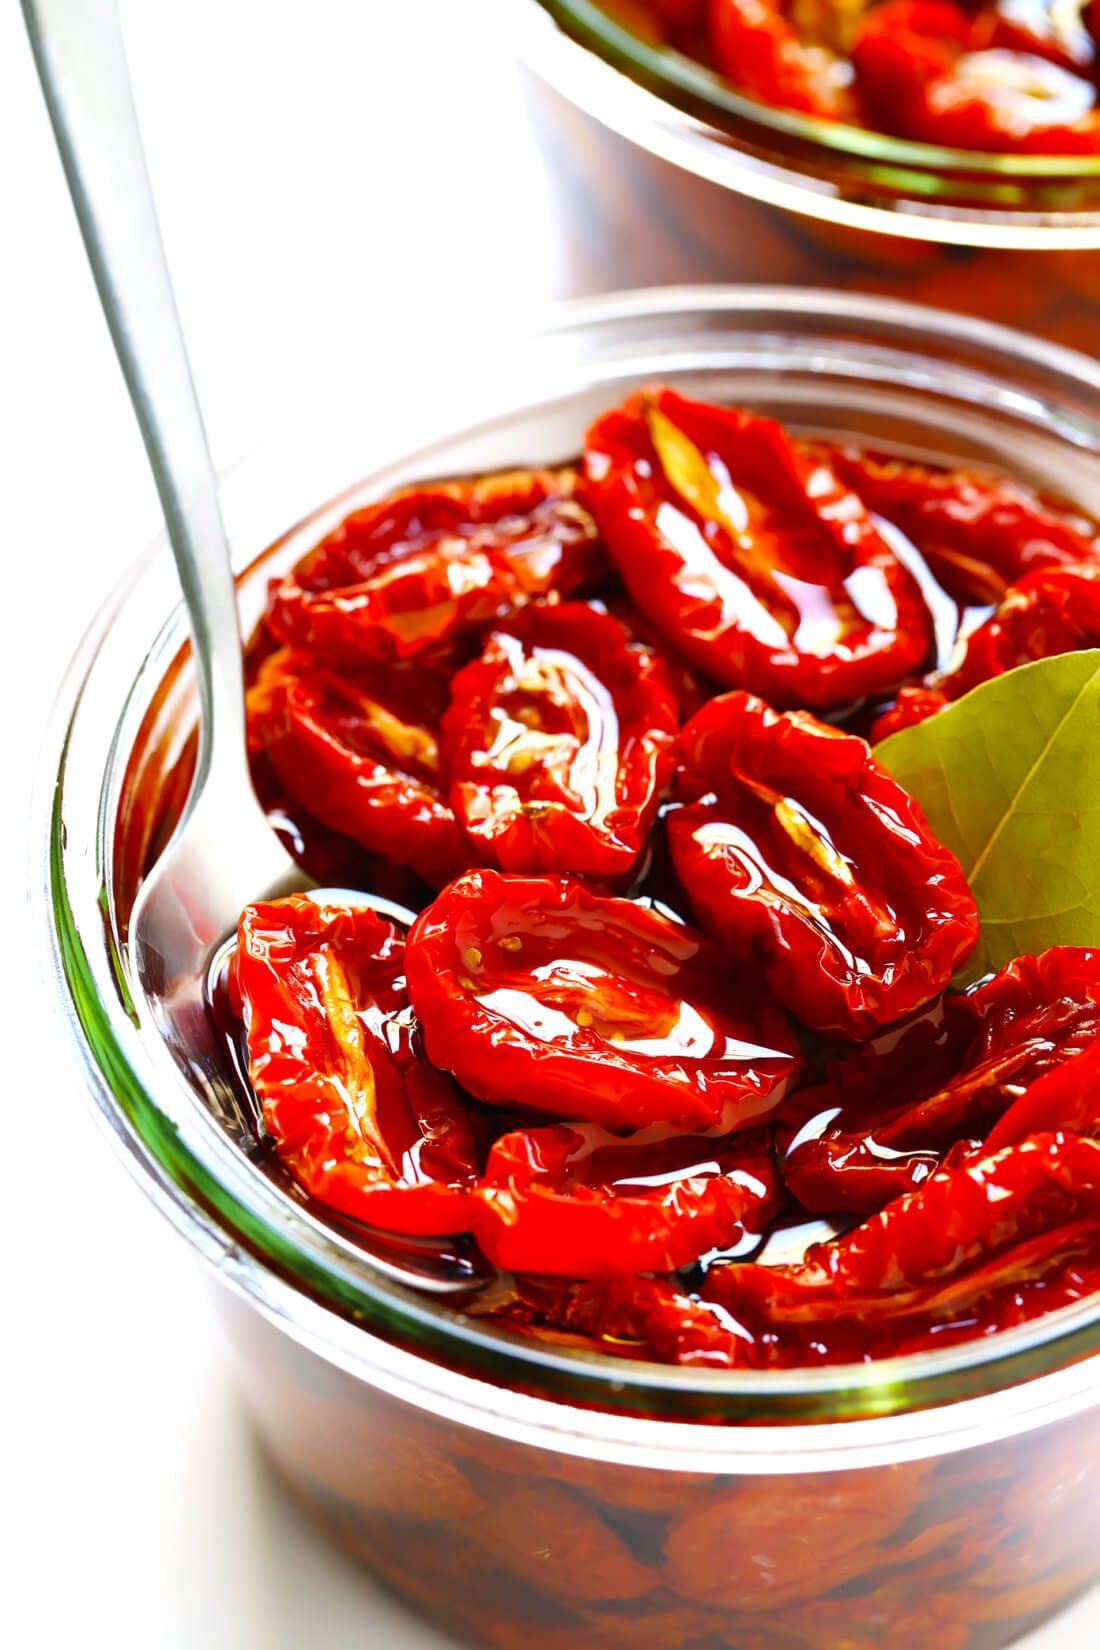 Freshly sliced Roma tomatoes ready for low-heat oven drying
Image source: www.gimmesomeoven.com
Freshly sliced Roma tomatoes ready for low-heat oven drying
Image source: www.gimmesomeoven.com
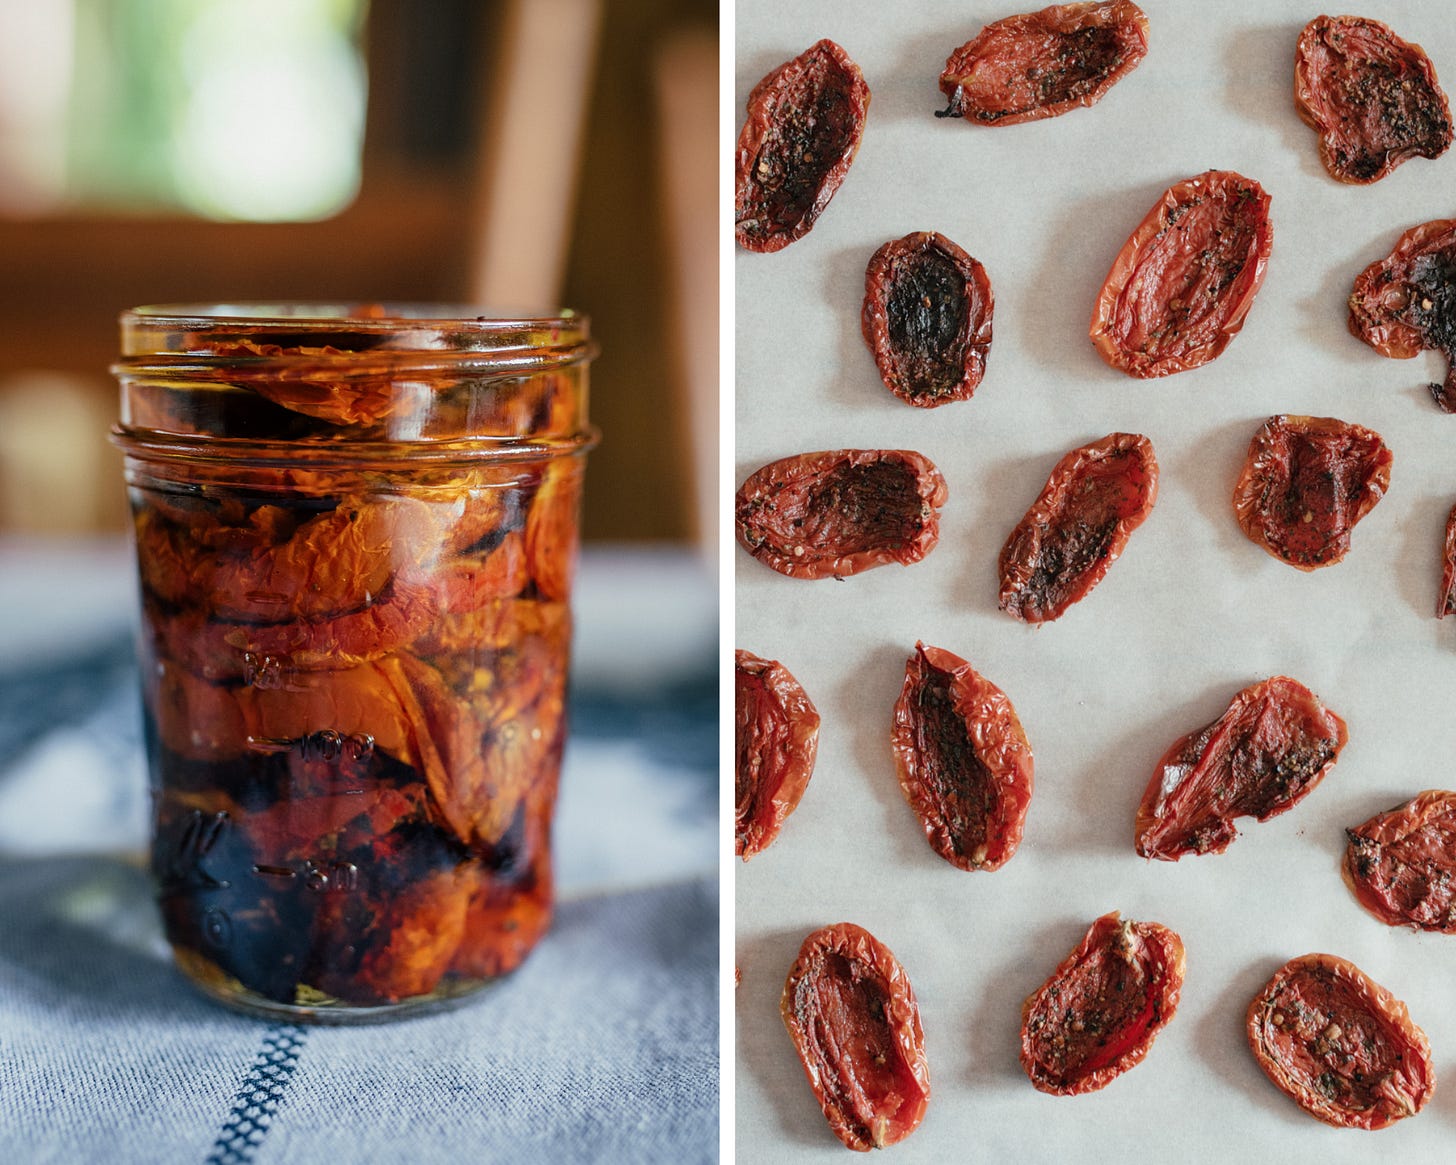 A simple pasta dish tossed with homemade sun-dried tomatoes and fresh basil
Image source: www.theelliotthomestead.com
A simple pasta dish tossed with homemade sun-dried tomatoes and fresh basil
Image source: www.theelliotthomestead.com
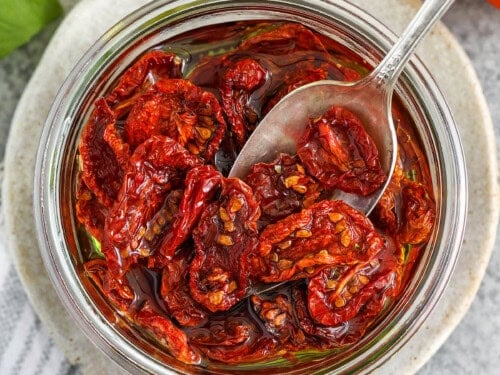 Oil-packed sun-dried tomatoes stored in a sterilized glass jar for long-term use
Image source: www.spendwithpennies.com
Oil-packed sun-dried tomatoes stored in a sterilized glass jar for long-term use
Image source: www.spendwithpennies.com
Related Articles
Looking for more easy kitchen projects and safety guides? Check out these popular resources:
- Child-safe kitchen upgrades to keep your cooking space secure for curious little ones.
- Rental-friendly childproofing solutions that require no drilling or permanent modifications.
- Top-rated kitchen cleaning tools to make quick work of sticky tomato residue and everyday messes.

I’m Abby Lu, a passionate home cook who loves simplifying everyday meals. At PlugChef.com, I share product reviews and cooking guides to help you find the best tools for your kitchen.
Related posts:
 How to Make a Fruit Basket for a Gift: Easy DIY Guide
 Do You Need a Basket? Essential Guide for Air Fryers
 What Blenders Do Tropical Smoothie Use: Expert Insights
Stainless Steel Vs White Kitchen Appliances: Ultimate Showdown
What Blenders Do Tropical Smoothie Use: Expert Insights
Stainless Steel Vs White Kitchen Appliances: Ultimate Showdown
 Kitchen Appliances for Wedding Registry: Must-Have Essentials
 Top 10 Best Non-Toxic Cooking Utensils – Safe & Durable Choices for Healthy Homes

