
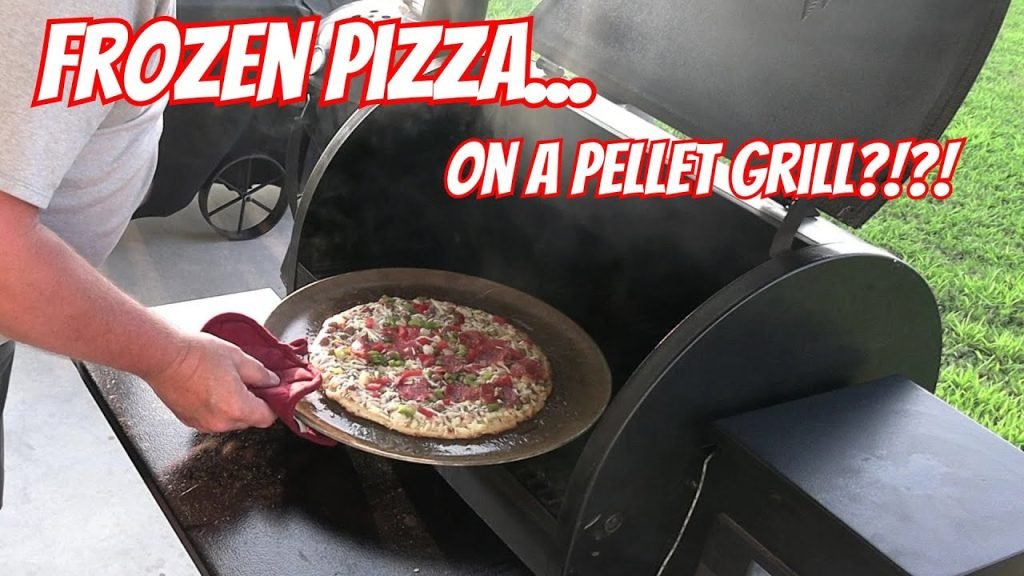
Craving a hot, crispy pizza but only have a frozen one on hand? You don’t need to wait forever or heat up your oven for ages.
Grilling frozen pizza can be quick, easy, and delicious—giving you that perfect crunch and smoky flavor every time. In this guide, you’ll discover simple steps to turn your frozen pizza into a mouthwatering meal right on the grill. Ready to impress yourself and your friends with a new way to enjoy pizza?
Let’s dive in and make your next pizza night unforgettable.

Credit: butcherbbq.com
Choosing The Right Frozen Pizza
Choosing the right frozen pizza is key to a tasty grilled meal. Not all pizzas handle the grill well. Some crusts burn or toppings dry out too fast. Picking a pizza with sturdy crust and fresh toppings helps. This makes grilling easier and results better.
Popular Pizza Types For Grilling
- Thin crust pizzas grill quickly and get crisp.
- Thick crust pizzas need more time but stay chewy.
- Neapolitan style pizzas have simple toppings that cook evenly.
- Deep dish pizzas might be harder to cook through on a grill.
- Vegetarian pizzas avoid greasy meats that can cause flare-ups.
Ingredients That Grill Well
- Cheeses like mozzarella melt smoothly without burning.
- Vegetables such as bell peppers and mushrooms hold moisture.
- Cooked meats like sausage work better than raw toppings.
- Herbs like basil add fresh flavor after grilling.
- Olive oil brushed on the crust prevents sticking and burning.

Credit: www.gianteagle.com
Preparing Your Grill
Preparing your grill properly is key to cooking frozen pizza perfectly. A well-prepared grill prevents sticking and ensures even cooking. Take time to set the right temperature and clean the grate before you start. These steps help achieve a crispy crust and melted cheese without burning.
Setting The Ideal Temperature
Set your grill to medium heat, about 350°F to 400°F (175°C to 205°C). This temperature cooks the pizza evenly without burning the crust. Preheat the grill for 10-15 minutes with the lid closed. Consistent heat helps the pizza cook through properly.
Cleaning And Oiling The Grate
Use a grill brush to remove old food and debris from the grate. A clean grate stops the pizza from sticking. After cleaning, lightly oil the grate with a paper towel dipped in vegetable oil. Use tongs to rub the oil on the grill surface. This creates a non-stick layer for your pizza dough.
Grilling Techniques
Grill frozen pizza by preheating the grill to medium heat and placing the pizza directly on the grates. Close the lid and cook for 8-12 minutes, checking often to prevent burning. Rotate the pizza halfway for even cooking and a crispy crust.
Grilling frozen pizza can elevate your outdoor cooking experience. Proper grilling techniques ensure a crispy crust and melted cheese. Understanding the heat and tools you use is crucial. Let’s explore some techniques that make grilling pizza simple and effective.Direct Vs Indirect Heat
Direct heat cooks the pizza quickly. Place the pizza directly over the flames. This method is best for a crispy base. But be cautious, it can burn the crust. Monitor it closely and turn it often. Indirect heat is gentler. Place the pizza away from the flames. This method allows even cooking. It prevents burning while ensuring the cheese melts. This technique is perfect for thicker crusts or toppings.Using Foil Or Pizza Stones
Using foil is easy. It stops the pizza from sticking. Place the pizza on foil before grilling. This method makes cleanup simple. It also helps in distributing heat evenly. Pizza stones offer a traditional touch. They retain and distribute heat well. Preheat the stone on the grill before placing the pizza. This ensures a crisp and evenly cooked crust. The stone absorbs moisture, enhancing texture.
Credit: www.aldireviewer.com
Cooking Steps For Frozen Pizza
Grilling frozen pizza brings a smoky flavor and crispy crust. Follow simple steps to cook it perfectly on the grill. These steps help avoid burning and ensure even cooking. Keep a close eye on your pizza for the best result.
Placing The Pizza On The Grill
Preheat the grill to medium heat. Place the frozen pizza directly on the grill grate. Avoid putting it over very high heat to prevent burning the crust. Close the grill lid to keep the heat steady. This helps the pizza cook evenly.
Timing And Monitoring
Cook the pizza for about 10 to 15 minutes. Check the pizza every few minutes to avoid burning. Look for melted cheese and bubbly edges. Use a timer to track cooking time. Adjust heat if the pizza cooks too fast or slow.
Rotating For Even Crispiness
Turn the pizza 90 degrees halfway through cooking. This helps the heat reach all sides evenly. Use a spatula or tongs to lift and rotate the pizza carefully. Rotate again if needed to avoid hot spots. Even crispiness makes the pizza more enjoyable.
Tips For Crispy Crust
Getting a crispy crust on a grilled frozen pizza can feel tricky, but it’s all about how you handle the heat and moisture. The right techniques help you avoid sogginess and bring out a satisfying crunch that makes every bite enjoyable. Let’s dive into some practical tips that will transform your frozen pizza into a crispy delight.
Avoiding Soggy Bottoms
One key to a crispy crust is managing moisture. Start by preheating your grill to medium-high heat so it’s hot enough to cook the pizza quickly without steaming it. Avoid placing the pizza directly over flames at first; use indirect heat to warm it through and melt the cheese.
Use a grill-safe pan or a pizza stone to create a barrier between the crust and moisture from toppings. This helps prevent the crust from soaking up excess water. If you don’t have these tools, try placing the pizza directly on the grill grates and keep the lid closed to trap heat evenly.
Have you ever noticed how letting frozen pizza sit out for a few minutes before grilling can help? Allowing it to thaw slightly reduces ice crystals that release water during cooking, which often leads to soggy bottoms.
Enhancing Texture With Toppings
Toppings can make or break your crust’s crispiness. Avoid overloading your pizza with watery ingredients like fresh tomatoes or watery vegetables. Instead, pat these toppings dry or use roasted versions to cut down on moisture.
Adding a light sprinkle of shredded cheese directly on the crust before placing sauce and toppings can create a protective layer. This simple trick keeps moisture from seeping into the dough and promotes a golden, crispy base.
Have you tried brushing your crust with olive oil before grilling? This not only adds flavor but also helps the crust crisp up beautifully. Experiment with different oils or even a light garlic butter brush for extra taste and crunch.
Serving And Storing Leftovers
Grilling frozen pizza is a quick way to enjoy a tasty meal. After cooking, it is important to serve the pizza properly and store leftovers safely. Proper serving enhances the taste and keeps the pizza fresh. Storing leftovers the right way prevents spoilage and food waste.
Leftover pizza can be a delicious snack or meal later. Following simple reheating tips keeps the pizza crispy and flavorful.
Best Serving Suggestions
- Cut the pizza into even slices for easy sharing.
- Serve with fresh herbs like basil or oregano for extra flavor.
- Pair with a light salad to balance the meal.
- Add a drizzle of olive oil or chili flakes for a spicy kick.
- Use small plates to keep portions controlled and neat.
Reheating Tips
- Preheat the grill or oven to medium heat before reheating.
- Place pizza slices on a grill pan or baking sheet.
- Heat for 5 to 7 minutes until cheese melts and crust crisps.
- Avoid microwaving to keep the crust from becoming soggy.
- Cover the pizza loosely with foil to prevent burning.
- Check frequently to avoid overcooking and drying out the pizza.
Common Mistakes To Avoid
Grilling frozen pizza can be quick and tasty. But some common mistakes can ruin your pizza. Avoid these errors to get a crispy crust and melted cheese every time. Simple steps help make your grilled pizza delicious and enjoyable.
Starting With A Cold Grill
Many people place the pizza on a cold grill. This causes the pizza to stick and cook unevenly. Always preheat the grill to medium-high before placing the pizza. A hot grill gives a crispy base and cooks toppings well.
Not Using Indirect Heat
Cooking pizza directly over flames can burn the crust. Use indirect heat by turning off burners directly under the pizza. This method cooks the pizza evenly without burning the bottom.
Skipping The Oil On The Grill Grates
Grill grates can cause the pizza to stick. Lightly oil the grates before placing the pizza. Use a paper towel dipped in oil and tongs to spread it. This prevents sticking and keeps the pizza intact.
Not Checking The Pizza Often
Frozen pizza cooks fast on a grill. Leaving it unattended can cause burning. Check the pizza every few minutes. Rotate it to ensure even cooking on all sides.
Ignoring The Frozen State
Placing frozen pizza directly on the grill without thawing can cause uneven cooking. Let the pizza sit at room temperature for a few minutes. This helps the cheese melt properly and crust to cook evenly.
Using High Flames Without Control
High flames can burn toppings and crust quickly. Keep the flames low to medium. Control heat by adjusting grill vents or burner settings for steady cooking.
Frequently Asked Questions
Can You Grill Frozen Pizza Without Thawing It First?
Yes, you can grill frozen pizza directly. Preheat the grill and cook on medium heat. This keeps the crust crispy and cheese melted perfectly.
What Grill Settings Work Best For Frozen Pizza?
Use medium heat with indirect grilling to avoid burning. Close the lid for even cooking and check frequently to prevent overcooking.
How Long Does It Take To Grill Frozen Pizza?
Grilling frozen pizza typically takes 10 to 15 minutes. Cook until the crust is golden and cheese is bubbly and melted.
Should You Use A Pizza Stone On The Grill?
Using a pizza stone helps distribute heat evenly. It prevents burning and gives the crust a nice, crispy texture when grilling frozen pizza.
Conclusion
Grilling frozen pizza is simple and quick. You get a crispy crust and melted cheese every time. Just follow the steps carefully to avoid burning. This method saves time and adds a smoky flavor. Perfect for busy days or outdoor meals.
Try it once, and you might prefer grilling over the oven. Enjoy your pizza with friends or family anytime. Keep practicing to find the best grill settings for you. Cooking frozen pizza on the grill is a fun, tasty choice.

Hi, I’m Daniel Brooks—a food lover and kitchen gear enthusiast. I enjoy testing cookware, utensils, and gadgets to see what really works in everyday cooking. At PlugChef.com, I share honest reviews, comparisons, and simple guides to help you choose the best tools for a safer, smarter, and more enjoyable kitchen.
Related posts:
 What Type of Cooking Utensils are Safe: Expert Picks
 What Innovations Could Blenders Make: Unleashing Future Tech
 Smart Strategies to Organize a Small Kitchen: Maximize Space
 How to Organize a Kitchen Cabinet: Expert Tips & Tricks
 How to Organize Kitchen Drawers: Expert Tips and Tricks
 How to Organize a Corner Kitchen Cupboard: Expert Tips

