
Are you tired of scrubbing your grill for hours, only to find stubborn grease and burnt-on food still stuck? What if there was a simple trick to make cleaning your grill as easy as cleaning your oven?
Using oven cleaner on a grill might sound unusual, but it could save you time and effort. You’ll discover how this method works, what to watch out for, and tips to get your grill sparkling clean without damaging it. Keep reading—you’re about to unlock a powerful cleaning secret that will change the way you care for your grill forever.

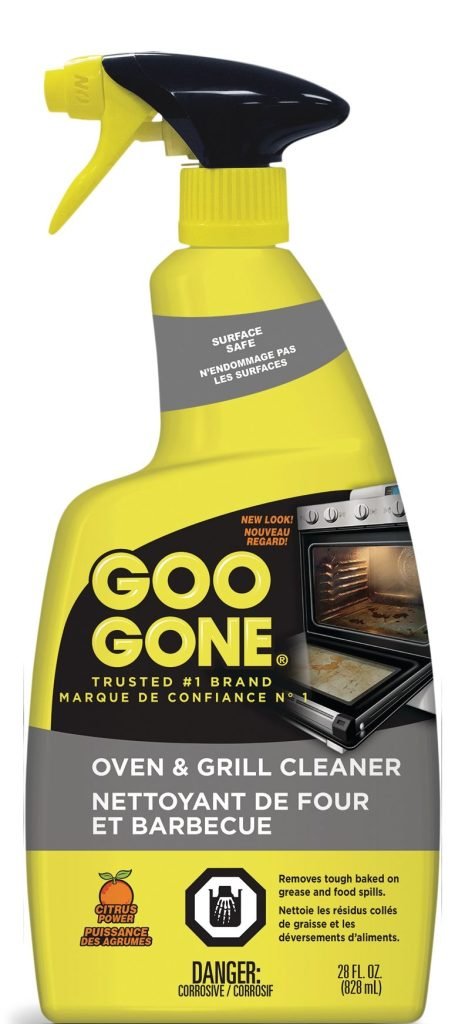
Credit: www.amazon.ca
Choosing The Right Oven Cleaner
Choosing the right oven cleaner for your grill is important for easy and effective cleaning. The right product removes grease and grime without damaging your grill. It also keeps your cooking surface safe and ready for use. Knowing the types of cleaners and their safety helps you pick the best one. There are options that suit different needs and preferences.
Types Of Oven Cleaners
- Spray Cleaners:Easy to use and good for light dirt.
- Gel Cleaners:Stick to surfaces and work well on tough stains.
- Foam Cleaners:Expand to cover large areas and remove grease.
- Natural Cleaners:Made from safe, non-toxic ingredients for gentle cleaning.
Safety Considerations
Choose cleaners that do not release harmful fumes. Look for products labeled safe for grills and food surfaces. Avoid cleaners with harsh chemicals like ammonia or bleach. Use gloves and ensure proper ventilation during cleaning. Test the cleaner on a small area first to check for damage.
Eco-friendly Options
Eco-friendly cleaners use biodegradable ingredients. They reduce pollution and are safer for your health. Many are free from harsh chemicals and synthetic fragrances. These options work well on grease and burnt food. They protect the environment while keeping your grill clean.

Credit: www.walmart.ca
Preparing Your Grill For Cleaning
Getting your grill ready for cleaning is a crucial step that many overlook. Proper preparation makes the cleaning process more effective and safer for you and your equipment. Taking time to prepare helps avoid damage and ensures every part gets the attention it needs.
Removing Grates And Parts
Start by carefully taking out the grates, burners, and any removable parts from your grill. These pieces often hold the most grease and food residue, so cleaning them separately is essential. Handle them gently to avoid bending or breaking, especially if they are cast iron or ceramic-coated.
Have you ever tried scrubbing stubborn grime while the parts are still attached? It’s frustrating and less effective. Removing these components allows you to soak and scrub them thoroughly, improving your grill’s overall cleanliness.
Pre-cleaning Steps
Before applying any oven cleaner, wipe down loose debris with a dry cloth or brush. This helps the cleaner focus on tough stains rather than dirt that can be easily removed. You might also want to heat the grill slightly to loosen grease, but be sure it’s cool enough to handle safely.
Consider testing the cleaner on a small, hidden area first. This quick check can prevent damage or discoloration on your grill’s surface. What’s the point of a deep clean if the finish gets ruined?
Protecting Surrounding Areas
Oven cleaners can be harsh and may damage surfaces near your grill. Lay down old newspapers or plastic sheets around the grill to catch drips and overspray. Cover nearby plants or furniture to prevent accidental harm.
Have you ever cleaned your grill only to find spots on your patio or deck afterward? Taking a few minutes to protect these areas saves a lot of cleanup stress later. Your outdoor space deserves just as much care as your grill.
Applying Oven Cleaner To The Grill
Oven cleaner removes tough grease and grime from grill surfaces quickly. Apply it carefully, avoiding burners and controls to protect them. Let it sit for a few minutes before scrubbing for best results.
Applying oven cleaner to your grill is a straightforward process, but it’s essential to do it correctly to ensure the best results. Whether you’re tackling a greasy barbecue or a neglected grill, using oven cleaner can make a daunting task much easier. But how can you apply it without causing damage or making a mess?Proper Application Techniques
Begin by making sure your grill is completely cool. This ensures that the cleaner can work effectively without evaporating or causing harmful fumes. Spray the oven cleaner evenly across the grill grates, ensuring you cover all areas where grease and grime have built up. Let it sit for the time recommended on the cleaner’s packaging, usually around 15-20 minutes, to allow the chemicals to break down the baked-on residues. Rinse thoroughly with a garden hose or a bucket of water, ensuring all cleaner residue is washed away. A quick rinse might leave behind cleaner, which could affect the taste of your food the next time you grill.Avoiding Damage To Grill Components
It’s crucial to check the cleaner’s compatibility with your grill material. Some oven cleaners can be harsh on stainless steel or painted surfaces. Always test a small, inconspicuous area before applying it to the entire grill. This precaution can save you from unwanted discoloration or corrosion. Avoid using oven cleaner on heating elements or electronic parts of the grill. These components can be delicate, and the cleaner might damage them, leading to costly repairs.Recommended Tools And Accessories
Having the right tools can make the cleaning process smoother and more effective. A good quality wire brush is essential for scrubbing off loosened grime after the cleaner has done its job. Opt for a brush with a long handle to keep your hands away from any cleaner residue. Consider using protective gloves and safety goggles to protect your skin and eyes from the chemicals in the oven cleaner. Lastly, keep some old newspapers or a drop cloth handy to protect your patio or deck from any drips or splashes during the cleaning process. Do you have a favorite tool or technique for cleaning your grill? Share it in the comments below!Letting The Cleaner Work
After applying oven cleaner to your grill, patience becomes your best tool. Letting the cleaner work allows it to break down grease and burnt-on food effectively. Rushing this step can mean more scrubbing later, so understanding the right waiting period and what to look for can save you effort and time.
Optimal Waiting Times
Most oven cleaners need at least 15 to 30 minutes to start dissolving grime. Some tougher stains might require waiting up to an hour. However, leaving the cleaner on for too long can damage certain grill surfaces—so check the product instructions carefully.
Think about the last time you cleaned your grill quickly and still had to scrub hard spots. Giving the cleaner enough time reduces that struggle. Have you ever noticed how a little extra wait makes wiping so much easier?
Signs The Cleaner Is Effective
You’ll often see the grime darken or bubble as the cleaner breaks it down. This reaction is a good indicator that the product is working. If the surface starts to look wet and slick instead of dry and crusty, that’s another positive sign.
If you don’t see any change after the suggested wait, the cleaner might not be strong enough, or the stain could be especially stubborn. In that case, consider reapplying or switching to a specialized formula. How often do you check these signs before scrubbing?
Handling Stubborn Stains
For tough, baked-on grease, sometimes one application isn’t enough. You can use a nylon scrubber or a plastic scraper to gently lift softened residue after the cleaner has worked. Avoid metal tools that could scratch your grill’s surface.
Spraying a little more cleaner and letting it sit again can also help break down stubborn spots. Sometimes, a second round of treatment is the key to making your grill look almost new. What’s your go-to technique for those difficult stains?
Scrubbing And Rinsing
Scrubbing and rinsing are key steps in cleaning a grill after applying oven cleaner. These steps remove grease, burnt food, and cleaning chemicals. Proper scrubbing loosens grime without damaging the grill surface. Rinsing washes away all residues for safe cooking later. Both actions help maintain grill performance and hygiene.
Choosing The Right Scrubbing Tools
Pick tools that clean well but do not scratch. Soft brushes or sponges work best on grill surfaces. Avoid steel wool as it may damage the finish. Nylon scrubbers remove grime without leaving marks. Use a scraper for tough spots but gently. Gloves protect your hands during scrubbing.
Safe Rinsing Methods
Use warm water to rinse the grill after scrubbing. A hose with moderate pressure washes off cleaning chemicals effectively. Avoid high pressure that may push residue into hard-to-reach places. Rinse multiple times to ensure all cleaner is gone. Dry the grill with a clean cloth to prevent rust.
Ensuring No Residue Remains
Residue can affect taste and safety during cooking. Check grill surfaces closely after rinsing. Run your hand over the grill to feel for slick or sticky spots. Repeat scrubbing and rinsing if residue is present. Proper cleaning makes every barbecue healthy and tasty.

Credit: www.youtube.com
Post-cleaning Maintenance
Proper post-cleaning maintenance keeps your grill in top shape. It extends the life of your appliance and ensures better cooking results. Taking time to dry and reassemble your grill after cleaning prevents rust and damage.
Drying And Reassembling The Grill
After cleaning, wipe the grill with a dry cloth to remove moisture. Leave it open for a while to air dry completely. Make sure all parts are dry before putting them back together. Assemble the grill carefully, checking that each piece fits properly. This helps avoid damage and keeps your grill ready for the next use.
Regular Cleaning Tips
Clean your grill regularly to stop grease and grime buildup. Use a soft brush or cloth to wipe surfaces after every use. Avoid harsh chemicals that may harm grill components. Check burners and trays often to remove food particles. Small, frequent cleanings reduce the need for deep scrubbing later.
Preventing Future Buildup
Prevent buildup by covering the grill when not in use. Use a grill cover that fits well and protects from dust and rain. Avoid letting food and grease sit on the grill for long. Try to clean spills quickly before they harden. Keeping the grill dry and clean stops rust and keeps it working well.
Alternative Cleaning Methods
Cleaning your grill doesn’t always mean reaching for harsh oven cleaners. There are alternative methods that can keep your grill spotless without damaging its surface or leaving behind strong chemical smells. These options can be gentler, effective, and sometimes even better for your health and the environment.
Natural Cleaning Solutions
Natural ingredients like baking soda, vinegar, and lemon juice can do wonders on grill grime. Mix baking soda with water to form a paste and apply it to stubborn spots. Let it sit for 15-20 minutes, then scrub with a brush or sponge.
Vinegar’s acidity helps break down grease quickly. Spray it directly on the grill grates and wipe off with a cloth. Lemon juice works similarly and leaves a fresh scent behind.
Have you ever tried these simple kitchen staples for cleaning? You might be surprised how much they can replace store-bought cleaners.
Using Grill-specific Cleaners
Grill-specific cleaners are formulated to tackle the unique buildup on grills without harming the metal. These products often contain ingredients tailored to remove carbon and grease efficiently.
Look for cleaners labeled as safe for stainless steel or cast iron, depending on your grill type. They usually require less scrubbing, saving you time and effort.
Choosing a cleaner designed for grills can prevent damage that oven cleaners might cause. It’s worth investing in a product made for the job to protect your equipment.
Steam And Heat Cleaning
Using steam or heat can loosen tough grime without chemicals. Heat your grill to a high temperature and then use a damp cloth or brush to wipe away softened residue.
Alternatively, a handheld steam cleaner can reach into corners and grills, blasting away dirt with hot steam. This method sanitizes while it cleans.
Have you noticed how heat changes the texture of grease? It becomes easier to remove, making your cleaning less of a chore.
Troubleshooting Common Issues
Cleaning your grill with oven cleaner can sometimes lead to unexpected challenges. These common issues can slow down your cleaning process or even cause damage if not handled properly. Let’s address some typical problems and how you can fix them effectively.
Removing Rust And Corrosion
Rust on your grill can be stubborn and frustrating. Oven cleaner helps break down grease but isn’t always enough to tackle rust spots.
Try scrubbing affected areas with a mixture of baking soda and water to create a mild abrasive paste. Apply it gently with a non-metal brush to avoid scratching the metal surface.
Have you noticed that rust often forms after using harsh cleaners? It’s a sign to rinse thoroughly and dry your grill completely after cleaning to prevent future corrosion.
Dealing With Persistent Odors
Strong odors can linger after using oven cleaner on your grill, making your food taste off. This usually happens because the cleaner’s residue isn’t fully removed.
Rinse your grill multiple times with warm water and mild soap. Then, heat the grill for 10-15 minutes to burn off any leftover cleaner particles.
If odors persist, wipe the surface with white vinegar. This natural deodorizer neutralizes chemical smells and is safe for your grill.
Avoiding Damage During Cleaning
Oven cleaners are powerful but can damage your grill’s finish if used carelessly. Always check the product label to ensure it’s safe for your grill’s material.
Wear gloves and work in a well-ventilated area to protect yourself. Avoid letting the cleaner sit too long; follow the recommended time closely.
Have you ever seen discoloration or peeling after cleaning? That’s a sign to switch to gentler products or methods next time to protect your grill’s longevity.
Frequently Asked Questions
Can I Use Oven Cleaner On A Grill Safely?
Yes, oven cleaner can be used on grills but with caution. Avoid contact with heating elements and rinse thoroughly after use to prevent chemical residue on cooking surfaces.
How To Apply Oven Cleaner On Grill Grates?
Spray oven cleaner evenly on cool grill grates. Let it sit for 10-15 minutes to break down grease. Scrub with a grill brush and rinse well with water.
Is Oven Cleaner Effective For Removing Grill Grease?
Oven cleaner is highly effective at dissolving stubborn grease and burnt residues on grills. It penetrates tough grime, making scrubbing easier and results cleaner.
Can Oven Cleaner Damage My Grill Surface?
Oven cleaner may damage some grill surfaces, especially painted or coated ones. Always check manufacturer guidelines and test a small area first to avoid corrosion or discoloration.
Conclusion
Cleaning your grill with oven cleaner saves time and effort. It removes tough grease and burnt food easily. Always follow safety steps to protect your hands and grill parts. Rinse the grill well after cleaning to avoid chemical taste. Regular cleaning keeps your grill ready for tasty meals.
Try oven cleaner carefully for a shiny, clean grill surface. A clean grill means better cooking and great flavors every time.

I’m Abby Lu, a passionate home cook who loves simplifying everyday meals. At PlugChef.com, I share product reviews and cooking guides to help you find the best tools for your kitchen.
Related posts:
 What Type of Cooking Utensils are Safe: Expert Picks
 What Innovations Could Blenders Make: Unleashing Future Tech
 Smart Strategies to Organize a Small Kitchen: Maximize Space
 How to Organize a Kitchen Cabinet: Expert Tips & Tricks
 How to Organize Kitchen Drawers: Expert Tips and Tricks
 How to Organize a Corner Kitchen Cupboard: Expert Tips

