
A burn pot is the core combustion chamber in pellet grills and stoves, where compressed wood pellets are ignited to generate heat for cooking or home heating. Over time, ash, tar, and hardened ash lumps called clinkers build up inside the pot, clogging air holes, reducing airflow, and causing inconsistent temperatures, excess smoke, and wasted fuel. Neglecting burn pot maintenance can also lead to premature wear on internal components like the auger and igniter, leading to costly repairs. This guide outlines simple, step-by-step methods to clean your burn pot quickly, plus safety tips and maintenance hacks to keep your grill or stove running like new for years. Always refer to your manufacturer’s manual first for model-specific guidance, as burn pot designs vary across brands.
Why Burn Pot Maintenance Is Non-Negotiable
When a burn pot is clogged with ash and residue, airflow to the combustion chamber is restricted, leading to incomplete pellet combustion. This not only causes temperature swings that ruin cooks on pellet grills, but also increases fuel waste by burning pellets inefficiently. In practice, a neglected burn pot is one of the most common causes of pellet grill performance issues, and a 10-minute routine clean after every few uses eliminates most problems before they start. For evidence-based maintenance protocols for pellet-burning appliances, consult the University of Minnesota Extension’s pellet stove care guidelines.
 Image source: food52.com
A clean, ash-free burn pot ensures even heat distribution for consistent cooking results.
Image source: food52.com
A clean, ash-free burn pot ensures even heat distribution for consistent cooking results.
Pre-Cleaning Safety and Prep
Cool-Down Protocol
Never attempt to clean a burn pot while it is still warm. Residual heat stored in the metal can cause serious third-degree burns even hours after use. Wait at least 2 hours after your last cook, unplug the grill entirely to avoid accidental ignition, and touch the burn pot gently to confirm it is completely cool to the touch before proceeding. Lay down a drop cloth or old newspaper under the grill to catch falling ash, and work in a well-ventilated area (preferably outdoors) to avoid inhaling fine ash particles that can irritate your lungs.
Essential Protective Gear
Skip cheap cotton work gloves—use heat-resistant gloves rated for high temperatures to protect your hands from sharp ash clinkers and any residual heat. Wear safety glasses with side shields to guard your eyes from flying debris, and use an N95 mask if you have asthma or other respiratory sensitivities. A common mistake many grill owners make is skipping eye protection, which can lead to painful eye irritation from fine ash dust.
Step-by-Step Burn Pot Cleaning Process
Step 1: Remove Loose Ash and Debris
If your grill has a removable burn pot, slide it out of its compartment and carry it to a well-ventilated outdoor area for cleaning. If the burn pot is fixed, use a small metal ash scoop to remove bulk ash from the pot first. Use a set of stiff-bristled cleaning brushes to sweep all loose ash from the pot walls, bottom, and small air holes around the edges. Finish by using an ash-rated vacuum (never a standard shop vac, which can ignite fine ash and cause a fire) to suction every remaining speck of dust from corners and perforations. A common oversight is missing the small air holes, which clog quickly and cause airflow issues later.
Step 2: Soak and Loosen Stuck-On Residue
For heavy tar, hardened ash, or stuck clinkers, fill a plastic tub with warm water and ½ cup of white vinegar (avoid harsh oven cleaners, which can corrode the burn pot’s metal coating and leave toxic residues that transfer to food). Submerge the burn pot and let it soak for 30–45 minutes; for extra stuck buildup, add 1 tablespoon of baking soda to the solution to break down mineral deposits. If the burn pot is too large to submerge, soak a clean rag in the solution and lay it over the affected areas for 20 minutes. Note: never soak aluminum burn pots for more than 1 hour, as prolonged water exposure can cause corrosion.
Step 3: Scrub Away Buildup and Clinkers
Drain the soaking solution, then use a stiff wire brush for steel burn pots or a nylon brush for coated/aluminum burn pots to scrub in circular motions, focusing on clogged air holes and areas with thick residue. For stubborn clinkers, first use a plastic putty knife to avoid scratching the pot’s surface, then a metal scraper if needed. For tough spots, a heavy-duty scrub brush will lift residue without damaging the metal. Avoid using excessive force, as burn pots are made of thin metal that can warp easily. If clinkers are extremely hardened, tap them lightly with a rubber mallet to break them apart before scraping.

Step 4: Rinse, Dry, and Reassemble
Rinse the burn pot thoroughly with clean water to remove all soap, vinegar, and loosened debris. Dry it completely with a lint-free cloth, or let it air dry in direct sunlight for 15 minutes to prevent rust. If you notice minor rust spots, wipe them with a small amount of vegetable oil to stop corrosion from spreading. Slide the burn pot back into its compartment, ensuring it sits flush against the burner assembly, then reconnect power to the grill. Run the grill on high for 10 minutes with the lid open before your next cook to burn off any remaining residue and test for proper airflow.
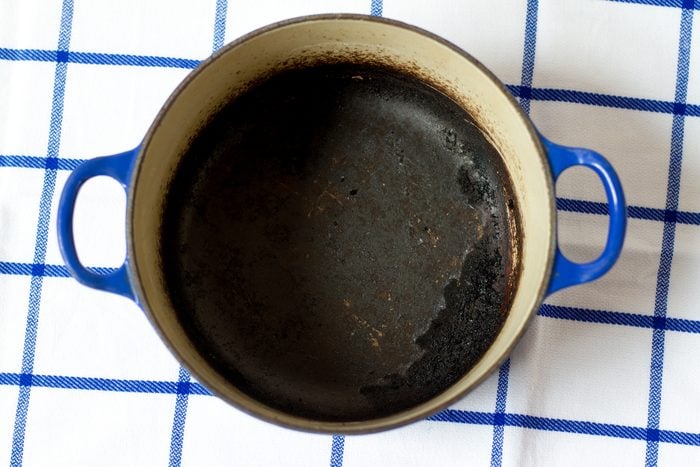 Image source: www.rd.com
A properly reinstalled burn pot sits flush against the grill's combustion chamber for optimal airflow.
Image source: www.rd.com
A properly reinstalled burn pot sits flush against the grill's combustion chamber for optimal airflow.
Common Burn Pot Issues and Quick Fixes
Even with regular cleaning, you may run into occasional burn pot problems. Here are the most common issues and how to fix them:
- Clogged air holes: Clear individual holes with a small paperclip or wire after cleaning to restore proper airflow. Clogged holes are the #1 cause of inconsistent temperatures on pellet grills.
- Persistent clinker formation: Switch to 100% hardwood pellets, which produce far less ash and tar than softwood or blended options. Clinkers often form when low-quality pellets are used consistently.
- Rust spots: Dry the burn pot thoroughly after every cleaning, and apply a thin layer of cooking oil after deep cleans to create a moisture barrier. Never leave the burn pot exposed to rain or snow when the grill is not in use.
- Excess smoke during cooking: Usually caused by leftover residue or a clogged air hole. Run the grill on high for 10–15 minutes with the lid open to burn off any remaining debris before cooking. To reduce fire risk during cleaning and use, follow the NFPA’s outdoor grilling safety recommendations.
Pro Tips to Reduce Cleaning Frequency
Regular cleaning is the best way to avoid stubborn buildup, but these small habits will cut down on how often you need to deep clean your burn pot:
- Stick to a cleaning schedule: Clean the burn pot after every 3–4 uses for casual grillers, and after every 1–2 uses for frequent users (3+ cooks per week). Waiting too long allows ash to harden into clinkers that are far harder to remove.
- Use high-quality pellets: In practice, 100% hardwood pellets produce significantly less ash and tar than softwood or blended options, reducing cleaning frequency for many users.
- Keep a small multi-surface cleaning brush on hand to wipe down the burn pot edges after each use, removing loose ash before it hardens.
- Avoid overfilling your grill’s hopper, which can cause pellets to sit for long periods and produce excess ash. Empty leftover pellets from the hopper if you won’t use the grill for more than a week.
- After deep cleaning, apply a thin layer of cooking oil to the burn pot surface with a long-handled cleaning brush to create a barrier against rust and make future cleaning easier.
Frequently Asked Questions
How often should I clean my burn pot?
For casual grillers (1–2 cooks per week), clean the burn pot every 3–4 uses. For frequent users (3+ cooks per week), clean it after every 1–2 uses. If you notice inconsistent temperatures, excess smoke, or hard clinkers forming, clean it immediately regardless of your schedule. Waiting too long allows ash to harden, making cleaning far more time-consuming.
What tools do I need to clean a burn pot?
At minimum, you’ll need heat-resistant gloves, safety glasses, a stiff wire or nylon brush (matched to your burn pot’s material), a plastic or metal scraper, an ash-rated vacuum, and a small metal ash scoop. For deep cleans, add white vinegar, baking soda, and a plastic tub for soaking.
Can I use water to clean the burn pot?
Yes, but only after the burn pot is completely cool. Avoid spraying hot metal with cold water, as this can warp the metal. For routine cleaning, dry methods (brushing and vacuuming) are preferred to prevent rust. If you do use water, dry the burn pot thoroughly immediately after rinsing.
How do I remove stubborn clinkers from the burn pot?
Soak the burn pot in warm vinegar solution for 45 minutes to loosen clinkers, then gently scrape with a plastic putty knife to avoid scratching. For extremely stubborn clinkers, tap them lightly with a rubber mallet to break them apart before scraping. Never use power tools like angle grinders, as they can damage the burn pot and create sparks that pose a fire risk.
Can I use oven cleaner on my burn pot?
No. Most oven cleaners contain harsh lye or ammonia that can corrode the burn pot’s metal coating, leave toxic residues that transfer to food, and damage your grill’s internal components. Stick to mild soap, white vinegar, or cleaners specifically approved by your grill’s manufacturer.
Why is my grill producing excess smoke after cleaning the burn pot?
This is usually caused by leftover cleaning residue or a clogged air hole. Run the grill on high for 10–15 minutes with the lid open to burn off any remaining residue before cooking. If the smoke persists, check that the burn pot is seated correctly and clear any clogged air holes with a small wire.
Conclusion
Regular burn pot cleaning is one of the easiest ways to extend the life of your pellet grill or stove, improve cooking results, and reduce fuel costs. The entire process takes just 10–15 minutes when done regularly, and avoids the hassle of chipping away at hardened clinkers and dealing with inconsistent temperatures mid-cook. By following the safety steps and maintenance tips outlined above, you’ll keep your burn pot in sparkling condition for years of reliable use. For more grill maintenance tips and reviews of the best cleaning tools for your outdoor cooking setup, check out our full library of grill care guides and product reviews.

I’m Abby Lu, a passionate home cook who loves simplifying everyday meals. At PlugChef.com, I share product reviews and cooking guides to help you find the best tools for your kitchen.
Related posts:
 Hawaiian Roll Ground Beef Sliders: Irresistible Party Bites
 Good Sides With Beef Tenderloin: Perfect Pairings for Gourmet Meals
 Navy Bean And Ham Recipes: Delicious Comfort Food Ideas
 Birria Tacos in Pressure Cooker: Easy, Flavorful, and Fast Recipe
 Can Yogurt Replace Sour Cream: Delicious & Healthier Swap Guide
 Cheesy Potatoes on the Grill: Irresistible Summer Side Dish

