
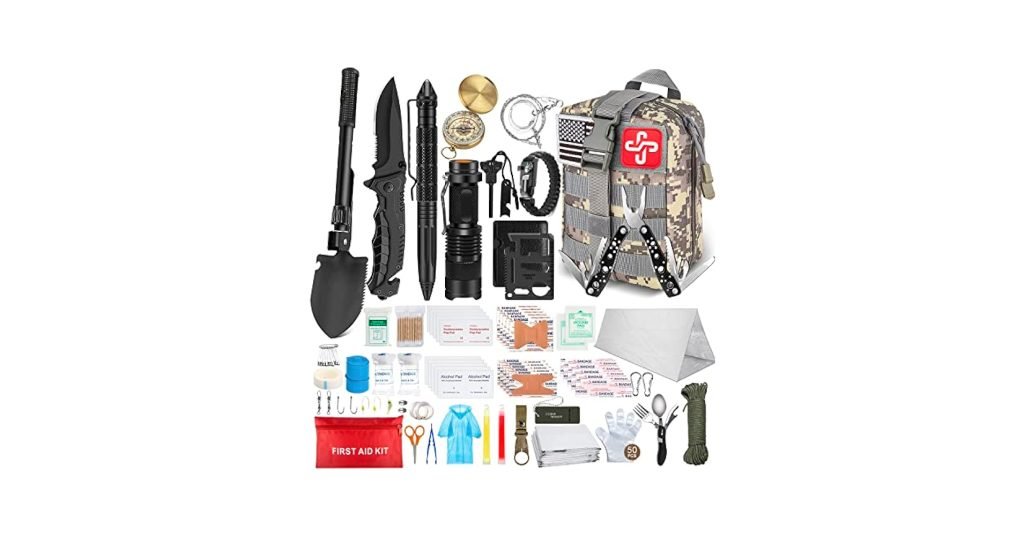
The zombie apocalypse may be a pop-culture fantasy, but building a dedicated first aid kit for extreme collapse scenarios is a practical way to master real emergency skills that apply to hiking accidents, natural disasters, and any situation where professional medical help is hours or days away. A standard household first aid kit is designed for minor cuts and scrapes when 911 is just 10 minutes away—but in a high-risk, low-resource scenario, you need supplies that address severe bleeding, life-threatening infection, and environmental illness, plus the knowledge to use them under pressure.
This guide breaks down exactly what to pack in your zombie apocalypse first aid kit, why each item matters, common prepper mistakes to avoid, and how to maintain your kit so it’s ready when you need it most. We’ll cover both must-have medical supplies and paired survival gear to keep you safe, no matter what threats you face.
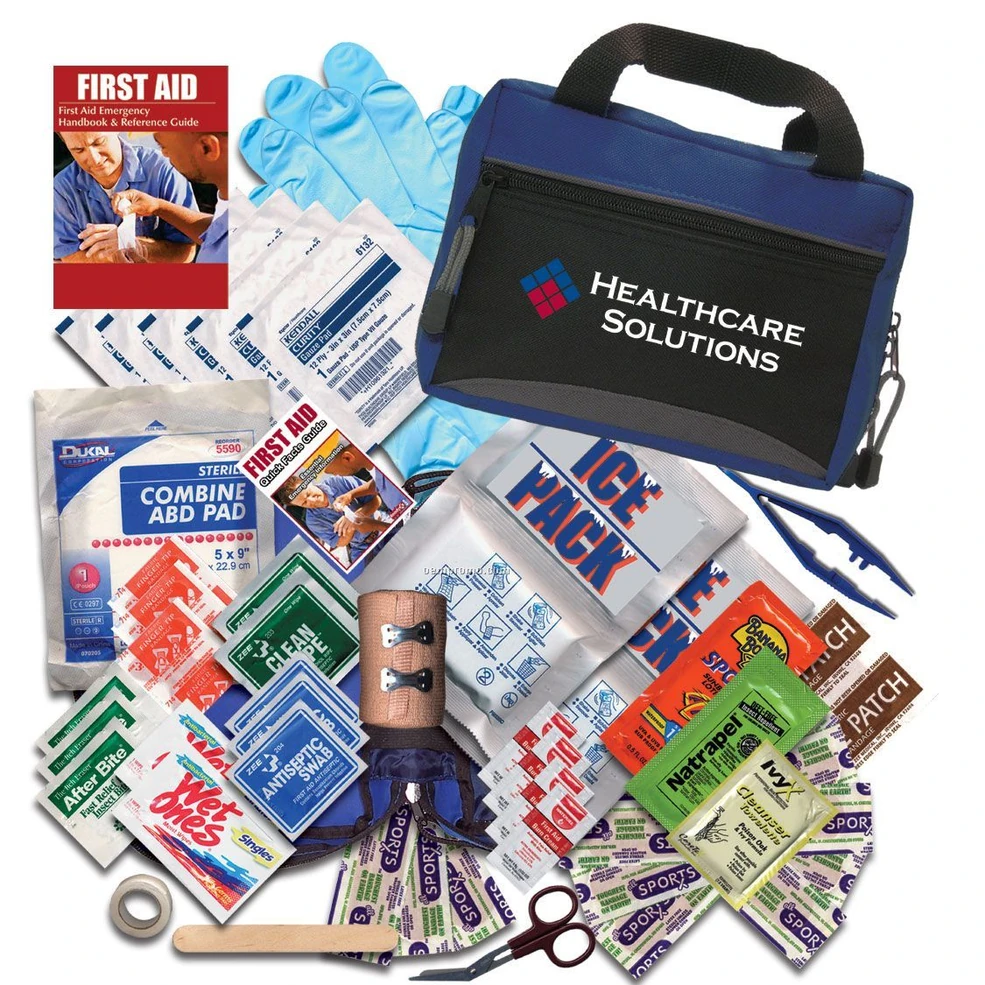 A well-organized kit sorted by use case lets you find supplies in seconds during a crisis.
Credit: zombie.fandom.com
A well-organized kit sorted by use case lets you find supplies in seconds during a crisis.
Credit: zombie.fandom.com
Why a Dedicated Zombie Apocalypse First Aid Kit Differs From a Standard Household Kit
Generic first aid kits are built for low-severity injuries in controlled environments, but a collapse scenario introduces unique, high-mortality risks that standard supplies can’t address. You may be days or weeks away from a pharmacy or hospital, so you need items that treat severe trauma, prevent infection from unsanitary conditions, and manage chronic health issues without access to regular care. Unlike a basic kit, a zombie apocalypse-focused pack also pairs medical supplies with survival gear to mitigate environmental threats like contaminated water, exposure, and foodborne illness that can incapacitate you as quickly as a physical injury.
The biggest gap in most prepper first aid kits is a lack of training: a 2023 survey of outdoor enthusiasts found that 68% of people who carried a first aid kit had never practiced using a tourniquet or cleaning a deep wound, rendering their supplies useless in a real crisis. This guide addresses both the what and the how of kit building, so you’re prepared to act when it counts.
Core First Aid Supplies (Expanded Beyond the Basics)
Start with a foundation of medical supplies that address the most common life-threatening injuries in a collapse scenario: severe bleeding, infection, and environmental illness.
Wound Care Essentials
Stock these items to treat everything from minor scrapes to deep puncture wounds (the most common injury from zombie encounters or accidents in debris-filled environments):
- Assorted adhesive bandages (waterproof and fabric varieties, in multiple sizes)
- Sterile gauze pads (4×4 and 5×9 for larger wounds)
- Hypoallergenic medical tape (for securing dressings without irritating sensitive skin)
- Wound closure strips (for small lacerations that don’t require sutures)
- Antibiotic ointment (prevents infection in minor cuts and abrasions)
- Burn gel packets (for treating thermal burns from fires or explosions)
- Elastic bandages (for sprains and compression on bleeding wounds)
- A high-quality tourniquet (CAT or SOF-T style, for life-threatening limb bleeding—note that these require formal training to use correctly; evidence-based first aid protocols from the American Red Cross offer step-by-step guidance for safe application)
Infection Prevention Supplies
Infection is the leading cause of preventable death in low-resource scenarios, so prioritize items that block the spread of germs:
- Alcohol-free antiseptic wipes (for cleaning open wounds without damaging healthy tissue)
- Povidone-iodine swabs (for disinfecting skin and tool surfaces)
- Disposable nitrile gloves (multiple pairs in sizes M and L, for protecting yourself and injured people from bloodborne pathogens)
- Face shields (for CPR or treating bite wounds, to avoid exposure to saliva splatter)
- 60%+ alcohol hand sanitizer (for use when you can’t wash your hands with soap and water)
- A small bottle of disinfectant spray (for cleaning tools and surfaces)
Over-the-Counter Medications
Expand beyond basic pain relievers to address the most common non-injury health risks in a collapse:
- Ibuprofen and acetaminophen (for pain, fever, and inflammation)
- Antihistamines (for allergic reactions to insect bites, food, or toxic plants)
- Anti-diarrheal medication (loperamide, critical for preventing dehydration from bad water or spoiled food)
- Electrolyte tablets (to replace salts lost from sweating, illness, or dehydration)
- A 3-6 month extra supply of any personal prescription medications (insulin, inhalers, heart medication, etc.) if you have a chronic condition
Long-Term Wound Care Items
Add these supplies to manage injuries when you can’t access professional medical care for days or weeks:
- Sterile wound packing gauze (for deep puncture wounds like bites, to stop bleeding and prevent infection)
- Medical-grade super glue (for temporary closure of small, clean cuts)
- A small magnifying glass (to inspect wounds for embedded debris or signs of infection)
- Butterfly closure strips (for holding deep lacerations closed while they heal)
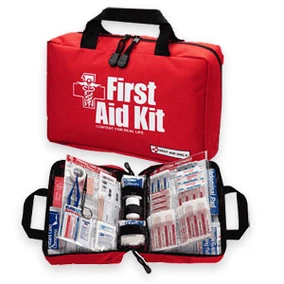 Even a basic first aid kit is useless if you don’t know how to use its contents under pressure.
Credit: zombie.fandom.com
Even a basic first aid kit is useless if you don’t know how to use its contents under pressure.
Credit: zombie.fandom.com
Zombie-Specific Medical Gear (No Fake Science, Just Real Risk Mitigation)
While there is no proven real-world treatment for fictional zombie viruses, bite and scratch injuries from encounters carry very real, high-stakes medical risks: human and animal saliva contains bacteria that cause severe cellulitis, sepsis, and tissue death if wounds are not cleaned and cared for properly. These supplies address those actual risks, not pop-culture tropes.
Bite and Scratch Treatment Tools
Prioritize items that let you clean and treat contaminated wounds quickly:
- Heavy-duty pointed tweezers (for removing embedded debris, broken teeth, or saliva-contaminated material from wounds)
- A sterile irrigation syringe (for flushing deep puncture wounds with clean water or antiseptic solution)
- Waterproof occlusive dressings (to keep bites covered and prevent further contamination)
- Extra-strength pain relievers (for the intense pain of deep puncture wounds)
Infection Mitigation Supplies
A common mistake preppers make is assuming a zombie bite is automatically fatal—prompt wound care reduces infection risk by 80% per standard emergency medical guidelines. Include:
- Broad-spectrum antibiotic ointment (for topical use on all open wounds)
- If you have a healthcare provider’s approval for emergency prescription antibiotics, a 7-10 day course of broad-spectrum oral antibiotics to treat early signs of wound infection. Never use prescription medications without medical supervision, but a supply is a common precaution for people with high infection risk (e.g., immunocompromised individuals).
- A small supply of sterile saline solution (for rinsing wounds without irritating damaged tissue)
Personal Protective Equipment (PPE)
Treating injured people (or yourself) exposes you to blood, saliva, and other bodily fluids that can carry disease. Pack:
- Disposable nitrile gloves (enough for 10+ treatments, as you will need to change them between each patient)
- A disposable face shield or N95 mask (for protection against saliva splatter when treating bite victims, or airborne pathogens in contaminated environments)
- A disposable gown or heavy-duty trash bag (to protect your clothes from bodily fluids)
Essential Survival Tools to Pair With Medical Supplies
Medical supplies alone won’t keep you alive in a collapse scenario. Pair them with basic survival gear to mitigate environmental risks that lead to injury or illness.
Multi-Function Tools
A reliable multi-tool is one of the most versatile items in your kit: use it to cut bandages, open food rations, repair shelter, or remove splinters and debris from wounds. Opt for a reputable brand with a knife, scissors, pliers, and can opener to cover most use cases. A compact fixed-blade knife is also useful for heavier cutting tasks, and a ferro rod or lighter lets you sterilize tools, boil water, or signal for help. When maintaining your cutting tools for long-term use, properly maintained cutting tools will hold up better under heavy stress than cheap, unsharpened alternatives.
Water Purification and Hydration Supplies
Contaminated water is one of the leading causes of preventable illness in collapse scenarios, causing diarrhea, vomiting, and dehydration that can incapacitate you in 12-24 hours. Pack:
- A portable water filter (removes 99.9% of bacteria and parasites from natural water sources)
- Water purification tablets (iodine or chlorine dioxide, for backup if your filter breaks)
- A collapsible 2-4 liter water container (for storing and transporting clean water)
- Electrolyte tablets (to replace salts lost from sweating or illness) The CDC recommends storing 1 gallon of water per person per day for drinking and sanitation in emergency scenarios. If you’re stockpiling large volumes of emergency water, large-capacity water storage containers are a durable, food-safe option that works for both water and dry rations.
Shelter and Environmental Protection
Exposure, sunburn, and insect bites can weaken your immune system and make you more vulnerable to infection, even if you avoid direct injury. Pack:
- An emergency blanket (lightweight, retains 90% of body heat to prevent hypothermia)
- A compact tarp (for rain shelter or ground cover to keep you dry)
- Insect repellent (to prevent bug bites that can carry disease)
- Broad-spectrum sunscreen (sunburn impairs your body’s ability to fight infection) If you’re storing non-perishable food rations to keep with your kit, compartmentalized food storage lets you sort rations by type and keep them protected from moisture and pests.
Triage Basics for Collapse Scenarios
If you’re caring for yourself or a group with limited supplies, you need to prioritize care to conserve resources and save the most lives. Follow this simple triage framework, which is taught in all certified first aid courses:
- Check for life-threatening bleeding first: Severe arterial bleeding can cause death in 3-5 minutes. Apply direct pressure or a tourniquet (if trained) to any uncontrolled bleed before addressing less severe injuries.
- Check airway and breathing: If someone isn’t breathing, perform CPR if you’re trained, using a CPR mask to avoid direct contact.
- Treat for shock: Keep injured people warm, lying down, and hydrated to prevent organ failure from blood loss or infection.
- Prioritize treatable injuries: If you have limited supplies, focus on injuries you can actually treat, rather than fatal injuries that would waste limited resources.
The best first aid kit in the world is only as useful as your ability to use it—sign up for a certified first aid course this month to practice life-saving skills before you need them.
Storage and Portability: Making Your Kit Accessible When It Matters Most
A kit that’s too heavy, disorganized, or hard to reach is useless in a crisis. Optimize your pack for speed and ease of use.
Choosing the Right Container
Pick a container that matches your use case:
- A hard-sided waterproof case is best for home or vehicle caches, as it protects fragile supplies from impacts, dust, and water damage.
- A MOLLE-compatible pouch is best for carrying on your person while moving, as it attaches to a backpack or belt for fast access without removing your pack. If you’re packing smaller medical supplies like pills and antiseptic wipes, small sealable storage containers fit perfectly in the outer pockets of your kit for quick retrieval.
 MOLLE-compatible bags let you attach your kit to a backpack or belt for fast access on the move.
Credit: www.walmart.com
MOLLE-compatible bags let you attach your kit to a backpack or belt for fast access on the move.
Credit: www.walmart.com
Organizing for Speed
Sort supplies by priority to cut down on search time during a crisis:
- Life-saving items (tourniquet, chest seal, gloves) go in the top outer pocket for instant access.
- Wound care supplies (gauze, bandages, tape) go in the middle section.
- Medications go in a labeled, waterproof zippered pouch to protect them from moisture.
- Survival tools (multi-tool, water filter) go in the bottom section. If you don’t want to buy specialized pouches, compartmentalized storage containers work as a cheap, reusable alternative to sort small items.
Weight and Accessibility
A kit designed for carrying on foot should weigh no more than 10-15 pounds to avoid slowing you down during an emergency. Test your kit by carrying it on a 2-mile hike to ensure it’s comfortable, and that you can access all supplies without taking it off your back. Avoid overpacking non-essential items: every ounce counts when you’re moving quickly.
Maintenance and Restocking: Keep Your Kit Ready for Anything
A neglected kit is as good as no kit at all. Follow this schedule to keep your supplies in good working order:
- Inspect every 3 months: Check expiration dates on all medications and ointments, replace used or damaged supplies immediately, and test tools (scissors should cut cleanly, tourniquets should not be frayed, water filters should not be clogged). Medications degrade faster in extreme temperatures, so don’t wait 6 months between checks as many preppers recommend.
- Restock immediately after use: Even if you only use one bandage, replace it right away so your kit is full for the next emergency. Keep a running inventory list in your kit to make restocking fast.
- Adjust seasonally: In winter, add extra hand warmers, lip balm with SPF, and extra gauze for frostbite treatment. In summer, add extra electrolyte tablets, insect sting relief, and additional water purification supplies. If you have seasonal allergies, add extra antihistamines during peak season.
Common First Aid Mistakes to Avoid in a Collapse Scenario
Even experienced preppers make these errors, which can turn a treatable injury into a life-threatening situation:
- Using hydrogen peroxide or rubbing alcohol on open wounds: These chemicals damage healthy tissue and delay healing. Use saline or povidone-iodine instead to clean wounds gently.
- Closing deep bite wounds with sutures or super glue: This traps bacteria inside the wound, leading to severe infection. Keep deep wounds loosely covered to allow drainage, and seek care from a medic as soon as possible.
- Using a tourniquet on a minor wound: Tourniquets are for life-threatening limb bleeding only. Improper use can cause permanent tissue damage or limb loss. If you’re not formally trained, stick to pressure dressings for most bleeding injuries.
- Skipping PPE when treating others: Always wear gloves and a face shield when treating someone else’s wound to avoid exposure to bloodborne pathogens or contaminated saliva.
- Storing your kit in extreme temperatures: Heat and cold degrade medications, damage electronic tools, and break down adhesive bandages and gauze. Keep your kit in a cool, dry place out of direct sunlight.
Frequently Asked Questions
What essential items should be in a zombie apocalypse first aid kit?
A well-stocked kit should include wound care supplies (gauze, bandages, antibiotic ointment), infection prevention items (gloves, antiseptics, face shields), over-the-counter medications (pain relievers, anti-diarrheals, antihistamines), survival tools (multi-tool, water filter), and any personal prescription medications. Prioritize items that address high-risk collapse injuries: severe bleeding, bite wounds, and illness from contaminated water or food.
How can I make my first aid kit "zombie-proof"?
Store your kit in a waterproof, hard-sided case or MOLLE pouch, keep it sealed with a lock or tamper-proof seal if you’re storing it in a shared space, and keep a backup kit in your bug-out vehicle and at your retreat location. Avoid storing your kit in areas with extreme temperature changes (like an attic or uninsulated garage) which can degrade medications and supplies.
Why is a first aid kit vital in a zombie apocalypse?
In a collapse scenario, emergency services will be overwhelmed or non-functional, so you will be responsible for your own medical care. A well-stocked kit lets you treat injuries that would otherwise be fatal: severe bleeding can cause death in 3-5 minutes, untreated infections can turn a small cut into sepsis in 24-48 hours, and dehydration from diarrhea can incapacitate you in 12 hours. The kit also lets you care for injured members of your group, which is critical for long-term survival.
How often should I update my zombie apocalypse first aid kit?
Inspect your kit every 3 months, not every 6 months, as medications degrade faster in extreme temperatures. Replace expired medications, restock used supplies, and update the kit for seasonal changes or new personal medical needs. After any use of the kit, replace all used items immediately so it’s ready for the next emergency.
Conclusion
A zombie apocalypse first aid kit is far more than a fun pop-culture project: it’s a practical way to build real, life-saving skills that apply to any emergency, from a weekend hiking trip to a major natural disaster. The supplies you pack will serve you in any scenario where professional help is unavailable, and the training you gain from learning to use them will make you more resilient in everyday life too.
The most important investment you can make isn’t the most expensive kit—it’s the time you spend learning to use your supplies, practicing wound care, and taking a certified first aid course. Preparation is the difference between panic and action when every second counts. Stock your kit, practice your skills, and stay ready for whatever comes your way. For more practical survival and home prep tips, check out our survival prep resources to build out your full emergency plan.

I’m Abby Lu, a passionate home cook who loves simplifying everyday meals. At PlugChef.com, I share product reviews and cooking guides to help you find the best tools for your kitchen.
Related posts:
 Upper Cabinet Pull Out Spice Rack: Transform Your Kitchen
 Pantry Organization Ideas Dollar Tree: Budget-Friendly Hacks
 Organizing Can Goods in Pantry: Smart Storage Hacks
 Kitchen Sink Floor Mat Anti Fatigue: Comfort & Style
 Dish Wash Rack Stainless Steel: Effortless Kitchen Organization
 How to Decorate a Basket for Living Room: Chic Ideas

