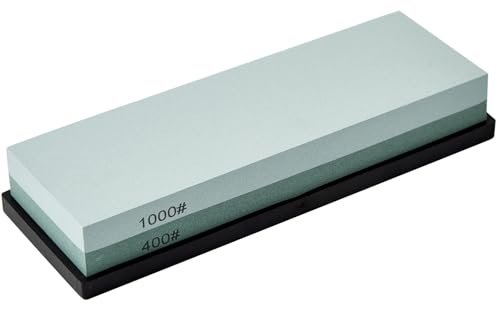
Dull knives are more than just a kitchen nuisance — they’re a safety hazard, requiring extra force to cut ingredients and increasing the risk of slips and accidental cuts. As outlined in University of Minnesota Extension’s kitchen knife safety guidelines, properly sharpened blades reduce this risk significantly by gliding cleanly through food with minimal effort. But with grit numbers ranging from 200 to 10,000+ on whetstone packaging, choosing the right one for your kitchen knives can feel overwhelming. The right grit depends on your knife’s steel type, current condition, skill level, and how often you cook — and picking the wrong one can permanently damage your blades. This guide breaks down exactly how whetstone grit works, how to match it to your needs, and which options are worth buying in 2026.
How Whetstone Grit Works: What the Numbers Actually Mean
Whetstone grit refers to the number of abrasive particles packed into one square inch of the stone’s surface. Lower grit numbers indicate coarser stones with larger, more spaced-out abrasive particles that remove metal quickly, while higher grit numbers indicate finer stones with smaller, denser particles that polish and refine the blade edge. Most home cooks only need a dual-sided whetstone to cover all their sharpening needs, but understanding the grit scale helps you avoid wasting time or ruining your knives.
The table below breaks down common grit ranges, their intended use, and their effect on your blades:
| Grit Range | Abrasive Action | Best Use Case | Effect on Blade |
|---|---|---|---|
| 200–600 (Coarse) | Aggressively removes metal, fixes chips and nicks | Repairing severely dull, chipped, or damaged blades | Leaves deep scratches that require finer grits to polish out |
| 800–1500 (Medium) | Moderately removes metal, reshapes dull edges | Regular sharpening for everyday kitchen knives | Leaves minor scratches that are smoothed out with higher grits |
| 2000–4000 (Fine) | Lightly polishes the edge, removes small burrs | Honing between full sharpenings, finishing edges after medium grit | Creates a smooth, sharp edge with minimal visible scratches |
| 5000–10,000+ (Polishing) | Polishes the edge to a mirror-like finish | Final polishing for high-end knives, razor-sharp edges | Removes nearly all scratches, creates a barely visible edge |
A common mistake new sharpeners make is using coarse grit for regular maintenance. Coarse stones remove far more metal than necessary, shortening your knife’s lifespan over time. Reserve coarse grits only for blades with visible damage or chips.
Match the Grit to Your Knife Type and Condition
Not all knives respond to the same grit, and using the wrong one for your blade’s steel can cause chipping, dulling, or permanent damage.
Soft vs. Hard Steel Knives
Western-style German and American kitchen knives are made from softer steel (55–58 on the Rockwell Hardness Scale, or HRC) that flexes slightly under pressure. This softer steel holds an edge well but dulls faster, and it can handle coarser grits (400–1000) without chipping. Japanese knives, by contrast, are made from much harder steel (60–67 HRC) that holds an edge far longer but is more brittle. Using a coarse grit on hard Japanese steel can cause tiny micro-chips along the edge, so stick to 1000+ grit for these blades to preserve their integrity.
Carbon steel knives, common in high-end Western and Japanese models, are softer than stainless steel and easier to sharpen, but they require more frequent maintenance to avoid rust. Stainless steel knives are harder and more rust-resistant, but they often need finer grits to sharpen effectively.
Assessing Your Knife’s Current Condition
Before picking a grit, test your knife’s edge:
- If it can’t slice a ripe tomato without tearing, or has visible nicks/chips: start with a 400–600 coarse grit to repair the edge, then move to a 1000–1500 medium grit to refine it.
- If it slices tomatoes cleanly but struggles with herbs or thin produce: a 1000–1500 medium grit is all you need for regular sharpening.
- If it cuts through almost everything but feels slightly dull: use a 2000+ fine grit to hone the edge, no coarse sharpening required.
Note that whetstones do not work for serrated knives, which have small, toothed edges that can’t be sharpened on a flat stone. Use a dedicated serrated knife sharpening rod for these blades instead.
Key Whetstone Features Beyond Grit That Matter
Grit is the most important factor, but these features will make sharpening safer, easier, and more effective:
Stone Material and Binder
Synthetic whetstones are the most popular option for home cooks: they’re consistent, affordable, and ready to use out of the box. Natural stones, cut from quarried rock, produce a finer edge but wear faster and are far more expensive, making them better suited for professional sharpeners. The binder that holds the abrasive particles together also matters: a softer binder cuts faster and is ideal for hard, high-end steel knives, while a harder binder lasts longer and works better for softer Western steel blades.
Accessory Inclusions
- Non-slip base: A non-negotiable safety feature that keeps the stone from sliding across your counter while you sharpen. Rubber bases offer the most grip, while bamboo bases are more aesthetic but slightly less stable on smooth surfaces.
- Angle guide: Most beginners struggle to maintain the correct 15–20 degree sharpening angle (20 degrees for Western knives, 15 degrees for Japanese knives). An included plastic angle guide clips to the blade to help you hold the correct position for consistent sharpening.
- Flattening stone: Whetstones wear unevenly over time, developing high and low spots that lead to uneven sharpening. A flattening stone (or diamond plate) resurfaces the whetstone to keep it even, and is a must-have for anyone who sharpens more than a few times a year.
- Leather strop: A leather strop removes tiny metal burrs left behind after sharpening and polishes the edge to extend the time between sharpenings. Most mid-range and premium sets include one.
Water vs. Oil Stones
Water stones are the standard for kitchen knife sharpening: they require only water to lubricate the surface, clean up easily, and are gentle on blades. Oil stones are more durable and better suited for outdoor or utility knives, but they require honing oil to lubricate, which creates a mess and is harder to clean up. For most home cooks, a water stone is the best choice.
Recommended Grit Combinations for Common Use Cases
Instead of buying a full range of individual grits, most users will be well-served by one of these pre-assembled combinations:
- Beginner home cook (sharpen 1–2 times per year, standard Western knives): 1000/6000 dual-grit whetstone. The 1000 side handles regular sharpening, while the 6000 side hones and polishes the edge for a clean finish.
- Intermediate home cook (sharpen monthly, mix of Western and Japanese knives): 400/1000 + 3000/8000 set. The 400 side repairs minor damage, while the 3000 and 8000 sides work for both soft Western and hard Japanese steel.
- Professional chef/knife collector (sharpen weekly, high-end hard steel knives): 3000/8000 dual-grit whetstone plus a dedicated flattening stone and leather strop. Skip coarse grits unless you need to repair major damage, to preserve the delicate edge of high-end blades.
- Outdoor/utility knife user (sharpen tough steel blades, machetes, hunting knives): 400/1000 dual-grit whetstone. The coarser side handles tough, dull steel quickly, while the 1000 side refines the edge.
Top Whetstone Picks for 2026
Below are our top recommended whetstones for every skill level and use case, all with proven track records for consistent, safe sharpening:
HiramWare 400/1000 Dual-Grit Whetstone
 Double-sided design lets you tackle both coarse sharpening and fine honing in one compact tool.
This entry-level dual-grit stone is perfect for beginners who want a no-fuss option for basic sharpening needs. The 400 grit side repairs minor nicks and dull edges, while the 1000 grit side refines the edge for everyday use. The included non-slip rubber base keeps the stone stable during use, and its compact 7-inch size fits easily in kitchen drawers. It works best for standard Western stainless steel knives, and is not suitable for ceramic or severely damaged blades.
This is our top pick for beginners looking for an affordable, reliable sharpening tool. View it on Amazon here.
Double-sided design lets you tackle both coarse sharpening and fine honing in one compact tool.
This entry-level dual-grit stone is perfect for beginners who want a no-fuss option for basic sharpening needs. The 400 grit side repairs minor nicks and dull edges, while the 1000 grit side refines the edge for everyday use. The included non-slip rubber base keeps the stone stable during use, and its compact 7-inch size fits easily in kitchen drawers. It works best for standard Western stainless steel knives, and is not suitable for ceramic or severely damaged blades.
This is our top pick for beginners looking for an affordable, reliable sharpening tool. View it on Amazon here.
Intelitopia Complete Sharpening Set (400/1000 + 3000/8000)
 Includes a leather strop and angle guide, perfect for beginners and intermediate users.
This all-in-one set is ideal for home cooks with a mix of Western and Japanese knives, or anyone who wants a complete sharpening setup without buying separate grits. It includes two dual-grit stones (400/1000 and 3000/8000), a leather strop, a bamboo base, three non-slip rubber bases, and a plastic angle guide for consistent sharpening angles. The only downside is its larger footprint, which may be cumbersome for small kitchens.
If you want a one-stop shop for all your sharpening needs, this set delivers excellent value. View it on Amazon here.
Includes a leather strop and angle guide, perfect for beginners and intermediate users.
This all-in-one set is ideal for home cooks with a mix of Western and Japanese knives, or anyone who wants a complete sharpening setup without buying separate grits. It includes two dual-grit stones (400/1000 and 3000/8000), a leather strop, a bamboo base, three non-slip rubber bases, and a plastic angle guide for consistent sharpening angles. The only downside is its larger footprint, which may be cumbersome for small kitchens.
If you want a one-stop shop for all your sharpening needs, this set delivers excellent value. View it on Amazon here.
Sharp Pebble 1000/6000 Premium Water Stone
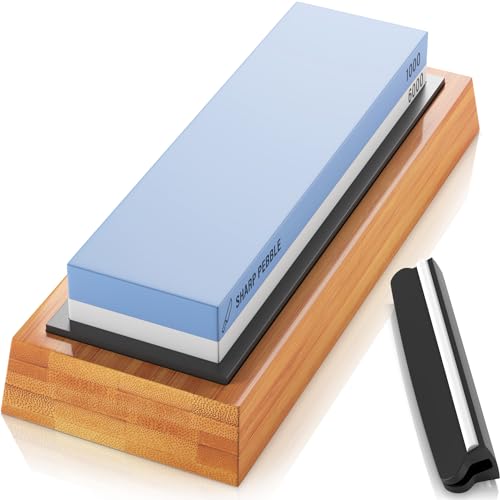 Water-based formula makes cleanup easy and avoids the mess of oil stones.
A favorite among home cooks with Japanese hard steel knives, this water stone’s 1000 grit side reshapes dull edges, while the 6000 grit side polishes to a razor-sharp finish. The non-slip bamboo base provides stable support, and the included angle guide helps new users maintain the correct 15-degree angle for Japanese blades. It requires minimal maintenance and cleans up easily with water, making it a low-fuss option for regular use.
This is our top pick for owners of high-end Japanese kitchen knives. View it on Amazon here.
Water-based formula makes cleanup easy and avoids the mess of oil stones.
A favorite among home cooks with Japanese hard steel knives, this water stone’s 1000 grit side reshapes dull edges, while the 6000 grit side polishes to a razor-sharp finish. The non-slip bamboo base provides stable support, and the included angle guide helps new users maintain the correct 15-degree angle for Japanese blades. It requires minimal maintenance and cleans up easily with water, making it a low-fuss option for regular use.
This is our top pick for owners of high-end Japanese kitchen knives. View it on Amazon here.
Kota Japan 3000/8000 Honing Whetstone
 Ideal for maintaining already sharp high-end Western knives with hard steel.
This fine-grit stone is designed for users who already have sharp knives and just need to hone the edge between full sharpenings, rather than repairing damage. The 3000 grit side lightly reshapes the edge, while the 8000 grit side polishes to a mirror-like finish that glides through even the thinnest slices of fish or vegetables. Its compact 7-inch size fits easily in drawers, and its durable construction holds up to regular use.
If you only need to maintain already sharp blades, this honing stone is a great lightweight pick. View it on Amazon here.
Ideal for maintaining already sharp high-end Western knives with hard steel.
This fine-grit stone is designed for users who already have sharp knives and just need to hone the edge between full sharpenings, rather than repairing damage. The 3000 grit side lightly reshapes the edge, while the 8000 grit side polishes to a mirror-like finish that glides through even the thinnest slices of fish or vegetables. Its compact 7-inch size fits easily in drawers, and its durable construction holds up to regular use.
If you only need to maintain already sharp blades, this honing stone is a great lightweight pick. View it on Amazon here.
Sharp Pebble 400/1000 Whetstone Kit with Flattening Stone
 Comes with a flattening stone to keep the whetstone surface even for consistent results.
This kit is perfect for intermediate users who sharpen frequently and want to maintain their whetstone’s performance over time. The 400/1000 dual grit handles both edge repair and regular sharpening, and the included flattening stone eliminates the need to buy a separate maintenance tool. The non-slip rubber base keeps the stone stable, and the premium composite material wears evenly for consistent results.
This is our top pick for regular sharpeners who want a long-lasting, low-maintenance option. View it on Amazon here.
Comes with a flattening stone to keep the whetstone surface even for consistent results.
This kit is perfect for intermediate users who sharpen frequently and want to maintain their whetstone’s performance over time. The 400/1000 dual grit handles both edge repair and regular sharpening, and the included flattening stone eliminates the need to buy a separate maintenance tool. The non-slip rubber base keeps the stone stable, and the premium composite material wears evenly for consistent results.
This is our top pick for regular sharpeners who want a long-lasting, low-maintenance option. View it on Amazon here.
HMPLL 4-Grit Professional Sharpening Set
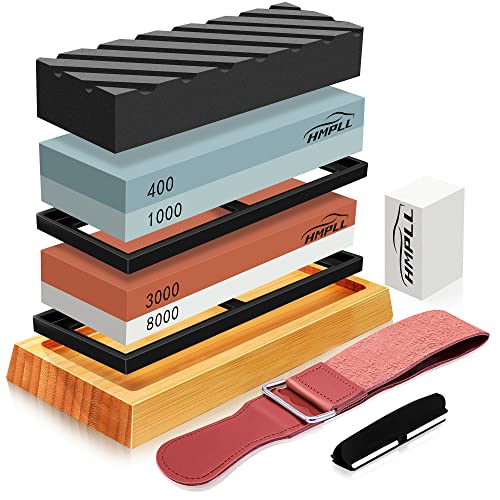 Four grit options let you tackle everything from major edge repairs to final polishing.
This comprehensive set is ideal for users with a large collection of knives made from different steel types, from soft Western chef’s knives to hard Japanese santokus. It includes four grit levels (400/1000/3000/8000), a leather strop, a non-slip base, and an angle guide, so you can handle every sharpening task without buying additional tools. The only downside is its larger size, which takes up more storage space than a simple dual-grit stone.
If you have a varied knife collection and want a single set for all your sharpening needs, this is the most versatile option. View it on Amazon here.
Four grit options let you tackle everything from major edge repairs to final polishing.
This comprehensive set is ideal for users with a large collection of knives made from different steel types, from soft Western chef’s knives to hard Japanese santokus. It includes four grit levels (400/1000/3000/8000), a leather strop, a non-slip base, and an angle guide, so you can handle every sharpening task without buying additional tools. The only downside is its larger size, which takes up more storage space than a simple dual-grit stone.
If you have a varied knife collection and want a single set for all your sharpening needs, this is the most versatile option. View it on Amazon here.
Keenbest Budget 400/1000 Dual-Grit Whetstone
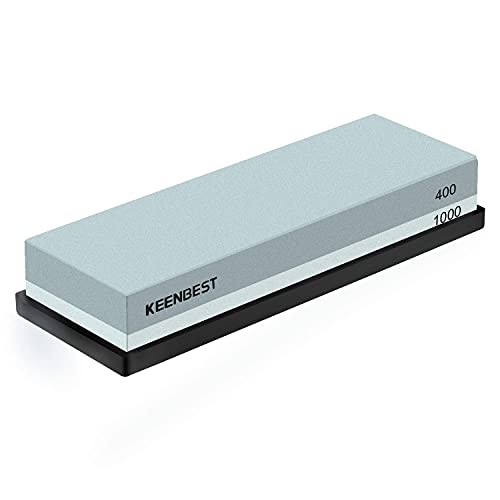 Affordable option for casual home cooks who only sharpen a few times a year.
This no-frills whetstone is a great pick for casual home cooks who only need to sharpen their knives a few times a year. The 400/1000 dual grit covers all basic sharpening needs, and the included non-slip rubber base keeps it stable during use. It’s made from durable synthetic material that holds up to occasional use, and its compact size makes it easy to store.
If you’re on a budget and only need a basic sharpening tool, this is the best value pick. View it on Amazon here.
Affordable option for casual home cooks who only sharpen a few times a year.
This no-frills whetstone is a great pick for casual home cooks who only need to sharpen their knives a few times a year. The 400/1000 dual grit covers all basic sharpening needs, and the included non-slip rubber base keeps it stable during use. It’s made from durable synthetic material that holds up to occasional use, and its compact size makes it easy to store.
If you’re on a budget and only need a basic sharpening tool, this is the best value pick. View it on Amazon here.
Whetstone 1000/3000 Dual-Grit Sharpening Kit
 Versatile grit combination works for both kitchen cutlery and outdoor utility knives.
This versatile kit is designed for users who need to sharpen both kitchen knives and tougher outdoor blades like hunting knives or machetes. The 1000 grit side handles regular sharpening for kitchen steel, while the 3000 grit side polishes edges for both kitchen and outdoor use. The non-slip base keeps it stable, and its compact size makes it easy to take on camping trips or to outdoor worksites.
If you need a whetstone that works for both kitchen and outdoor blades, this is the most versatile pick. View it on Amazon here.
Versatile grit combination works for both kitchen cutlery and outdoor utility knives.
This versatile kit is designed for users who need to sharpen both kitchen knives and tougher outdoor blades like hunting knives or machetes. The 1000 grit side handles regular sharpening for kitchen steel, while the 3000 grit side polishes edges for both kitchen and outdoor use. The non-slip base keeps it stable, and its compact size makes it easy to take on camping trips or to outdoor worksites.
If you need a whetstone that works for both kitchen and outdoor blades, this is the most versatile pick. View it on Amazon here.
Dual-Sided 1000/6000 Professional Sharpening Kit
 Compact design makes it easy to store in kitchen drawers or take on the go.
This lightweight, compact whetstone is perfect for home cooks with limited storage space, or anyone who wants to take their sharpener on the go. The 1000 grit side reshapes dull edges, while the 6000 grit side polishes to a smooth, sharp finish. The non-slip base keeps it stable, and its small footprint fits easily in drawers or kitchen tool bags.
If you need a portable, space-saving sharpening option, this kit is a great choice. View it on Amazon here.
Compact design makes it easy to store in kitchen drawers or take on the go.
This lightweight, compact whetstone is perfect for home cooks with limited storage space, or anyone who wants to take their sharpener on the go. The 1000 grit side reshapes dull edges, while the 6000 grit side polishes to a smooth, sharp finish. The non-slip base keeps it stable, and its small footprint fits easily in drawers or kitchen tool bags.
If you need a portable, space-saving sharpening option, this kit is a great choice. View it on Amazon here.
Common Whetstone Mistakes to Avoid
Even with the right grit, these common errors can damage your knives or lead to poor sharpening results:
- Using too much pressure: Let the abrasive particles do the work — pressing too hard removes excess metal, shortens your knife’s lifespan, and can chip the edge. Use light, even pressure as you slide the blade across the stone.
- Skipping the burr check: After sharpening each side of the blade, run your finger lightly along the edge (away from the blade, to avoid cuts!) to feel for a tiny metal burr. If you don’t feel a burr, you haven’t sharpened that side enough, and will end up with a dull, uneven edge.
- Not flattening your whetstone regularly: Whetstones wear unevenly over time, developing high and low spots that lead to uneven sharpening. Flatten your stone every 5–10 uses with a flattening stone or diamond plate to keep it even.
- Using coarse grit for regular honing: Coarse grit removes far more metal than needed for routine maintenance, shortening your knife’s lifespan over time. Only use coarse grits when your knife has visible damage or chips.
After sharpening, store your blades safely out of reach of children using child safety cabinet locks or no-drill drawer locks to prevent accidental cuts in the kitchen. If you’re prepping ingredients for a charcuterie spread with your freshly sharpened knives, check out our guide to slicing cheese for charcuterie boards for clean, precise slices.
Maintaining Your Whetstone for Long-Term Use
A well-cared-for whetstone can last 2–5 years, while a neglected one will wear out in months. Follow these tips to keep yours in top shape:
- Soak traditional water stones for 5–10 minutes before use to saturate the abrasive particles. Splash-and-go stones only need a quick rinse with water before use.
- After each use, scrub off built-up metal slurry with a professional-grade cleaning brush to prevent the abrasive particles from getting clogged.
- Flatten the stone every 5–10 uses to maintain an even surface.
- Store the stone in a dry, well-ventilated area, and avoid leaving it submerged in water for long periods, which can cause it to break down.
- Replace the stone when it can no longer be flattened to an even surface, or when it sharpens significantly slower than it did when new.
After sharpening, wipe down your blades with a soft kitchen cleaning brush to remove any metal filings or stone residue before storing.
Frequently Asked Questions
What grit whetstone is best for sharpening very dull kitchen knives?
Start with a 400–600 coarse grit to repair chips and reshape the edge, then move to a 1000–1500 medium grit to refine it, and finish with a 3000+ fine grit to polish. This progressive approach removes damaged metal without over-grinding the blade.
Can I use a whetstone on ceramic knives?
No — ceramic knives are extremely hard (8–9 on the Mohs scale) and brittle, so standard whetstones will not sharpen them effectively and may cause chipping. Use a diamond-coated sharpening stone or a dedicated ceramic knife sharpener instead.
How often should I sharpen my kitchen knives?
Home cooks who use knives daily should sharpen every 1–2 months, and hone with a fine grit or honing rod weekly to maintain the edge between full sharpenings. Professional chefs may need to sharpen weekly, depending on how frequently they use their blades.
What’s the difference between a water stone and an oil stone?
Water stones are lubricated with water, clean up easily, and are the best choice for most kitchen knives. Oil stones require honing oil to lubricate, are more durable, and are better suited for outdoor or utility knives that are exposed to moisture and rough use.
Do I need to flatten my whetstone?
Yes — whetstones wear unevenly over time, developing high and low spots that lead to uneven sharpening and can damage your knife’s edge. Flatten your stone every 5–10 uses with a flattening stone or diamond plate to keep it performing consistently.
Can a whetstone sharpen serrated knives?
No — serrated knives have small, toothed edges that can’t be sharpened on a flat whetstone. Use a dedicated serrated knife sharpening rod instead, running it along each tooth to restore the edge.
Conclusion
Choosing the right grit whetstone for your kitchen knives doesn’t have to be complicated. For most home cooks, a simple 1000/6000 dual-grit whetstone covers all regular sharpening and honing needs, while more advanced users with hard Japanese steel or varied knife collections may benefit from a multi-grit set. Remember to match the grit to your knife’s steel type and condition, avoid using coarse grit for routine maintenance, and flatten your stone regularly to keep it performing well.
Once you’ve sharpened your knives, store them safely out of reach of children using our range of childproof drawer latches to keep your whole kitchen safe. For more tips on maintaining your kitchen tools, check out our guide to prepping ingredients with sharp, precise cuts for your next charcuterie board.

Hi, I’m Daniel Brooks—a food lover and kitchen gear enthusiast. I enjoy testing cookware, utensils, and gadgets to see what really works in everyday cooking. At PlugChef.com, I share honest reviews, comparisons, and simple guides to help you choose the best tools for a safer, smarter, and more enjoyable kitchen.
Related posts:
 Best Portable Coffee Mug Warmer: Top Picks for Cozy Coffee Moments
 Best Mixer for Bread Dough: Top Picks for Perfect Kneading
 Best Tool to Cut Cheese: Top Multi-Functional Slicers for Every Kitchen
 Best Tool to Slice Vegetables Thin: Top Kitchen Slicers for Precision Cuts
 What is the Best Type of Wood for Kitchen Utensils: Top Picks
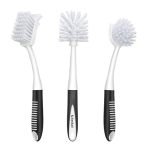 Dish Washing Brush With Handle for Effortless Deep Kitchen Cleaning