
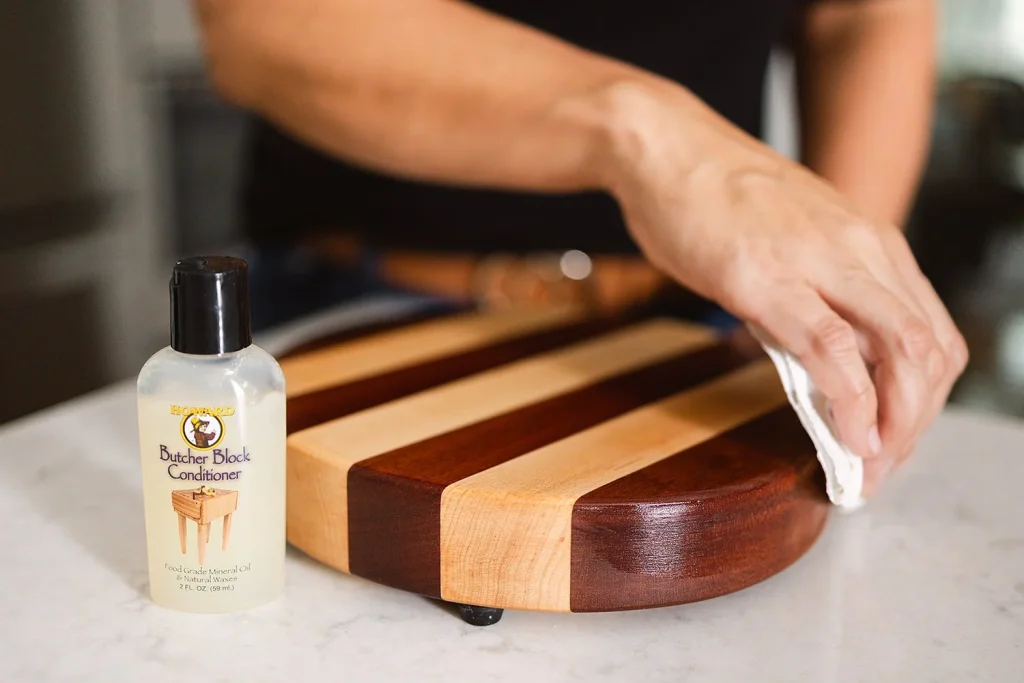
Introduction
Wooden cutting boards are the unsung workhorses of every kitchen, handling everything from nightly vegetable prep to holiday meat carving. Without regular maintenance, these boards dry out, crack, and absorb food particles and moisture that can harbor harmful bacteria. Oiling with mineral oil is the simplest, most effective way to extend your board’s lifespan by years while keeping it safe for food contact. This guide covers everything you need to know, from choosing the right oil to troubleshooting common mistakes, for board owners of all skill levels.
Why Food-Grade Mineral Oil Is the Best Choice for Cutting Boards
Not all cutting board oils are created equal. Plant-based cooking oils like olive, vegetable, and coconut oil are popular household staples, but they go rancid quickly when exposed to air and moisture, leaving sticky residues and off-flavors that can transfer to food. Beeswax-based board butters create a nice topcoat but don’t penetrate deep into wood fibers for long-term moisture protection.
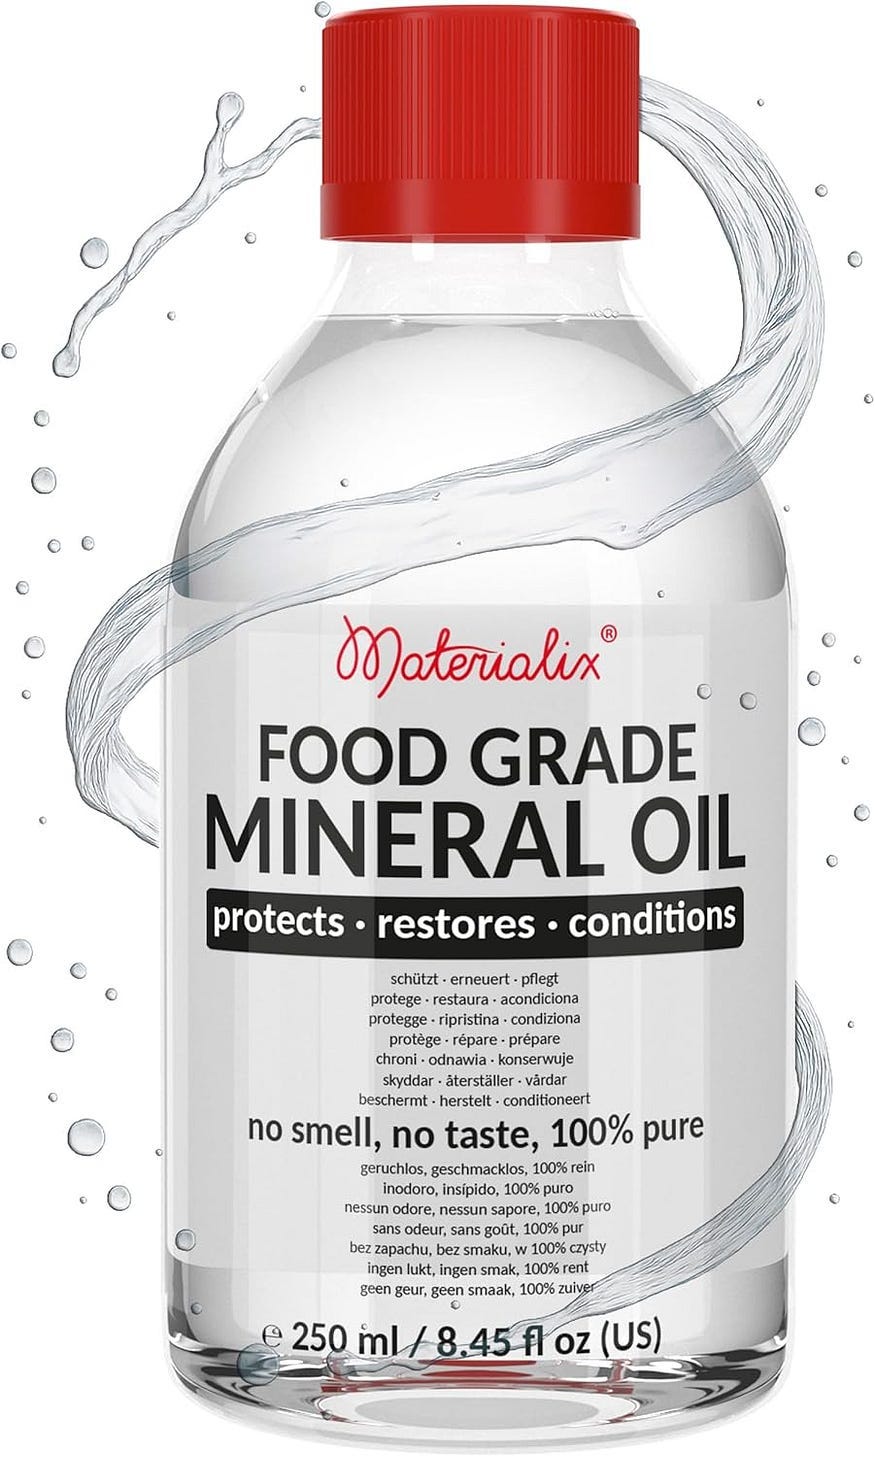
 Pure food-grade mineral oil is odorless, tasteless, and safe for all food-contact wooden surfaces.
Credit: www.amazon.ca
Pure food-grade mineral oil is odorless, tasteless, and safe for all food-contact wooden surfaces.
Credit: www.amazon.ca
Food-grade mineral oil is the gold standard for cutting board care for good reason. It is a highly refined, inert petroleum product that contains no added fragrances, preservatives, or harmful chemicals, and is classified as safe for direct food contact by the U.S. Food and Drug Administration, as outlined in their food-contact substance guidelines. Unlike plant-based oils, it never goes rancid, won’t alter the taste of your food, and penetrates deep into wood pores to replenish lost moisture without creating a flaky or peeling surface layer. In practice, it is also affordable, widely available, and easy to apply with minimal mess.
What You’ll Need
Gather these supplies before you start to make the process quick and mess-free:
- 1 bottle of USP-grade food-grade mineral oil (avoid technical or cosmetic-grade mineral oil, which may contain unsafe additives)
- 2 lint-free microfiber cloths or clean cotton rags (avoid paper towels that leave behind lint)
- Mild dish soap and warm water
- Clean, dry paper towels
- Optional: 220-grit fine sandpaper, rubber gloves for sensitive skin
Avoid using harsh chemical cleaners, bleach, or dishwashers on your board before oiling, as these can damage the wood and leave residues that react with the oil.
Step-by-Step Guide to Oiling Your Cutting Board
Follow these steps for a long-lasting, even finish every time:
Step 1: Deep Clean and Prep the Board
Start with a completely clean, dry board to ensure the oil penetrates evenly. Scrub the entire surface (top, bottom, and edges) with warm water and mild dish soap to remove food residue, then rinse thoroughly. If your board has set-in stains from beets, turmeric, or tomato sauce, pre-treat it with our guide to removing tough cutting board stains before proceeding to lift discoloration. For boards with rough spots or minor surface damage, lightly sand the area with 220-grit sandpaper along the direction of the wood grain, then wipe away all dust with a dry cloth. Pat the board completely dry with a clean towel, then let it air dry for 1–2 hours in a well-ventilated area away from direct heat. Never soak the board in water, as this causes warping and swelling.
Step 2: Apply a Thin, Even Layer of Mineral Oil
Pour 2–4 ounces of food-grade mineral oil directly onto the dry board surface (you will need more oil for larger boards over 18 inches long). Use a lint-free cloth to spread the oil in a thin, consistent layer across every part of the board, including the top, bottom, edges, and any cut-out handles. Work the oil into the wood grain with small circular motions first, then wipe in the direction of the grain for a smoother final finish. If the board is very dry and absorbs oil immediately, add more oil as you go until the surface stops soaking it up right away.
 Apply oil in thin, even layers to avoid sticky residue and ensure full wood penetration.
Credit: medium.com
Apply oil in thin, even layers to avoid sticky residue and ensure full wood penetration.
Credit: medium.com
Step 3: Let the Oil Fully Penetrate the Wood
Set the board aside undisturbed for 6–8 hours, ideally overnight, in a warm, dry area away from direct sunlight or heat sources. The oil needs time to seep into the wood fibers to replenish lost moisture and create a protective barrier against water and bacteria. You will notice the board’s color deepen as it absorbs the oil, which is a normal sign the treatment is working. If you are short on time, wait at least 2 hours, but an overnight soak will deliver the most durable results.
Step 4: Wipe Off All Excess Oil
After the soaking period, use a clean, dry lint-free cloth or paper towel to wipe away any oil that has not been absorbed by the wood. Do not skip this step: leftover surface oil becomes sticky, attracts dust and food particles, and does not provide additional protection. If the board feels tacky after the first wipe, let it sit for another 30 minutes, then wipe again. Do not rinse the board with water after this step, as it will wash away the protective oil layer you just created. Once the board is dry to the touch, it is safe to use immediately.
How Often Should You Oil Your Cutting Board?
Oiling frequency depends on how often you use your board. For daily use, oil every 2–4 weeks. For occasional use (once a week or less), oil every 6–8 weeks. Signs your board needs an oiling: the wood looks dull or pale, feels rough to the touch, or water beads up on the surface instead of soaking in slightly. New wooden boards should be oiled 2–3 times before first use to fully saturate the raw wood and prevent early drying.
Common Oiling Mistakes to Avoid
Even experienced home cooks make these errors that can damage their boards:
- Using non-food-grade oil: Cosmetic or technical mineral oil may contain additives that are not safe for food contact. Always check the label for "USP-grade" or "food-safe" certification.
- Using plant-based oils: Olive, vegetable, and coconut oil go rancid within weeks, leaving sticky residues and off-flavors that can harbor bacteria.
- Skipping the pre-cleaning step: Oiling over food residue or old, grimy oil traps bacteria under the new protective layer and prevents even absorption.
- Over-oiling the board: Applying too much oil or skipping the excess wipe step leads to sticky surfaces that attract dust and grime.
- Storing the board incorrectly: After oiling, store the board upright in a dry, well-ventilated area away from direct heat or sunlight to prevent warping.
Long-Term Cutting Board Maintenance Tips
Oiling is just one part of keeping your board in good shape. Follow these tips between oiling sessions to maximize its lifespan:
- Wipe the board down with a damp cloth and mild dish soap after each use, then dry immediately with a clean towel.
- Use separate boards for raw meat, poultry, and produce to prevent cross-contamination. If you notice lingering odors from garlic, onion, or fish even after washing, follow our guide to eliminating wooden cutting board smells to fully neutralize the scent.
- If you spot small black or green mold growth, scrub the area with a 1:1 vinegar and water solution first, then refer to our guide to removing mold from wood cutting boards to fully disinfect the surface before your next oiling.
- Never put your wooden board in the dishwasher or submerge it in water for extended periods.
Frequently Asked Questions
How often should I oil my cutting board?
For daily use, oil every 2–4 weeks. For occasional use, oil every 6–8 weeks, or whenever the board looks dull, feels rough, or absorbs water quickly instead of beading it.
Can I use other oils besides mineral oil?
No. Plant-based oils go rancid quickly, and beeswax or board butter only works as a topcoat, not a deep-penetrating treatment. Food-grade mineral oil is the only widely available option that is safe, long-lasting, and effective for regular maintenance.
How much mineral oil do I need for one board?
For a standard 18×12 inch board, you will need 2–4 ounces of oil. Larger boards over 24 inches long may require up to 6 ounces.
Should I oil both sides of the cutting board?
Yes. Oiling both sides prevents warping and cracking by ensuring the wood absorbs moisture evenly on all sides.
Is mineral oil safe for cutting boards?
Yes, as long as you use USP-grade food-grade mineral oil, which is FDA-approved for direct food contact. It is non-toxic, inert, and will not leach harmful chemicals into food when used as directed.
Can I use mineral oil on bamboo cutting boards?
Yes. Mineral oil works for all types of wooden cutting boards, including bamboo, teak, walnut, and maple. Bamboo is denser than most hardwoods, so it may absorb oil more slowly, but regular oiling will still prevent cracking and drying.
Conclusion
Oiling your cutting board with mineral oil is a low-effort, high-reward maintenance task that will keep your board smooth, safe, and functional for years. It costs just a few dollars per bottle and takes less than 10 minutes of active work, plus an overnight soak, to protect a tool you likely use every day. If you’re in the market for a new board, check out our guide to building a wooden cutting board from scratch for a custom, durable option, or browse our tutorial for making a professional-grade butcher block cutting board built to withstand heavy daily use.

I’m Abby Lu, a passionate home cook who loves simplifying everyday meals. At PlugChef.com, I share product reviews and cooking guides to help you find the best tools for your kitchen.
Related posts:
 Browned Butter Mizithra Cheese Pasta: Irresistible Flavor Boost
 Does Oven Cleaner Remove Rust? Effective Tips You Need to Know
 Recipe for Butternut Squash Baked: Easy, Delicious & Healthy Delight
 Making Eggs in Cast Iron: Perfectly Crispy Every Time
Open Face Grilled Cheese Sandwich: Irresistible Comfort Food Delight
Making Eggs in Cast Iron: Perfectly Crispy Every Time
Open Face Grilled Cheese Sandwich: Irresistible Comfort Food Delight
 Honey Glazed Spiral Cut Ham: Irresistible Recipe for Every Feast

