
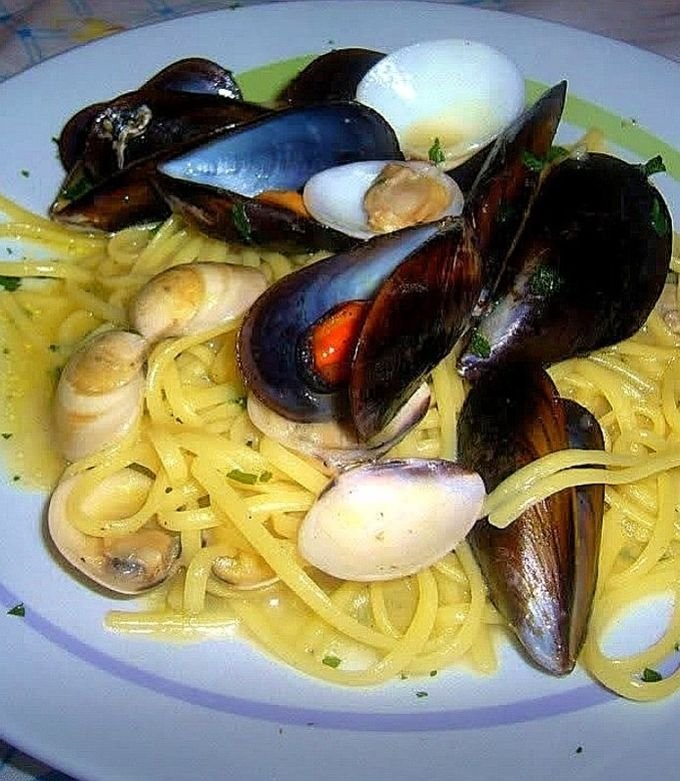
Imagine savoring a dish that brings the fresh taste of the sea straight to your plate. Pasta with clams and mussels is more than just a meal—it’s an experience that combines simple ingredients with rich, savory flavors.
If you love seafood and crave something easy to make yet impressive, this recipe is made for you. Keep reading, and you’ll discover how to create a mouthwatering pasta dish that will delight your taste buds and impress anyone you serve it to.
Your next favorite dinner is just a few steps away.
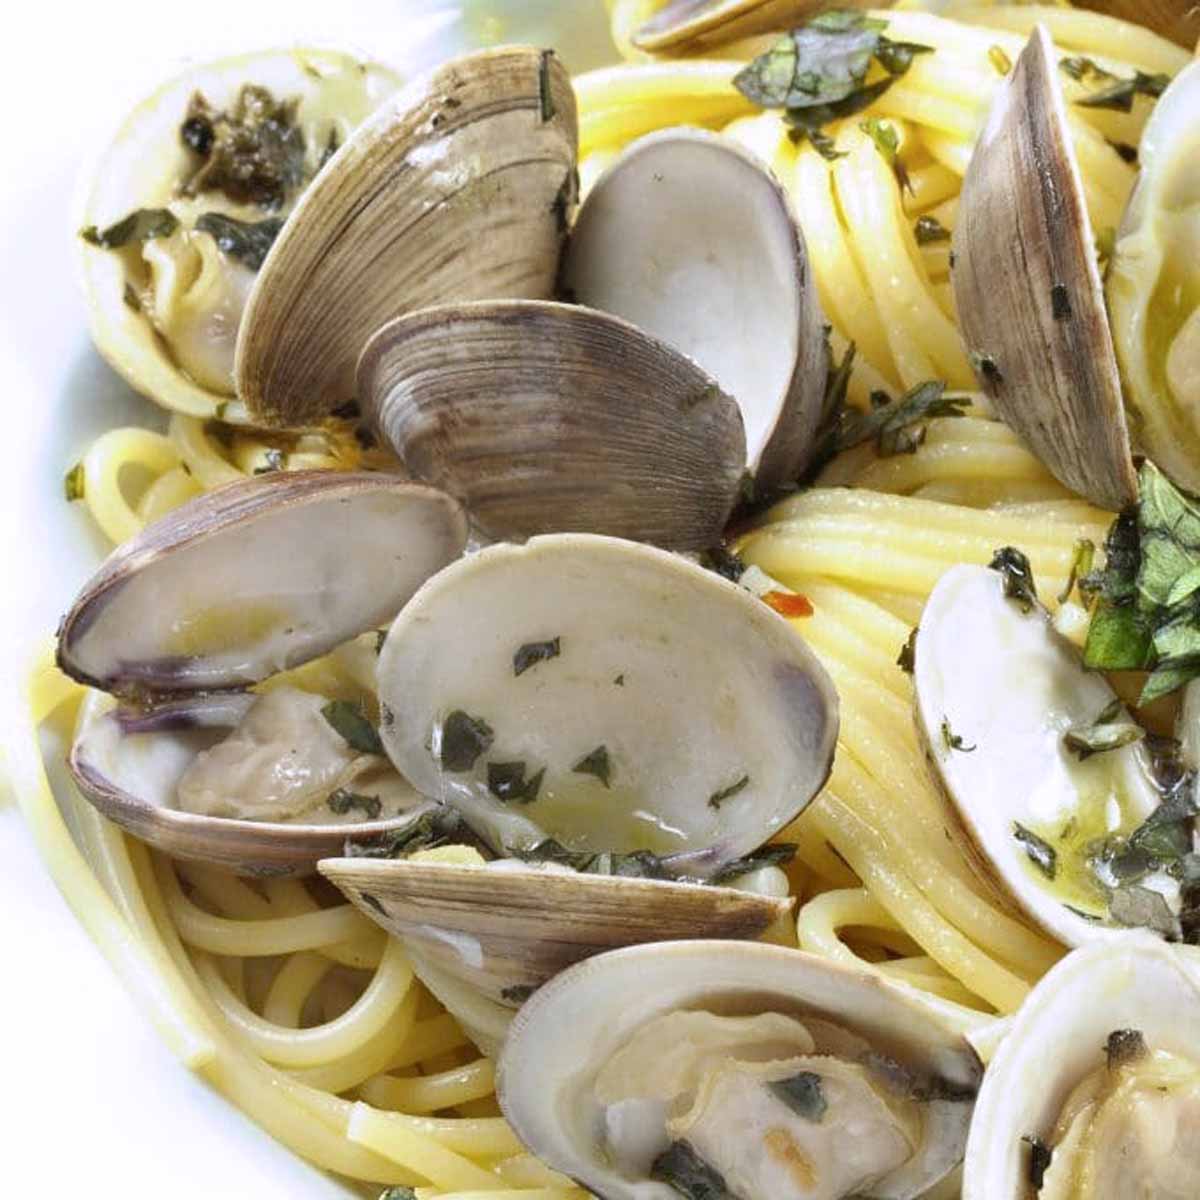
Credit: www.askchefdennis.com
Choosing Fresh Clams And Mussels
Choosing fresh clams and mussels is the foundation of a delicious pasta dish. The quality of your shellfish affects the flavor, texture, and safety of your meal. Knowing what to look for can transform your cooking experience and impress anyone at your table.
How To Select Quality Shellfish
Start by buying shellfish from a reputable source that stores them properly on ice or in a cool, moist environment. Look for clams and mussels that are tightly closed or close quickly when tapped. Avoid any that have cracked or broken shells, as these may be dead or contaminated.
Ask your fishmonger about the harvest date or origin. Fresh shellfish should come from clean waters and be harvested recently—ideally within the last 24 to 48 hours. If you can, smell the shellfish; fresh ones have a mild, salty scent like the ocean, not a strong fishy or ammonia odor.
Signs Of Freshness To Look For
- Shell condition:Shells must be intact and free from excessive dirt or barnacles.
- Movement:Live clams and mussels will respond to touch by closing their shells.
- Smell:A clean, briny smell is a good sign; any off-putting odor means avoid.
- Weight:Heavier shellfish usually means they are full of water and alive, which is good.
Have you ever cooked with shellfish that didn’t seem fresh and ended up with a bland or unpleasant dish? Paying attention to these freshness signs ensures your pasta bursts with natural, ocean-fresh flavors every time you cook.
Essential Ingredients For The Dish
Getting the ingredients right is crucial for making pasta with clams and mussels that truly stands out. Each component plays a specific role, contributing to the overall flavor and texture of the dish. Knowing which pasta to choose and what seasonings enhance the seafood can make your cooking experience more rewarding and your final dish more delicious.
Pasta Varieties That Work Best
Choosing the right pasta can elevate your dish from ordinary to unforgettable. Thin, long pastas like spaghettior linguineare excellent because they hold the sauce well without overpowering the delicate taste of the clams and mussels.
If you prefer something with more bite, fettuccineor trofiealso pair nicely, offering a satisfying chew that complements the tender shellfish. Have you ever tried a twist like bucatini? Its hollow center traps the sauce, making every bite flavorful.
Flavorful Additions And Seasonings
The magic of this dish lies in the simple, fresh ingredients that bring out the natural taste of the seafood. Start with good-quality extra virgin olive oiland garlic, which add richness and aroma.
White wine is a classic choice for deglazing the pan and adding acidity, but a splash of lemon juicecan brighten the entire plate. Don’t forget fresh herbs like parsleyor basil—they add color and a fresh note that lifts the flavors.
Season with sea saltand freshly ground black pepperto taste. You might also want to experiment with a pinch of red pepper flakesif you like a subtle kick. What seasoning combinations have you found bring out the best in your seafood pasta?
Preparing The Shellfish
Rinse clams and mussels under cold water to remove sand and debris. Discard any shells that are cracked or stay open. Soak them in salted water for 20 minutes to help release grit before cooking.
Preparing the shellfish for your pasta with clams and mussels is not just a step; it’s an art that elevates your dish to a new level of flavor. Fresh shellfish can transform a simple pasta dish into a culinary masterpiece. But handling these delicate ingredients requires some know-how to ensure both taste and safety. Let’s dive into the essentials of preparing these ocean treasures for your next meal.Cleaning And Debearding Techniques
Start with a good rinse under cold water. This helps remove any sand or debris clinging to the shells. For mussels, focus on the beard—a fibrous tuft protruding from the shell—by pulling it towards the hinge and giving a firm tug. Clams usually require a bit more attention. Soak them in a bowl of salted water for 20 minutes to encourage them to expel any sand. Rinse again and you’re ready to move forward.Tips For Handling Seafood Safely
Safety is key when dealing with seafood. Always keep your shellfish refrigerated until you’re ready to use them. They should smell like the ocean, not fishy or sour. Check for any that remain open after a gentle tap on the shell. If they don’t close, discard them to avoid any health risks. Consider this: are you using separate utensils and cutting boards for your shellfish and other ingredients? Cross-contamination is a risk you don’t want to take. Keep your workspace clean to ensure a delicious and safe meal. By taking these steps, you’re not just preparing shellfish; you’re ensuring a delectable experience that speaks of freshness and care. Ready to impress your dinner guests with a plate full of oceanic delight?
Credit: worldofpastabilities.com
Cooking The Pasta Perfectly
Cooking pasta perfectly is key to a delicious pasta with clams and mussels dish. The pasta needs to complement the seafood without overpowering it. Achieving the right balance makes every bite enjoyable. The texture and timing of cooking pasta are crucial to get that perfect harmony.
Timing Pasta With Seafood
Seafood cooks very fast, usually in just a few minutes. Pasta takes longer, so start cooking pasta first. Boil the pasta until it is almost done, about 1-2 minutes less than the package says. This is called “al dente,” which means firm to the bite.
Drain the pasta but keep some pasta water. Add the pasta to the seafood sauce just before the seafood finishes cooking. This way, the pasta absorbs the flavors and finishes cooking in the sauce. The seafood stays tender and juicy.
Choosing The Right Pasta Texture
Use pasta that holds sauce well. Long, thin pasta like spaghetti or linguine works best. These shapes catch the clam and mussel sauce easily. Avoid very thick pasta, which can overwhelm the delicate seafood taste.
Cook the pasta until it is firm but not hard. Soft pasta can become mushy and spoil the texture contrast with the seafood. The perfect pasta texture enhances the dish’s overall flavor and mouthfeel.
Making The Sauce
Making the sauce for pasta with clams and mussels is where the dish really comes alive. The sauce should highlight the natural briny flavors of the shellfish without overpowering them. Getting this balance right means focusing on building a broth that’s both savory and aromatic.
Building A Flavorful Broth
Start by gently sautéing garlic and shallots in olive oil to create a fragrant base. This step brings out subtle sweetness and depth that you’ll notice in every bite.
Next, add the clams and mussels along with a splash of water or seafood stock. Cover the pan and let the shellfish steam until they open, releasing their juices into the broth.
Have you ever tasted a sauce that felt watery or bland? That usually means the broth wasn’t concentrated enough. To avoid this, simmer the liquid briefly after the shellfish open to reduce and intensify the flavors.
Incorporating Wine And Herbs
A dry white wine is essential here. Adding it early in the cooking process helps lift the flavor profile and adds a hint of acidity that balances the brininess.
Fresh herbs like parsley or thyme give the sauce a fresh, green note. Chop them finely and sprinkle in just before serving to keep their brightness intact.
Try experimenting with small amounts of chili flakes for a subtle kick that complements the seafood. It’s a simple twist that can transform your sauce from good to memorable.
Combining Pasta With Clams And Mussels
Combining pasta with clams and mussels creates a dish bursting with fresh, briny flavors that complement the pasta’s comforting texture. The key is to blend these ingredients so that every bite delivers a perfect balance of seafood and sauce. Achieving this requires attention to how you mix and fold the components together.
Techniques For Tossing Ingredients
Use tongs or large forks to gently lift and toss the pasta with clams and mussels. This helps to avoid breaking the shellfish or overworking the pasta. Moving the ingredients slowly ensures the sauce clings evenly to each strand of pasta.
Try tossing the pasta in the pan with the seafood and sauce over low heat for a minute or two. This allows the flavors to marry and the pasta to absorb some of the broth without becoming mushy. Remember, tossing too vigorously can damage the delicate mussels and clams.
Ensuring Even Flavor Distribution
After tossing, taste your dish for balance. Does the pasta have enough of the garlicky, lemony broth? If not, add a splash of reserved pasta water or a little extra olive oil to help spread the flavors.
Also, check that the clams and mussels are scattered evenly. You want each portion to have a fair share of seafood, avoiding clumps in one area. This keeps every bite exciting and consistent.
Have you ever ended up with a fork full of just pasta or just seafood? Mixing thoughtfully helps prevent that. Aim for harmony between texture and taste in every forkful.
Serving Suggestions
Serving pasta with clams and mussels is about more than just plating. It’s about creating a full experience that excites the senses. Small touches can make the dish even better. From fresh garnishes to perfect wine choices, every detail counts. Here are some tips to serve this seafood pasta in a way that impresses.
Garnishes To Enhance The Dish
- Chopped fresh parsley adds color and a fresh taste.
- A squeeze of lemon brightens the flavors beautifully.
- Grated Parmesan cheese adds a rich, creamy touch.
- Crushed red pepper flakes bring a gentle heat.
- Toasted breadcrumbs add a satisfying crunch.
- Drizzle of good quality olive oil for smooth richness.
Pairing With Wine And Sides
White wine with crisp acidity pairs well with seafood pasta. Try a Sauvignon Blanc or Pinot Grigio. They balance the briny taste of clams and mussels.
Simple sides keep the focus on the main dish. Serve a green salad with lemon vinaigrette for freshness. Crusty bread is perfect for soaking up the sauce. Light roasted vegetables offer a healthy, flavorful touch.
Tips For Leftovers And Storage
Saving leftover pasta with clams and mussels can keep your meal fresh and tasty for later. Proper storage helps preserve the flavors and textures. It also prevents the seafood from becoming rubbery or losing its delicate taste.
Follow simple tips to store and reheat your dish safely. This way, you enjoy every bite as if it were freshly made.
Best Practices To Preserve Flavor
- Cool the pasta quickly before storing it.
- Use airtight containers to keep moisture out.
- Store leftovers in the refrigerator for up to 2 days.
- Avoid mixing pasta with too much sauce before storing.
- Keep clams and mussels separate if possible, to maintain texture.
- Freeze only if necessary, but expect slight texture changes.
Reheating Without Overcooking
- Reheat gently on low heat to avoid toughening seafood.
- Use a pan with a splash of water or broth to add moisture.
- Stir often to heat evenly and prevent sticking.
- Microwave in short intervals, stirring between each session.
- Check temperature carefully; seafood should be warm, not hot.
- Serve immediately after reheating to enjoy best taste and texture.
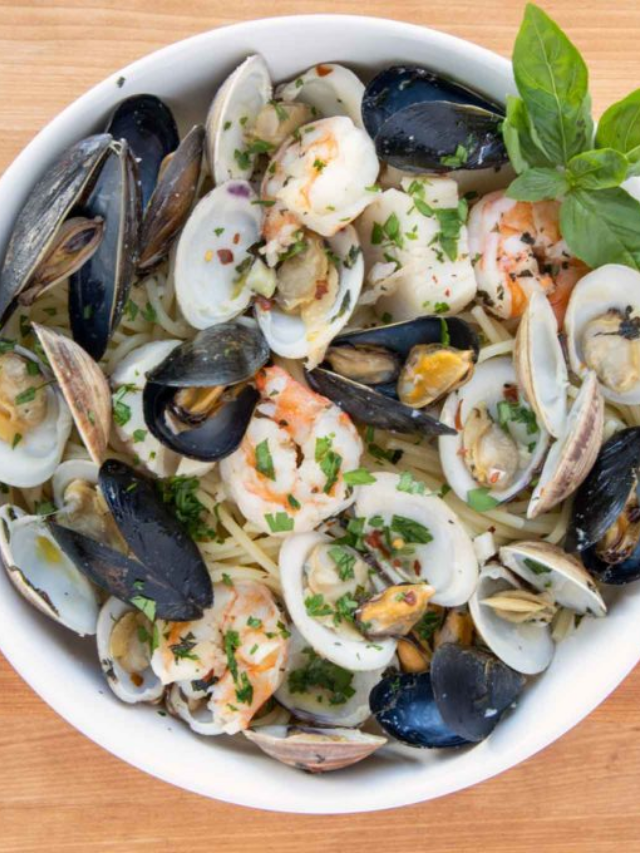
Credit: www.askchefdennis.com
Frequently Asked Questions
What Type Of Pasta Pairs Best With Clams And Mussels?
Linguine and spaghetti are ideal for clams and mussels. Their thin strands hold the seafood sauce well. These pastas complement the delicate flavors without overpowering them. They also cook quickly, matching the fast preparation of shellfish dishes.
How Do You Clean Clams And Mussels Properly?
Rinse clams and mussels under cold water to remove sand. Soak them in salted water for 20 minutes to expel grit. Discard any with cracked shells or that don’t close when tapped. This ensures your seafood is fresh and safe to eat.
Can I Use Canned Clams And Mussels In This Recipe?
Yes, canned clams and mussels can be used for convenience. Drain them well and add near the end of cooking. Fresh seafood provides better texture and flavor, but canned options work well for quick meals.
What Sauce Complements Pasta With Clams And Mussels?
A light garlic, white wine, and olive oil sauce complements this dish. It enhances the seafood’s natural flavors without overpowering them. Adding fresh parsley and a squeeze of lemon brightens the taste and adds freshness.
Conclusion
Pasta with clams and mussels makes a tasty, simple meal. Fresh seafood brings natural flavors to your plate. Cooking it at home saves money and feels rewarding. You can add garlic, lemon, or herbs for extra taste. This dish works well for quick dinners or special occasions.
Try it once, and you might cook it again soon. Enjoy the blend of pasta and ocean flavors today.

Hi, I’m Daniel Brooks—a food lover and kitchen gear enthusiast. I enjoy testing cookware, utensils, and gadgets to see what really works in everyday cooking. At PlugChef.com, I share honest reviews, comparisons, and simple guides to help you choose the best tools for a safer, smarter, and more enjoyable kitchen.
Related posts:
 What Type of Cooking Utensils are Safe: Expert Picks
 What Innovations Could Blenders Make: Unleashing Future Tech
 Smart Strategies to Organize a Small Kitchen: Maximize Space
 How to Organize a Kitchen Cabinet: Expert Tips & Tricks
 How to Organize Kitchen Drawers: Expert Tips and Tricks
 How to Organize a Corner Kitchen Cupboard: Expert Tips

