
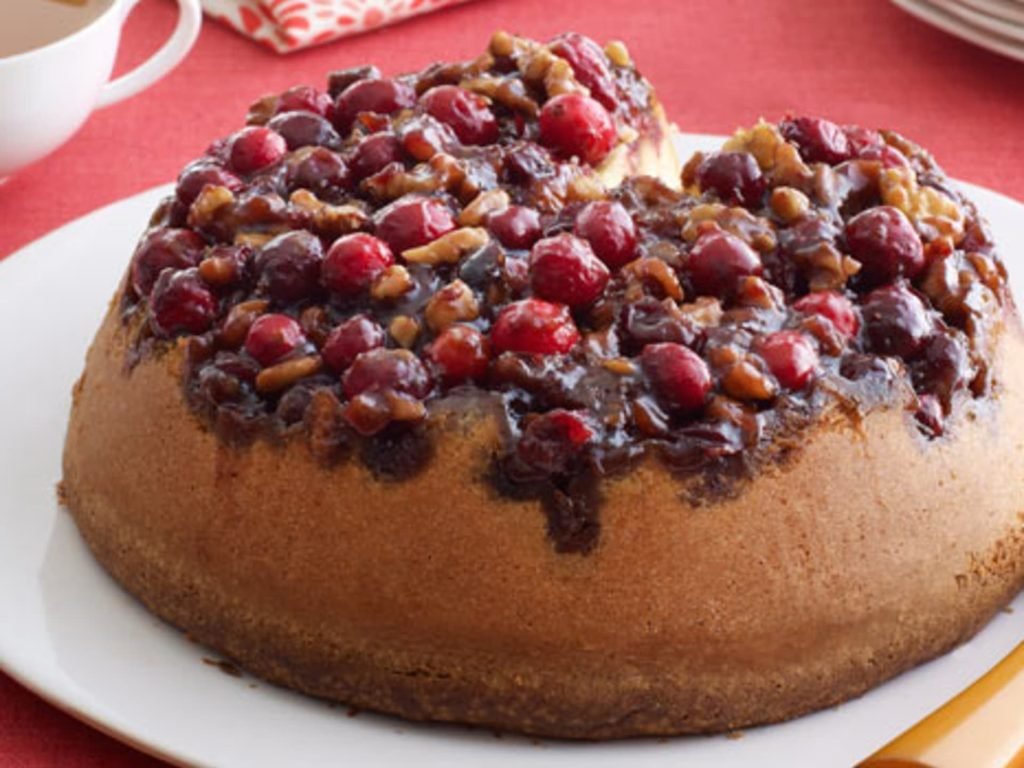
There’s nothing quite like the aroma of a warm upside down cake fresh from the oven, and this apple cranberry variation is the perfect cozy, crowd-pleasing dessert for fall and winter gatherings. With a glossy, caramelized fruit topping of sweet apples and tart cranberries, and a tender, moist cake crumb beneath, it’s easy enough for beginner bakers to pull off, but impressive enough to serve at Thanksgiving, Christmas, or a casual weeknight dinner. Unlike store-bought versions, this recipe uses simple, fresh ingredients and comes together in under an hour of active prep time, with no special equipment required.
Why This Apple Cranberry Upside Down Cake Stands Out
The magic of this recipe lies in its perfect balance of flavors and textures: the tartness of fresh cranberries cuts through the richness of the brown sugar caramel topping, while the sweet, firm apple slices add a tender, juicy bite. The buttermilk in the batter keeps the crumb ultra-moist, and the upside-down baking method ensures the fruit is the star of every slice. It’s also highly adaptable for dietary restrictions, and the leftover cake stays delicious for days, making it a practical choice for meal prep or potlucks.
Ingredients You’ll Need
We’ve split the ingredients into two core components for clarity, with swap options for common dietary needs included.
Caramelized Fruit Topping
- ½ cup packed light brown sugar
- 3 tbsp unsalted butter, melted (use vegan butter for dairy-free)
- 2 large firm apples (Granny Smith for tartness, Honeycrisp for sweetness, or a mix of both), peeled and sliced into ¼-inch thick pieces
- 1 cup fresh cranberries (or thawed frozen cranberries, patted completely dry to avoid sogginess)
- Optional: ¼ cup chopped pecans or walnuts for extra crunch
Cake Batter
- 1 ½ cups all-purpose flour (swap for 1:1 gluten-free flour blend, plus ½ tsp xanthan gum if your blend does not include it, for gluten-free diets)
- 1 cup granulated sugar
- 1 tsp baking powder
- ½ tsp baking soda
- ½ tsp fine sea salt
- 2 large eggs (swap for 2 flax eggs: 1 tbsp ground flaxseed + 3 tbsp water per egg, let sit 5 minutes to thicken, for vegan)
- ½ cup unsalted butter, melted (use vegan butter for dairy-free)
- 1 cup buttermilk (sub with 1 cup whole milk + 1 tbsp white vinegar, let sit 5 minutes to curdle, for dairy-free)
- 1 tsp pure vanilla extract
- Optional: 1 tsp ground cinnamon, ¼ tsp ground nutmeg, or a pinch of cardamom for warm, cozy flavor
Use an angled handle cleaning brush to coat the entire bottom and sides of your 9-inch round cake pan (or 8×8 square pan) evenly with butter or nonstick spray, ensuring no fruit sticks when you flip the cake.
Step-by-Step Preparation Guide
Follow these steps for a flawless, evenly cooked cake every time.
Prep the Fruit Layer
Start by arranging the topping: pour the melted butter and brown sugar into the bottom of your greased pan, tilting to spread it into an even layer across the entire surface. Next, arrange the apple slices in a tight, overlapping circular pattern, starting from the outer edge of the pan and working your way inward. Scatter the cranberries evenly between the apple slices for pops of bright red color and tart contrast. Press the fruit lightly with the back of a spoon to set it in place—this prevents it from shifting when you pour the batter.
A common mistake is crowding the apple slices too tightly, which prevents the caramel from seeping between the fruit and leads to soggy, undercooked spots. Leave a tiny gap between each slice to allow the caramel to circulate as it bakes.
Make the Cake Batter
In a medium bowl, whisk together the flour, baking powder, baking soda, salt, and any optional spices until fully combined and no lumps remain. In a separate large bowl, cream the melted butter and granulated sugar until light and fluffy, then add the eggs one at a time, mixing well after each addition. Stir in the vanilla extract and buttermilk until smooth.
Gradually add the dry ingredient mixture to the wet ingredients, stirring gently with a spatula until just combined. As the University of Minnesota Extension notes, overmixing cake batter develops excess gluten, leading to a dense, tough crumb instead of the light, tender texture you want in this recipe. A few small lumps in the batter are perfectly normal.
Assemble and Bake
Pour the batter slowly over the arranged fruit layer, spreading it gently with a spatula to cover all the fruit without disturbing the arrangement below. Tap the pan lightly on the counter 2-3 times to release any trapped air bubbles, which helps the cake rise evenly.
Bake at 350°F (175°C) for 40–45 minutes, until a toothpick inserted into the center of the cake comes out clean or with just a few moist crumbs, and the edges of the cake are pulling away slightly from the pan. If your oven runs hot, lower the temperature by 10°F and add 5 minutes to the bake time to avoid burning the caramel topping before the cake is cooked through. Avoid opening the oven door for the first 30 minutes of baking, as sudden temperature drops can cause the cake to sink in the center.
Flipping and Serving Like a Pro
This step is where all your prep work comes together, and a few small tricks will ensure a picture-perfect, intact fruit topping every time.
The Perfect Flip
Let the cake cool in the pan for 10–15 minutes after baking—this lets the caramel topping set so it doesn’t run when you flip. Run a thin knife around the edge of the pan to loosen the cake, taking care not to cut into the fruit layer. Place a serving plate or flat tray upside down on top of the pan, hold both firmly, and flip quickly in one smooth motion. If the cake resists, tap the bottom of the pan gently with the handle of a knife to help release it. In practice, many home bakers rush this step and end up with a torn fruit topping; letting the cake cool for a full 15 minutes makes all the difference for a clean release.
Serving and Garnish Ideas
Serve the cake warm for the best gooey, caramelized texture. Top with a light dusting of powdered sugar, a scoop of vanilla ice cream, a dollop of whipped cream, or a drizzle of salted caramel sauce for extra richness. For a festive holiday spread, pair slices with a cutting cheese for boards featuring sharp cheddar and dried fruit for a sweet-savory contrast. You can also serve it on an engraved serving board you’ve decorated yourself for a personal, gift-worthy touch.
Customization and Variations
This recipe is highly flexible, so you can adjust it to match your taste preferences or what you have on hand:
- Alternative fruits: Swap half the cranberries for fresh blueberries for a milder, sweeter flavor, use sliced pears instead of apples for a softer, juicier topping, or add pomegranate seeds for a pop of tart crunch.
- Spice additions: Add 1 tsp ground cinnamon, ¼ tsp ground nutmeg, or a pinch of cardamom to the dry ingredients for warm, cozy flavor.
- Glazes and toppings: Drizzle with warm maple syrup, salted caramel, or a cream cheese glaze for extra richness. Sprinkle chopped nuts over the topping before baking for extra crunch.
- Dietary swaps: Follow the ingredient swaps listed above for gluten-free, vegan, or dairy-free versions.
Storage and Reheating Tips
Let the cake cool completely before storing to avoid condensation that makes the topping soggy. Keep it at room temperature in an airtight container for up to 2 days, or in the refrigerator for up to 5 days. For longer storage, wrap tightly in plastic wrap and aluminum foil and freeze for up to 3 months.
To reheat individual slices, microwave on medium power for 15–30 seconds. To reheat the whole cake, wrap it loosely in foil and warm in a 300°F (150°C) oven for 10 minutes. The FDA recommends letting baked goods cool to room temperature before storing to prevent sogginess and foodborne bacteria growth. Add a splash of apple juice to the cake before reheating if it’s been stored for more than a day to restore moisture.
If you need to clean up spills or scrub baked-on sugar from your cake pan after use, heavy-duty scrub brushes make quick work of stuck-on residue without scratching nonstick surfaces. For general kitchen cleanup, a multi-surface cleaning brush works well for both countertops and bakeware.
Frequently Asked Questions
Can I use frozen cranberries in this recipe?
Yes, thaw them completely and pat them dry with a paper towel to remove excess moisture, which prevents a soggy topping and uneven baking.
How do I keep the cake from sticking to the pan?
Grease the pan thoroughly with butter or nonstick spray, and make sure the cake cools for at least 10 minutes before flipping to let the caramel set.
Can I make this cake ahead of time?
Yes, bake it 1–2 days in advance, store covered at room temperature, and reheat gently in the oven before serving for best results.
Can I use canned apples instead of fresh?
No, canned apples are too soft and wet, and will make the topping soggy and the cake dense. Stick to fresh, firm apples for the best texture.
What pan size is best for this recipe?
A 9-inch round cake pan is ideal, but an 8×8 square pan works too—just add 5 minutes to the bake time for the larger surface area.
Conclusion
This apple cranberry upside down cake is the ultimate combination of sweet, tart, and caramelized richness, with a foolproof method that makes it accessible for bakers of all skill levels. Whether you’re serving it for a holiday feast, a potluck, or a cozy night in, it’s guaranteed to be a hit with everyone who tries a slice. The flexible recipe also lets you customize it to match your taste preferences or dietary needs, so you can make it your own.
For more easy, tested recipes and kitchen hacks to simplify your cooking routine, browse our full blog collection. If you’re baking with kids, check out our range of kitchen safety latches to secure cabinets and drawers away from little helpers near hot ovens and sharp utensils. Give this recipe a try for your next gathering, and enjoy every bite of this irresistibly delicious dessert.

I’m Abby Lu, a passionate home cook who loves simplifying everyday meals. At PlugChef.com, I share product reviews and cooking guides to help you find the best tools for your kitchen.
Related posts:
 How to Make a Fruit Basket for a Gift: Easy DIY Guide
 Do You Need a Basket? Essential Guide for Air Fryers
 How to Adjust Syrup Dispenser Pressure: Expert Tips
 Appliance Play Food Kitchen Toys: Ignite Imaginative Play
 How Long Do Beauty Blenders Last: Expert Tips Unveiled
 Philips Kitchen Appliances Compact Pasta And Noodle Maker: Effortless Homemade Pasta

