
Grilling season is one of the best parts of the year, until you pull back the lid to find your grates caked in sticky, baked-on grease and charred food bits. No matter how much you scrub with a standard grill brush, that stubborn buildup sticks around, making food stick, causing uneven cooking, and even leaving off-flavors on your favorite burgers and veggies. Many people assume deep cleaning grill grates requires hours of elbow grease or harsh scrubbing that damages the metal, but oven cleaner for grill grates is a proven, low-effort solution that cuts through even the toughest grime in minutes—when used correctly. This guide covers everything you need to know to choose the right cleaner, avoid damaging your grill, and get sparkling clean results every time, plus long-term tips to keep your grates in top shape between deep cleans. For more expert guidance on kitchen upkeep, from grill maintenance to cabinet safety, visit our kitchen care blog.
Choosing the Right Oven Cleaner for Your Grill Type
Not all oven cleaners are created equal, and picking the wrong formula can discolor your grates, leave toxic residues, or fail to remove tough buildup. The right choice depends on your grate material, how often you grill, and your safety and environmental priorities.
Types of Oven Cleaners
There are four main categories of oven cleaners to choose from, each with unique strengths and use cases:
- Caustic aerosol cleaners: Typically containing sodium hydroxide (lye), these are the most powerful option for heavy, baked-on grease on durable cast iron or bare stainless steel grates. They break down fat molecules in 15-20 minutes, requiring minimal scrubbing, but are too harsh for porcelain-enameled or non-stick coated surfaces.
- Grill-specific aerosol cleaners: Formulated with lower concentrations of harsh chemicals and no added fragrances that could transfer to food, these are a safer pick for frequent use on all metal grate types. Many are also designed to rinse off completely without leaving toxic residue.
- Gel and foam cleaners: These cling to vertical grate surfaces and undersides where 70% of grease buildup accumulates, reducing overspray and ensuring the cleaner stays in contact with grime for longer. They work well for grates with complex bar patterns that are hard to coat with aerosol sprays.
- Natural cleaners: Made from baking soda, vinegar, citric acid, or plant-based enzymes, these non-toxic options are safe for all grate types, including porcelain and non-stick coatings. They require 45-60 minutes of soak time and more scrubbing effort for heavy buildup, but are the safest choice for households with kids or pets.
Safety and Compatibility Considerations
Before buying any oven cleaner, check your grill's manual to confirm your grate material, and always read the product label to ensure it's safe for cookware surfaces. Caustic cleaners can cause severe skin and eye irritation, so always wear nitrile gloves (latex degrades quickly when exposed to strong chemicals) and safety goggles during use. Work in a well-ventilated area, preferably outdoors, to avoid inhaling fumes, and never apply cleaner to warm or hot grates, as heat accelerates fume release and increases respiratory risk. For full guidance on safe handling of household cleaning chemicals, refer to the EPA's safe cleaning product guide.
Eco-Friendly and Low-Residue Options
If you prioritize low-waste, non-toxic cleaning products, look for formulas certified by the EPA Safer Choice program, which verifies that all ingredients are safe for human health and the environment. Plant-based cleaners often use citric acid or enzymes to break down grease, and many come in refillable aluminum or recycled plastic containers to reduce plastic waste. Note that most eco-friendly formulas require longer soak times than traditional caustic cleaners, so plan ahead if you're short on time. Avoid "greenwashed" products that claim to be natural but still contain harsh solvents or synthetic fragrances—check the ingredient list for vague terms like "surfactants" without specific sourcing.
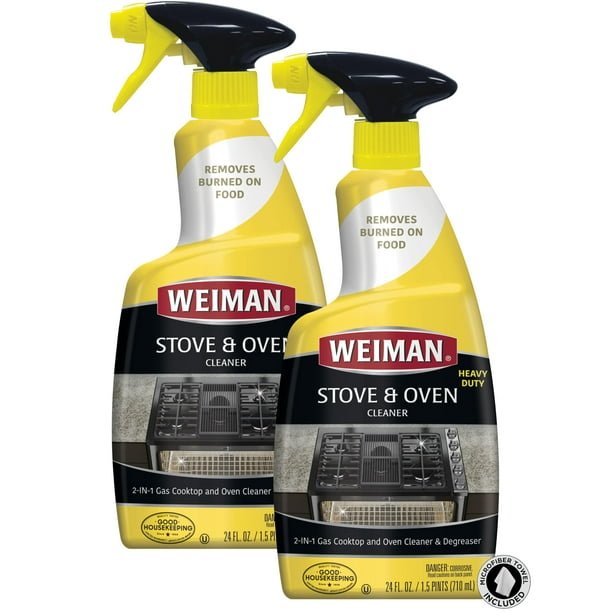
 This heavy baked-on grease and char is exactly what a properly formulated oven cleaner can dissolve in 15-20 minutes
Credit: www.amazon.ca
This heavy baked-on grease and char is exactly what a properly formulated oven cleaner can dissolve in 15-20 minutes
Credit: www.amazon.ca
Pre-Cleaning Prep: Protect Your Grill and Your Space
Skipping prep steps is the most common reason oven cleaner fails to remove tough buildup, or leads to accidental damage to your grill or surrounding surfaces. Follow these steps to set yourself up for a successful, mess-free clean.
Remove Loose Debris First
Start by scraping off large chunks of burnt food and ash with a putty knife, then brush away remaining loose crumbs with a stiff grill brush. For gas grates, turn the burners on high for 2-3 minutes to carbonize remaining stuck-on particles, making them far easier to brush off before applying cleaner. A stiff bathroom and kitchen cleaning brush works well to dislodge crumbs from between tight grate bars that a standard grill brush can't reach. This step prevents loose debris from mixing with the cleaner and creating extra mess to rinse later.
Disassemble Removable Grill Components
Remove all grate bars, flavorizer bars, heat deflectors, and drip trays from your grill before cleaning. This gives you full access to all surfaces of the grates, and lets you soak smaller parts separately for more thorough cleaning. Consult your grill's manual if you're unsure which parts are removable, and label multi-burner components if you have a complex setup to avoid mixing them up during reassembly. For gas grills, always disconnect the gas line before removing internal parts to avoid accidental leaks.
Shield Surrounding Surfaces
Before applying any cleaner, cover nearby surfaces to avoid accidental spills or splashes. If cleaning outdoors, cover patios, grass, and garden plants with a tarp, as caustic cleaner runoff can kill vegetation and discolor concrete. If cleaning indoors, line your sink or tub with cardboard to avoid etching the surface with harsh chemicals, and cover countertops with old newspaper or plastic sheeting. If you have young children or pets, store oven cleaner and other harsh chemicals in a locked cabinet using child safety locks for cabinets to prevent accidental exposure.
Step-by-Step Deep Cleaning Process for Spotless Grates
Once you've prepped your grates and chosen the right cleaner, follow this step-by-step process to get restaurant-quality results without damaging your grill.
Apply Cleaner Evenly
Place removed grates on a flat, covered surface (old cardboard or a plastic tarp works well) in a well-ventilated area. For aerosol cleaners, hold the can 8-10 inches from the grate surface and spray in a sweeping motion to cover all sides, including the underside where most grease accumulates. For gel or foam cleaners, use a disposable brush to apply a thick, even layer to all surfaces, making sure to get into the gaps between grate bars. Avoid overspraying, as excess cleaner will drip off and create extra mess to rinse later.
Let It Soak for Optimal Results
Let the cleaner sit for the exact time specified on the product label—most caustic formulas need 15-20 minutes, while natural and grill-specific cleaners may require 30-45 minutes. Never exceed the recommended soak time, as prolonged exposure to caustic chemicals can corrode cast iron or etch stainless steel. Use this waiting time to fill a bucket with hot soapy water for rinsing, and wipe down the grill interior with a damp cloth to remove loose grease.
Scrub Without Damaging Surfaces
After the soak time, use a non-abrasive scrubbing pad for stainless steel or porcelain grates, and a brass-bristle grill brush for cast iron (steel bristles can scratch porcelain coatings). For tough baked-on spots, a heavy-duty kitchen cleaning scrub brush will cut through grime without scratching most metal grate surfaces. Focus on areas with heavy buildup, applying firm, even pressure; for stuck-on carbon, let the cleaner sit for an additional 5 minutes before scrubbing again. Avoid using steel wool on stainless steel, as it can leave small scratches that trap grease and rust over time.
Rinse and Dry Thoroughly
Rinse grates under hot running water for 2-3 minutes to wash away all cleaner residue and loosened grime. Follow up with a scrub using hot soapy water and a clean brush to remove any remaining oily film, then rinse again with clear hot water. Dry grates immediately with a clean microfiber towel to prevent water spots and rust, especially for cast iron. If you're seasoning cast iron grates, proceed to the seasoning step immediately after drying to avoid rust formation.
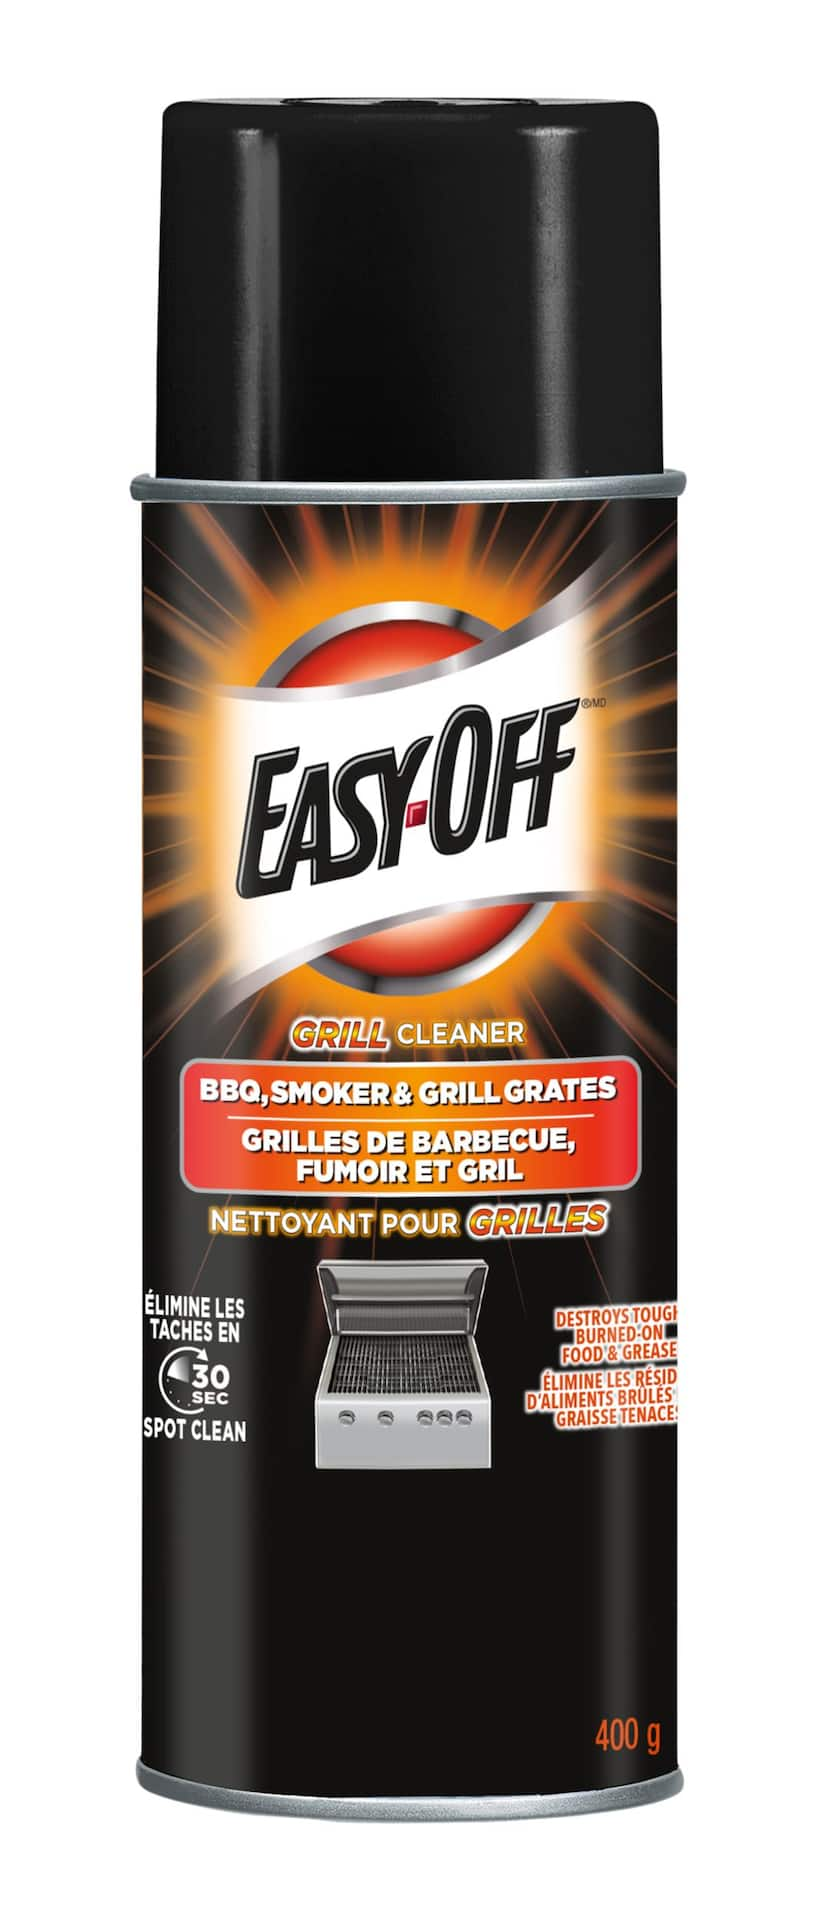 Grill-specific oven cleaners are formulated to avoid leaving toxic residues on food-contact surfaces
Credit: www.canadiantire.ca
Grill-specific oven cleaners are formulated to avoid leaving toxic residues on food-contact surfaces
Credit: www.canadiantire.ca
Alternative Grill Grate Cleaning Methods
If you prefer to avoid harsh chemicals entirely, or need a quick fix for light buildup, these alternative methods are just as effective for most cleaning needs.
Natural DIY Cleaning Solutions
For light to moderate grease buildup, mix 3 parts baking soda with 1 part warm water to form a thick paste, spread it over the grates, and let sit for 30 minutes before scrubbing with a brush. For tougher buildup, spray undiluted white vinegar over the grates, let sit for 10 minutes, then scrub with a salt and lemon juice mixture (the salt acts as a mild abrasive, while the citric acid cuts through grease). These natural solutions are safe for all grate types and non-toxic, but require more scrubbing effort than caustic cleaners for heavy buildup. Pair natural cleaning pastes with a professional kitchen cleaning brush made from sustainable bamboo for a low-waste, effective clean.
Grill Brush Maintenance Tips
A high-quality grill brush is essential for both quick post-use cleaning and deep cleaning. Brass-bristle brushes are the safest option for all grate types, as they won't scratch porcelain or stainless steel, while steel-bristle brushes are best for heavy-duty cast iron grates. Replace your grill brush every 3-6 months, as loose bristles can break off and end up in your food, posing a choking hazard. After each use, clean the brush by soaking it in hot soapy water to remove built-up grease and bacteria.
Pressure Washing for Heavy Buildup
Pressure washing is a fast, chemical-free option for stainless steel or bare cast iron grates, but never use it on porcelain-enameled or non-stick coated grates, as the high pressure can damage the coating. Set your pressure washer to under 1500 PSI, hold the nozzle 6-8 inches from the grate surface, and use a sweeping motion to blast away grease and carbon buildup. Always dry grates immediately after pressure washing with a clean towel to prevent rust formation. After deep cleaning the grates, use a kitchen wall cleaning brush to scrub grease splatters off the grill's exterior and control panel.
Long-Term Care to Keep Grates Sparkling Between Deep Cleans
Regular maintenance is the best way to avoid heavy buildup and reduce how often you need to use oven cleaner for deep cleaning.
Post-Use Quick Cleaning Routine
The easiest way to avoid deep cleaning is to do a 30-second brush-down of your grates after every use, while they're still warm (not hot enough to burn you). This prevents grease and food particles from carbonizing and hardening, making deep cleaning far easier. Keep a small grill brush stored near your grill for quick post-use cleanups, and wipe down the grill lid and exterior with a damp cloth after each use to prevent grease splatters from building up.
Seasoning for Cast Iron Grates
Seasoning is only necessary for cast iron or bare carbon steel grates, not stainless steel or porcelain. After deep cleaning and drying, apply a thin, even layer of high-smoke-point cooking oil (canola, grapeseed, or avocado oil work best) to all surfaces of the grate. Turn the grill to high heat (400-450°F) for 10-15 minutes to polymerize the oil, creating a natural non-stick layer that prevents food from sticking and protects the metal from rust. Repeat this process 2-3 times for new or heavily rusted cast iron grates to build up a durable seasoning layer. For best practices, see the University of Minnesota Extension's cast iron care guide.
Rust Prevention Strategies
Rust forms when moisture sits on metal grates for extended periods, so always dry grates thoroughly after cleaning, and never store them outside in damp conditions. Use a tight-fitting, waterproof grill cover to protect your grill from rain and snow, and store removable grates in a dry indoor space during winter if you live in a humid climate. For small rust spots on cast iron grates, scrub the area with steel wool, then re-season the entire grate to restore the protective layer. For stainless steel grates, use a dedicated stainless steel rust remover to avoid scratching the surface.
 Proper drying is the final step to ensure no cleaner residue remains before re-seasoning or cooking
Credit: www.amazon.ca
Proper drying is the final step to ensure no cleaner residue remains before re-seasoning or cooking
Credit: www.amazon.ca
Common Mistakes That Damage Grates or Leave Hazardous Residue
Even experienced grill owners make these avoidable errors that can ruin their grates or create health risks. Avoid these pitfalls to get safe, effective results every time.
Using Oven Cleaner on Warm Grates
Applying caustic cleaner to warm or hot grates releases toxic fumes that can cause respiratory irritation, headaches, or nausea. Always let grates cool completely to room temperature before applying any cleaner. If you're cleaning grates right after a cookout, wait at least 2 hours, or clean them the next day when they're fully cool.
Using the Wrong Cleaner for Your Grate Material
Caustic aerosol cleaners will etch and discolor porcelain-enameled or non-stick coated grates, permanently damaging the surface. Always check your grill's manual to confirm your grate material, and choose a cleaner formulated for that specific type. When in doubt, opt for a natural cleaning solution to avoid damage.
Skipping the Patch Test
Even cleaners labeled as safe for metal can cause discoloration or corrosion on certain finishes. Test the cleaner on a small, hidden area of the grate first, let it sit for the recommended time, then rinse and check for damage before applying it to the entire surface.
Not Rinsing Thoroughly
Leftover cleaner residue can make food taste bitter, and in severe cases, cause mild gastrointestinal upset if ingested. Rinse grates under hot running water for at least 2 minutes, scrub with hot soapy water, then rinse again with clear hot water to ensure all residue is removed.
Reusing Damaged Grill Brushes
Old grill brushes with loose or broken bristles can shed metal pieces that end up in your food, posing a serious choking hazard or causing internal injury. Replace your grill brush every 3-6 months, and inspect it before each use for loose bristles.
Frequently Asked Questions
What is the best oven cleaner for grill grates?
The best cleaner depends on your grate material and safety needs. For cast iron or stainless steel grates, a caustic aerosol oven cleaner works fastest for heavy grease, but always choose a grill-specific formula to avoid toxic residues. For porcelain-enameled or non-stick coated grates, use a natural baking soda and vinegar solution or an EPA Safer Choice-certified gentle cleaner to avoid etching the surface. Always check the product label to confirm it's safe for metal cookware surfaces.
How do I safely use oven cleaner on grill grates?
First, let grates cool completely to room temperature to avoid toxic fume release. Wear nitrile gloves and safety goggles, work in a well-ventilated outdoor area if possible. Spray or apply cleaner evenly to all surfaces, avoid overspray on surrounding areas. Let sit for the time specified on the label (never longer, as this can corrode metal). Scrub with a non-abrasive pad or grill brush, then rinse with hot soapy water for 2-3 minutes to remove all residue, followed by a clear hot water rinse. Dry thoroughly with a clean towel before reinstalling or seasoning.
Can oven cleaner damage grill grates?
Yes, if used incorrectly. Caustic oven cleaners will corrode and discolor porcelain-enameled coatings, and can etch stainless steel if left on too long. Natural cleaners are low-risk but may not remove heavy baked-on grease from cast iron if not scrubbed vigorously. Always do a patch test on a small, hidden area of the grate first, and follow the cleaner's instructions for safe use on cookware surfaces.
How often should I clean grill grates with oven cleaner?
For grills used 2-3 times per week, deep clean with oven cleaner every 4 weeks to prevent heavy grease buildup. For occasional use (1-2 times per month), every 2-3 months is sufficient. Always do a quick brush-down of grates after each use while they're still warm to reduce the need for frequent deep cleaning.
Can I use oven cleaner on non-stick coated grill grates?
No. Caustic oven cleaners will degrade non-stick coatings, releasing toxic fumes and making the surface unsafe for cooking. For non-stick grates, use a mild dish soap and warm water solution, and avoid abrasive scrubbers that can scratch the coating.
Is it safe to cook on grates immediately after using oven cleaner?
No. Always rinse grates thoroughly with hot soapy water, then a final clear hot water rinse, and dry completely before cooking. For extra safety, let grates air dry for 2-3 hours or re-season cast iron grates before your next cookout to ensure all chemical residues are gone.
Conclusion
Oven cleaner is one of the most effective tools for deep cleaning grill grates, cutting through even the toughest baked-on grease and carbon buildup in a fraction of the time it takes to scrub by hand. The key to getting sparkling, food-safe results is choosing the right cleaner for your grate material, following proper safety protocols, and pairing deep cleaning with regular post-use maintenance to prevent heavy buildup from forming in the first place. Avoid common mistakes like using cleaner on warm grates or skipping the final rinse, and your grill will stay in top condition for years of perfect cookouts. For more expert kitchen maintenance guides, reviews of top-rated cleaning tools, and safety tips for households with kids, browse our full kitchen care blog to keep every part of your home in top shape.

I’m Abby Lu, a passionate home cook who loves simplifying everyday meals. At PlugChef.com, I share product reviews and cooking guides to help you find the best tools for your kitchen.
Related posts:
 Kitchen Sink Mats at Target: Enhance Your Kitchen Space
 Pinks Rose Print under Sink Mat: Elevate Your Kitchen Decor
 Oxo Good Grips Silicone Sink Mat: Ultimate Protection
 3 Shelf Hanging Closet Organizer: Maximize Your Space
 How to Clean Teak Cutting Board: Easy Steps for Lasting Shine
 How to Make a Cutting Board from Wood: Easy DIY Step-by-Step Guide

