
Your butcher block is more than just a kitchen surface—it’s where you prepare meals, share moments, and create memories. But without the right care, it can dry out, crack, or lose its natural beauty.
Knowing how to oil your butcher block properly is the key to keeping it strong and looking great for years. In this guide, you’ll discover simple, effective steps that anyone can follow to protect your wood and bring out its best.
Ready to give your butcher block the care it deserves? Let’s dive in.
Choosing The Right Oil
Choosing the right oil for your butcher block is key to keeping it safe and lasting long. The oil protects the wood from drying out and cracking. It also helps resist stains and odors. Not every oil is good for kitchen use. Some oils can go bad and damage your board. Knowing which oils are safe and effective helps maintain your butcher block properly.
Food-safe Oils
Food-safe oils are designed to protect wood that touches food. They do not spoil or harm health. Common food-safe oils include:
- Mineral oil
- Walnut oil
- Coconut oil (refined)
- Pure beeswax (often mixed with oils)
These oils soak into the wood and create a water-resistant layer. They keep the wood healthy without leaving harmful residues.
Oil Types To Avoid
Avoid oils that can turn rancid or are toxic. These include:
- Vegetable oils (corn, soybean, canola)
- Olive oil
- Flaxseed oil (unless specially prepared for wood)
- Any oil with additives or chemicals
These oils can smell bad and damage the wood over time. They may also attract bacteria or mold.
Benefits Of Mineral Oil
Mineral oil is the best choice for butcher blocks. It is:
- Colorless and odorless
- Non-toxic and food safe
- Easy to apply and absorbs well
- Does not go rancid
This oil seals the wood surface, preventing cracks and stains. It also keeps the wood smooth and shiny. Regular use of mineral oil extends the life of your butcher block.
Credit: www.homedepot.com
Preparing The Butcher Block
Preparing your butcher block before oiling is essential for a long-lasting finish. A clean, smooth surface helps the oil soak in evenly. Proper preparation also removes any dirt, stains, or odors that can affect the wood’s condition.
Cleaning The Surface
Start by wiping the butcher block with a damp cloth. Use mild soap and warm water to remove grease and grime. Avoid soaking the wood; excess water can cause damage. Dry the surface with a clean towel immediately after cleaning.
Sanding For Smoothness
Sanding helps remove rough spots and old finishes. Use fine-grit sandpaper, such as 220 grit, for the best results. Sand in the direction of the wood grain to avoid scratches. Wipe away dust with a dry cloth after sanding.
Removing Stains And Odors
Stains and odors can come from food or spills. Sprinkle baking soda on the surface and scrub gently with a damp sponge. For tough stains, use a mix of lemon juice and salt. Let it sit for a few minutes before rinsing and drying the block.
Applying The Oil
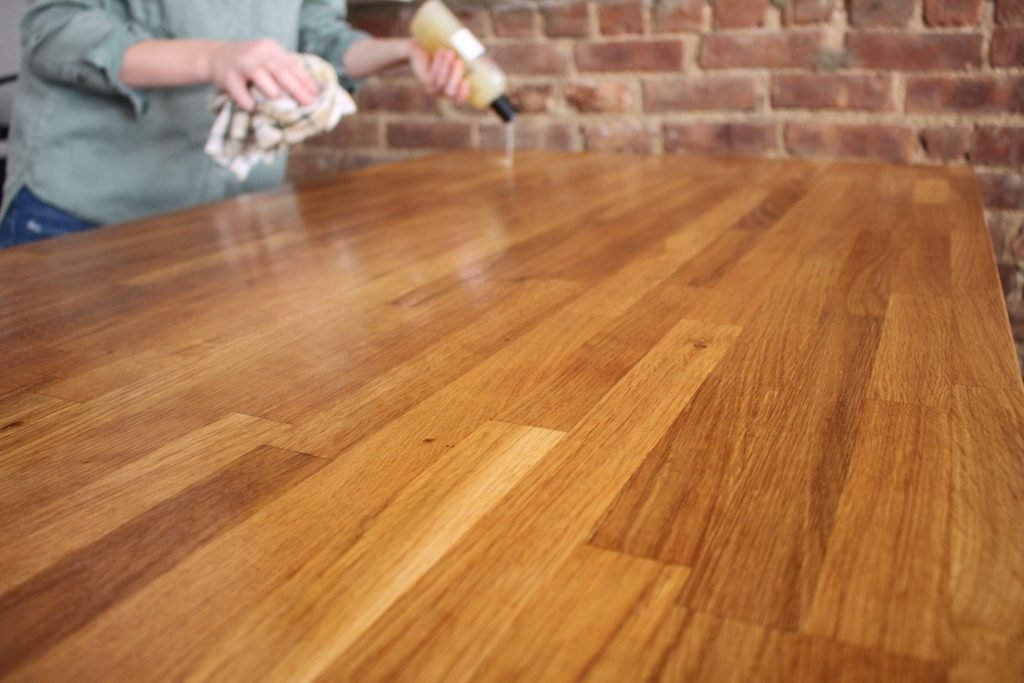
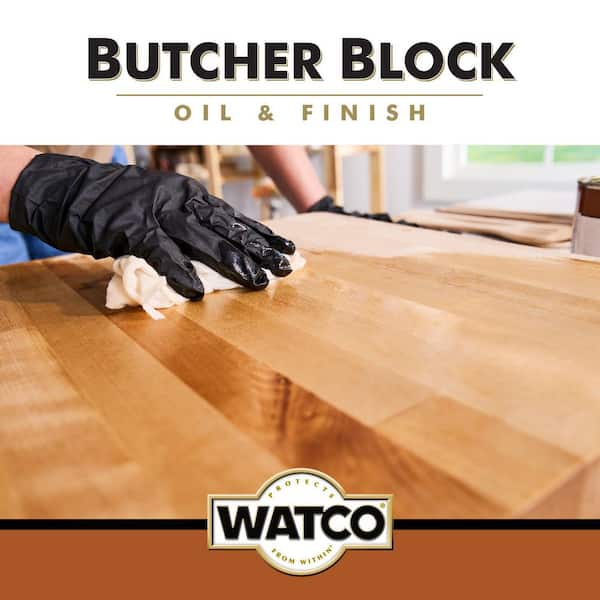
Apply oil evenly using a clean cloth or paper towel. Rub it gently into the wood, covering all surfaces for protection. Let the oil soak in before wiping off any extra.
Applying oil to your butcher block keeps it looking great. It also protects the wood from wear and moisture. With the right tools and steps, the process is simple and quick.Tools You’ll Need
Gather your supplies before you start. Here’s a list of what you’ll need:- Food-safe mineral oil
- Clean, lint-free cloths or paper towels
- Sandpaper (optional for rough spots)
Step-by-step Application
First, clean the butcher block surface. Use a damp cloth to remove dust or debris. Let the surface dry completely before oiling. Next, pour a small amount of oil onto the block. Use a cloth to spread the oil evenly across the surface. Rub in the direction of the wood grain for better absorption. Let the oil sit for 15-20 minutes. This allows the wood to soak up the oil. Afterward, wipe away any excess oil with a clean cloth. This prevents a sticky surface.How Much Oil To Use
Start with a small amount of oil. A few tablespoons usually suffice for a medium-sized block. Add more oil if needed. Avoid over-saturating the wood, as this can lead to a sticky surface.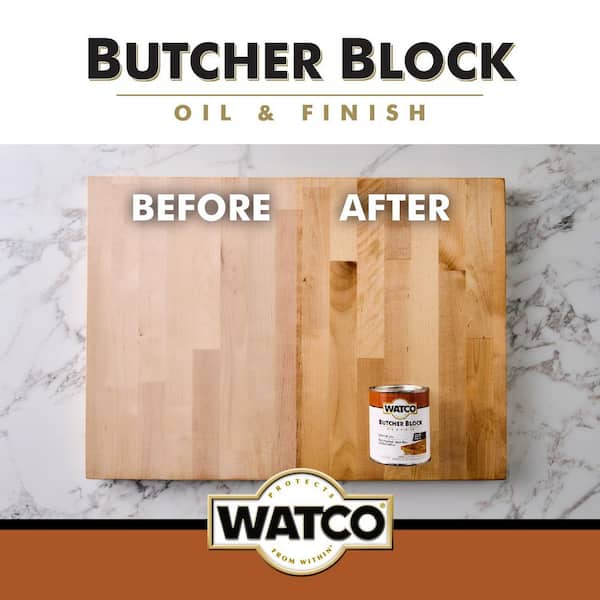
Credit: www.homedepot.com
Drying And Absorbing
After applying oil to your butcher block, the drying and absorbing phase is crucial. This step determines how well the wood soaks up the oil, affecting both the look and durability of your board. Paying attention to this stage ensures your butcher block stays protected and beautiful for years.
Optimal Drying Time
Let the oil sit on the butcher block for at least 20 to 30 minutes. This allows the wood fibers to soak up the oil deeply. If you wipe it off too soon, the wood won’t absorb enough, leaving it vulnerable to cracks and stains.
After the initial soak, wipe off any excess oil with a clean cloth. Then, give your butcher block a full 24 hours to dry before using it again. This waiting period helps the oil cure and creates a protective layer on the surface.
Tips To Speed Up Absorption
- Warm the oil slightly before application to help it penetrate faster.
- Apply the oil in thin, even layers rather than one thick coat.
- Use a soft cloth or brush to gently massage the oil into the wood, encouraging deeper absorption.
Have you noticed how some oils soak in quicker than others? Choosing a natural oil like mineral or walnut oil can make a difference in absorption speed and finish quality.
When To Apply Additional Coats
Check your butcher block after the first coat dries. If the wood looks dry or dull, it’s time for another layer. Multiple coats build up a stronger barrier against moisture and wear.
Generally, 2 to 3 coats work well for new or very dry butcher blocks. After each coat, wait for the oil to fully dry before adding the next one. Patience here pays off with a smoother, longer-lasting finish.
Maintaining Your Butcher Block
Maintaining your butcher block keeps it looking fresh and lasting longer. Proper care protects the wood from drying, cracking, and stains. Simple routines help preserve its natural beauty and functionality.
Regular Oil Schedule
Oiling your butcher block regularly prevents it from drying out. Apply mineral oil or a specialized butcher block oil once every few weeks. For new blocks, oil more often during the first month. This builds a strong protective layer. A well-oiled surface resists water and food stains better.
Cleaning Between Oilings
Clean the surface carefully before oiling. Use a mild soap and warm water to wipe away food residue. Avoid soaking the wood; water can cause damage. Dry the block thoroughly with a clean towel. This step ensures oil soaks into clean, dry wood for best results.
Avoiding Common Mistakes
- Don’t use vegetable or olive oil; they can go rancid.
- Avoid harsh chemicals that strip natural oils from the wood.
- Never put the block in the dishwasher; heat and water cause warping.
- Don’t skip drying the block fully before oiling.
- Avoid cutting directly after oiling; let oil absorb for a few hours.

Credit: food52.com
Restoring Old Or Damaged Blocks
Restoring old or damaged butcher blocks brings back their beauty and function. Over time, wood can dry out, crack, or get deep stains. Proper care and treatment can extend the life of these kitchen essentials. The process involves cleaning, fixing damage, and applying oil to renew the wood’s surface.
Deep Cleaning Techniques
Start by removing dirt and stains from the block’s surface. Use a mixture of warm water and mild dish soap. Scrub gently with a soft brush or sponge. For tough stains, sprinkle coarse salt or baking soda on the block. Rub it with a half lemon to lift grime and odors. Rinse with clean water and dry thoroughly with a towel. Avoid soaking the wood to prevent warping.
Repairing Cracks And Gouges
Inspect the block for cracks or deep cuts. Small cracks can be filled with food-safe wood filler or beeswax. Press the filler into the cracks and smooth the surface. Let it dry completely before sanding lightly. For larger gouges, sanding helps even the surface. Use fine-grit sandpaper and sand along the grain. Clean off dust with a damp cloth before moving on.
Re-oiling For Renewal
Choose a food-safe mineral oil or butcher block oil. Pour a small amount onto the wood and spread evenly with a clean cloth. Cover every part, including edges and corners. Let the oil soak in for several hours or overnight. Wipe off any excess oil to avoid sticky residue. Repeat the oiling process regularly to keep the wood hydrated and protected.
Frequently Asked Questions
How Often Should I Oil My Butcher Block?
You should oil your butcher block every 3 to 4 weeks. Regular oiling prevents drying and cracking. It keeps the wood hydrated and food-safe. Increase oiling frequency in dry or high-use environments for best results.
What Type Of Oil Is Best For Butcher Blocks?
Food-grade mineral oil is the best choice for butcher blocks. It is safe, odorless, and non-toxic. Avoid vegetable oils as they can go rancid. Mineral oil penetrates wood and protects it from moisture damage effectively.
Can I Use Any Oil To Treat A Butcher Block?
No, only food-safe oils like mineral oil should be used. Other oils may spoil or damage the wood. Using non-food-safe oils can make the surface unsafe for food preparation. Always check oil labels for safety certification.
How Do I Prepare A Butcher Block Before Oiling?
Clean the surface thoroughly with mild soap and water. Dry completely before applying oil to prevent trapping moisture. Lightly sand if the surface is rough or stained. This ensures better oil absorption and a smooth finish.
Conclusion
Oiling your butcher block keeps it strong and looking good. Do this regularly to stop cracks and stains. Use food-safe oil and apply it evenly. Let the oil soak in well before wiping extra off. This simple care helps your wood last for years.
A well-oiled butcher block makes cooking safer and easier. Keep your kitchen tools healthy with this easy step. Small effort, big difference.

I’m Abby Lu, a passionate home cook who loves simplifying everyday meals. At PlugChef.com, I share product reviews and cooking guides to help you find the best tools for your kitchen.
Related posts:
 What Type of Cooking Utensils are Safe: Expert Picks
 What Innovations Could Blenders Make: Unleashing Future Tech
 Smart Strategies to Organize a Small Kitchen: Maximize Space
 How to Organize a Kitchen Cabinet: Expert Tips & Tricks
 How to Organize Kitchen Drawers: Expert Tips and Tricks
 How to Organize a Corner Kitchen Cupboard: Expert Tips

