
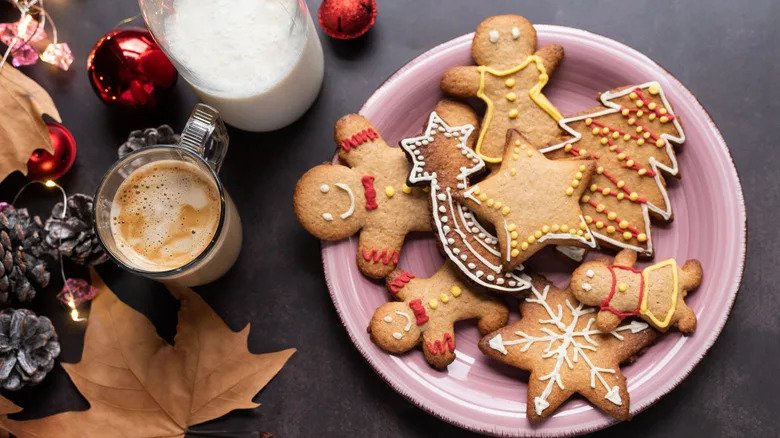
If you want to take your cookie decorating to the next level, using squeeze bottles is a game changer. Imagine creating smooth lines, intricate designs, and vibrant patterns with ease—all from one simple tool.
Whether you’re a beginner or have some experience, squeeze bottles give you control and precision that can make your cookies look professional. You’ll discover how to use squeeze bottles to decorate cookies like a pro, impress your friends, and enjoy every step of the process.
Ready to make your cookies stand out? Let’s dive in.

Credit: www.amazon.com
Choosing The Right Squeeze Bottles
Choosing the right squeeze bottles makes cookie decorating easier and more fun. These bottles help control icing flow and create neat designs. Selecting the right type, nozzle size, and material ensures smooth decorating and better results.
Types Of Bottles
Squeeze bottles come in different shapes and styles. Some have a soft, flexible body for easy squeezing. Others are rigid, offering more control but needing more pressure. Some bottles include interchangeable nozzles for varied icing effects.
- Soft plastic bottles: easy to squeeze, good for beginners.
- Rigid bottles: better for detailed work and steady flow.
- Bottles with multiple tips: versatile for different designs.
Bottle Nozzle Sizes
Nozzle size affects how thick or thin your icing lines will be. Small nozzles create fine details. Larger nozzles cover big areas faster. Choose a size based on your cookie design and skill level.
- Small (0.5-1 mm): perfect for outlines and delicate patterns.
- Medium (1-3 mm): good for filling and moderate details.
- Large (3+ mm): ideal for flooding or broad strokes.
Material And Durability
Material impacts the bottle’s lifespan and ease of cleaning. Silicone bottles are soft and easy to squeeze but may stain. Plastic bottles are lightweight and durable but can crack over time. Choose bottles that are dishwasher safe for quick cleaning.
- Silicone: flexible, stain-resistant, gentle on hands.
- Plastic: sturdy, affordable, may need careful handling.
- Glass: rare for squeeze bottles, heavier but very durable.
Preparing Your Icing
Preparing your icing properly is the key to smooth, beautiful cookie decorations. The right texture makes squeezing easier and helps your designs hold their shape. Getting this step right saves you from frustration and messy results later.
Consistency Tips
The icing needs to be just the right thickness—not too runny, not too stiff. If it’s too thin, your designs will spread and lose detail. Too thick, and it won’t flow well through the squeeze bottle.
Start with a basic royal icing recipe and add water slowly to adjust. Test your icing by lifting a spoon—if the icing falls off in a smooth ribbon and disappears in about 10 seconds, you’re close. You can also try squeezing a small amount onto parchment paper to see how it spreads.
Color Mixing Tricks
Using squeeze bottles means you’ll want vibrant colors that stand out on your cookies. Gel food coloring is your best friend—it won’t thin the icing like liquid colors do. Add color gradually, a little at a time, to get the shade you want.
Mix colors in a separate bowl before adding them to your squeeze bottles. This way, you avoid contaminating your bottles and keep colors pure. Curious about creating a custom shade? Try combining two or three gel colors on a palette until you find the perfect hue.
Storing Icing Properly
Keeping your icing fresh and usable is essential, especially if you’re decorating over several hours or days. Cover your icing tightly with plastic wrap to prevent it from drying out. Store it in an airtight container if you’re not using it immediately.
If the icing thickens while stored, add a few drops of water and stir gently to bring it back to the right consistency. Have you ever tried warming your icing slightly in a warm water bath? It can help loosen it without changing the texture too much.
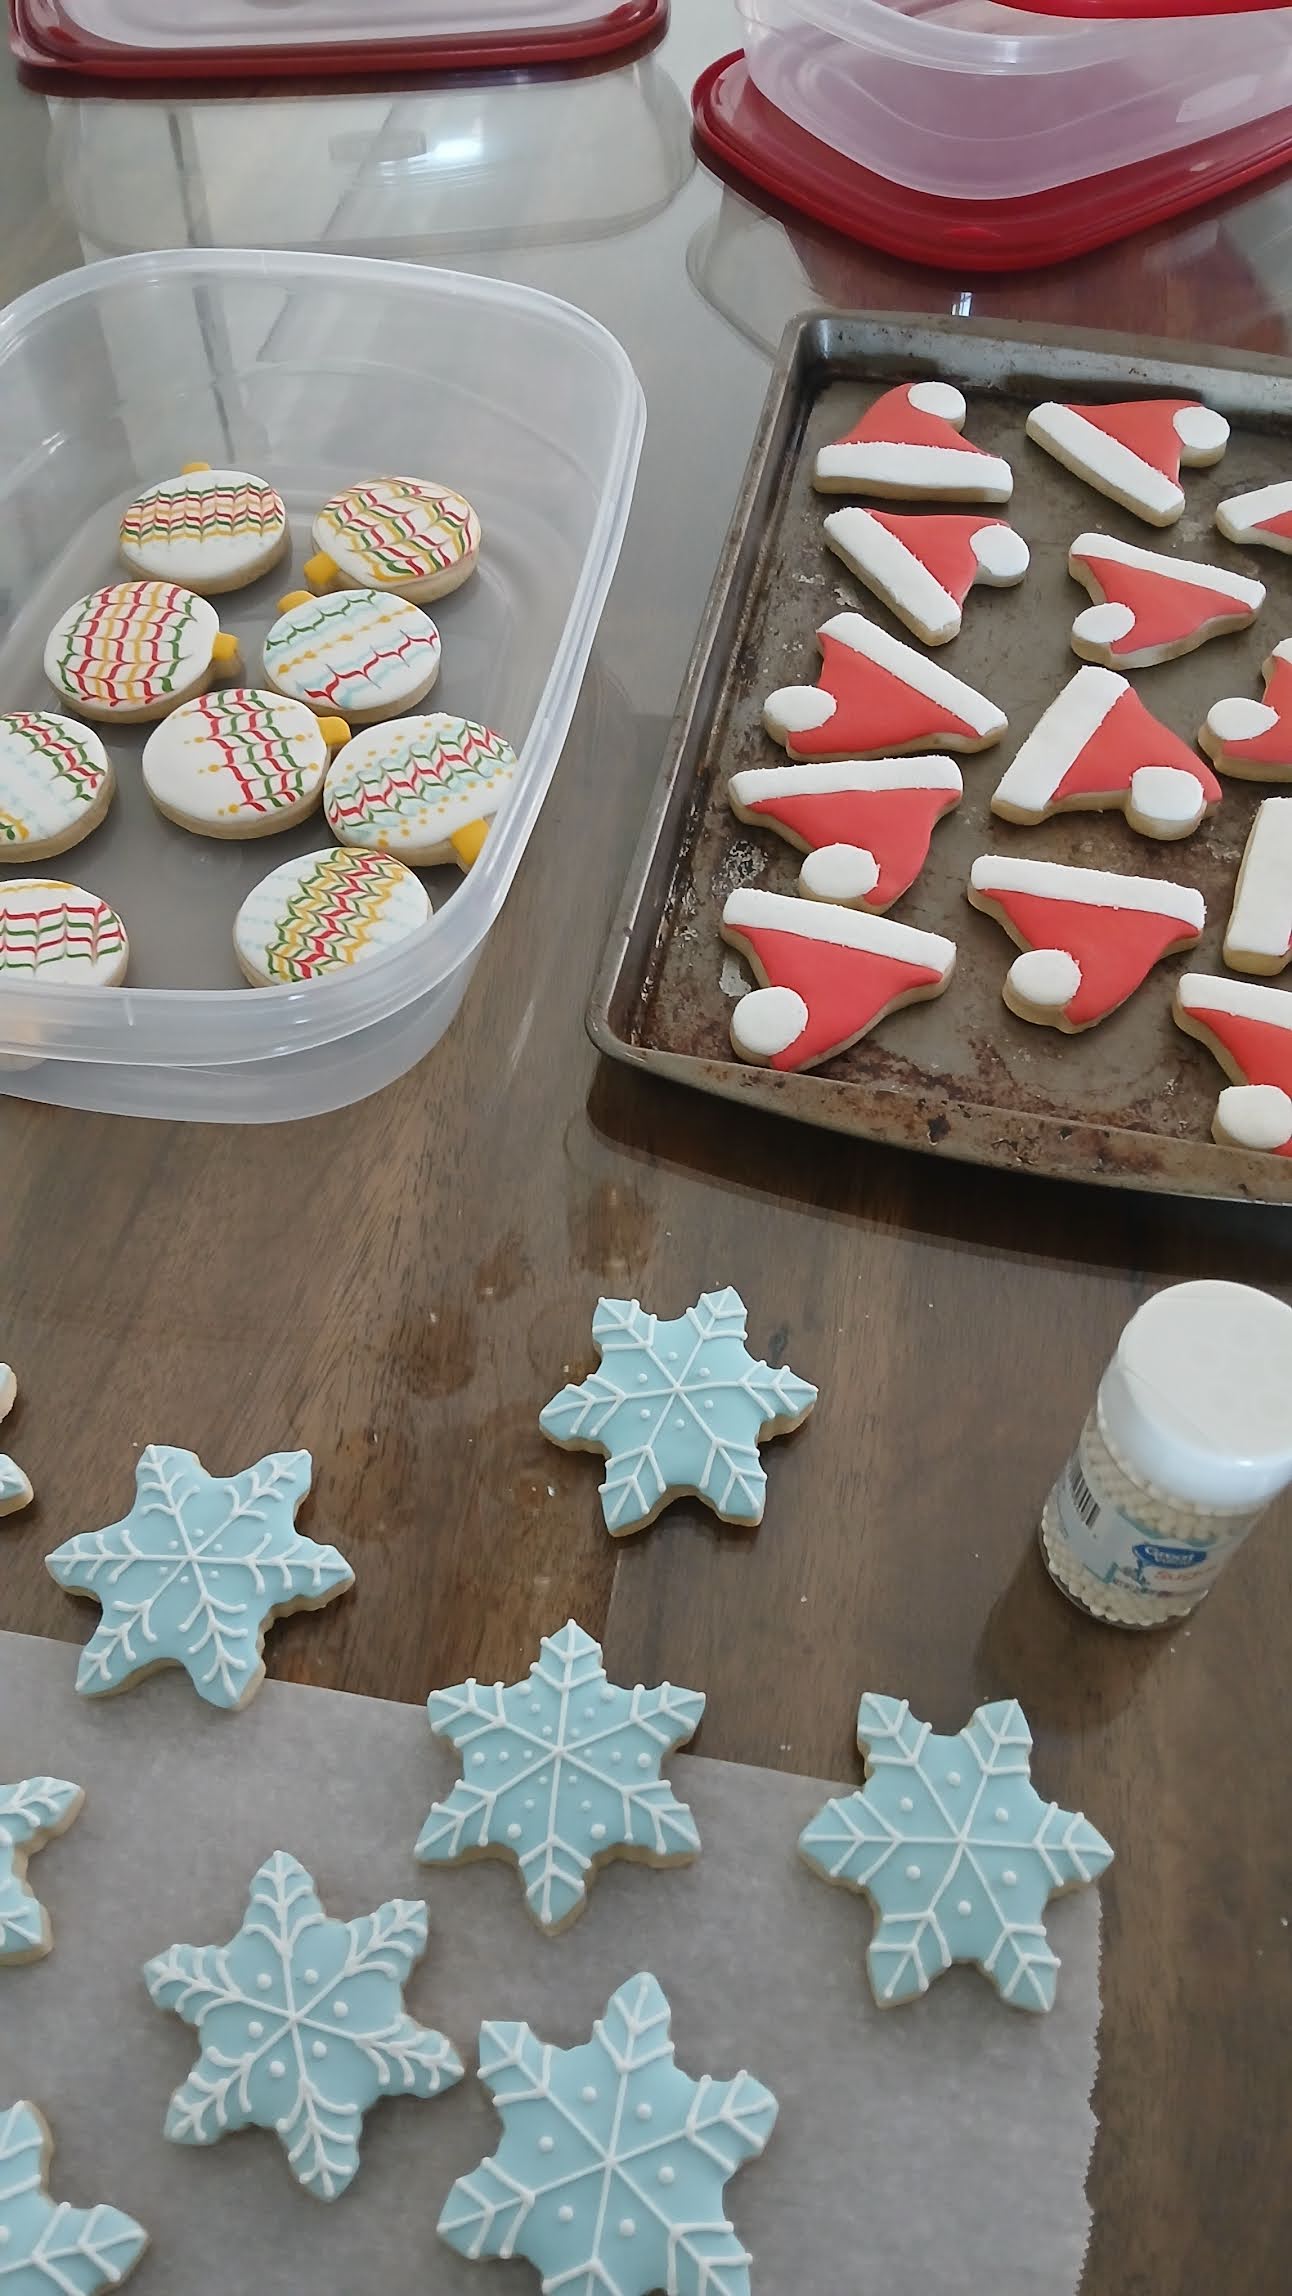
Basic Techniques For Squeeze Bottle Decorating
Squeeze bottles help create neat and detailed cookie designs with ease. Control the flow by gently squeezing for fine lines or bold shapes. Practice steady movements to decorate cookies beautifully and quickly.
Decorating cookies with squeeze bottles offers precision and creativity, making it a delightful activity for both beginners and seasoned bakers. With the right techniques, your cookies can transform into mini works of art. Let’s delve into the basic techniques that will help you master this art form and impress your family and friends.Outlining Cookies
Creating a clean outline is the first step in decorating cookies with a squeeze bottle. Start by holding the bottle at a 45-degree angle to the surface of the cookie. Slowly squeeze to release the icing, guiding it along the edge of the cookie. This barrier will prevent the icing from spilling over when you flood the cookie.Flooding Tips
Flooding is all about filling the outlined area with a smooth layer of icing. Use a slightly thinner consistency of icing for this step. Squeeze the bottle gently and fill in the outlined area, allowing the icing to spread evenly. Use a toothpick to pop any air bubbles and help spread the icing into corners.Creating Patterns
Patterns add personality to your cookies and can be achieved with simple techniques. Once the flooded icing starts to set, use a different color icing to draw lines or dots on the wet surface. Drag a toothpick through the lines to create a marbled or feathered effect. Experiment with different colors and shapes to find what works best for your design. Decorating cookies with squeeze bottles is not just about aesthetics; it’s a way to express your creativity. Have fun experimenting with these techniques, and remember, practice makes perfect. What unique designs will you create next?Advanced Design Ideas
Advanced cookie decorating with squeeze bottles offers exciting ways to enhance your designs. These ideas bring depth and detail to your cookies. They help create unique and eye-catching treats.
Marbling Effects
Create beautiful swirls by squeezing different colored icings close together. Use a toothpick or skewer to drag through the colors gently. This motion blends the colors into a marble pattern. The result looks like smooth, flowing waves on your cookies. Experiment with two or three colors for varied effects.
Layering Colors
Apply one color of icing and let it dry slightly. Then add another color on top using your squeeze bottle. This technique creates sharp, clean lines and shapes. It adds dimension and contrast to your cookie designs. Use lighter colors first, then darker shades on top for best results.
Adding Texture
Use the tip of your squeeze bottle to create raised dots, lines, or zigzags. Vary the pressure to change the thickness of the icing. This adds interesting texture and detail to plain surfaces. You can also sprinkle edible glitter or small candies on wet icing for extra flair.
Common Mistakes To Avoid
Decorating cookies with squeeze bottles is a fun way to add intricate designs, but it can come with its share of challenges. Many bakers, even experienced ones, face common mistakes that can turn a perfect cookie into a frustrating project. Recognizing these pitfalls early helps you create smooth, professional-looking decorations every time.
Preventing Icing Drips
One of the biggest annoyances is icing dripping uncontrollably from the bottle. This often happens when the icing is too runny or the bottle tip is too wide for detailed work.
Try thickening your icing slightly if it flows too fast. Also, use smaller tips for fine lines and detailed patterns. I once tried a wide tip for delicate lacework and ended up with messy blobs instead of crisp lines—lesson learned!
Another trick is to keep the bottle upright and squeeze gently. Do you notice your icing pooling on the cookie surface? That’s a sign you’re applying too much pressure or the icing isn’t thick enough.
Controlling Pressure
Applying the right pressure on the squeeze bottle is critical. Too much force can cause sudden bursts of icing, ruining your design.
Hold the bottle like a pen and practice steady, light squeezes. If your hand feels tense, take a short break to avoid shaky lines. You want control, not speed.
Consider how different icing consistencies respond to pressure. Thicker icing needs more squeeze, thinner icing less. Experiment with a scrap cookie to find your sweet spot before decorating your main batch.
Cleaning Bottles Effectively
After decorating, cleaning your squeeze bottles properly ensures they last longer and perform well next time. Leftover icing can clog the nozzle and cause uneven flow.
Disassemble the bottle parts and rinse them immediately with warm water. Use a small brush or pipe cleaner to clear the nozzle thoroughly.
Have you ever started decorating only to find your bottle clogged halfway through? Avoid this by drying parts completely before storing, preventing bacteria and mold buildup.
Credit: www.vosshomebakery.com
Tools And Accessories To Enhance Your Work
Using the right tools can make decorating cookies with squeeze bottles not only easier but also more fun. Small accessories often have a big impact on the quality and precision of your designs. Choosing the right extras helps you achieve cleaner lines, smoother finishes, and less mess.
Using Toothpicks And Brushes
Toothpicks are simple yet powerful tools for cookie decorating. They help you fix tiny mistakes by gently dragging or blending icing without ruining your entire design. You can also use them to create delicate patterns, like marbling or feathering, by swirling colors together.
Brushes add a painterly touch to your cookies. Soft food-safe brushes allow you to spread thin layers of color or add shimmering details with edible dusts. Have you tried using a tiny brush to soften harsh edges after squeezing icing? It can turn a rough outline into a smooth masterpiece.
Cookie Stencils
Cookie stencils save time and bring precision to your cookie art. They let you add intricate designs quickly by simply placing the stencil over your cookie and applying icing or edible spray. This is especially useful if you want consistent patterns across multiple cookies.
Using stencils can also inspire creativity. You might discover new motifs or themes you wouldn’t have thought to draw freehand. What patterns would you love to repeat perfectly on every cookie? Stencils might be the answer.
Drying Racks
Drying racks keep your decorated cookies safe while the icing sets. They prevent smudges and help maintain the shape of delicate details. A tiered drying rack is a space saver and allows good air circulation around each cookie.
Think about how much time you spend waiting for icing to dry. Using a drying rack can speed up this process by keeping cookies elevated and exposed to air. Do you often struggle with smudged designs? A drying rack might be your best friend.
Tips For Speed And Efficiency
Speed and efficiency are key to decorating cookies with squeeze bottles. Simple tricks help you save time and reduce mess. Work smart to keep your decorating smooth and fun.
Batch Decorating
Decorate many cookies at once to save time. Fill all your squeeze bottles before starting. Apply the same color or design to each cookie in a group. This avoids constant cleaning and refilling.
Group cookies by shape or design. This helps keep your flow steady. Work in stages, like outlining first, then filling in colors. It speeds up the process without losing quality.
Organizing Your Workspace
Set up your tools and ingredients neatly. Keep squeeze bottles within easy reach. Place colors in order of use to avoid confusion.
Use small bowls or trays for icing colors. This prevents spills and saves refills. Have paper towels and toothpicks ready for quick cleanups. A tidy space makes decorating faster and easier.
Quick Fixes
Mistakes happen. Fix them fast to keep moving. Use a toothpick to lift or smooth icing edges. Wipe excess icing gently with a damp cloth.
Thin icing with water to correct thick spots. Add more icing to fill gaps quickly. Small fixes done fast keep your cookies looking great without slowing you down.

Credit: www.yahoo.com
Frequently Asked Questions
What Are The Benefits Of Using Squeeze Bottles For Cookie Decorating?
Squeeze bottles offer precise control and reduce mess while decorating cookies. They allow easy handling of icing. This method speeds up the process and improves design accuracy.
How Do I Prepare Icing For Squeeze Bottle Decorating?
Use a smooth, medium-consistency royal icing. Thin it slightly to flow easily through the bottle tip. Avoid lumps by mixing well and straining if necessary.
What Tips Work Best With Squeeze Bottles For Cookies?
Small round tips (1-3 mm) are ideal for detailed lines and dots. Larger tips suit flooding or filling areas. Choose tips based on your design complexity.
How Do I Clean Squeeze Bottles After Decorating?
Rinse bottles and tips immediately with warm water. Use a small brush to clean inside tips. Let them dry completely to prevent icing clogs.
Conclusion
Decorating cookies with squeeze bottles makes the process fun and simple. You control the flow of icing easily. It helps create neat and beautiful designs every time. Practice a little, and your cookies will look great. This method saves time and reduces mess.
Try different colors and patterns to express creativity. Enjoy baking and decorating with friends or family. Squeeze bottles bring joy to cookie decorating for all skill levels. Give it a go, and see the difference yourself.

Hi, I’m Daniel Brooks—a food lover and kitchen gear enthusiast. I enjoy testing cookware, utensils, and gadgets to see what really works in everyday cooking. At PlugChef.com, I share honest reviews, comparisons, and simple guides to help you choose the best tools for a safer, smarter, and more enjoyable kitchen.
Related posts:
 What Type of Cooking Utensils are Safe: Expert Picks
 What Innovations Could Blenders Make: Unleashing Future Tech
 Smart Strategies to Organize a Small Kitchen: Maximize Space
 How to Organize a Kitchen Cabinet: Expert Tips & Tricks
 How to Organize Kitchen Drawers: Expert Tips and Tricks
 How to Organize a Corner Kitchen Cupboard: Expert Tips

