
Tracking calories with a food scale removes guesswork and gives you reliable data so you can hit weight, fitness, or health goals. This guide walks through everything you need — choosing the right scale, preparing and weighing different foods, converting weight to calories, troubleshooting accuracy, and practical routines that make tracking fast and sustainable.
Read on for step-by-step instructions, real-world tips from experience, and tools you can start using today.
Why use a food scale (and when it matters)
A food scale converts portion control from visual estimation to precise grams or ounces. In practice, people who measure portions see big differences: a handful can vary widely, and restaurant portions often exceed home estimates. Accurate weighing matters when:
- You need precise calorie or macronutrient totals (for weight loss, gain, clinical nutrition).
- You follow a structured meal plan or track macros.
- You cook from scratch and must split recipe calories across servings.
For foods without a nutrition label (fresh produce, raw meat) use a food-composition database and the scale. The USDA offers comprehensive nutrition data for this purpose, which is useful when labels are absent or inconsistent (USDA). For practical public guidance about portion control and nutrition tracking, see high-quality health resources such as NHS guidance.
Choosing the right food scale
Not all scales are equally useful for calorie tracking. Choose one that suits your accuracy needs and workflow.
Key specs and features to prioritize
- Resolution: 1‑gram (0.1 oz) increments for most needs; 0.1‑gram for precision (e.g., supplements).
- Capacity: 3–5 kg (6–11 lb) covers most bowls and plates; choose higher if weighing bulk batches.
- Tare function: essential — must zero with a container or plate.
- Clear display and backlight: faster reading in low light.
- Units switchable: grams and ounces.
- Stability and platform size: a flat, stable surface prevents skewed readings.
- Battery type and auto-off: removable coin batteries or rechargeable; disable or extend auto-off if you often weigh multiple items.
- Optional: Bluetooth/app sync for automatic logging and macro breakdowns.
Types of scales
- Digital kitchen scales: best balance of cost and accuracy.
- Mechanical scales: durable, no batteries, but less precise.
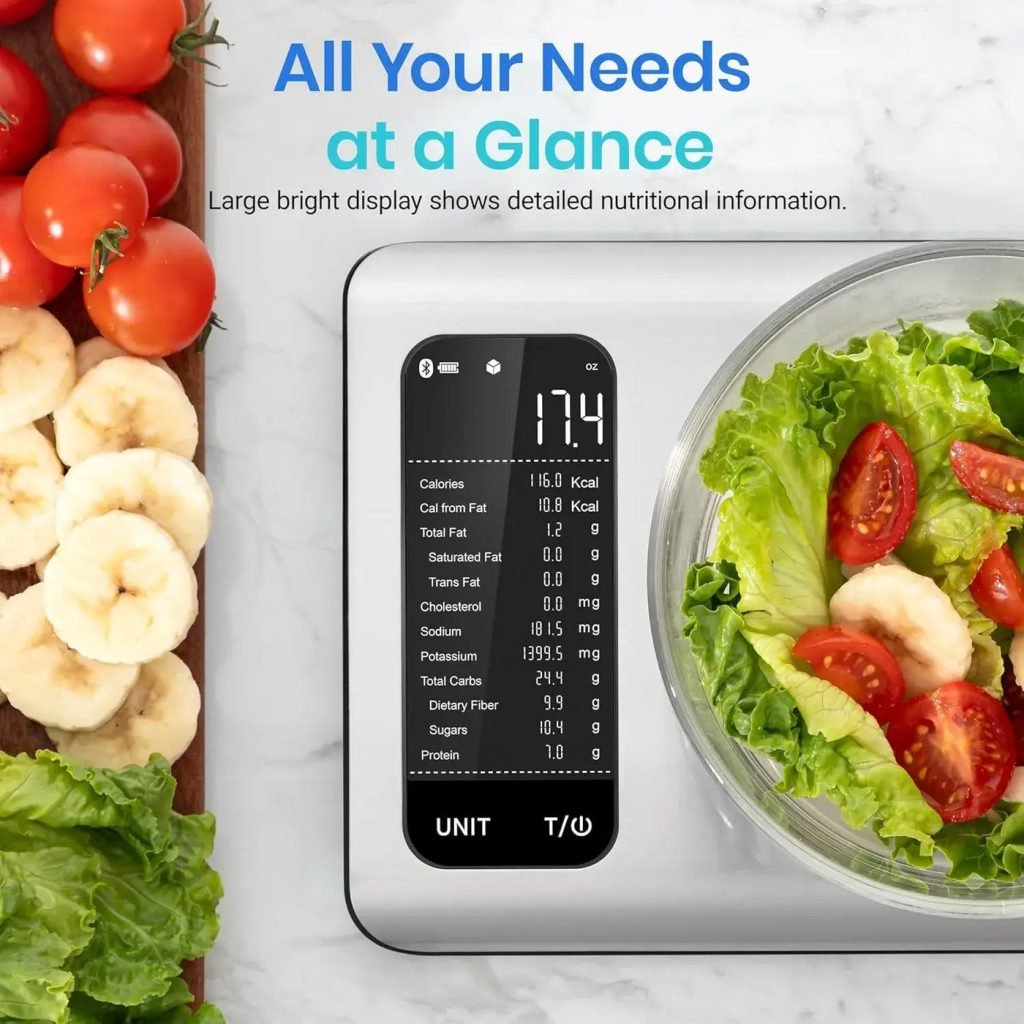
- Smart nutrition scales: calculate calories/macros using built-in databases or pair with phone apps — useful if you want automatic logging. Consider models like smart nutrition options when you want faster logging (smart nutrition scale reference).
Budget versus prosumer
- Budget digital scales give accurate weights for most users. If you’re tracking to the gram (clinical nutrition, competition prep), invest in higher-resolution or laboratory-style scales.
- In practice, a reliable mid-range digital scale with 1 g resolution plus a good workflow produces excellent results for most people.
For product options and buying tips, see a brief comparison of digital models and features (digital scale options).

Credit: fitkitchpro.com
Example: a smart nutrition scale that displays macros and calories for weighed items.
Preparing food for accurate weighing
Preparation reduces error and speeds the process.
Containers and tare workflow
- Use lightweight, flat-bottomed bowls or plates. Place the empty container on the scale and press tare to zero before adding food. Repeat tare if adding multiple ingredients to the same container.
- For liquids, use a heat‑safe cup or a liquid measuring container. Tare with the empty container first.
- For sticky or oily foods, line a container with parchment or use a small plastic dish you can tare; tare again after adding.
Raw vs. cooked: why it matters
- Nutrient databases and labels often list values for either raw or cooked weight. Always check which state (raw/cooked/drained) the data refers to and weigh accordingly.
- Cooking changes water content and weight. For example, 100 g raw rice becomes roughly 200–300 g cooked depending on method and absorption — always weigh the state matching your nutrition source.
Portioning tips
- Portion ingredients separately when possible (protein, starch, fat, sauces). Weighing components individually gives the most accurate totals.
- For mixed dishes you cannot separate, weigh the finished dish and use recipe nutrition or calorie databases to compute calories per gram, then calculate per portion (explained below).
- When preparing many meals, weigh bulk portions during meal prep, then divide into containers by exact gram amounts.
Keep a dedicated scale spot and a small “weighing kit” (spoon, small bowls, parchment) to streamline routine use.
How to weigh different foods (practical examples)
Solid foods
- Fruits, vegetables, and meats: cut to consistent pieces when needed, tare with the container, then add. For meats, decide whether you’ll track raw or cooked and be consistent.
Leafy or airy foods
- For salads, compress lightly the leaves for a consistent approach. Avoid squeezing hard — aim for the same technique each time.
Powders and small items (nuts, seeds)
- Use a narrow container to contain spills. Spoon items in, tare, then add gradually to avoid overshoot.
Liquids and viscous items
- Use a liquid-safe container and tare. Remember that water-based liquids are roughly 1 g per ml, but syrups, oils, and alcohols differ — use nutrition data per gram for those.
Sticky foods and oil
- Weigh oil on the scale in a container, or weigh the spoon before and after pouring and take the difference. For very viscous items, warm them slightly (if safe) to reduce sticking.
Weighing cooked dishes and yield factors
- If you weigh ingredients raw, add up raw calories and divide across cooked yield. If you weigh a cooked whole (e.g., casserole), calculate total recipe calories and then derive calories per gram: total calories ÷ total cooked weight = calories per gram. Multiply by portion grams for that serving.
Practical example: converting cooked casserole to per-portion calories
- Weigh and log all raw ingredients and their calories. Sum total calories (e.g., 2,400 kcal).
- Cook dish and weigh total finished product (e.g., 1,800 g).
- Calories per gram = 2,400 ÷ 1,800 = 1.33 kcal/g.
- 300 g serving = 300 × 1.33 = ~400 kcal.
Credit: fitkitchpro.com
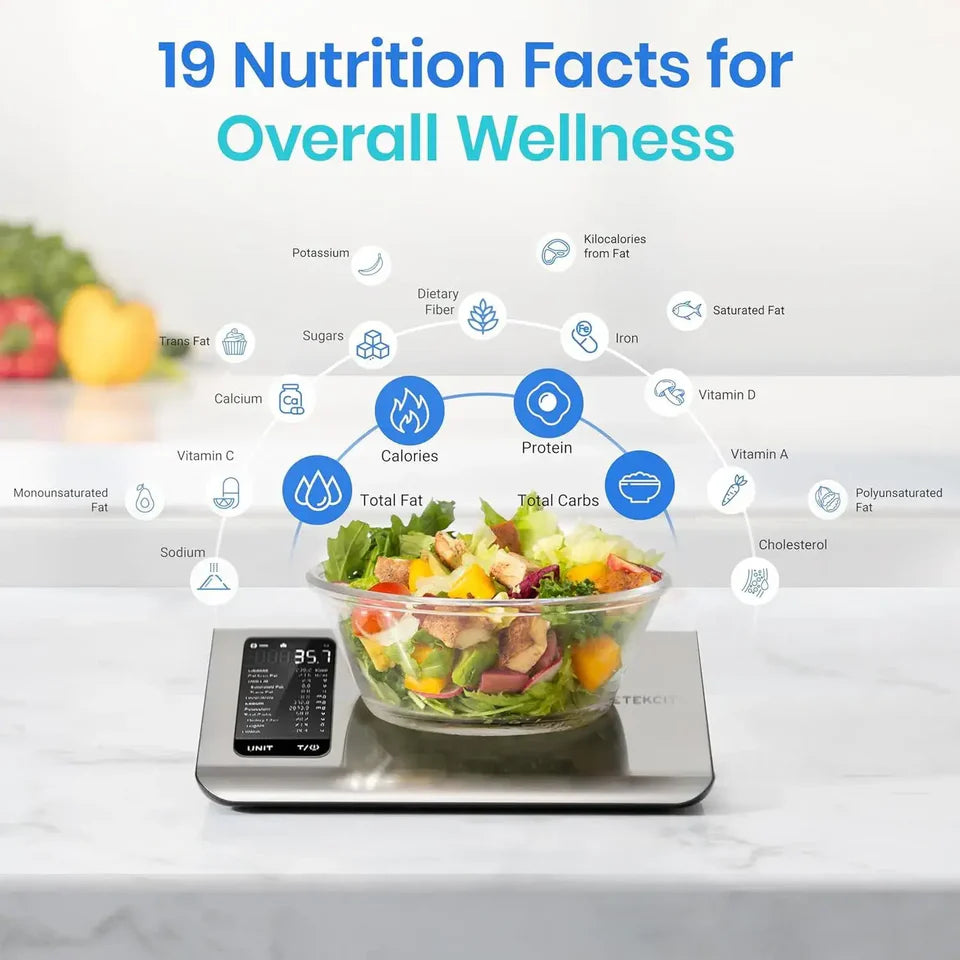
Smart scales can show macros and calories for an item after weighing.
Converting weight to calories — clear formulas and examples
Basic formula
- Calories = weight (grams) × calories per gram.
How to find calories per gram
- Nutrition label: if label reads 250 kcal per 50 g, calories per gram = 250 ÷ 50 = 5 kcal/g.
- Database entry (per 100 g): if food lists 150 kcal per 100 g, calories per gram = 150 ÷ 100 = 1.5 kcal/g.
- For water-based liquids, using the database entry is best rather than assuming 1 g = 1 ml for calorie content.
Worked examples
- Example A (label): Bread — label lists 90 kcal per 30 g. You weigh 60 g. Calories = 60 × (90 ÷ 30) = 60 × 3 = 180 kcal.
- Example B (database): Raw apple — database shows 52 kcal per 100 g. You weigh 150 g. Calories = 150 × (52 ÷ 100) = 150 × 0.52 = 78 kcal.
Using databases and apps
- For foods without labels (fresh produce, restaurant items), use a verified nutrition database. The USDA database is a primary source for raw and cooked food values (USDA data). Many food‑logging apps draw from such databases — confirm the database source when precision matters.
Logging efficiently: apps, shortcuts, and batch methods
Apps and scale connectivity
- Many smart scales sync with apps to auto-log weight and nutrient values. For non‑smart scales, manual entry is still fast: weigh (g) → lookup calories per 100 g → quick calculation in app.
- Choose apps with large, vetted databases and the ability to create custom foods or recipes. Some allow saving frequent items (e.g., "my 100 g cooked chicken breast") for one‑tap logging.
Meal-prep workflow
- During batch cooking: weigh and log total recipe calories, then divide weight into containers and label each with grams and calories. This reduces daily weighing to grabbing a container and scanning or manual entry.
- Pre-measure snacks and staples (nuts, protein portions) into small bags/containers and label with calories. This saves decision fatigue.
Shortcuts that keep accuracy
- Save common raw weights as custom foods (e.g., "cooked brown rice, 150 g") to avoid repeated calculation.
- Use barcode scanning for packaged items but confirm the scanned serving size matches your weighed amount.
For ideas on meal-prep scale usage and recommended workflow, see a guide on prepping with a digital scale (meal prep with scale).
Calibration, maintenance, and troubleshooting
Calibrating your scale
- Check manufacturer instructions; many home kitchen scales include a calibration function with a known-weight object (e.g., 500 g calibration weight).
- If your scale drifts or shows inconsistent values, replace batteries first, clear debris from the platform, retare with an empty container, and recalibrate.
Common problems and fixes
- Sticky or uneven readings: clean the weighing surface and make sure the scale sits on a flat, hard surface (not carpet).
- Jumping numbers: stabilize the load, avoid drafts and vibrations, and ensure the platform is dry and flat.
- Auto-off interrupting multistep weighing: disable auto-off if possible or develop a tare sequence that avoids lengthy pauses.
- If readings differ from a known weight (e.g., a packaged 100 g item), weigh multiple known items to check consistency.
In practice, frequent small errors come from inconsistent tare use and weighing containers with residue. A quick wipe and consistent tare routine eliminates most issues.
Common mistakes and how to avoid them
- Skipping tare: always tare with the container. In practice, forgetting tare is the most common source of systematic overestimation.
- Mixing raw/cooked states: be consistent — don’t mix raw weights for some ingredients and cooked for others unless you adjust the database entries accordingly.
- Using inaccurate database entries: user‑submitted entries in apps can be wrong. Prefer official sources (packaging, USDA) or verified app entries.
- Ignoring cooking oils and sauces: log oils and dressings separately — these are calorie-dense and easy to overlook.
- Over‑precision pressure: aiming for milligram accuracy when not needed wastes time. Match precision to your goals (1 g is enough for most users).
Tips to make tracking sustainable
- Start small: weigh breakfast for 3–5 days to build habit, then expand.
- Create a station: keep your scale, small bowls, and notepad/app ready near prep area.
- Batch and label: portion once, log once — saves time and keeps accuracy.
- Use consistent technique: compress salad leaves similarly, use the same containers and spoons, and track raw vs cooked consistently.
- Reward progress: pick measurable milestones (e.g., two consecutive weeks of consistent logging) and treat yourself in a non-food way.
Try this 7‑day micro-challenge: weigh at least two meals per day and log them. After a week you’ll understand typical portion sizes and save time.

Credit: www.amazon.com
Compact digital scale useful for quick daily weighing.
Frequently asked questions
How accurate do kitchen scales need to be?
- For everyday calorie tracking, 1‑gram resolution is adequate. Very precise clinical or supplement work may need 0.1 g resolution. Ensure consistent technique and calibration for best results.
Should I weigh raw or cooked food?
- Stick to whichever state matches your nutrition source. If your labels and database entries are for raw food, weigh raw. If you eat the cooked item and use cooked values, weigh cooked. Consistency is the priority.
Can I rely on app database entries?
- Use verified entries and manufacturer labels when possible. The USDA provides reliable reference data for many foods, which apps often reference (USDA). If an app entry seems off (e.g., calories too low/high), cross-check with another source.
Is tracking with a scale time-consuming?
- Initially it takes longer. After you develop a routine and save frequent items/recipes, logging becomes quick. Meal-prep and saved entries dramatically reduce time.
What if my scale gives different readings than another scale?
- Differences can come from calibration, surface, or resolution. Recalibrate and test with known weights. If differences persist, use one scale consistently for your tracking to maintain internal consistency.
Conclusion — practical next steps
A food scale turns vague portioning into reliable data. To get started:
- Buy or place a decent digital scale with 1 g resolution in your kitchen.
- Learn the tare workflow and weigh a few common portions for a week.
- Use a trusted database or label, save frequent items as custom foods, and consider batch-prepping to save time.
Small, consistent actions beat perfection. Measure two meals today and compare the calorie totals to your usual estimates — you’ll likely be surprised. If you want a simple habit to start: weigh your breakfast for a week and watch how quickly your portion awareness improves.
Try weighing one full day of meals now — it takes 10–20 minutes and gives a powerful baseline for your goals.
(Helpful reads on related tools and meal-prep ideas: nutrition posters and tips, portion sizing guide, and a review of digital scales if you’re shopping (scale review).)

Hi, I’m Daniel Brooks—a food lover and kitchen gear enthusiast. I enjoy testing cookware, utensils, and gadgets to see what really works in everyday cooking. At PlugChef.com, I share honest reviews, comparisons, and simple guides to help you choose the best tools for a safer, smarter, and more enjoyable kitchen.
Related posts:
 How to Make a Fruit Basket for a Gift: Easy DIY Guide
 Do You Need a Basket? Essential Guide for Air Fryers
 What Blenders Do Tropical Smoothie Use: Expert Insights
Stainless Steel Vs White Kitchen Appliances: Ultimate Showdown
What Blenders Do Tropical Smoothie Use: Expert Insights
Stainless Steel Vs White Kitchen Appliances: Ultimate Showdown
 Kitchen Appliances for Wedding Registry: Must-Have Essentials
 Top 10 Best Non-Toxic Cooking Utensils – Safe & Durable Choices for Healthy Homes

