
Have you ever wondered how a simple drawing of a first aid kit can make a big difference? Whether you’re a student, a teacher, or just someone who wants to be prepared, knowing how to draw a first aid kit helps you understand its key parts and importance.
Imagine being able to quickly sketch what you need in an emergency—this skill can boost your confidence and readiness. Keep reading, and you’ll discover easy steps to create your own clear, useful first aid kit drawing that anyone can understand.
Your safety starts with knowing the essentials, and it all begins with a simple drawing.

Credit: www.shutterstock.com
Basic Shapes In First Aid Kit
Drawing a first aid kit can be an engaging task, especially when you focus on the basic shapes that make up its structure. Whether you’re a budding artist or simply looking to understand the components better, getting the shapes right sets a solid foundation. It’s not just about drawing; it’s about seeing the first aid kit as a collection of essential forms that tell a story of preparedness. Let’s explore how you can break down this useful object into manageable parts.
Identifying Core Components
Start by considering the core components that a first aid kit usually contains. You might see bandages, antiseptic wipes, and scissors as part of the kit. Each of these items has a distinctive shape that contributes to the overall look of the kit. Recognizing these basic shapes helps you visualize the kit better. Have you ever thought about how each component fits together like pieces of a puzzle?
- Bandages often come in rectangular or elongated shapes.
- Antiseptic wipes might be square.
- Scissors have a complex shape but can be simplified into curves and straight lines.
Focusing on these shapes enables you to sketch the kit with greater accuracy and detail.
Sketching The Box Structure
The box structure is the backbone of your first aid kit drawing. Begin with a simple rectangle to represent the main body of the kit. Consider the depth and dimensions—do you prefer a compact kit or something more spacious? This choice impacts the overall design.
Next, add a smaller rectangle or square for the lid, showing how it opens or closes. Imagine the hinges and the clasp; these are small details that make your drawing realistic. Think about the handle—does it fold or remain rigid?
By breaking down the box into these basic shapes, you can create a drawing that is both functional and artistic. Have you ever tried adding shadows to give your sketch depth? It brings the kit to life and makes your drawing pop.
Adding Details And Symbols
Adding details and symbols brings life to your first aid kit drawing. It helps others recognize the kit quickly. Details make the drawing clear and meaningful. Symbols give important visual clues about the kit’s use.
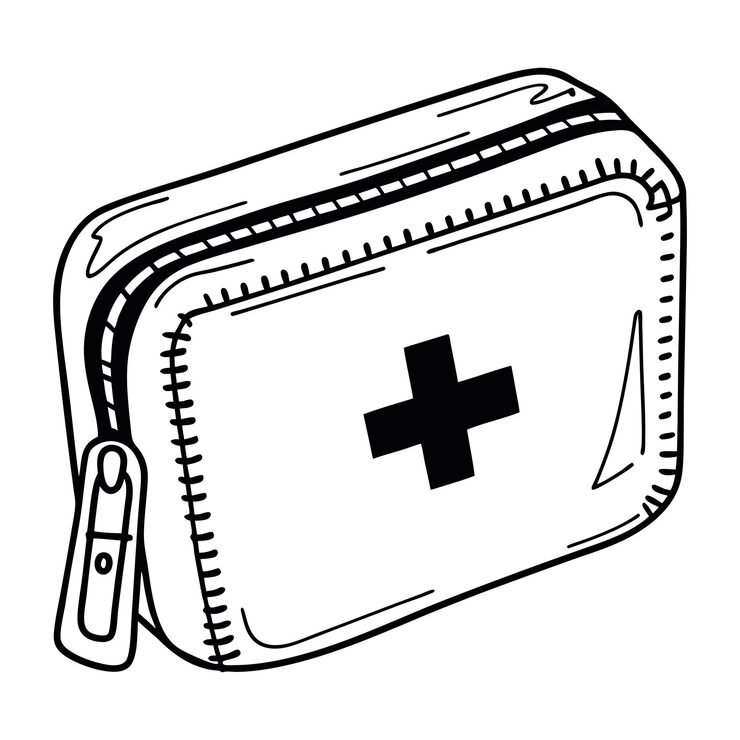
Drawing The Cross Symbol
The cross is a universal sign for first aid. Draw a simple, bold cross in the center. Use thick lines to make it stand out. The cross is usually red or white. Place it on the kit’s front side. Keep the shape neat and balanced for clarity.
Incorporating Medical Tools
Small icons of medical tools add realism to your drawing. Include items like bandages, scissors, or a thermometer. Use simple shapes to represent each tool clearly. Position these symbols near the cross or on the kit’s surface. This shows what the kit contains at a glance.
Choosing The Right Perspective
Choosing the right perspective for drawing a first aid kit shapes how clear and useful your illustration will be. It influences what details you highlight and how easy it is for viewers to understand the kit’s features. Picking the correct viewpoint also helps you communicate the kit’s function and design effectively.
Front View Techniques
The front view is the simplest and most direct way to show a first aid kit. It highlights the kit’s face, making logos, labels, or the cross symbol immediately visible. This perspective is perfect if you want to focus on the identity or branding of the kit.
To draw the front view effectively:
- Start with a rectangle or square as the base shape.
- Keep lines straight and edges sharp to convey a sturdy container.
- Add details like handles, locks, or stickers symmetrically.
Have you noticed how a clear front view can make the kit look more accessible and ready for use? Your viewers should feel like they can grab it right off the page.
Isometric Drawing Tips
Isometric drawing adds depth by showing three sides of the first aid kit at once. This angle gives a more realistic and dimensional look without complex perspective rules. It’s great if you want to display the kit’s shape and size clearly.
Try these tips for a strong isometric sketch:
- Use 30-degree angles for the sides to keep proportions consistent.
- Draw parallel lines carefully to maintain the 3D effect.
- Include shadows or highlights to enhance the volume.
Imagine your drawing as a mini model—would you want to pick it up and examine it from all sides? Isometric perspective helps achieve that feeling. What parts of the kit become clearer when you see it from this angle?

Credit: www.freepik.com
Using Shading And Texture
Using shading and texture can transform a simple drawing of a first aid kit into a realistic and visually engaging piece. These techniques help your drawing pop off the page by adding dimension and tactile qualities. Let’s look at how you can apply shadows and texture effectively to make your artwork stand out.
Creating Depth With Shadows
Shadows give your drawing a sense of space and form. Observe where the light source hits your first aid kit and where it doesn’t. Darken the areas furthest from the light to create contrast.
Start with soft shading around edges to suggest curved surfaces. Use stronger, sharper shadows under lids or inside compartments to show depth. Don’t hesitate to layer your shading gradually—it helps build a natural gradient instead of harsh lines.
Have you noticed how shadows can tell a story about the object’s shape? Try placing your kit near a window or lamp and sketch the shadows you see. This real-life practice sharpens your ability to replicate depth in your art.
Texturing The Kit Surface
Texture adds realism by mimicking the material of your first aid kit. Is it smooth plastic, rough fabric, or metal? Each surface requires different strokes and patterns.
Use small, consistent strokes to suggest fabric or a matte finish. For plastic, try smooth shading with occasional highlights to show glossiness. If your kit has dents or scratches, lightly sketch these details to give it character.
Remember, texture doesn’t need to be perfect. Imperfections make your drawing believable. Experiment with pencils or pens to find the mark-making style that best captures the kit’s material.
Coloring Tips For Realism
Coloring a first aid kit drawing with realism makes it more eye-catching and believable. Realistic colors bring depth and life to your artwork. Simple techniques help create natural looks that anyone can achieve. Focus on color choices and shading for best results.
Selecting Accurate Colors
Choose colors true to real first aid kits. Usually, the main color is bright red or white. Use a strong red for the body and white for the cross symbol. Avoid colors that look too dull or too bright. Match your colors to real objects or reference photos. This adds authenticity to your drawing.
Blending And Highlights
Blend colors smoothly to avoid harsh lines. Use gradual shading to show light and shadow. Add soft highlights on edges where light hits. This creates a three-dimensional feel. Use a lighter shade of red or white for highlights. Blend them gently into the base color. Shadows can be added with darker reds or grays. This contrast helps your drawing pop.
Common Mistakes To Avoid
Drawing a first aid kit might seem simple, but many make common mistakes. These errors can make your drawing look unbalanced or unclear. Avoiding these pitfalls helps create a clear and professional-looking image. Focus on accuracy and details to improve your sketch.
Proportional Errors
Proportions are key in any drawing. Making parts of the kit too large or too small causes imbalance. For example, the cross symbol should fit well within the kit shape. Check the size of compartments and items inside. Keep all parts in harmony to make the drawing realistic.
Ignoring Details
Details bring your drawing to life. Skipping small parts like the zipper, handle, or label reduces the impact. These tiny elements tell the viewer what the object is. Add simple lines and shapes to show these features. Details help the drawing stand out and look complete.
Tools And Materials
Choosing the right tools and materials is key to creating a clear and effective drawing of a first aid kit. The supplies you pick can affect the level of detail, style, and overall impact of your artwork. Whether you prefer working with pencils or pixels, understanding your options helps you bring your vision to life with confidence.
Recommended Drawing Supplies
Start with basic sketching tools like pencils (HB or 2B) to outline the shape of the first aid kit. A good eraser is essential for correcting mistakes without damaging the paper. Adding fine liners or ink pens helps define edges and adds contrast.
For coloring, markers and colored pencils work well for vibrant and precise shading. If you want texture, watercolor paints or pastels can create a more natural look. Don’t forget a quality sketchbook or smooth drawing paper to avoid smudging and ensure clean lines.
- Pencils (HB, 2B)
- Eraser (kneaded or rubber)
- Fine liners or ink pens
- Colored pencils or markers
- Watercolors or pastels (optional)
- Sketchbook or smooth drawing paper
Digital Vs Traditional Methods
Digital drawing offers flexibility with undo options and layers, making it easier to experiment without fear of ruining your work. You can adjust colors instantly and use tools like brushes and textures that mimic real materials. However, it requires a tablet or computer and software like Photoshop or Procreate.
Traditional drawing provides a tactile experience that many artists find inspiring. The feel of pencil on paper can guide your hand more naturally, which might improve your control and creativity. Plus, your finished piece is ready to display or scan without additional steps.
Which method suits your style better? Think about your comfort with technology, the look you want, and how you plan to use your drawing. Trying both can reveal surprising strengths in your workflow.

Credit: www.shutterstock.com
Frequently Asked Questions
What Items Should Be Included In A First Aid Kit Drawing?
A first aid kit drawing should include bandages, antiseptic wipes, scissors, gloves, and adhesive tape. It helps visualize essential supplies for emergencies clearly.
How Can I Make A First Aid Kit Drawing Simple?
Use basic shapes and clear labels for each item. Focus on recognizable symbols and keep colors minimal to enhance understanding.
Why Is Drawing A First Aid Kit Important?
Drawing a first aid kit helps in planning and organizing emergency supplies. It improves preparedness and ensures no critical item is missed.
Can A First Aid Kit Drawing Help In Teaching Safety?
Yes, it visually explains the contents and use of each item. This aids in quick learning and better emergency response.
Conclusion
A clear drawing of a first aid kit helps everyone understand its contents. It shows important items needed in emergencies. This simple visual guide can save time and lives. Keep your kit organized and easy to find. Practice drawing it to remember what to include.
A well-prepared first aid kit brings peace of mind. Stay ready, stay safe.

I’m Abby Lu, a passionate home cook who loves simplifying everyday meals. At PlugChef.com, I share product reviews and cooking guides to help you find the best tools for your kitchen.
Related posts:
 What Type of Cooking Utensils are Safe: Expert Picks
 What Innovations Could Blenders Make: Unleashing Future Tech
 Smart Strategies to Organize a Small Kitchen: Maximize Space
 How to Organize a Kitchen Cabinet: Expert Tips & Tricks
 How to Organize Kitchen Drawers: Expert Tips and Tricks
 How to Organize a Corner Kitchen Cupboard: Expert Tips

