
Imagine transforming a simple photo into a stunning display piece that draws attention and admiration. Cutting your own picture mat board can be the key to achieving this.
It’s not just about framing a photo; it’s about adding depth and dimension that makes your artwork stand out. You might think it’s tricky, but with the right guidance, you can master this skill and create personalized, professional-looking mats that enhance your photographs or artworks.
This guide will walk you through the process step-by-step, empowering you to unleash your creativity and elevate your framing game. Are you ready to learn how to cut picture mat board like a pro? Let’s dive in and discover the secrets to making your pictures pop.
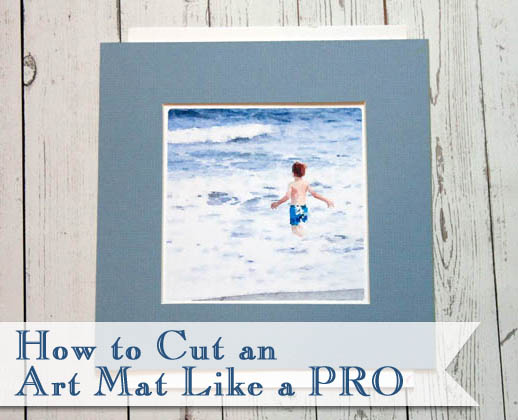
Credit: prettyhandygirl.com
Tools And Materials Needed
A cutting mat, ruler, and sharp utility knife are essential for precision. Ensure a sturdy table or work surface to avoid accidents. Choose a high-quality mat board that complements your artwork for the best results.
Cutting picture mat board is an art that transforms the way your photos and artworks are displayed. Knowing the right tools and materials not only makes the task easier but also ensures a professional-looking finish. You might wonder, do I have everything I need to start? Let’s dive into the essentials that will set you up for success.Essential Cutting Tools
A precision mat cutter is your main tool. It’s designed specifically for cutting mat boards smoothly and accurately. When I first started, I tried using a regular utility knife, but the results were subpar. Investing in a good mat cutter changed my entire approach. A steel ruler is another must-have. It helps you guide the cutter along straight lines and ensures your cuts are precise. Plastic rulers can slip and lead to crooked edges, and no one wants that. Finally, a self-healing cutting mat is essential. It not only protects your workspace but also provides a stable surface for clean cuts. As you use it, it “heals” itself, so it lasts longer than you might expect.Supporting Materials
High-quality mat board is the star of the show. Look for boards that are acid-free to preserve your artwork over time. Colors and textures vary, so choose what complements your art best. A good pencil and eraser are handy for marking your measurements. This might seem basic, but accurate marking is crucial for perfectly cut mats. Don’t forget adhesive tape. This secures the artwork to the mat and keeps everything in place. Acid-free tape is best to avoid damaging your art.Safety Gear
Working safely is as important as working accurately. Safety goggles protect your eyes from any stray debris. This might sound excessive, but safety should never be an afterthought. A cut-resistant glove for your non-dominant hand can prevent accidents. I’ve had a few close calls before I started using one, and it’s a simple way to keep your fingers safe.Organizational Tools
A storage box for your tools keeps your workspace tidy. This can be as simple as a labeled shoe box or a dedicated organizer. Keeping tools organized helps maintain focus and efficiency. Labels and folders for different mat boards help you quickly find what you need. It’s easy to mix up colors and textures, so a little organization goes a long way. Do you have all these tools and materials? If not, it might be time to make a shopping list. Investing in the right supplies can make the difference between a frustrating project and a rewarding one.
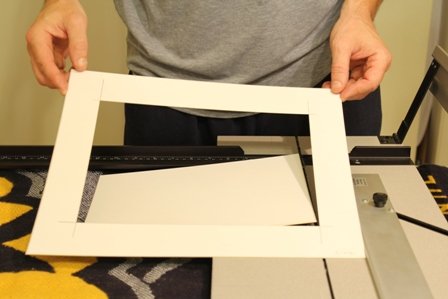
Credit: www.framedestination.com
Choosing The Right Mat Board
Choosing the right mat board is crucial for enhancing the visual appeal of your framed artwork or photographs. A well-chosen mat board not only protects your piece but also complements its colors and style, adding depth and dimension. But how do you select the perfect mat board for your masterpiece?
Size Matters
Consider the dimensions of your artwork first. The mat board should be proportionate to the piece, neither overwhelming nor underwhelming it. A larger mat can make a small picture stand out, while a thinner mat might be suitable for larger artworks. Measure your artwork and visualize how different mat sizes will look around it.
Color Choices
Colors play a pivotal role in setting the mood of your framed piece. Choose a color that enhances the artwork’s colors, but doesn’t clash with them. Neutral tones like white or black are classic choices that work with most pieces. If you’re feeling adventurous, pick a color from the artwork itself to bring out specific hues.
Material Quality
Material quality ensures longevity and protection. Acid-free mat boards prevent discoloration and damage over time. Consider whether you need a standard or archival-quality board, especially for valuable or sentimental pieces. Think about the environment where your artwork will be displayed and choose accordingly.
Personal Preferences
Your personal style can guide your choice. Do you favor minimalist designs or ornate frames? A simple mat board might suit a sleek, modern look, while a textured or patterned board could enhance a more elaborate frame. Reflect on your tastes and the overall aesthetic you’re aiming for.
Have you ever chosen a mat board that transformed your artwork? Share your story in the comments below! Your experiences can help others make the right choice. Remember, the right mat board is the silent partner in showcasing your art, making it shine while providing the necessary support.
Preparing Your Workspace
Setting up your workspace is essential for cutting picture mat board. Arrange your tools and materials within easy reach. Ensure your cutting area is clean and well-lit for precision and safety.
Preparing your workspace is a crucial step in cutting picture mat board effectively and safely. Imagine the frustration of realizing you’re missing a tool or don’t have enough space to work comfortably halfway through your project. By setting up your area thoughtfully, you can transform a potentially chaotic process into a streamlined and enjoyable experience. Let’s dive into how you can prepare your workspace like a pro.Ensure Adequate Space
Before you start, make sure you have enough room to lay out your materials. A clutter-free table or countertop is ideal. You don’t want to struggle with overlapping papers or tools falling off the edge. If you have a dedicated craft table, that’s great! If not, a kitchen table can work just as well. Just be sure to clear off any non-essential items.Gather Your Tools
Having all your tools within arm’s reach saves time and reduces frustration. You’ll need a cutting mat, a ruler, a pencil, and a utility knife. It’s easy to overlook something small like a pencil, but having to search for one mid-process can disrupt your flow. Consider laying out your tools in the order you’ll use them to maintain a logical sequence.Optimize Lighting
Good lighting can make a significant difference in precision cutting. Natural light is the best choice, but if that’s not possible, use a desk lamp or overhead light to minimize shadows. You want to see every line and mark clearly. Poor lighting can lead to mistakes that waste materials and time.Prioritize Safety
Safety should always come first. Ensure your cutting mat is stable and won’t slide around. Keep your fingers clear of the blade and use a ruler as a guide. If kids or pets are around, be mindful of where you place sharp objects. A small slip can lead to injury or damage, so take precautions.Consider Your Comfort
Are you comfortable standing or sitting for extended periods? Adjust your workspace height accordingly. A chair with good back support can make a big difference if you’re sitting. If you’re standing, a cushioned mat can relieve foot fatigue. Being physically comfortable helps maintain focus and efficiency.Reflect On Your Setup
Before you start cutting, take a moment to review your setup. Is there anything missing or anything that could be improved? Sometimes a brief pause helps you spot potential issues before they become problems. This reflection can enhance your workspace and make the process smoother. Preparing your workspace is more than just getting organized—it’s about setting the stage for a successful project. Have you ever had a workspace mishap that affected your project outcome? Share your thoughts and let us know how you overcame it!Measuring The Mat Board
Cutting picture mat board involves precise measuring for a perfect fit. Start by determining the artwork’s dimensions. Measure twice to ensure accuracy and avoid mistakes.
Measuring the mat board is a crucial step in creating a visually appealing picture frame. It’s not just about getting the size right; it’s about ensuring your artwork is perfectly centered and has the right balance. You’ve probably been in a situation where the mat didn’t quite fit, leaving your beautiful picture looking slightly off. Don’t worry, with the right approach, you’ll get it spot on every time.Determining Dimensions
First, gather your artwork and the frame. Measure the artwork’s width and height, jotting down these dimensions. Make sure to add a little extra space around the artwork for a balanced look. Consider the frame’s size. The mat board should fit snugly inside the frame. Subtract the artwork dimensions from the frame’s dimensions to find the width of the matting on each side. Think about how wide you want the mat border to be. A wider mat can add a touch of elegance, while a narrower one might keep things simple.Marking Guidelines
With your dimensions in hand, it’s time to mark the mat board. Use a pencil and a ruler to draw the guidelines. Precision is key, so double-check your measurements as you go. Lay the mat board on a flat surface. Lightly draw lines where the cuts will be made, ensuring they align perfectly with the dimensions you’ve decided. Remember, it’s easier to erase pencil marks than to fix a cut. Take your time marking the guidelines. It’s worth the effort to avoid costly mistakes later on. Have you ever thought about how a simple pencil line can make or break your mat board cutting project? Precision at this stage can save you both time and frustration later.Cutting Techniques
Cutting picture mat board can be a rewarding task that enhances your art and photography displays. Whether you’re framing family portraits or crafting an art piece, the right cutting technique can make a significant difference. Let’s dive into some effective methods for cutting mat boards that can help you achieve professional results with ease.
Using A Mat Cutter
A mat cutter is your best friend for precision cutting. It offers clean edges and straight lines, making your artwork look polished and professional. Consider using a handheld mat cutter for smaller projects—it’s portable and easy to use. Simply line up the board, apply pressure, and slide the cutter across.
For larger pieces, a table-top mat cutter might be more suitable. These provide more stability and control. Remember to adjust the blade depth to match the thickness of your board. Have you ever felt frustrated with uneven cuts? A mat cutter could be your solution.
Alternative Cutting Tools
Don’t have a mat cutter? No worries. A sharp utility knife can be an effective alternative. Use a metal ruler to guide your cuts, ensuring straight lines. It’s crucial to keep your blade sharp—dull blades can tear the mat board.
Scissors are another option, though they’re best for smaller projects or less precise work. They offer flexibility but require a steady hand. Have you ever tried cutting with scissors only to find wobbly edges? A ruler and sharp knife can help you avoid this common pitfall.
What other tools have you tried? Share your experiences and tips in the comments below!

Credit: www.amazon.com
Creating Beveled Edges
Creating beveled edges on a mat board adds an elegant touch. It enhances the framed artwork, giving it depth and dimension. This process might seem daunting, but with the right steps, anyone can do it. Here’s how to achieve that professional look.
Choose The Right Tools
Start with the correct tools for cutting. A sharp mat cutter is essential. It ensures clean, smooth edges. A sturdy ruler helps guide your cuts. This combination makes the task easier and more precise.
Measure And Mark Accurately
Measure the mat board carefully. Mark the areas to be cut with a pencil. Accurate measurements prevent mistakes. Double-check each line before cutting. Precision here saves time and effort later.
Position The Mat Board
Place the mat board on a stable surface. Ensure it doesn’t move during cutting. Use a cutting mat underneath to protect surfaces. Position your ruler along the marked line. This setup keeps everything steady.
Cut The Beveled Edge
Align the mat cutter along the ruler. Apply firm, even pressure as you cut. Keep the cutter angled for a beveled edge. Move slowly to maintain control. Check the cut for smoothness and adjust if needed.
Finalize And Inspect
Inspect the cut edges for any rough spots. Use sandpaper to smooth them if necessary. Ensure the bevel is even across all sides. This final touch perfects the presentation. Enjoy your professionally beveled mat board.
Ensuring Precision
Cutting a picture mat board requires precision. It enhances the artwork’s presentation. A slight error can affect the whole look. Proper tools and techniques matter. Let’s explore key steps for accuracy.
Using The Right Tools
Choose a sharp utility knife. A dull blade can ruin the edges. Invest in a quality cutting mat. It protects surfaces and ensures clean cuts. A metal ruler provides a straight guide. Avoid plastic rulers as they may shift.
Measuring Carefully
Accurate measurements are crucial. Use a pencil to mark the mat board. Double-check all dimensions before cutting. Ensure lines are straight and clear. This prevents mistakes during cutting.
Setting Up A Stable Workspace
Stability is key for precision. Choose a flat and clean table. Make sure it does not wobble. Clear the area of any clutter. This helps in focusing on the task.
Practicing The Cutting Technique
Practice makes perfect. Test cuts on scrap material first. Hold the knife at a steady angle. Apply even pressure throughout. Move slowly to avoid slips. Mastering the technique ensures perfect cuts.
Troubleshooting Common Issues
Cutting picture mat board can be tricky. Common issues arise from uneven cuts and mistakes. These problems can affect the final look. With some helpful tips, you can easily overcome these challenges.
Handling Uneven Cuts
Uneven cuts often result from improper tool use. Ensure your blade is sharp. A dull blade can cause jagged edges. Use a ruler for straight lines. Press firmly to maintain control. Consistent pressure is key.
Check your cutting angle. A wrong angle leads to irregular cuts. Adjust your position frequently. Keeping the mat steady is essential. Secure it with clips if needed.
Fixing Mistakes
Mistakes happen, but they are fixable. If a cut is wrong, trim it slightly. Use a smaller blade for precision. Align the mat carefully before cutting. Measure twice to avoid errors.
For minor tears, use adhesive tape. It helps bind small splits. Apply gently to avoid further damage. Sandpaper can smooth rough edges. Rub lightly for best results.
Tips For Perfect Mat Cutting
Precision in mat cutting enhances the visual appeal of framed artwork. Ensure a clean cut by using a sharp blade and a sturdy ruler. Accurate measurements are crucial for a snug fit within the frame.
Cutting a picture mat board can be a rewarding task that enhances your artwork or photographs. Precision is key, but the process doesn’t have to be daunting. By following some straightforward tips, you can achieve a clean, professional look every time. These insights will not only save you time but also ensure your mats look like they were cut by a pro.Use The Right Tools
Selecting the right tools makes a significant difference. A sharp utility knife or a specialized mat cutter can be your best friends here. A dull blade can cause ragged edges, so always ensure your tools are sharp and ready to go.Measure Twice, Cut Once
Accuracy is crucial. Measure your artwork and decide how much of the mat board you want to show around it. Double-check your measurements before making any cuts to avoid costly mistakes.Secure Your Mat Board
To avoid slipping, secure the mat board on a stable surface. You can use a non-slip mat or tape the corners. This ensures your cuts are clean and straight.Practice On Scrap Pieces
Not ready to cut your expensive mat board just yet? Practice on scrap pieces first. This allows you to hone your technique and build confidence.Maintain Consistent Pressure
Apply consistent pressure while cutting. Too much pressure can cause the blade to veer off course, while too little can result in incomplete cuts. Find a balance that works for you.Check For Burrs And Imperfections
After cutting, inspect the edges for burrs or imperfections. A little sanding with fine-grit sandpaper can smooth out any rough spots. This attention to detail can make a big difference in the final presentation.Use A Ruler Or Straight Edge
A ruler or straight edge is essential for guiding your cuts. It helps maintain straight lines and ensures precision. Choose one with a non-slip backing for added stability. Every artist has their own set of tricks. Share yours or learn from others. What technique has saved you time or improved your results? By exchanging tips, we all become better mat cutters.Frequently Asked Questions
What Is The Best Way To Cut Mat Board?
Use a sharp utility knife and a metal straightedge to cut mat board precisely. Secure the board with clips to prevent movement. Make multiple light passes with the knife for a clean edge. A cutting mat underneath protects surfaces and ensures smoother cuts.
How To Cut Mat Board Without A Mat Cutter?
Use a sharp utility knife and a metal ruler. Secure the mat board on a cutting mat. Align the ruler along the cutting line and make multiple light passes with the knife. Ensure consistent pressure for a clean cut. Practice on scrap pieces for better control.
How To Cut Matboard With A Utility Knife?
To cut matboard with a utility knife, use a straightedge for guidance. Score lightly first, then apply more pressure. Ensure your blade is sharp for a clean cut. Secure the matboard to prevent slipping. Work on a sturdy, flat surface for best results.
Can You Cut Mat Board With A Paper Cutter?
Yes, you can cut mat board with a paper cutter. Use a heavy-duty cutter for clean edges. Ensure the blade is sharp for precise cutting. Consider the board’s thickness for best results. It’s a practical option for small projects. Always handle with care to avoid damage or injury.
Conclusion
Cutting picture mat board is easier with practice. Start with the right tools. Measure carefully for precision. Use a sharp blade for clean cuts. Practice makes perfect. Mistakes will happen. Don’t worry. Learn from each attempt. Adjust your technique. Keep your workspace tidy.
This helps avoid errors. Remember, patience is key. With dedication, you’ll improve. Your picture mat will look professional. Enjoy the process. Creativity flourishes with effort. Matting adds depth to photos. It’s a rewarding skill. Share your results with others. Inspire creativity in your community.

Hi, I’m Daniel Brooks—a food lover and kitchen gear enthusiast. I enjoy testing cookware, utensils, and gadgets to see what really works in everyday cooking. At PlugChef.com, I share honest reviews, comparisons, and simple guides to help you choose the best tools for a safer, smarter, and more enjoyable kitchen.
Related posts:
 What Type of Cooking Utensils are Safe: Expert Picks
 What Innovations Could Blenders Make: Unleashing Future Tech
 Smart Strategies to Organize a Small Kitchen: Maximize Space
 How to Organize a Kitchen Cabinet: Expert Tips & Tricks
 How to Organize Kitchen Drawers: Expert Tips and Tricks
 How to Organize a Corner Kitchen Cupboard: Expert Tips

