Imagine turning simple cream into a fluffy, delicious topping in just minutes, right in your own kitchen. With an immersion blender, you can whip up fresh, airy whipped cream faster and easier than ever before.
Whether you’re topping desserts, coffee, or fresh fruit, this method saves you time and effort. If you’ve ever struggled with hand whisks or bulky mixers, this quick guide will change the way you make whipped cream forever. Ready to impress yourself and your guests with perfect whipped cream every time?
Keep reading to discover how!
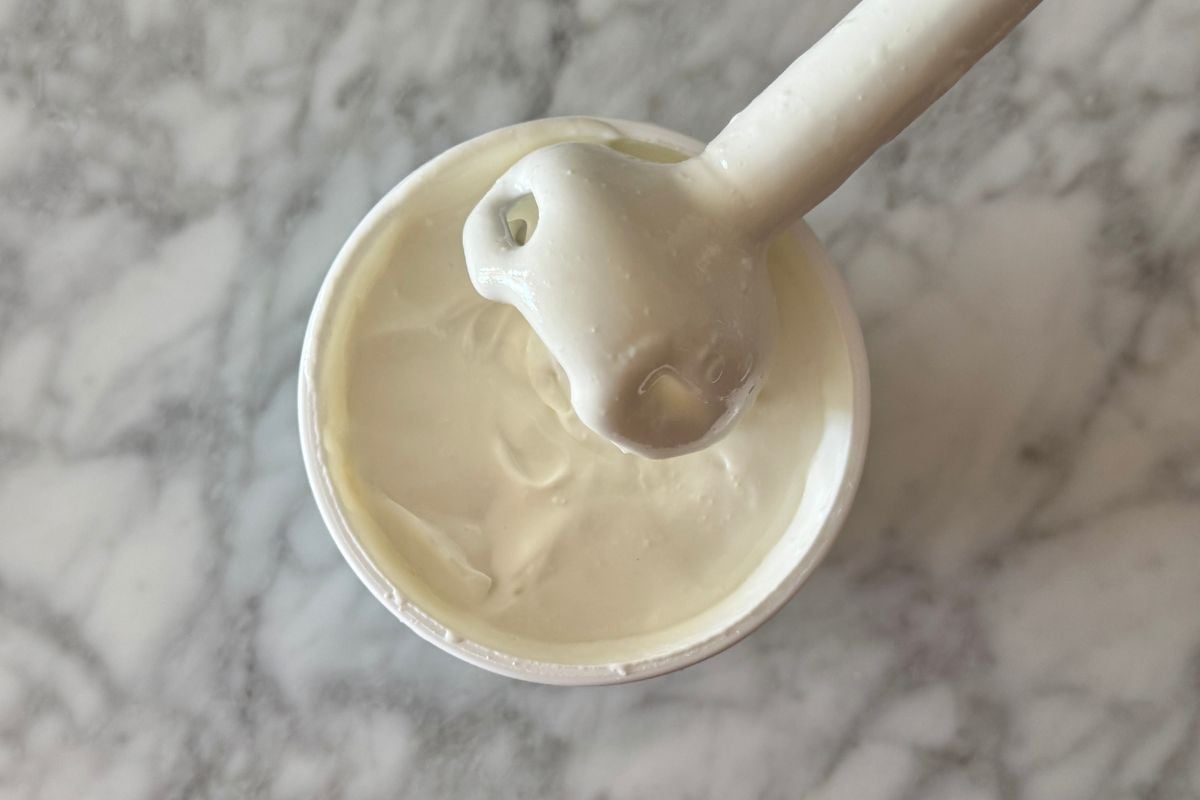
Credit: healthyfoodiegirl.com
Benefits Of Using An Immersion Blender
Using an immersion blender to whip cream offers several clear advantages that can make your kitchen tasks easier and more enjoyable. This handy tool combines power and simplicity, turning a potentially messy job into a quick and neat process. If you’ve ever struggled with slow whipping or uneven texture, an immersion blender might be the upgrade your routine needs.
Speed And Efficiency
An immersion blender whips cream much faster than traditional methods. You can go from liquid to fluffy cream in under a minute, saving valuable time, especially when you’re juggling multiple dishes. Have you noticed how slow hand-whisking can drain your energy? The immersion blender speeds things up without sacrificing quality.
Ease Of Use And Cleanup
Using an immersion blender is straightforward and doesn’t require bulky equipment. You simply immerse the blade in the cream and blend away, no need for bowls or separate beaters. Cleanup is just as simple—most parts detach and are dishwasher-safe, so you avoid the hassle of scrubbing multiple tools.
Consistent Texture
One of the biggest challenges with whipping cream is getting a smooth, even texture. An immersion blender ensures consistent results by blending the cream uniformly throughout. This reduces the risk of over-whipping or lumps, giving you that perfect, velvety finish every time. Have you ever ended up with grainy cream? This tool helps you avoid that disappointment.

Credit: food52.com
Choosing The Right Ingredients
Fresh, cold heavy cream works best for smooth, fluffy whipped cream. Choose simple ingredients like sugar and vanilla for natural flavor. Using good quality cream ensures better texture and taste when whipped with an immersion blender.
Choosing the right ingredients for whipped cream can make a big difference. Every element contributes to the texture and taste of the final product. With an immersion blender, these choices become even more crucial for achieving that perfect, fluffy consistency.
Selecting Heavy Cream
The foundation of whipped cream is heavy cream. It should contain at least 36% milk fat. This fat content helps the cream whip up to the right texture. Avoid using light cream or half-and-half. They won’t whip properly.
Sweeteners And Flavorings
Sweetening your whipped cream adds a delightful touch. Granulated sugar is a popular choice. Powdered sugar, however, dissolves more easily. Consider adding vanilla extract for a classic flavor. For a twist, try almond or peppermint extract.
Chilling For Best Results
Chilling your ingredients is crucial. Cold cream whips better and faster. Place your bowl and immersion blender attachments in the fridge. They should chill for at least 15 minutes. This helps maintain the cream’s temperature during whipping.
Step-by-step Whipping Process
Whipping cream with an immersion blender is quick and satisfying, but getting it just right requires attention to detail. The process is straightforward, yet mastering it can elevate your desserts and drinks to a new level. Let’s walk through the steps to help you achieve fluffy, stable whipped cream every time.
Preparing Your Equipment
Start by chilling your bowl and the immersion blender attachments in the fridge for at least 15 minutes. Cold equipment helps the cream thicken faster, giving you better control over the whipping process.
Choose a deep, narrow bowl to minimize splatter and make blending easier. This setup keeps the cream contained and helps the blades do their job efficiently.
Proper Technique For Whipping
Pour cold heavy cream into your chilled bowl—about one cup works well for practice. Hold the immersion blender just below the surface of the cream to avoid splashing.
Pulse the blender in short bursts rather than running it continuously. This approach prevents over-whipping and helps you watch the cream’s texture closely.
As the cream thickens, slowly move the blender up and down to incorporate air evenly. Stop frequently to check the consistency so you don’t overshoot the perfect texture.
Signs Of Perfectly Whipped Cream
You’ll know your whipped cream is ready when it forms soft, billowy peaks that hold shape but still look light. The cream should glide smoothly off a spoon without being runny or grainy.
Does the cream feel airy yet stable? That balance means it’s perfect for topping pies or folding into desserts. If it looks glossy and holds its shape, you’re set.
Have you ever whipped cream that turned into butter? Catching the texture early saves you from that common mistake. Pay attention to the cream’s behavior—it changes quickly once you reach the right point.
Troubleshooting Common Issues
Using an immersion blender to whip cream can be quick and efficient, but sometimes things don’t go as planned. You might face issues like overwhipping, separation, or the whipped cream not having the right texture. Troubleshooting these common problems helps you get perfect results every time.
Overwhipping And How To Fix It
Overwhipping turns your smooth whipped cream into a grainy, butter-like texture. If you notice it starting to clump or look curdled, stop immediately. To fix this, add a few tablespoons of fresh cold cream and gently fold it in by hand to soften the texture.
Have you ever stopped blending just a second too late? It’s easy to do, especially when you’re aiming for stiff peaks. Next time, blend in short bursts and check frequently to avoid this problem.
Preventing Separation
Separation happens when the fat separates from the liquid, leaving you with watery cream and clumps. This often occurs if the cream or your mixing bowl is too warm. Keep everything cold by chilling your bowl and cream before whipping.
If separation starts, try gently folding the mixture to bring it back together. Avoid overmixing, which breaks the fat structure and causes the liquid to leak out.
Adjusting Consistency
Whipped cream can be too runny or too stiff depending on how long you blend it and the type of cream you use. If it’s too soft, continue blending in short bursts, watching closely for the right thickness. If it’s too stiff, add a splash of cold cream and stir gently.
Do you prefer your whipped cream light and fluffy or thick and rich? Adjusting the consistency is simple once you understand the texture changes during blending.
Creative Ways To Use Whipped Cream
Whipped cream made with an immersion blender is more than just a simple dessert topping. Its light, airy texture and fresh flavor open up many creative possibilities in your kitchen. Once you master the technique, you might find yourself experimenting beyond the usual uses.
Topping For Desserts And Drinks
Whipped cream instantly transforms ordinary desserts into indulgent treats. Try adding a generous dollop on fresh fruit, pies, or warm brownies to balance sweetness and add creaminess.
It’s also fantastic on drinks like hot chocolate, coffee, or milkshakes. Have you ever topped your morning coffee with homemade whipped cream instead of milk? It’s a simple change that makes your routine feel special.
Incorporating Into Recipes
Whipped cream isn’t just for topping—it can add lightness and moisture inside your recipes. Fold it gently into mousse, cake batters, or pancake mix to create a tender texture.
Mixing whipped cream into soups or sauces can add a subtle richness without heaviness. Next time you make a creamy soup, try stirring in some whipped cream at the end and taste the difference yourself.
Flavor Variations
You can easily customize whipped cream to suit your taste or the occasion. Add vanilla extract, cocoa powder, or a splash of liqueur for exciting flavors that complement your dish.
Ever tried cinnamon or citrus zest in your whipped cream? These small additions can brighten flavors and surprise your guests. What flavor twist will you try next to elevate your whipped cream?
Maintenance Tips For Your Immersion Blender
Taking care of your immersion blender is just as important as using it correctly, especially when whipping cream. Proper maintenance keeps your blender running smoothly and ensures every batch of whipped cream turns out perfect. Let’s look at some practical tips that make maintenance simple and effective.
Cleaning After Use
After whipping cream, clean your immersion blender right away to prevent residue buildup. Detach the blending arm and rinse it under warm water immediately. Use a soft sponge with mild dish soap to scrub off any cream stuck to the blades and shaft.
Avoid immersing the motor part in water—wipe it down with a damp cloth instead. If you notice stubborn cream bits, soak the detachable part in soapy water for a few minutes before scrubbing. This quick cleanup prevents clogging and keeps your blender ready for the next use.
Storage Recommendations
Store your immersion blender in a dry place to protect it from moisture and dust. If your blender came with a protective cover or case, use it to keep the blades safe and avoid accidents. Avoid tossing it in a crowded drawer where the blades can get nicked or bent.
Consider hanging it on a hook or placing it upright in a utensil holder to keep it accessible and damage-free. How often do you check your kitchen tools for safe storage? Small changes in where you keep your blender can save you from costly repairs later.
Extending Blender Lifespan
To make your immersion blender last longer, don’t overload it by blending thick mixtures continuously. Give it short breaks during heavy use to prevent overheating. Also, use the blender only for its intended purposes; whipping cream is gentle work, but blending tough ingredients can strain the motor.
Regularly inspect the cord for any damage and avoid pulling it sharply when unplugging. Investing a few minutes in these habits helps you avoid unexpected breakdowns. Wouldn’t you prefer your blender to be ready whenever you crave perfectly whipped cream?
:max_bytes(150000):strip_icc()/whipped-cream-_7885_beauty_216-0baae3ff81f4465eb7cc0c728e556960.jpg)
Credit: www.southernliving.com
Frequently Asked Questions
How Do You Whip Cream With An Immersion Blender?
To whip cream with an immersion blender, chill your bowl and cream first. Blend on medium speed until soft peaks form. Avoid over-whipping to prevent turning cream into butter.
What Cream Is Best For Immersion Blender Whipping?
Use heavy whipping cream with at least 30% fat content. This ensures smooth, stable whipped cream. Avoid low-fat creams as they don’t whip well with an immersion blender.
How Long Does Whipping Cream Take With Immersion Blender?
Whipping cream with an immersion blender usually takes 1 to 3 minutes. Time varies by cream temperature and blender speed. Stop when soft or stiff peaks appear.
Can I Add Sugar While Whipping Cream With Immersion Blender?
Yes, add powdered sugar or granulated sugar during whipping. Sweeten to taste after cream thickens slightly. Adding sugar early helps it dissolve evenly.
Conclusion
Whipping cream with an immersion blender is quick and easy. It saves time and effort in the kitchen. You get smooth, fluffy cream every time. No need for extra tools or machines. Just a few minutes, and your cream is ready.
Perfect for desserts, coffee, or snacks. This simple method fits any home cook’s routine. Try it today and enjoy fresh whipped cream anytime.

Hi, I’m Daniel Brooks—a food lover and kitchen gear enthusiast. I enjoy testing cookware, utensils, and gadgets to see what really works in everyday cooking. At PlugChef.com, I share honest reviews, comparisons, and simple guides to help you choose the best tools for a safer, smarter, and more enjoyable kitchen.
Related posts:
 What Type of Cooking Utensils are Safe: Expert Picks
 What Innovations Could Blenders Make: Unleashing Future Tech
 Smart Strategies to Organize a Small Kitchen: Maximize Space
 How to Organize a Kitchen Cabinet: Expert Tips & Tricks
 How to Organize Kitchen Drawers: Expert Tips and Tricks
 How to Organize a Corner Kitchen Cupboard: Expert Tips

