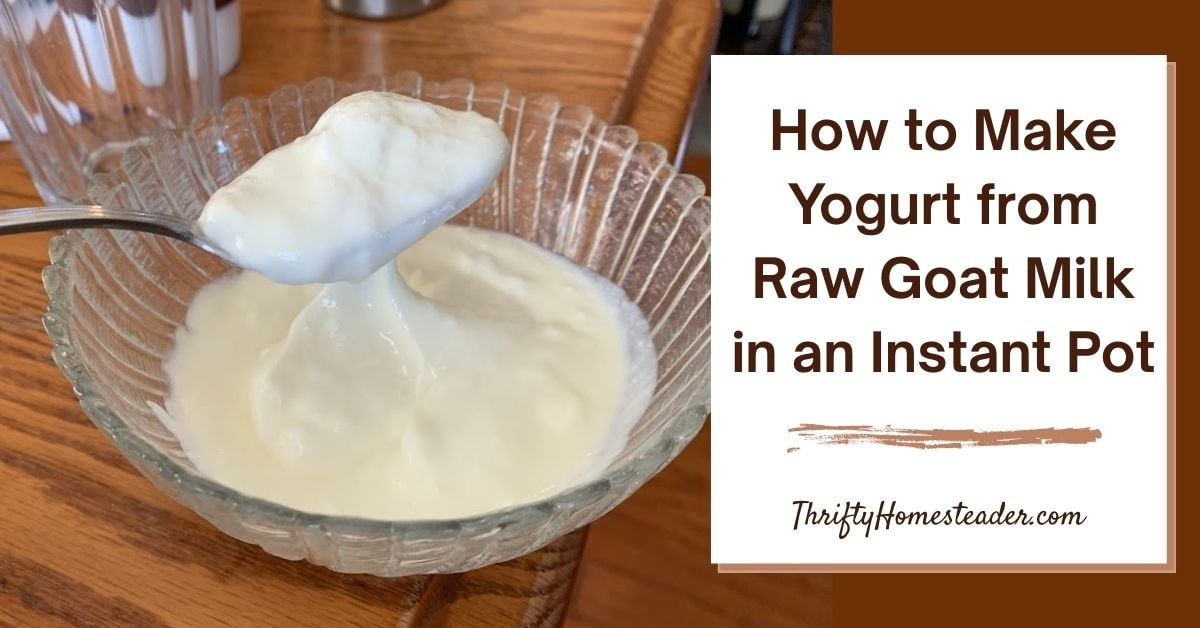
Are you ready to enjoy creamy, homemade yogurt without any hassle? Making yogurt with your Instant Pot is easier than you think.
Imagine having fresh, healthy yogurt right in your kitchen, tailored to your taste and free from additives. In this guide, you’ll discover simple steps to create delicious yogurt that your whole family will love. Keep reading, and you’ll soon master a skill that saves money, boosts your health, and impresses your friends.
Let’s dive in and transform your Instant Pot into a yogurt-making machine!
Why Choose Instant Pot For Yogurt
Choosing the Instant Pot to make yogurt brings ease and consistency to your kitchen. It simplifies the process, saving time and effort. The Instant Pot controls temperature precisely, creating the perfect environment for yogurt cultures. This control improves the taste and texture of homemade yogurt.
Using an Instant Pot also fits well with busy lifestyles. It requires less monitoring than traditional methods, making it ideal for beginners and experienced cooks alike. The device offers a set-it-and-forget-it convenience that helps you enjoy fresh yogurt anytime.
Benefits Of Instant Pot Yogurt
- Precise temperature control ensures consistent results.
- Less hands-on time compared to traditional yogurt making.
- Built-in yogurt function simplifies the entire process.
- Can make large batches, saving money and reducing waste.
- Maintains a clean environment for fermentation, reducing contamination risk.
- Energy efficient compared to using an oven or stove for hours.
Comparison With Traditional Methods
| Aspect | Instant Pot | Traditional Methods |
|---|---|---|
| Temperature Control | Automatic and precise | Manual, less consistent |
| Time Required | Hands-off, set and wait | Needs regular checking |
| Ease of Use | User-friendly with preset functions | Requires experience and attention |
| Batch Size | Large capacity options | Limited by containers used |
| Energy Efficiency | Uses less power overall | Higher energy use |
Ingredients And Tools Needed
Making yogurt with an Instant Pot is straightforward once you have the right ingredients and tools. Knowing exactly what to use can save you time and improve your results. Let’s look at the essentials you’ll need before you start your yogurt-making journey.
Milk Selection Tips
Your choice of milk greatly affects the taste and texture of your homemade yogurt. Whole milk gives a creamier, richer yogurt, while low-fat or skim milk produces a lighter version.
Raw milk can be used but must be pasteurized for safety. If you prefer plant-based options, almond or coconut milk works but may require additional thickeners.
Have you considered how the fat content in milk changes your yogurt’s creaminess? Experiment with different types to find your favorite.
Starter Cultures Options
Starter culture is the live bacteria that turns milk into yogurt. You can use store-bought plain yogurt with active cultures as a starter or buy powdered yogurt starter from health stores.
Make sure the starter contains live and active cultures, like Lactobacillus bulgaricus and Streptococcus thermophilus. These bacteria are essential for fermentation.
Using a fresh starter ensures your yogurt thickens well and develops a good tangy flavor. Have you checked the expiration date on your starter culture lately?
Essential Equipment
Besides your Instant Pot, a few simple tools will help you make yogurt easily. You’ll need a heatproof container or glass jar to hold the milk inside the Instant Pot.
A whisk is handy for mixing milk and starter smoothly. A thermometer helps monitor milk temperature, ensuring it’s just right for fermentation.
Don’t forget a clean lid or plastic wrap to cover the container during incubation. Keeping things hygienic is key to avoiding unwanted bacteria.
Step-by-step Yogurt Making
Making yogurt with an Instant Pot is simple and rewarding. Follow these steps to create creamy, homemade yogurt. Each step is straightforward, ensuring a delightful outcome. Let’s dive into the process!
Preparing The Milk
Start with fresh milk of your choice. Pour the milk into the Instant Pot. Use the ‘Sauté’ mode to heat the milk. Stir frequently to prevent burning. Heat until it reaches 180°F. This step kills unwanted bacteria. Once heated, let it cool to 110°F. Use a thermometer for accurate measurement.
Adding The Starter
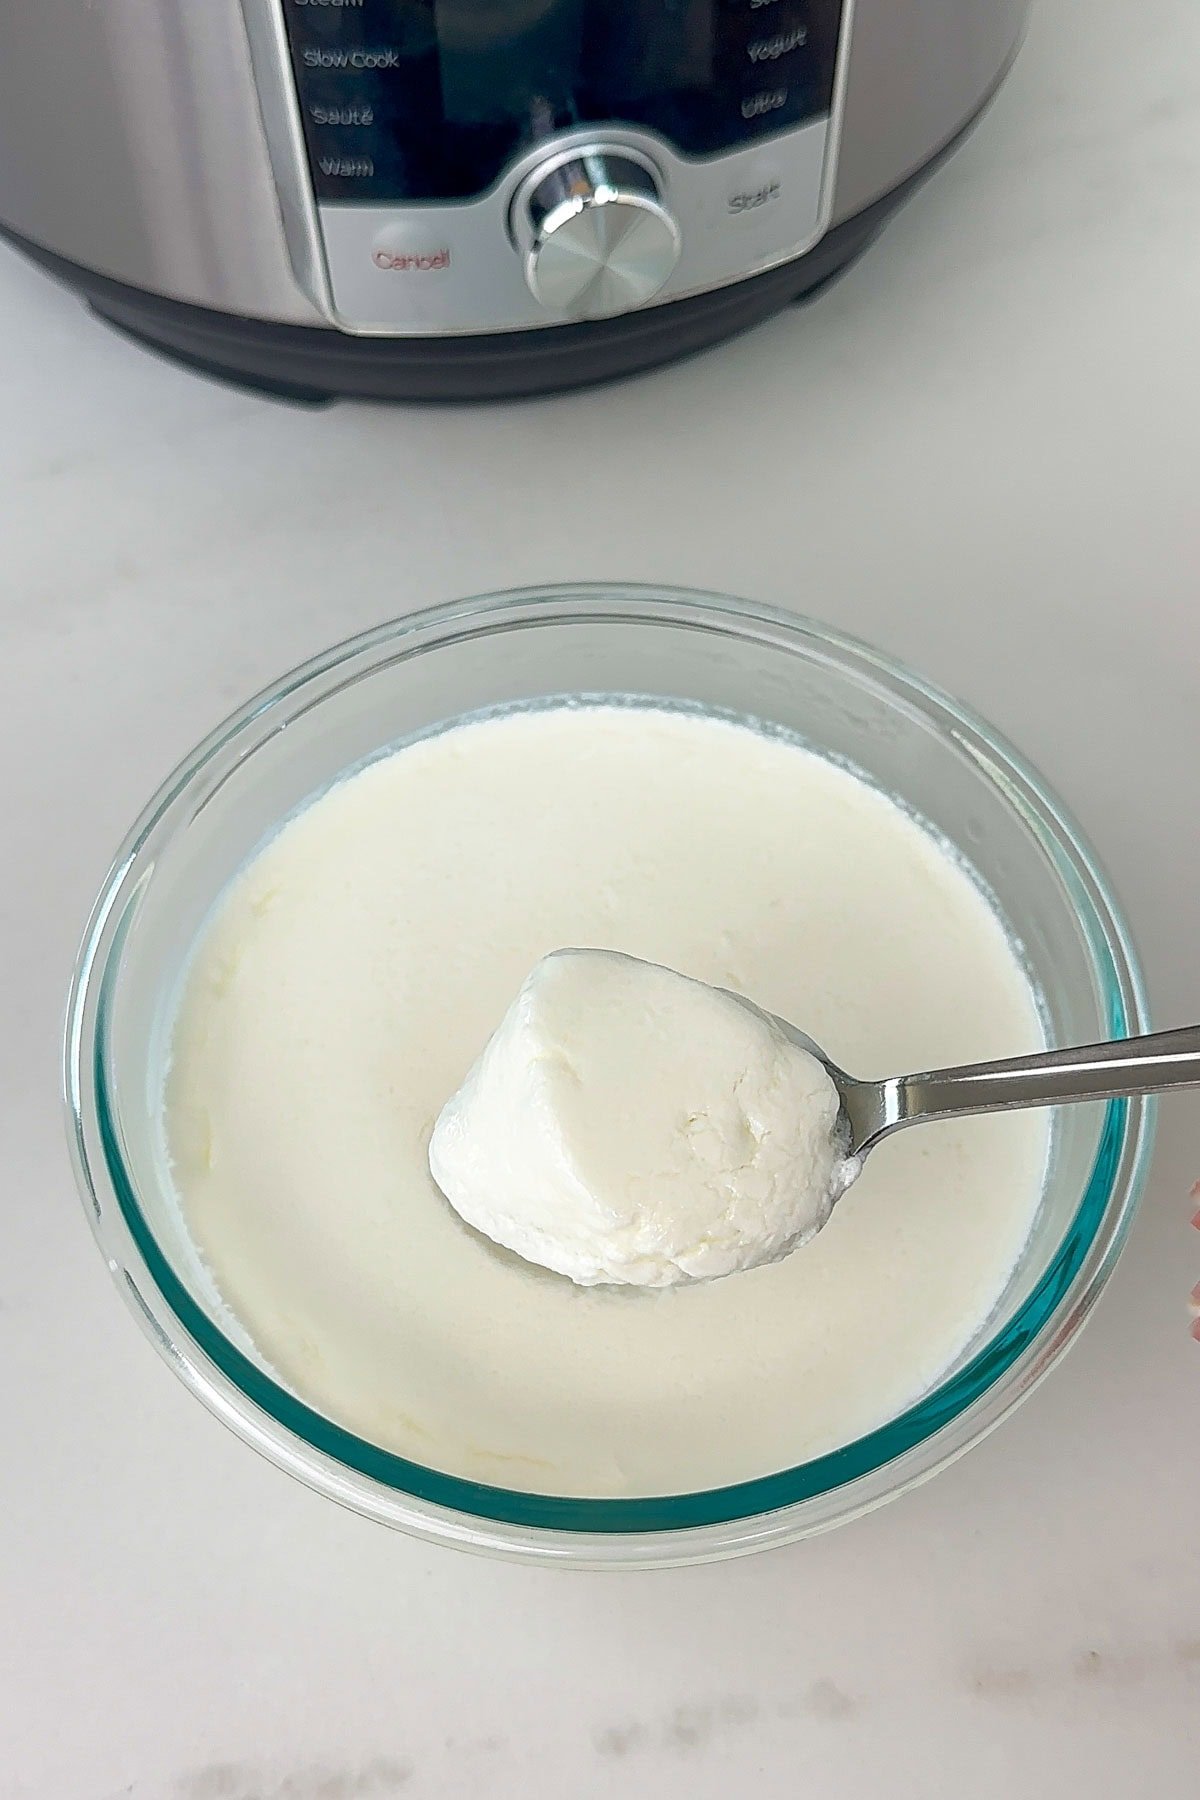
Take a small amount of the cooled milk. Mix it with a yogurt starter or plain yogurt. Ensure the starter has live cultures. Stir until smooth. Add this mixture back into the pot. Mix well with the rest of the milk.
Setting The Instant Pot
Select the ‘Yogurt’ function on the Instant Pot. Adjust the time to 8 hours. This duration allows proper fermentation. Secure the lid, but the vent position doesn’t matter. The Instant Pot maintains a stable temperature.
Incubation Process
Let the Instant Pot work its magic. Avoid disturbing the pot during incubation. After 8 hours, check the yogurt’s consistency. It should be thick and creamy. If desired, strain the yogurt for a thicker texture. Transfer to the fridge to cool before serving.
Credit: thriftyhomesteader.com
Tips For Creamy And Thick Yogurt
Making creamy and thick yogurt in your Instant Pot is simple with the right tips. Achieving the perfect texture depends on a few key factors. Pay attention to milk type, straining, and fermentation conditions.
Milk Fat Content
Higher fat milk creates richer yogurt. Whole milk or 2% milk gives creamier results. Skim milk produces thinner yogurt with less flavor. Avoid ultra-pasteurized milk. Fresh, cold milk helps bacteria grow well. Use milk with at least 3.25% fat for best creaminess.
Straining Techniques
Straining removes excess whey and thickens yogurt. Use cheesecloth or a fine mesh strainer. Let yogurt drain in the fridge for several hours. The longer you strain, the thicker it becomes. Save the whey for smoothies or baking. Straining also boosts the yogurt’s protein content.
Temperature And Timing
Maintain a steady temperature around 110°F (43°C). The Instant Pot yogurt function controls this well. Ferment yogurt for 8 to 12 hours for thicker texture. Longer fermentation makes tangier yogurt. Avoid opening the lid during incubation. Consistent warmth helps good bacteria multiply.
Flavoring And Serving Ideas
Flavoring homemade yogurt made in an Instant Pot opens up many tasty possibilities. You can keep it simple or get creative with mix-ins. The fresh, creamy yogurt provides a perfect base for sweet and savory flavors. Exploring different options makes each serving unique and enjoyable.
Natural Sweeteners
Natural sweeteners enhance yogurt without artificial ingredients. Try honey for a floral note and smooth texture. Maple syrup adds a rich, warm flavor that blends well. Agave nectar offers a mild sweetness and is great for vegans. These sweeteners dissolve easily, mixing evenly with the creamy yogurt.
Fruit And Nut Additions
Fresh or dried fruits add color and natural sweetness. Blueberries, strawberries, and mango cubes brighten the flavor and boost nutrition. Chopped nuts like almonds, walnuts, or pistachios add crunch and healthy fats. Sprinkle cinnamon or nutmeg for extra warmth and aroma. These toppings create a balanced texture and taste.
Savory Yogurt Uses
Yogurt works well in savory dishes too. Mix in chopped herbs like dill, parsley, or chives for a fresh dip. Add a pinch of salt and garlic powder for a tasty sauce. Use it as a creamy base for salad dressings or marinades. Savory yogurt can also complement spicy dishes or grilled meats.

Credit: food52.com
Troubleshooting Common Issues
Making yogurt with an Instant Pot is satisfying, but sometimes things don’t go as planned. Troubleshooting these common issues can save you time and frustration. Understanding what causes problems like runny yogurt, grainy texture, or overculturing helps you get consistently creamy results.
Runny Yogurt Fixes
Runny yogurt often means it didn’t set properly. This can happen if the incubation time was too short or the temperature was too low. Try increasing the incubation time by 1-2 hours or double-checking your Instant Pot’s temperature settings.
Another tip is to use whole milk instead of low-fat milk. The higher fat content helps thicken the yogurt naturally. Also, avoid opening the lid during incubation, as heat loss can affect the setting process.
Avoiding Grainy Texture
Grainy yogurt happens when the milk proteins clump together unevenly. This can be caused by overheating the milk or incubating for too long. Make sure to gently heat the milk to about 180°F (82°C) and cool it to 110°F (43°C) before adding the starter.
Stir the milk well but avoid vigorous mixing, which can break down proteins and create a grainy feel. Using a fresh, high-quality starter culture also helps keep the texture smooth.
Preventing Overculturing
Overculturing occurs when yogurt incubates too long, resulting in sour and overly thick yogurt. Keep track of your incubation time carefully; most yogurts need 8-12 hours, depending on your taste preference. If your yogurt tastes too tangy or smells strong, it’s likely overcultured.
Try reducing the incubation time next time or use a smaller amount of starter culture. Are you experimenting with different incubation periods? Note your results each time to find the perfect balance for your taste buds.
Storing And Shelf Life
Knowing how to store your homemade Instant Pot yogurt properly can make a big difference in its taste and safety. Yogurt’s shelf life depends on handling, refrigeration, and recognizing when it’s no longer good to eat. Let’s break down practical tips to keep your yogurt fresh and safe.
Proper Refrigeration
After your yogurt is ready, cool it quickly by placing the container in the fridge. Keep it at or below 40°F (4°C) to slow bacterial growth and preserve its creamy texture.
Use airtight containers to prevent your yogurt from absorbing other fridge odors. Avoid leaving it out at room temperature for more than two hours, as this encourages spoilage.
Reusing Yogurt Starter
Thinking about saving some of your yogurt to use as a starter for the next batch? That’s smart and saves money.
Choose plain, unflavored yogurt with live active cultures for the best results. However, limit reusing the starter to about 3-4 times because the bacterial culture weakens and can affect the quality and taste.
Signs Of Spoilage
How do you know if your yogurt has gone bad? Look for these clear signs:
- Off smell:A sour, rancid, or ammonia-like odor means it’s time to toss it.
- Mold:Any fuzzy spots or discoloration on the surface are a definite no-go.
- Texture changes:Excessive liquid separation or curdling beyond normal whey is suspicious.
If you notice any of these, don’t risk your health. Trust your senses and discard the spoiled yogurt immediately.
Credit: pipingpotcurry.com
Frequently Asked Questions
How Long Does Instant Pot Yogurt Take To Make?
Instant Pot yogurt typically takes 8 to 12 hours. The time depends on your preferred tartness. Longer incubation yields tangier yogurt.
What Ingredients Do I Need For Instant Pot Yogurt?
You need milk and a yogurt starter with live cultures. Whole milk is best for creamy texture. Avoid flavored or ultra-pasteurized milk.
Can I Use Any Instant Pot Model For Yogurt?
Most Instant Pot models have a yogurt function. Check your model’s manual to confirm. The function simplifies the fermentation process.
How Do I Store Homemade Instant Pot Yogurt?
Store yogurt in a clean airtight container. Refrigerate immediately after fermentation. Homemade yogurt lasts about 1 to 2 weeks in the fridge.
Conclusion
Making yogurt with an Instant Pot is simple and fun. You control the ingredients, so it stays fresh and healthy. Homemade yogurt tastes better than store-bought versions. It saves money and reduces waste. You can add your favorite flavors easily.
Try different milk types to find what you like best. This process fits well into busy lives. Enjoy creamy yogurt anytime, made by you. Give it a try and see the difference yourself.

Hi, I’m Daniel Brooks—a food lover and kitchen gear enthusiast. I enjoy testing cookware, utensils, and gadgets to see what really works in everyday cooking. At PlugChef.com, I share honest reviews, comparisons, and simple guides to help you choose the best tools for a safer, smarter, and more enjoyable kitchen.
Related posts:
 What Type of Cooking Utensils are Safe: Expert Picks
 What Innovations Could Blenders Make: Unleashing Future Tech
 Smart Strategies to Organize a Small Kitchen: Maximize Space
 How to Organize a Kitchen Cabinet: Expert Tips & Tricks
 How to Organize Kitchen Drawers: Expert Tips and Tricks
 How to Organize a Corner Kitchen Cupboard: Expert Tips

