Imagine slicing fresh vegetables or carving a perfectly roasted chicken on a cutting board that not only looks stunning but also lasts for years. Sounds perfect, right?
That’s exactly what you can achieve by sealing your wood cutting board properly. You might be wondering why this step is crucial. Well, without proper sealing, your cutting board can become a breeding ground for bacteria, warp, or even crack over time.
But don’t worry; sealing it is easier than you think! In this guide, we’re going to walk you through the simple steps to seal your wood cutting board effectively. You’ll discover the benefits of sealing and how it can protect your board from moisture, stains, and even unwanted odors. Plus, we’ll share some expert tips to make sure your board stays in top-notch condition, adding elegance to your kitchen for years to come. Are you ready to give your cutting board the care it deserves? Let’s dive in and transform your ordinary kitchen tool into a durable, hygienic masterpiece that you’ll love using every day.
Selecting The Right Sealant
Choosing the right sealant ensures your wood cutting board stays durable and safe. Food-safe mineral oil is a popular choice. It enhances the board’s appearance while protecting against moisture. Regular application keeps the wood in top condition.
Selecting the right sealant for your wood cutting board is vital. It ensures durability and food safety. There are many sealant options available. Each has its own benefits. Choosing the right one can be confusing. Here, we break down the most popular choices.Natural Oils
Natural oils are a popular choice. They are food-safe and easy to apply. Mineral oil is a top pick. It’s colorless and odorless. It penetrates deeply, protecting the wood. Another option is coconut oil. It’s naturally antibacterial and pleasant smelling. Beeswax can also be combined with oils. It provides a thicker, protective layer. Remember to reapply oils regularly. This keeps the board in top condition.Commercial Sealants
Commercial sealants offer strong protection. They often last longer than natural oils. Food-safe varnishes are a good option. They create a hard, durable surface. Look for those labeled “food-safe.” They ensure your board is safe for food contact. Avoid sealants with harsh chemicals. Always check product labels. Polyurethane is another commercial choice. It’s tough and water-resistant. But, ensure it’s a food-grade version. Frequent use of commercial sealants isn’t needed. They provide long-lasting protection.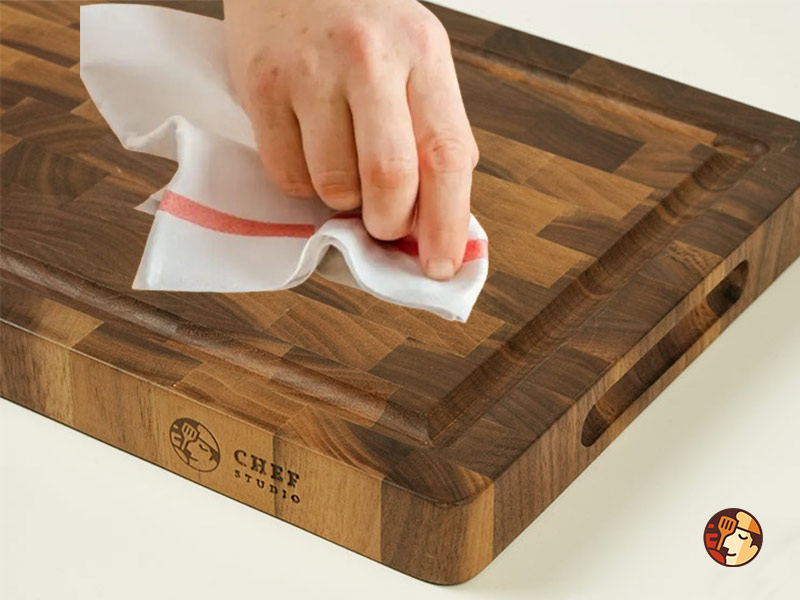
Credit: en.chefstudio.vn
Preparing The Cutting Board
Sealing a wood cutting board extends its lifespan. It also enhances its appearance. Before sealing, proper preparation is crucial. A well-prepared board absorbs sealant evenly. It also prevents damage. Follow these steps for effective board preparation.
Cleaning The Surface
Start by cleaning the board thoroughly. Use warm water and mild soap. Scrub gently to remove food particles. Rinse well to wash away soap residue. Dry the board completely with a towel. Moisture can affect the sealing process. Ensure the board is completely dry.
Sanding For Smoothness
Sanding creates a smooth surface. Use fine-grit sandpaper for this. Sand in the direction of the wood grain. This prevents scratches. Sanding removes rough patches and stains. It also opens wood pores for better sealant absorption.
After sanding, wipe the board with a damp cloth. This removes dust particles. Let the board dry again. A clean, smooth surface is ready for sealing.
Applying The Sealant
Sealing a wood cutting board preserves its beauty and extends its life. Proper sealing prevents moisture and bacteria from penetrating the wood. Let’s explore some effective techniques for applying sealant to your cutting board.
Oiling Techniques
Begin with a clean, dry cutting board. Use food-grade mineral oil for the best results. Pour a small amount of oil onto the board. Spread it evenly with a clean cloth or paper towel. Work the oil into the wood using circular motions. Ensure every inch of the board is covered.
Allow the oil to soak in for a few hours. If the board looks dry, apply more oil. Repeat the process until the wood no longer absorbs oil. This process helps to nourish and protect the wood fibers.
Layering Sealant Coats
Once the oiling is complete, it’s time to apply the sealant. Choose a food-safe sealant like beeswax or a specialized cutting board cream. Apply a thin layer of sealant over the entire surface. Use a clean cloth to spread it evenly.
Let the first coat dry completely. This usually takes a few hours. After drying, buff the surface with a soft cloth. Apply a second coat for added protection. Ensure the sealant is absorbed well. Buff again for a smooth finish.
Regular maintenance with oil and sealant keeps the board in top condition. It protects against moisture and enhances the board’s durability.
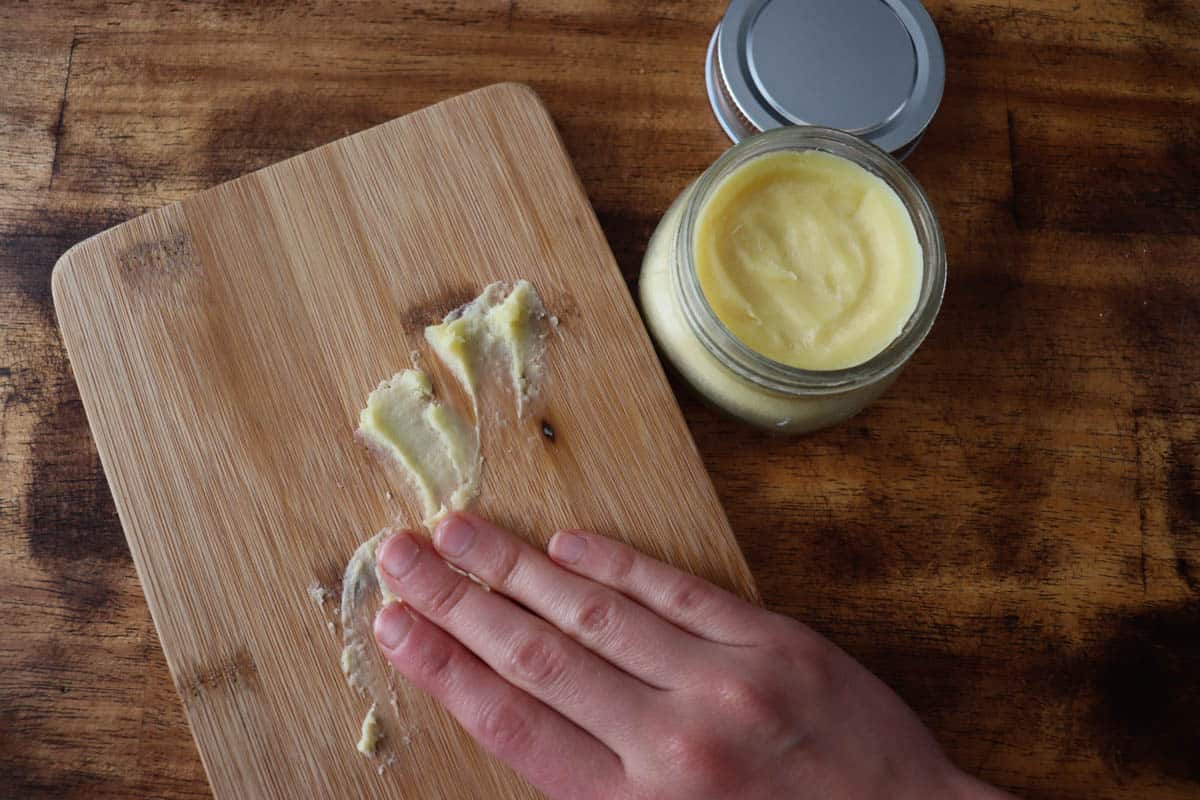
Credit: tulipsandtwill.com
Drying And Curing Process
Sealing a wood cutting board enhances its durability and hygiene. Begin by thoroughly drying the board after cleaning. Apply food-safe mineral oil evenly, allowing it to cure overnight for optimal absorption. Repeat the process monthly to keep the board in top condition, ensuring longevity and safety in your kitchen.
Sealing a wood cutting board is not just about applying a finish; it’s about ensuring that finish sets properly through the drying and curing process. This step is crucial to protect the wood, making it more durable and long-lasting. Understanding the nuances of drying and curing helps you achieve a professional finish and prolongs the life of your cutting board. Have you ever wondered why sometimes your board doesn’t seem to repel water as effectively? It might be due to inadequate drying and curing.Time Requirements
The drying and curing process requires patience. Typically, a freshly sealed cutting board should dry for at least 24 hours before it’s ready for use. This duration allows the oil or finish to penetrate deeply into the wood fibers, offering optimal protection. For those who live in more humid environments, you might find that it takes a little longer for your cutting board to dry completely. In such cases, consider giving it an extra day or two. This additional time ensures that the seal is fully set, preventing premature wear and tear.Temperature Considerations
Temperature plays a vital role in how well your board dries and cures. Aim for a warm, dry environment—around 70°F (21°C) is ideal. Colder temperatures can slow down the process, leading to a less effective seal. If you’ve ever tried drying a board in a chilly garage, you might have noticed it took forever. A warm kitchen counter is often a perfect spot. Just avoid placing it near direct heat sources like a stove or radiator, as extreme heat can warp the wood. By understanding these factors, you ensure your cutting board is not only functional but also a beautiful addition to your kitchen. Have you tried varying the drying time or temperature? What worked best for you? Share your experiences in the comments!Maintaining A Sealed Cutting Board
Maintaining a sealed cutting board is essential for preserving its longevity and ensuring food safety. A well-sealed cutting board not only looks beautiful but also provides a reliable surface for your culinary creations. Regular care will keep it in top condition, reducing the need for frequent replacements. Let’s dive into some practical ways to maintain your sealed cutting board.
Regular Cleaning Practices
After each use, rinse your cutting board with warm water and mild soap. This helps remove food particles and prevents bacteria buildup. Avoid soaking the board or using harsh chemicals as they can damage the sealant.
Dry the board thoroughly with a clean towel after washing. Leaving it wet can lead to warping and weaken the seal. Consider air drying on a rack for extra precaution.
Is your cutting board starting to smell? Sprinkle some baking soda on the surface and scrub gently with a damp cloth. This natural solution is effective and won’t harm the seal.
Periodic Resealing
Over time, the seal on your cutting board may wear off. Resealing is crucial to maintain its protective barrier. A simple way to check is by observing if water droplets absorb rather than bead on the surface.
Reseal your board by applying food-grade mineral oil. Pour a small amount onto the board and rub it in using a clean cloth. Let it soak overnight for optimal absorption.
How often should you reseal? It varies based on usage, but a good rule of thumb is every few months. You’ll notice a difference in its texture and appearance with regular upkeep.
Taking these small steps can greatly enhance your cutting board’s durability. Have you ever had a favorite board that lasted for years? It’s possible with consistent maintenance. What’s your go-to method for keeping your cutting board in prime condition?

Credit: www.youtube.com
Common Mistakes To Avoid
Avoid using too much oil, as it can create a sticky surface. Always dry the board completely to prevent moisture damage.
Sealing your wood cutting board is a crucial step to ensure its longevity and performance. However, there are some common mistakes that can undermine your efforts. These errors might seem small, but they can lead to bigger issues like a damaged board or even food safety concerns. In this section, we’ll explore some frequent pitfalls and how to avoid them, so your cutting board stays in top shape.Over-oiling
Using too much oil is a mistake many make. You might think more oil equals better protection, but it can actually harm your board. Over-oiling can cause the wood to become sticky or even warp over time. Apply oil sparingly and let it soak in completely. A thin layer is usually enough to protect the board and keep it looking great. If you notice excess oil pooling on the surface, wipe it off with a clean cloth.Using Harsh Chemicals
Harsh chemicals are a definite no-go. They can strip the wood of its natural oils and compromise the integrity of the board. Imagine the disappointment of seeing your beautiful board deteriorate after using a strong detergent. Stick to gentle, food-safe products for cleaning. A mixture of vinegar and water is often enough to sanitize without causing damage. Always rinse thoroughly and dry your board immediately to prevent water damage. Have you ever wondered why some cutting boards last longer than others? It’s often about how well you care for them, including avoiding these common mistakes. By steering clear of over-oiling and harsh chemicals, you ensure your board not only lasts longer but also remains safe for food preparation.Frequently Asked Questions
What Can I Use To Seal A Wooden Cutting Board?
Use food-grade mineral oil to seal a wooden cutting board. It’s safe and prevents moisture damage. Apply generously, let it soak overnight, and wipe excess. Beeswax mixed with mineral oil is another option for added protection. Regular maintenance keeps your board in great condition.
Does A Wooden Cutting Board Need To Be Sealed?
Yes, sealing a wooden cutting board helps protect against moisture and bacteria. Use food-safe mineral oil regularly. This maintains the board’s durability and hygiene. Proper care extends the lifespan of your cutting board. Regular sealing keeps the board in optimal condition for safe food preparation.
How To Make A Wooden Cutting Board Waterproof?
To waterproof a wooden cutting board, apply food-grade mineral oil generously. Let it soak overnight, then wipe off excess. Repeat monthly for best results. Use beeswax polish for extra protection and shine. Ensure the board is clean and dry before starting.
How To Make A Wooden Cutting Board Food Safe?
To make a wooden cutting board food safe, sand it smoothly and clean it thoroughly. Apply food-grade mineral oil or beeswax. Let it absorb for several hours, then wipe off excess. Regularly maintain by reapplying oil to prevent drying and cracking.
This ensures a safe surface for food preparation.
Conclusion
Sealing your wood cutting board is essential. It keeps the board healthy. It prevents cracks and stains. This simple task extends its lifespan. Choose the right oil. Apply it correctly and regularly. Your cutting board will stay durable and beautiful.
Use these tips for a lasting board. Enjoy cooking with a reliable surface. Keep your kitchen functional and neat. A sealed cutting board means less worry. Happy cooking awaits with a well-maintained board. Remember, care leads to longevity. Keep your cutting board in top shape easily.

Hi, I’m Daniel Brooks—a food lover and kitchen gear enthusiast. I enjoy testing cookware, utensils, and gadgets to see what really works in everyday cooking. At PlugChef.com, I share honest reviews, comparisons, and simple guides to help you choose the best tools for a safer, smarter, and more enjoyable kitchen.
Related posts:
 What Type of Cooking Utensils are Safe: Expert Picks
 What Innovations Could Blenders Make: Unleashing Future Tech
 Smart Strategies to Organize a Small Kitchen: Maximize Space
 How to Organize a Kitchen Cabinet: Expert Tips & Tricks
 How to Organize Kitchen Drawers: Expert Tips and Tricks
 How to Organize a Corner Kitchen Cupboard: Expert Tips

