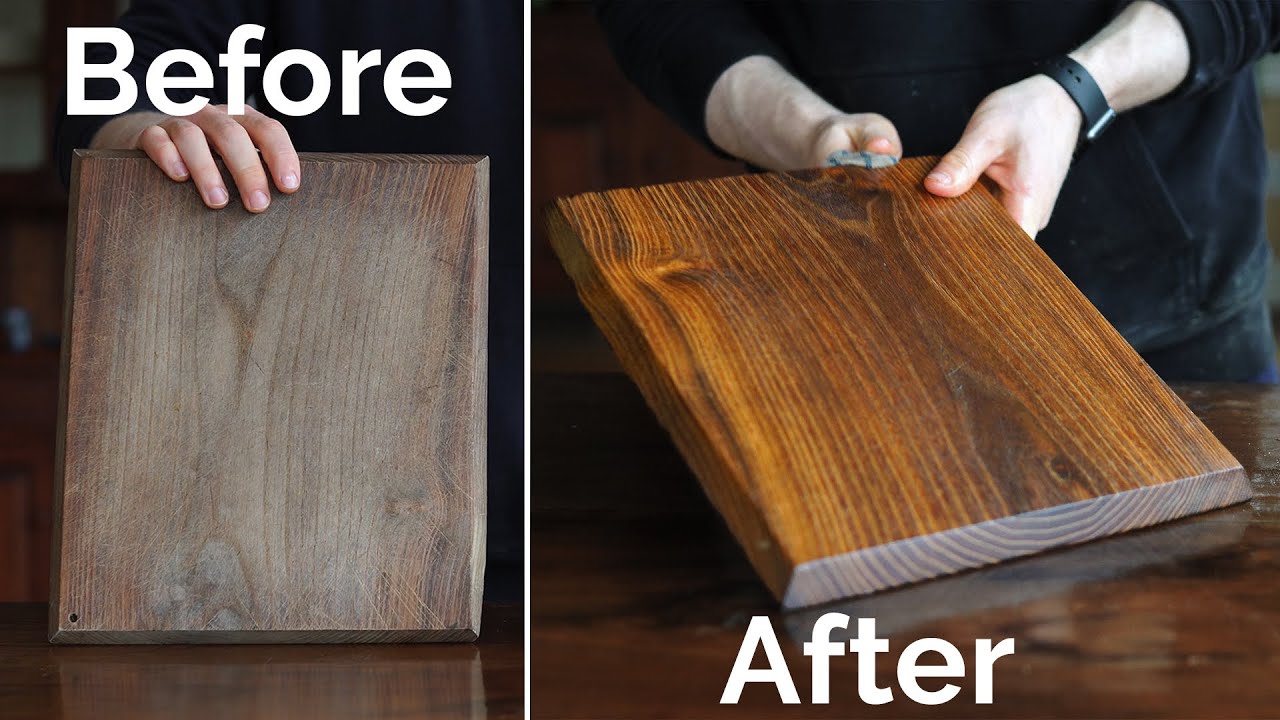
Imagine this: you’re preparing a delicious meal, ready to wow your guests, but your once-pristine cutting board looks worn and tired. You might wonder if it’s time to toss it and buy a new one.
But wait—did you know you can breathe new life into your cutting board with just a few simple steps? Refinishing your cutting board not only saves you money but also gives you the satisfaction of transforming something old into something fresh and functional.
In this guide, we’ll show you exactly how to do it. You’ll discover easy techniques that will make your cutting board look as good as new, enhancing your kitchen experience. Ready to roll up your sleeves and give your cutting board the makeover it deserves? Let’s dive in!
Choosing The Right Tools
Refinishing a cutting board can breathe new life into your kitchen essentials. The right tools make the process smooth and efficient. Selecting the proper equipment ensures success and ease. This guide will help you choose the right tools for your project.
Essential Equipment
Start with sandpaper. It removes scratches and smooths the surface. Choose a medium grit for initial sanding. Finish with a fine grit for a polished look. A sanding block or electric sander can speed up the process. Both options help achieve a uniform finish.
Mineral oil is crucial. It protects and hydrates the wood. Apply generously after sanding. Use a clean cloth to spread evenly. Let it soak in for optimal results.
Optional Accessories
Consider a wood conditioner. It enhances the board’s appearance. Use it before applying mineral oil for best results. Beeswax can also be used. It provides extra protection. Adds a subtle shine too.
Purchase a clamp if needed. It holds the board steady while working. Ensures precision during sanding and oiling. A dust mask is advisable. Keeps you safe from airborne particles.
Gloves offer protection. They prevent oil from irritating your skin. Ensure a comfortable grip while working. They are affordable and easy to find.
Preparing The Cutting Board
Preparing the cutting board involves cleaning, sanding, and oiling. First, wash it thoroughly to remove residue. Next, sand the surface to eliminate scratches and stains. Finish by applying food-safe oil to restore its shine and protect the wood.
Refinishing a cutting board brings life back to an essential kitchen tool. Preparing the board is the first step in the refinishing process. Proper preparation ensures a smooth and long-lasting finish. Before you start, gather all necessary materials. This makes the process efficient. Start with a clean workspace. This prevents unwanted dirt and debris from affecting your work.Cleaning The Surface
Begin by thoroughly cleaning the cutting board’s surface. Use mild soap and warm water. This removes food particles and stains. Avoid harsh chemicals that might damage the wood. A gentle scrubbing with a soft brush helps. Make sure to rinse the board thoroughly. Residue can interfere with the refinishing process. Let the board dry completely. This usually takes several hours. Moisture can affect the finish quality.Inspecting For Damage
After cleaning, inspect the cutting board for damage. Look for cracks, deep scratches, or stains. Minor scratches can be sanded away. Use fine-grit sandpaper for this. Deep cracks might need filling. Wood filler works well for such repairs. Ensure the filler matches the board’s color. Check for warping or uneven surfaces. These might require professional attention. Assessing damage ensures a perfect finish later.Sanding Techniques
Sanding techniques are crucial for refinishing a cutting board. They determine the smoothness and look of the board. Proper sanding removes old stains and scratches, giving the board a fresh appearance. This section will guide you through essential sanding techniques.
Selecting The Grit
Choosing the right grit sandpaper is vital. Start with coarse grit to remove deep marks. Typically, 60 to 80 grit works well for initial sanding. It helps in stripping old finishes and rough patches. Once the surface feels smoother, switch to finer grit. Use 120 to 150 grit for intermediate sanding. It refines the board’s texture. Finish with 220 grit for a polished surface. This ensures a smooth finish, ready for oiling.
Sanding The Surface
Begin sanding along the grain. This prevents scratches and ensures a smooth surface. Use steady, even strokes across the board. Avoid pressing too hard. Gentle pressure gives better results. Regularly check the surface for rough spots. Sand until these spots disappear. Wipe the board with a damp cloth. This removes dust and reveals unfinished areas. Repeat sanding if needed.
Use a sanding block for uniform pressure. It helps in reaching edges and corners. Circular motions can be used for stubborn stains. Ensure the surface feels smooth before moving to finer grits. This step is crucial for a flawless finish.

Credit: www.youtube.com
Removing Dust And Debris
Refinishing a cutting board involves several important steps. One of the most crucial steps is removing dust and debris. This ensures a smooth and clean surface for the finishing process. Dust and debris can interfere with the adhesion of oils or finishes. Proper cleaning is essential for a professional look. Here are two effective methods to achieve this.
Using A Damp Cloth
Start by wiping the cutting board with a damp cloth. This helps to pick up loose dust and particles. Make sure the cloth is only slightly damp. Excess water can damage the wood. Wipe gently in a circular motion. This technique ensures you reach all areas. Allow the board to air dry completely after wiping.
Vacuuming The Area
Consider using a vacuum for deeper cleaning. Use a vacuum with a brush attachment. This method effectively sucks up dust and debris. Move the vacuum gently across the board’s surface. Pay special attention to grooves and corners. Vacuuming ensures the board is dust-free before you apply any finish.
Applying Finish
Refinishing a cutting board restores its beauty and functionality. Applying finish is a crucial step. This part protects the wood and enhances its appearance. Follow these steps to ensure a successful application.
Choosing The Right Finish
Picking the right finish is essential. Look for food-safe options. Mineral oil is a popular choice. It penetrates the wood and keeps it hydrated. Beeswax can add shine and protection. Ensure the finish is easy to apply and maintain.
Applying The Finish Evenly
Start with a clean surface. Use a lint-free cloth or brush. Apply the finish in thin layers. Cover all areas, including edges. Allow each layer to dry completely. Repeat the process for better absorption. Ensure even coverage for a smooth look.
Curing And Buffing
Refinishing a cutting board involves curing and buffing for a smooth, clean surface. Start by sanding the board to remove scratches. Apply food-safe oil evenly, let it absorb, then buff with a soft cloth for a polished finish. This process restores the board, ensuring it’s ready for safe food preparation.
Refinishing a cutting board can breathe new life into your kitchen. The process involves sanding, oiling, curing, and buffing. Curing and buffing are crucial steps. They ensure durability and a smooth finish. These steps enhance the board’s appearance and longevity.Allowing Time To Cure
After oiling your cutting board, let it cure. Place the board on a dry surface. Ensure it stays flat. Allow at least 24 hours for the oil to penetrate deeply. This time lets the oil soak into the wood. It creates a protective layer. A well-cured board resists moisture and stains. Do not rush this step. Patience pays off with a longer-lasting finish.Buffing For Smoothness
Buffing gives your cutting board a smooth touch. Use a clean, soft cloth. Gently rub the board’s surface. Move in circular motions for even results. Buffing removes excess oil. It also enhances the board’s shine. A smooth finish feels good to the touch. It also looks appealing. Spend a few minutes buffing to achieve the best outcome.Maintaining The Cutting Board
Refinishing a cutting board is simple. Begin by sanding the surface to remove scratches. Next, apply food-safe mineral oil generously, allowing it to soak in. Repeat the oiling process until the board looks refreshed and smooth. This regular maintenance ensures longevity and a clean surface for food preparation.
Maintaining a cutting board is crucial if you want it to last and continue to function effectively. Just like your favorite kitchen tools, your cutting board deserves regular care. A well-maintained cutting board not only looks appealing but also ensures a safe and clean cooking environment. So, how do you keep your cutting board in top-notch condition? Let’s dive into some practical steps you can take to ensure your cutting board remains your kitchen ally for years to come.Regular Cleaning
Regular cleaning is the cornerstone of a well-maintained cutting board. After each use, wash your cutting board with warm, soapy water. Avoid soaking it in the sink, as prolonged exposure to water can cause the wood to warp or crack. Use a soft sponge or cloth to gently scrub the surface. Don’t be tempted to use harsh cleaning agents; they can damage the board’s finish. Once cleaned, dry the board thoroughly with a towel. Stand it upright or hang it to ensure complete air drying. Moisture is a common enemy of wooden boards, leading to mildew and unpleasant odors.Periodic Reapplication Of Finish
Every few weeks, treat your cutting board to a fresh coat of finish. This not only restores its appearance but also protects it from moisture and bacteria. Mineral oil or beeswax are excellent choices for this task. To apply, pour a small amount of oil onto the board and spread it evenly with a clean cloth. Ensure the oil penetrates the wood by leaving it to soak overnight. In the morning, wipe off any excess with a dry cloth. Consider how often you use your board. More frequent use might require more frequent oiling. This simple act can significantly extend the life of your cutting board. When was the last time you gave your cutting board a little TLC? Keeping up with these maintenance routines ensures it serves you well, meal after meal.
Credit: food52.com
Credit: www.youtube.com
Frequently Asked Questions
Is It Okay To Sand A Wood Cutting Board?
Yes, sanding a wood cutting board is okay. It smooths out scratches and removes stains. Use fine-grit sandpaper for best results. Always clean and oil the board after sanding to maintain its condition. Regular maintenance ensures a long-lasting, hygienic surface for food preparation.
How To Finish A Cutting Board After Sanding?
Apply food-grade mineral oil generously to the sanded cutting board. Allow it to absorb for several hours. Wipe off excess oil with a clean cloth. Repeat the process to ensure full coverage and protection. Finish with beeswax for added shine and durability.
Ensure the board is completely dry before use.
What Grit For Refinishing Cutting Board?
Use 120-grit sandpaper for initial sanding of the cutting board. Follow with 220-grit for a smoother finish. This process ensures a clean, even surface. Always sand in the direction of the wood grain. Finish by applying food-safe mineral oil to protect and extend the board’s life.
What To Coat A Wooden Cutting Board With?
Coat a wooden cutting board with food-grade mineral oil to protect and maintain its surface. Beeswax can also be mixed with mineral oil for added protection. Avoid using vegetable oils, as they can turn rancid. Regularly oiling the board helps prevent cracks and warping, ensuring longevity.
Conclusion
Refinishing a cutting board can be simple and rewarding. With patience, a worn-out board can look new again. Sand, oil, and wax are your best friends in this task. Always choose food-safe products for refinishing. Regular maintenance keeps your cutting board in top shape.
Clean it after each use to prevent stains and odors. Proper care extends its lifespan and keeps your kitchen looking great. Now, your cutting board is ready to serve you well. Enjoy cooking with your refreshed kitchen companion!

I’m Abby Lu, a passionate home cook who loves simplifying everyday meals. At PlugChef.com, I share product reviews and cooking guides to help you find the best tools for your kitchen.
Related posts:
 What Type of Cooking Utensils are Safe: Expert Picks
 What Innovations Could Blenders Make: Unleashing Future Tech
 Smart Strategies to Organize a Small Kitchen: Maximize Space
 How to Organize a Kitchen Cabinet: Expert Tips & Tricks
 How to Organize Kitchen Drawers: Expert Tips and Tricks
 How to Organize a Corner Kitchen Cupboard: Expert Tips

