Are you tired of your wooden cutting board looking dull and worn out? Or perhaps you’re worried about germs lurking in the cracks?
Sealing your wooden cutting board is a simple yet powerful solution that transforms it from a kitchen accessory into a reliable tool that lasts for years. Imagine slicing your favorite vegetables on a board that gleams with freshness and safety.
This article will guide you through the easy steps to seal your wooden cutting board, keeping it hygienic and extending its life. Discover how a little care can make a big difference in your kitchen experience. Dive in to learn how to give your board the protection it deserves and enjoy a cleaner, more beautiful kitchen environment.
Choosing The Right Sealant
Selecting the ideal sealant ensures your wooden cutting board stays durable and hygienic. Use food-safe mineral oil to protect and nourish the wood. Apply generously, let it soak, and wipe off excess for a smooth finish.
Choosing the right sealant for your wooden cutting board is crucial. It not only enhances the board’s lifespan but also maintains its beauty and functionality. With various options available, how do you decide which one suits your needs best?Natural Oils
Natural oils are a popular choice for sealing wooden cutting boards. They penetrate deeply into the wood, providing a protective barrier that enhances the board’s durability. Common oils include mineral oil, which is food-safe and odorless, and coconut oil, which adds a pleasant aroma. Mineral oil is easy to apply. Simply pour a small amount onto the board and rub it in with a cloth. Allow it to soak overnight and wipe off any excess the next day. Coconut oil, on the other hand, offers antimicrobial properties. Make sure to use fractionated coconut oil, as it remains liquid at room temperature. This type of oil not only protects but also keeps your board smelling fresh.Food-safe Waxes
Food-safe waxes provide an excellent seal for wooden cutting boards. They create a smooth, water-resistant surface that prevents moisture from penetrating the wood. This can help reduce the risk of warping and cracking. Beeswax is a natural option that many prefer. It’s easy to apply and leaves a nice sheen on the board. Combine it with mineral oil for better results; the mixture can be gently heated and then rubbed onto the board. Carnauba wax is another alternative, known for its hardness and durability. It’s derived from the leaves of the carnauba palm, making it a vegan-friendly option. Though a bit harder to apply, it offers a long-lasting finish.Commercial Sealants
Commercial sealants are designed specifically for kitchen use. They are usually a blend of oils and waxes, optimized for sealing cutting boards. These products are convenient and often come with instructions for best results. Howard’s Butcher Block Conditioner is a popular commercial option. It’s a mix of food-grade mineral oil and natural waxes. Users often praise its ease of application and the protective layer it forms. Remember to check the label for food safety certifications. Some commercial sealants contain chemicals that might not be safe for direct food contact. Always prioritize your health and safety when selecting a product. Have you considered the type of food you usually prepare on your cutting board? This can guide you in selecting the most suitable sealant. Whether you choose natural oils, food-safe waxes, or commercial products, the right sealant can make a significant difference in the longevity and performance of your wooden cutting board.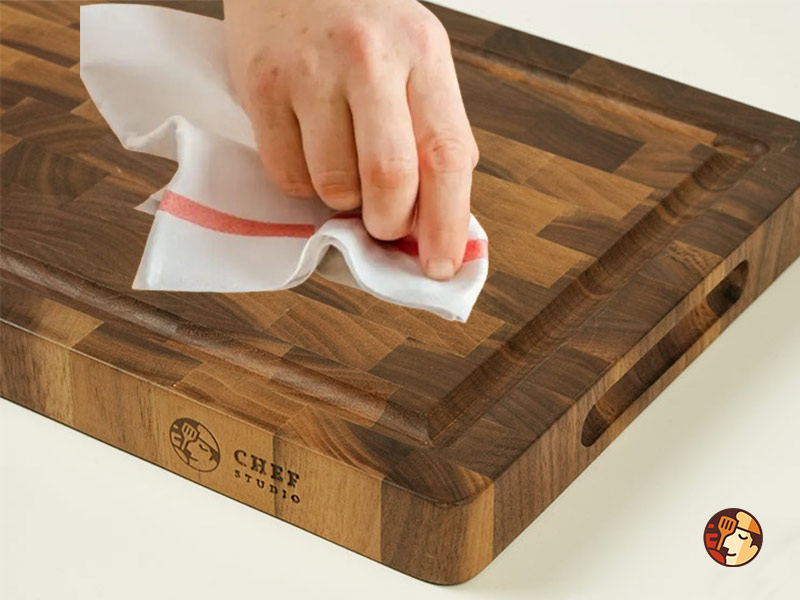
Credit: en.chefstudio.vn
Preparation Steps
Clean the cutting board thoroughly with soap and water. Dry it completely before applying food-safe mineral oil. Let the oil soak in overnight.
Preparing your wooden cutting board for sealing is a crucial step that ensures it remains durable and safe for your food preparation. A well-sealed board protects against moisture and bacteria, extending its lifespan. Are you ready to give your cutting board the care it deserves? Let’s dive into the preparation steps, focusing on cleaning and sanding.Cleaning The Board
Begin by thoroughly cleaning your cutting board. Use a mild dish soap and warm water, scrubbing both sides gently. This removes any food particles and oils that can interfere with the sealing process. After rinsing, dry the board with a clean towel. Leave it to air dry completely for several hours. Moisture can be your board’s enemy, so ensure it’s bone-dry before proceeding. Have you noticed stubborn stains or odors? A sprinkle of baking soda and vinegar can work wonders.Sanding For Smoothness
Sanding is essential for a smooth surface. It helps the sealant adhere better and gives your board a polished look. Start with a medium-grit sandpaper, gently sanding in the direction of the wood grain. Once you’ve tackled the rough spots, switch to a fine-grit sandpaper for a sleek finish. Don’t rush; patience here pays off with a beautifully even surface. Feel the board with your fingertips—do you sense any rough patches? If yes, give it another go until it feels perfectly smooth. These preparation steps may seem simple, but they form the foundation of a well-maintained cutting board. When was the last time you gave your cutting board a little TLC? Perhaps now is the perfect moment to start.Application Techniques
To seal a wooden cutting board, start by cleaning and drying it thoroughly. Apply food-grade mineral oil evenly across the surface using a clean cloth. Let the oil soak in overnight, then wipe off any excess. This process protects the wood and keeps it looking fresh.
Taking care of your wooden cutting board not only extends its life but also ensures a safer cooking environment. Sealing your cutting board correctly can protect it from moisture and bacteria. Let’s explore some effective application techniques to keep your wooden cutting board in top shape.Applying Oil
Begin by choosing the right oil. Food-grade mineral oil is a popular choice because it is safe and doesn’t spoil. Before applying, ensure your board is clean and dry. Pour a small amount of oil directly onto the board. Use a clean cloth to spread it evenly across the surface, following the wood grain. Allow the oil to soak in for several hours or overnight. This helps the wood absorb the oil deeply, ensuring robust protection. Wipe off any excess oil with a clean cloth.Using Wax
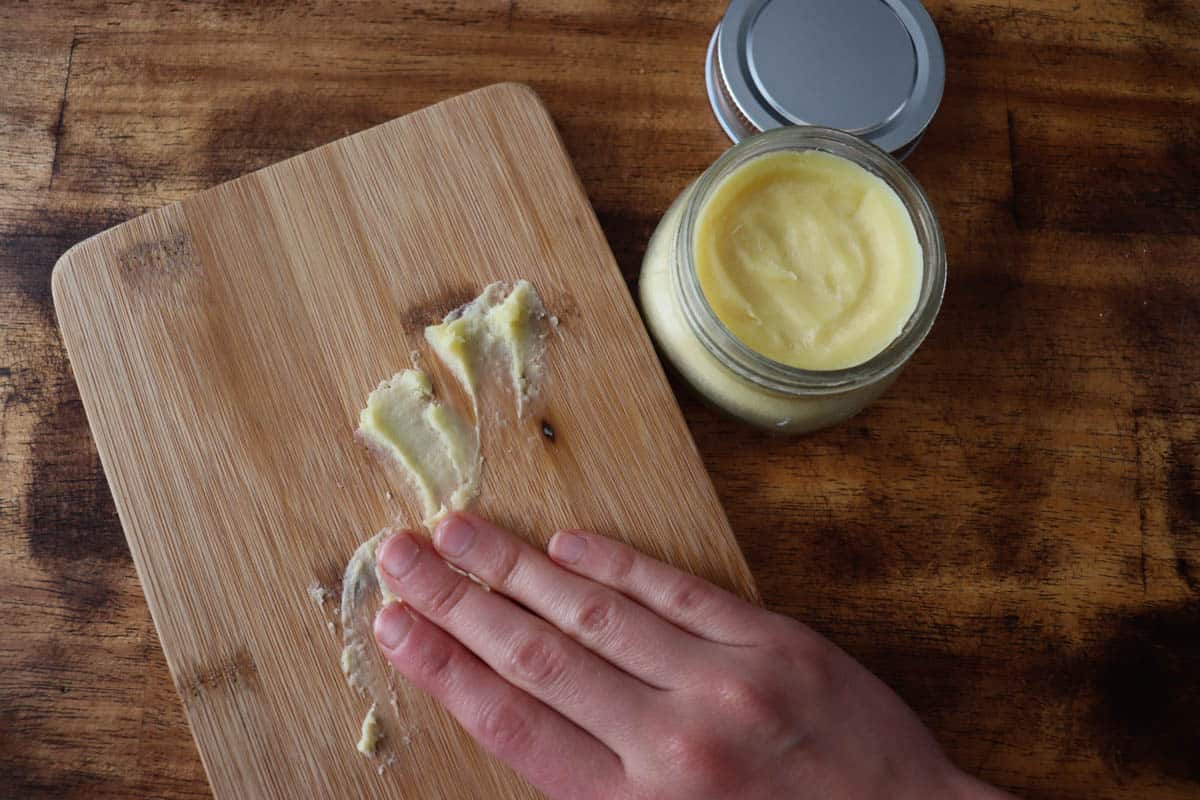
Wax provides an additional layer of protection. Beeswax or carnauba wax are great options due to their natural properties. Start by melting a small amount of wax in a double boiler. Once melted, let it cool slightly to a workable temperature. Use a soft cloth to apply the wax onto the board, again following the grain. Let the wax sit for about 15 minutes, then buff the board with a clean cloth to a subtle sheen. This not only seals the board but also gives it a beautiful finish.Layering For Protection
Consider layering oil and wax for enhanced protection. Begin with a layer of oil, let it dry, and then apply a layer of wax. This dual-layer method can be particularly effective for boards that see heavy use. How often should you repeat this process? It depends on usage, but a good rule of thumb is to seal your board once a month. This ensures ongoing protection against moisture and staining. Have you ever noticed your cutting board looking dull or stained? Perhaps it’s time to ask yourself: when was the last time you sealed it? Regular maintenance can keep your board looking new and performing well. Remember, maintaining your cutting board isn’t just about aesthetics. It’s about preserving a tool that plays a crucial role in your kitchen. So, take these steps to seal your board effectively and enjoy the benefits for years to come.Drying And Curing
Sealing a wooden cutting board ensures its longevity and protects it from moisture. The process involves two critical steps: drying and curing. Proper drying and curing enhance the board’s durability and resistance against bacteria.
Optimal Drying Conditions
Ensure the board is clean before drying. Place it in a warm, dry area with good air circulation. Avoid direct sunlight, which can cause warping. A gentle breeze helps in even drying. Check that the board is completely dry before moving on.
Timeframes For Curing
Curing is letting the sealant set and harden. Allow the cutting board to sit undisturbed for 24 to 48 hours. This timeframe ensures the sealant penetrates deeply. During curing, keep the board in a dust-free environment. This prevents particles from sticking to the sealant.
Maintenance Tips
Maintaining a wooden cutting board is crucial to keep it in top condition. Regular maintenance ensures longevity and optimal performance, making your kitchen tasks easier and more enjoyable. Let’s dive into some practical tips to help you keep your cutting board well-sealed and ready for use.
Regular Reapplication
Sealing your wooden cutting board isn’t a one-time task. You need to reapply the sealant regularly. Think of it like moisturizing your skin to keep it supple and healthy. Aim for a monthly schedule, using food-grade mineral oil or beeswax. These sealants form a protective barrier against moisture, preventing warping and cracking.
Have you ever noticed the board looking dull or feeling rough? That’s a signal it’s time for a touch-up. Applying a thin layer of oil and letting it soak overnight can revive its smooth surface. Regular reapplication keeps your board looking and functioning its best.
Signs Of Wear
Even with regular maintenance, cutting boards can show signs of wear. Watch for deep scratches, discoloration, or a rough texture. These signs mean your board needs attention. Scratches can harbor bacteria, making it unsafe for food prep.
If you notice these issues, it’s not the end for your board. A light sanding can smooth out scratches, followed by a generous oiling. This routine not only extends the life of your cutting board but also ensures safety and hygiene. Have you experienced a board that looks beyond repair? Sometimes, a little TLC is all it needs.
Ask yourself: when was the last time you checked your cutting board? Taking a moment to inspect it could save you time and trouble in the long run. Embrace these maintenance tips, and your wooden cutting board will remain a reliable kitchen companion for years to come.
Troubleshooting Common Issues
Sealing a wooden cutting board protects it from moisture and bacteria. Begin by cleaning the board thoroughly. Apply food-safe mineral oil generously, allowing it to soak overnight for best results.
Sealing a wooden cutting board keeps it looking fresh and functional. Yet, issues can arise during the process. This section addresses common problems and offers simple solutions. This guide helps you achieve a smooth, long-lasting finish.Sticky Residue
Sticky residue can occur if oil doesn’t absorb well. Use a clean cloth to wipe away excess oil. Let the board sit overnight to fully absorb the oil. If the board remains sticky, wash it with warm soapy water. Rinse thoroughly and dry with a towel. Avoid using too much oil in future applications.Uneven Finish
An uneven finish often happens with incorrect oil application. Ensure the oil is spread evenly across the board. Use a brush or cloth for even distribution. Sand rough spots with fine sandpaper if needed. Reapply oil and let it sit for proper absorption. Keep the board on a flat surface while drying to avoid unevenness. Regular maintenance helps maintain an even finish.Expert Recommendations
Sealing a wooden cutting board keeps it in top condition. Experts suggest using the right products and sealing frequency. This ensures your board remains durable and safe for food preparation. Let’s explore their recommendations.
Choosing Products
Experts recommend using food-grade mineral oil. It penetrates the wood, keeping it hydrated. Beeswax polish is also popular. It adds a protective layer on the surface. Avoid vegetable oils. They can turn rancid and cause unpleasant odors. Always select products labeled safe for food contact. This ensures no harmful chemicals reach your food.
Frequency Of Sealing
Sealing frequency depends on how often you use the board. For daily use, seal it once a month. For occasional use, every two to three months is enough. Check your board’s condition regularly. If it looks dry or loses its sheen, seal it. Regular sealing prevents cracks and warping. It also enhances the board’s lifespan.
Credit: tulipsandtwill.com

Credit: tulipsandtwill.com
Frequently Asked Questions
Should A Wooden Cutting Board Be Sealed?
Yes, sealing a wooden cutting board is crucial. It prevents moisture absorption and reduces bacteria growth. Use food-safe mineral oil or beeswax for sealing. Regular maintenance ensures durability and hygiene. A well-sealed board remains smooth and functional for longer. Protect your investment by sealing it properly.
What Is The Best Type Of Sealant To Use On A Cutting Board?
Use food-grade mineral oil as the best sealant for cutting boards. It’s safe and prevents wood drying. Apply regularly for optimal protection and longevity.
What Is The Best Finish For A Wooden Cutting Board?
Mineral oil is the best finish for a wooden cutting board. It penetrates deeply, preserving and protecting the wood. Beeswax provides added protection and shine. Use food-grade finishes to ensure safety. Regularly apply to maintain durability and hygiene, keeping your cutting board in top condition.
How To Make A Wooden Cutting Board Food Safe?
Sand the cutting board smoothly, then apply food-grade mineral oil. Let it absorb, then wipe off excess. Use beeswax for extra protection. Reapply oil monthly to maintain. Avoid using vegetable oils as they can turn rancid. Wash with warm water and mild soap, and dry immediately.
Conclusion
Sealing a wooden cutting board is simple. Protects it from damage. Keeps it looking new. Regular care is key. Clean it well after use. Apply mineral oil regularly. Let it soak in. Wipe off excess oil. This prevents cracks and warping.
Enhances the board’s durability. Avoid soaking it in water. Always dry it thoroughly. A well-sealed board is safe for food. Adds life to your kitchen tools. Enjoy using your cutting board longer. Simple steps make a big difference. Your board stays strong.
Ready for all your culinary adventures.

I’m Abby Lu, a passionate home cook who loves simplifying everyday meals. At PlugChef.com, I share product reviews and cooking guides to help you find the best tools for your kitchen.
Related posts:
 What Type of Cooking Utensils are Safe: Expert Picks
 What Innovations Could Blenders Make: Unleashing Future Tech
 Smart Strategies to Organize a Small Kitchen: Maximize Space
 How to Organize a Kitchen Cabinet: Expert Tips & Tricks
 How to Organize Kitchen Drawers: Expert Tips and Tricks
 How to Organize a Corner Kitchen Cupboard: Expert Tips

