Have you ever lifted your Dutch oven lid only to find a burnt, stubborn layer stuck to the bottom? It’s frustrating when your delicious meal turns into a tough cleanup challenge.
But don’t worry—burnt bottoms happen to everyone, and there’s a way to fix it. You’ll discover simple tricks to clean your Dutch oven without damaging it, plus smart tips to prevent burning next time. Keep reading, and you’ll save time, protect your cookware, and enjoy better meals every time.

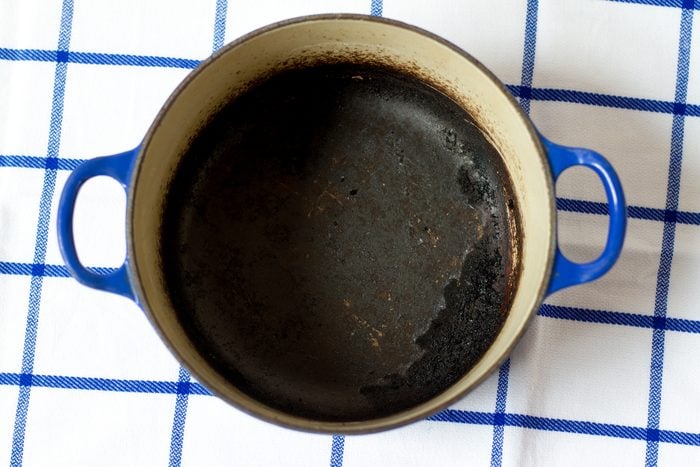
Credit: www.reddit.com
Causes Of Burnt Bottoms
Burnt bottoms in a Dutch oven can spoil a meal and cause frustration. Understanding the common causes helps prevent this issue. Several factors lead to food sticking and burning at the bottom.
High Heat Usage
Using very high heat often causes burning. Dutch ovens retain heat well, so too much heat cooks food unevenly. The bottom gets hotter than the rest, causing food to burn quickly. Always start with medium or low heat.
Inadequate Oil Or Liquid
Not using enough oil or liquid increases the chance of burning. Oil creates a barrier between food and the pot. Liquid helps distribute heat evenly. Without enough moisture, food sticks and burns at the bottom.
Cooking Without Stirring
Leaving food without stirring causes hot spots. Stirring moves food around and prevents it from sitting too long on the hot surface. This simple step stops burning and ensures even cooking.
Old Or Damaged Cookware
Old or damaged Dutch ovens may cause burning. Scratches or worn surfaces can make food stick more. A damaged pot may not heat evenly. Using well-maintained cookware helps prevent burnt bottoms.
Immediate Cleaning Steps
Burnt residue on the bottom of your Dutch oven can be frustrating to deal with, especially when you want to use it again soon. Acting quickly can make a huge difference in how easy the cleaning process will be. Immediate cleaning steps not only save your cookware but also keep your cooking experience enjoyable.
Soaking Techniques
Start by filling your Dutch oven with warm water and a little dish soap. Let it soak for at least 30 minutes to loosen the burnt food particles.
If the burn is stubborn, try adding a few tablespoons of baking soda to the water before soaking. Baking soda naturally lifts grime without damaging the surface.
Have you ever left a burnt pot to sit overnight and regretted it? Soaking right away helps prevent that hardened crust from becoming impossible to remove.
Gentle Scrubbing Tools
Use a soft sponge or a nylon scrubber to clean the soaked residue. These tools are tough on burnt bits but gentle on the Dutch oven’s surface.
Avoid steel wool or metal brushes, as they can scratch and ruin the enamel coating. Instead, test a small area first if you’re unsure about your scrubber’s abrasiveness.
Consider a plastic scraper for lifting stubborn spots without scratching. Have you tried this simple tool? It often surprises people with how effective it is.
Avoiding Harsh Chemicals
Steer clear of bleach or other harsh chemicals that might damage your Dutch oven’s finish or leave harmful residues. These substances can eat away at enamel over time.
Stick to natural cleaners like vinegar, baking soda, or mild dish soap instead. They clean effectively and protect your cookware’s longevity.
Would you risk ruining an expensive pot just to get it spotless? Gentle cleaning agents are safer and still deliver great results without compromising your Dutch oven’s quality.
Effective Diy Cleaning Methods
Soaking the Dutch oven in warm water and baking soda loosens burnt residue effectively. Gentle scrubbing with a soft brush removes stubborn stains without damage.
Cleaning the burnt bottom of your Dutch oven can feel daunting, but with some effective DIY methods, you can restore it to its former glory. These methods utilize common household items, making them accessible and cost-effective. Let’s dive into practical solutions that can save you both time and effort.Baking Soda Paste
Baking soda is a kitchen hero when it comes to cleaning. Create a paste by mixing baking soda with a small amount of water. Apply it generously on the burnt areas. Let it sit for at least 15 minutes. This gives it time to loosen the burnt residues. Scrub gently with a non-abrasive sponge and rinse thoroughly.Vinegar Soak
Vinegar is a natural cleaner that’s both effective and eco-friendly. Fill your Dutch oven with equal parts of water and white vinegar. Bring the mixture to a gentle boil and then let it cool. This method softens the burnt bits, making them easier to scrub off with a dish brush.Salt Scrub Method
Coarse salt works wonders for tackling tough stains. Sprinkle a generous amount of salt over the burnt areas. Add a few drops of water to create a gritty scrub. Rub the salt in circles with a cloth, applying enough pressure to lift the stains without scratching your Dutch oven.Dish Soap And Hot Water
Sometimes, the simplest methods are the most effective. Fill your Dutch oven with hot water and a few drops of dish soap. Let it soak overnight. This helps to dissolve the burnt particles. In the morning, scrub the bottom with a soft sponge, and you’ll likely see a significant improvement. Have you tried any of these methods before? Which one worked best for you?Using Commercial Cleaners
Using commercial cleaners can be a quick solution to tackle the burnt bottom of your Dutch oven. These products are designed to break down tough residues, saving you time and elbow grease. However, choosing the right cleaner and applying it safely are crucial to protect your cookware and get the best results.
Choosing The Right Product
Not all commercial cleaners are safe for Dutch ovens, especially those with enamel coatings. Look for products specifically labeled as safe for cast iron or enamel cookware. Avoid harsh abrasives or bleach-based cleaners that can damage the surface.
Brands like Bar Keepers Friend and Bon Ami offer gentle but effective options. You might also find a cleaner designed for cookware or kitchen use, which often balances strength with safety.
Safe Application Tips
Always read the instructions on the label before using any commercial cleaner. Use gloves to protect your skin and work in a well-ventilated area to avoid inhaling fumes.
Apply the cleaner sparingly to the burnt area and let it sit for the recommended time. Use a non-abrasive scrubber or sponge to gently lift the burnt residue without scratching the surface.
Never use metal scouring pads, as they can ruin the finish of your Dutch oven. Rinse thoroughly with warm water and repeat if necessary.
Post-cleaning Care
After cleaning, dry your Dutch oven completely to prevent rust, especially if it’s cast iron. Apply a thin layer of cooking oil to the surface to restore its protective seasoning.
Store your Dutch oven with the lid off or slightly ajar to allow air circulation and keep moisture from building up inside.
Have you noticed how proper care after cleaning can extend the life of your cookware? This small step makes a big difference in maintaining performance and appearance.
Preventing Future Burnt Bottoms
Preventing burnt bottoms on your Dutch oven keeps your meals tasty and your cookware in great shape. Taking simple steps can stop food from sticking and burning. These tips help you cook with less hassle and clean up easily.
Proper Heat Control
Use medium or low heat when cooking. High heat burns food quickly and damages the pot. Start with low heat and increase slowly if needed. Avoid placing the Dutch oven directly on very high flames. This keeps heat even and prevents hot spots.
Regular Maintenance
Clean your Dutch oven after every use. Remove any food residue or burnt bits right away. Use warm water and a soft brush or sponge. Avoid harsh scrubbers that scratch the surface. Dry it well to stop rust or damage.
Using Protective Layers
Place a heat diffuser or a protective layer under the pot. This spreads the heat evenly across the bottom. You can also use parchment paper or silicone mats when baking. These layers stop direct contact with flames or oven racks.
Seasoning Your Dutch Oven
Keep your Dutch oven well-seasoned for a smooth surface. Apply a thin layer of oil inside and outside after cleaning. Heat it gently to lock the oil in. Seasoning builds a natural non-stick coating that stops food from burning.

Credit: www.yahoo.com
When To Replace Your Dutch Oven
Knowing when to replace your Dutch oven can save you from frustrating cooking experiences and potential health risks. A burnt bottom is often a sign of wear, but not all damage means it’s time to toss your pot. Learning to recognize the difference between repairable issues and irreparable damage will help you make smart choices about your kitchen tools.
Signs Of Irreparable Damage
Look closely at the surface of your Dutch oven’s bottom. If the enamel coating is chipped or cracked, food can stick and bacteria may hide in those crevices. Deep scratches or exposed cast iron underneath the enamel are also warning signs.
Another red flag is rust that doesn’t go away after thorough cleaning. Rust weakens the metal and could lead to holes, ruining the pot’s ability to hold liquids. If the pot warps and no longer sits flat, it can cause uneven cooking and might not work well with your stove.
Have you noticed persistent burning despite adjusting heat and cooking times? This might mean the seasoning or enamel has worn out beyond repair. Continuing to use a damaged Dutch oven can affect your meals and even release harmful substances.
Cost Vs. Repair Considerations
Repairing a Dutch oven might seem like a good idea, especially if it has sentimental value. Minor chips or stains can sometimes be fixed with enamel repair kits or by professional refinishing. However, these repairs can be costly and time-consuming.
Compare the price of repair with buying a new Dutch oven. High-quality brands often come with warranties and improved materials that last longer. Investing in a new pot might save you money and frustration in the long run.
Ask yourself: will the repair restore the pot’s performance fully? If not, replacing it will enhance your cooking experience. Sometimes, spending on a new Dutch oven means better heat distribution, easier cleaning, and more enjoyable meals.
Credit: www.rd.com
Frequently Asked Questions
Why Does My Dutch Oven Bottom Burn Food?
Burning occurs due to high heat or uneven heat distribution. Use low to medium heat and preheat slowly. Avoid placing the Dutch oven on direct flames or electric coils. Proper seasoning and using oil can also prevent sticking and burning.
How To Clean Burnt Dutch Oven Bottom Effectively?
Fill the pot with warm water and baking soda. Let it soak for an hour. Use a non-abrasive scrubber to remove residue. Avoid harsh chemicals that damage the surface. Repeat if necessary for stubborn burnt spots.
Can Burnt Dutch Oven Affect Food Taste?
Yes, burnt residue can cause a bitter, smoky flavor. It may transfer unpleasant tastes to your dishes. Proper cleaning after each use prevents flavor contamination. Maintain your Dutch oven to ensure fresh, clean cooking every time.
Is It Safe To Cook With A Burnt Dutch Oven?
Cooking with a burnt Dutch oven is generally safe if cleaned well. Burnt food particles can affect taste but not safety. Avoid using damaged or cracked cookware. Regular maintenance keeps your Dutch oven safe and efficient.
Conclusion
Burnt bottoms on Dutch ovens can happen to anyone. Cleaning them is simple with the right steps. Avoid high heat to prevent future burns. Use gentle scrubbing and natural cleaners for best results. Taking care of your Dutch oven keeps it lasting long.
Cooking with care makes meals better and pots happy. Small efforts bring big rewards in the kitchen. Enjoy cooking without worry or stress. A clean Dutch oven means tastier food every time. Keep these tips handy for a great cooking experience.

I’m Abby Lu, a passionate home cook who loves simplifying everyday meals. At PlugChef.com, I share product reviews and cooking guides to help you find the best tools for your kitchen.
Related posts:
 What Type of Cooking Utensils are Safe: Expert Picks
 What Innovations Could Blenders Make: Unleashing Future Tech
 Smart Strategies to Organize a Small Kitchen: Maximize Space
 How to Organize a Kitchen Cabinet: Expert Tips & Tricks
 How to Organize Kitchen Drawers: Expert Tips and Tricks
 How to Organize a Corner Kitchen Cupboard: Expert Tips

