
Are you ready to enjoy creamy, delicious yogurt right from your own kitchen? Making yogurt in your Instant Pot is easier than you think, and it gives you full control over ingredients and flavor.
Imagine having fresh, homemade yogurt whenever you want—without any additives or preservatives. In this guide, you’ll discover simple steps to turn basic milk into a healthy treat that’s perfect for breakfast, snacks, or cooking. Keep reading, and you’ll be surprised how quickly and effortlessly you can create your own yogurt at home.

Image: Make Yogurt in Instant Pot Easy, Creamy, Homemade Delight
Choosing The Right Ingredients
Choosing the right ingredients is the foundation of making delicious homemade yogurt in your Instant Pot. The quality of milk and the starter culture you select directly influence the texture, flavor, and creaminess of your yogurt. Paying attention to these details can turn a simple batch into a creamy, tangy treat that feels fresh and satisfying every time.
Selecting Fresh Milk
Fresh milk is your yogurt’s main ingredient, so it deserves careful thought. Whole milk usually gives the creamiest results, but you can also use 2% or skim milk depending on your preference for richness and calories.
Look for milk without additives or preservatives. Organic or locally sourced milk often tastes fresher and has a better nutrient profile, which can affect the final yogurt flavor.
Have you ever noticed how store-bought yogurt can taste different depending on the brand of milk used? That’s the impact fresh milk has on your homemade batch.
Picking The Best Starter Culture
Your starter culture is the bacteria that turns milk into yogurt. Using a high-quality starter ensures your yogurt will have the right balance of tartness and creaminess.
You can use plain yogurt with live active cultures as a starter. Look for labels that say “live and active cultures” and avoid those with additives or flavors.
If you want more control, you can buy freeze-dried yogurt starter cultures online. These often guarantee specific strains of bacteria, which can help you experiment with different textures and flavors.
Preparing The Instant Pot
Preparing the Instant Pot is a key step to make smooth and creamy yogurt. The appliance needs to be ready for the special yogurt setting. This ensures the milk heats and ferments properly. A clean pot also helps keep the yogurt fresh and safe to eat.
Setting Up The Yogurt Function
Start by plugging in the Instant Pot and checking the lid. Make sure the sealing ring is in place and clean. Press the “Yogurt” button on the control panel. The display may show “boil” or “normal.” Choose “boil” to heat the milk first. This step kills unwanted bacteria and prepares the milk for culturing. After boiling, the pot will cool down. The Instant Pot will then switch to the fermentation stage automatically.
Cleaning And Sterilizing
Clean the inner pot with warm, soapy water before use. Rinse it well to remove any soap residue. Sterilize the pot by boiling water in it for a few minutes. This kills germs and old bacteria. Let the pot air dry or dry it with a clean towel. Also, clean the lid and sealing ring thoroughly. Avoid any leftover food particles that could spoil the yogurt.
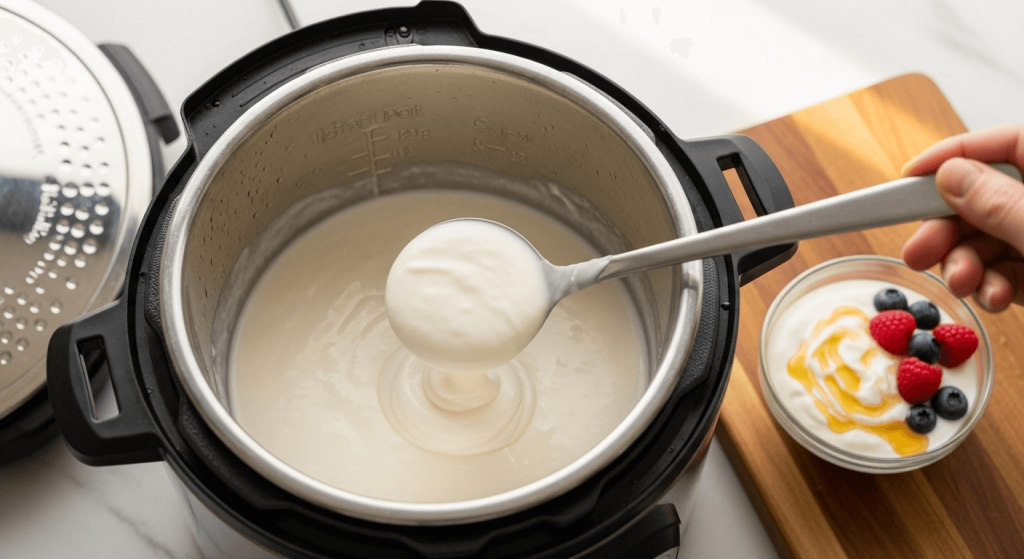
Step-by-step Yogurt Making
Making yogurt in an Instant Pot is simple and quick. Warm the milk, add yogurt culture, then let it incubate until thick and creamy. This method ensures smooth, fresh yogurt with minimal effort.

Image: Step-by-step Yogurt Making
Making yogurt in an Instant Pot is a rewarding and simple process that transforms ordinary milk into a creamy, probiotic-rich delight. The step-by-step yogurt making journey is not just about following instructions; it’s about discovering the perfect balance of time and temperature to suit your taste. Let’s dive into this culinary adventure and learn how you can create your own homemade yogurt masterpiece.
Heating The Milk
Start by pouring your choice of milk into the Instant Pot. Whole milk tends to yield a richer yogurt, but low-fat options work well too. Set the Instant Pot to the ‘Yogurt’ function and press ‘Adjust’ until it displays ‘boil’. This step ensures the milk reaches 180°F, killing any unwanted bacteria.
Cooling To The Perfect Temperature
Once the heating cycle is complete, it’s crucial to cool the milk. Allow it to reach around 110°F, which is ideal for adding the yogurt starter. Use a thermometer to check the temperature, and if you’re impatient like me, a cold water bath in the sink speeds up the cooling process.
Adding The Starter
Spoon in a few tablespoons of plain yogurt with active cultures to kickstart the fermentation. Stir gently to distribute the cultures evenly throughout the milk. This starter is the magic ingredient that transforms milk into yogurt, so make sure it’s fresh and high-quality.
Incubation Process
Cover the Instant Pot with the lid, set it to the ‘Yogurt’ function again, and choose your incubation time. The longer it incubates, the tangier the yogurt will be. Typically, 8-12 hours works well, but feel free to adjust based on your taste preference. Have you ever wondered why some yogurts taste tangier than others? The incubation time is your secret weapon for achieving that perfect flavor profile. Enjoy the process and savor the satisfaction of making delicious yogurt right in your kitchen.

Image: Yogurt in Instant Pot
Tips For Creamy Texture
Creating creamy yogurt in an Instant Pot depends on a few key factors. Small changes can lead to big improvements in texture. These tips help you get smooth, thick yogurt every time. Focus on ingredients and process control to achieve the best results.
Using Milk Powder
Milk powder boosts the milk’s protein content. More protein means thicker, creamier yogurt. Stir 2 to 4 tablespoons of milk powder into milk before heating. This simple step thickens the final yogurt naturally. It also improves the mouthfeel without changing the taste.

Image: Make Yogurt in Instant Pot:Tips For Creamy Texture
Adjusting Incubation Time
The incubation time controls yogurt firmness and tanginess. Longer incubation makes thicker yogurt but more sour. Shorter incubation gives mild flavor but softer texture. Experiment with times between 8 and 12 hours. Find the balance that suits your taste and texture preferences.
Maintaining Consistent Temperature
Yogurt cultures need steady warmth to grow well. The Instant Pot keeps a stable temperature around 110°F (43°C). Avoid opening the lid during incubation. Temperature drops can slow fermentation and cause grainy texture. Keep the pot undisturbed for smooth, creamy yogurt.
Flavoring And Serving Ideas
After making yogurt in your Instant Pot, the real fun begins—flavoring and serving it to suit your taste buds. Plain yogurt is versatile, but adding the right flavors transforms it into a delicious treat or a savory delight. You can easily tailor your homemade yogurt to match your mood or meal.
Natural Sweeteners And Fruits
Sweetening your yogurt naturally keeps it healthy and tasty. Try stirring in honey, maple syrup, or agave for a gentle sweetness that won’t overpower the tangy yogurt.
Fresh or frozen fruits add texture and bursts of flavor. Blueberries, strawberries, and mango chunks mix well, making each spoonful exciting.
For an extra touch, sprinkle some cinnamon, nutmeg, or vanilla extract. These simple additions can make your yogurt feel like a dessert without the guilt.
Savory Yogurt Variations
Yogurt isn’t just for sweet dishes—it shines in savory recipes too. Mix in chopped cucumbers, garlic, and dill to create a quick tzatziki sauce that pairs perfectly with grilled meats or veggies.
Adding a pinch of salt, black pepper, and a drizzle of olive oil turns your yogurt into a creamy dip. Toss in some chopped herbs like parsley or mint for freshness.
Have you tried yogurt as a base for salad dressings or marinades? Its creamy texture and mild tang add depth without heaviness. Don’t hesitate to experiment with spices like cumin or smoked paprika to match your meal’s theme.
Storing And Shelf Life
Once you’ve made your yogurt in the Instant Pot, knowing how to store it properly can make all the difference in taste and safety. Yogurt is a live food, meaning the good bacteria continue to work after you make it. Proper storage keeps those cultures alive and your yogurt fresh longer.
Refrigeration Tips
Store your yogurt in a clean, airtight container to prevent it from absorbing other fridge odors. Keep it in the coldest part of your fridge, usually the back shelf, not the door. This helps maintain a steady temperature and preserves freshness.
Check your yogurt daily for any signs of spoilage, like an off smell or mold. Usually, homemade yogurt lasts about 1 to 2 weeks in the fridge. Have you noticed how the texture thickens a bit after a few days? That’s normal and shows the cultures are still active.
Reusing Yogurt As Starter
You can reuse a small amount of your homemade yogurt as a starter for your next batch. This saves money and keeps your yogurt culture going strong. Just remember to use fresh yogurt—at its peak, not near its expiration.
Mix about 2 tablespoons of your current batch into warm milk to kickstart fermentation. Be cautious about reusing the starter more than 3 to 4 times. After that, the bacterial balance can weaken, affecting taste and texture.
Have you ever thought about how the quality of your starter impacts every batch? Keeping a good starter is like keeping a good recipe alive.
Troubleshooting Common Issues
Making yogurt in an Instant Pot is simple but may bring some common issues. Troubleshooting helps improve your results and enjoy creamy yogurt every time. Understanding these problems saves time and ingredients. Here are solutions to fix common yogurt-making challenges.
Grainy Or Lumpy Yogurt
Grainy or lumpy yogurt happens when the milk curdles unevenly. This texture feels rough and not smooth. Use fresh milk and avoid overheating it. Stir gently while cooling before adding the starter culture. Also, make sure the starter is well mixed but not too much.
Try these tips:
- Heat milk to 180°F (82°C), then cool to 110°F (43°C) slowly.
- Use a good quality starter with live cultures.
- Do not disturb the yogurt during incubation.
- Strain yogurt with a fine cloth to remove lumps if needed.
Yogurt Not Setting Properly
Yogurt that stays runny or watery lacks proper fermentation. Temperature and incubation time affect setting. The Instant Pot yogurt function must keep a steady 110°F to 115°F. Too low or high temperature stops the cultures from growing well.
Check these points:
- Use fresh starter from a previous batch or store-bought plain yogurt.
- Keep incubation time between 8 and 12 hours for thicker yogurt.
- Make sure the Instant Pot yogurt setting works correctly.
- Try a longer incubation if yogurt is too soft.
Sour Taste Problems
A very sour yogurt tastes sharp and unpleasant. This happens if fermentation lasts too long. High temperatures also speed up sourness. To reduce sour taste, shorten incubation time or lower temperature.
Follow these suggestions:
- Use 8 hours incubation for mild flavor.
- Refrigerate yogurt immediately after incubation ends.
- Use fresh milk and starter to control acidity.
- Taste yogurt during incubation to find the right time.

Image: instant pot yogurt jars
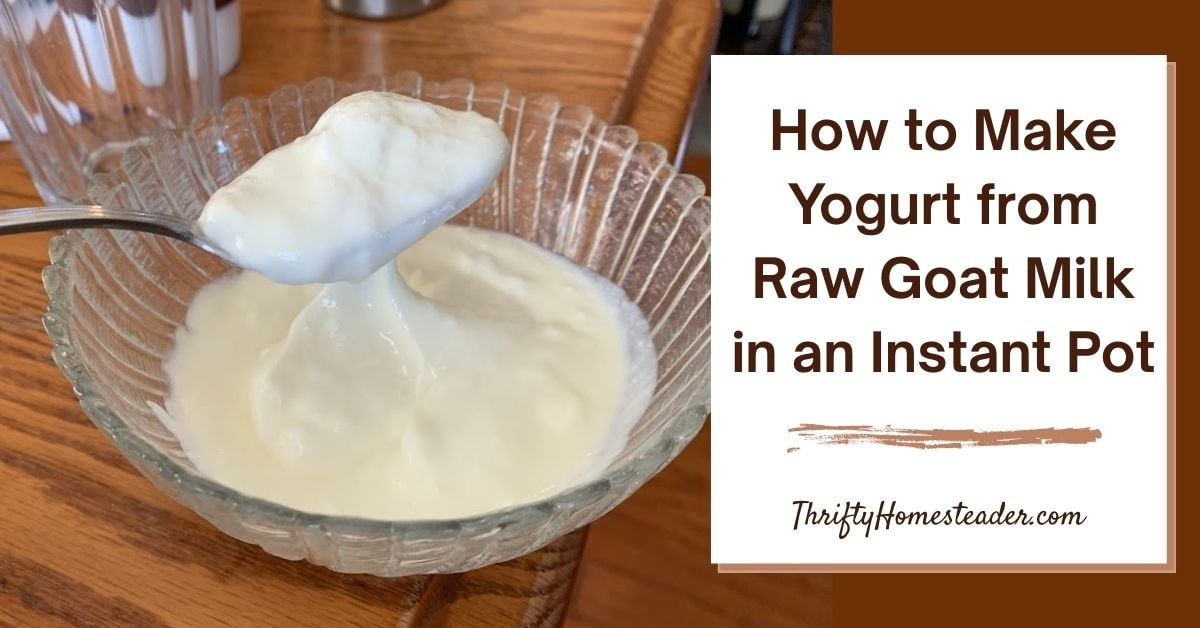
Credit: thriftyhomesteader.com
Frequently Asked Questions
How Long Does It Take To Make Yogurt In Instant Pot?
Making yogurt in an Instant Pot typically takes 8 to 12 hours. This includes heating, cooling, and incubating the milk. The long incubation ensures proper fermentation and thick yogurt. You can adjust the time for tangier or milder yogurt.
What Type Of Milk Is Best For Instant Pot Yogurt?
Whole milk is best for creamy Instant Pot yogurt. You can also use 2% or skim milk, but the texture may be thinner. Avoid ultra-pasteurized milk as it can affect fermentation. Organic milk often yields better flavor and texture.
Can I Use Store-bought Yogurt As A Starter?
Yes, store-bought yogurt with live cultures works well as a starter. Use plain, unsweetened yogurt with active cultures. Avoid flavored or gelatin-added yogurts. Typically, 2 tablespoons per quart of milk are enough to start fermentation.
How Do I Know When Instant Pot Yogurt Is Ready?
Instant Pot yogurt is ready when it thickens and tastes tangy. After incubation, it should have a smooth, creamy texture. You can refrigerate it to further thicken. If it’s too mild, extend incubation time next batch.
Conclusion
Making yogurt in your Instant Pot saves time and effort. You control the ingredients, ensuring fresh and healthy results. The process is simple and fits well into daily routines. Enjoy creamy, homemade yogurt anytime you want. Give it a try and taste the difference yourself.
Homemade yogurt can boost your meals and snacks with ease. Keep experimenting with flavors to find your favorite. Your kitchen will thank you for this easy addition.

I’m Abby Lu, a passionate home cook who loves simplifying everyday meals. At PlugChef.com, I share product reviews and cooking guides to help you find the best tools for your kitchen.
Related posts:
 What Type of Cooking Utensils are Safe: Expert Picks
 What Innovations Could Blenders Make: Unleashing Future Tech
 Smart Strategies to Organize a Small Kitchen: Maximize Space
 How to Organize a Kitchen Cabinet: Expert Tips & Tricks
 How to Organize Kitchen Drawers: Expert Tips and Tricks
 How to Organize a Corner Kitchen Cupboard: Expert Tips

