
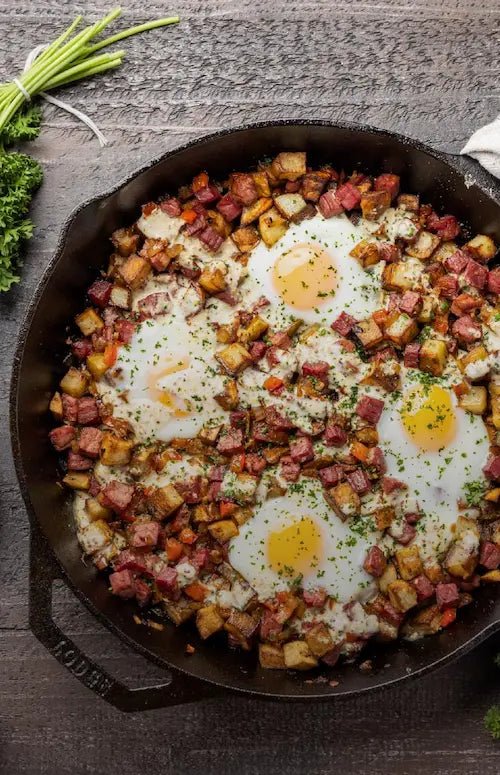
Are you tired of eggs sticking to your pan or turning out unevenly cooked? Cooking eggs in cast iron could be the game-changer you’ve been searching for.
Imagine perfectly cooked eggs with a rich, golden texture every time, right from your own kitchen. You’ll discover simple tips and tricks to master the art of cooking eggs in cast iron, unlocking flavors and textures that will make your breakfast—and your mornings—truly unforgettable.
Keep reading to transform your egg-cooking experience forever.

Image: Cook Eggs in Cast Iron: Perfect Tips for Flawless Breakfasts
Why Choose Cast Iron For Eggs
Choosing cast iron for cooking eggs brings many advantages. This classic cookware offers a unique cooking experience that enhances the taste and texture of your eggs.
Cast iron pans heat evenly and keep that heat steady. This means eggs cook perfectly without hot spots. Plus, cast iron gets better with use. Its natural non-stick surface improves over time, making egg cooking easier.
Benefits Of Cast Iron Cooking
- Even cooking surface prevents burning or sticking.
- Enhances flavor with natural seasoning buildup.
- Works on all heat sources, including ovens and campfires.
- Versatile for frying, scrambling, or baking eggs.
Heat Retention And Distribution
Cast iron holds heat longer than other pans. It spreads heat uniformly across the surface. This steady heat helps eggs cook gently and evenly. No sudden temperature drops or spikes. Perfect eggs every time.
Durability And Seasoning
Cast iron pans last for decades with care. They resist scratches and dents. The seasoning layer builds up with use and cleaning. This natural coating keeps eggs from sticking. It also adds a subtle, rich flavor to your cooking.
Credit: www.youtube.com
Preparing Your Cast Iron Pan
Preparing your cast iron pan properly is key to cooking perfect eggs. A well-prepared pan keeps eggs from sticking and enhances their flavor. Follow simple steps to clean, season, and preheat your pan before cooking.
Cleaning Before Use
Clean your cast iron pan with warm water and a soft brush. Avoid soap, as it can remove seasoning. Dry the pan thoroughly with a towel or by heating it on low heat. This prevents rust and keeps the surface smooth.
Seasoning Tips
Seasoning creates a natural, non-stick coating on your pan. Apply a thin layer of cooking oil all over the pan’s surface. Use oils with a high smoke point like vegetable or flaxseed oil. Heat the pan in the oven at 375°F (190°C) for one hour. Let it cool inside the oven. Repeat this process a few times for better results.
Preheating The Pan
Preheat the cast iron pan on low to medium heat before adding eggs. This helps even heat distribution and prevents sticking. Allow the pan to warm for at least 5 minutes. Test the temperature by sprinkling a few drops of water; they should dance or sizzle immediately.
Best Oils And Fats For Eggs
Butter, olive oil, and coconut oil work well for cooking eggs in cast iron. These fats prevent sticking and add rich flavor. Choose oils with a high smoke point for best results.
Cooking eggs in a cast iron skillet can be a delightful experience. The choice of oils and fats plays a crucial role. The right fat enhances flavor and prevents sticking. Let’s explore some popular options.
Butter Vs. Oil
Butter and oil both have unique qualities. Butter adds a rich, creamy taste to eggs. Its lower smoke point requires careful temperature control. Oil, like olive or canola, offers a higher smoke point. It provides a neutral flavor, allowing the taste of eggs to shine. Choose based on your taste preference and cooking style.
Using Bacon Fat
Bacon fat infuses eggs with a smoky, savory flavor. It’s a great way to use leftover bacon drippings. This fat adds depth to your breakfast dish. Ensure the bacon fat is strained and stored correctly. It provides a crispy texture to the eggs, making them even more delicious.
Non-stick Alternatives
Non-stick alternatives like avocado oil are great for eggs. They have a high smoke point and mild flavor. Avocado oil ensures eggs won’t stick and are easy to flip. Coconut oil is another option, adding a slight sweetness. Both are healthy choices for cooking eggs in cast iron.

Credit: jawnsicooked.com
Techniques For Cooking Eggs
Cooking eggs in a cast iron skillet can transform a simple breakfast into a flavorful experience. The pan’s heat retention and even cooking surface help you master different egg styles with ease. Let’s dive into practical ways to get the best results for fried eggs, scrambled eggs, and omelets.
Fried Eggs Perfected
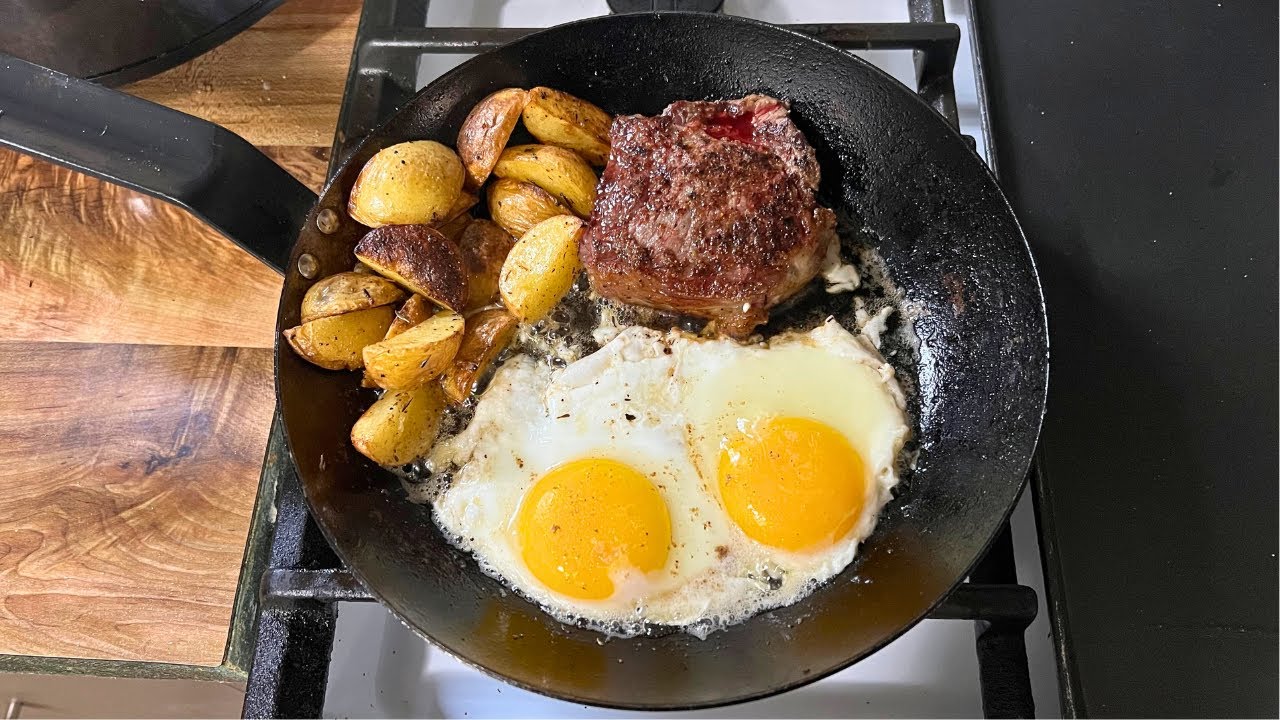
Start with a well-seasoned cast iron skillet and heat it on medium-low. Add a small amount of oil or butter to prevent sticking and create a crispy edge. Crack your egg gently into the pan and let it cook without moving it for a few minutes.
Notice the edges turning golden while the yolk stays runny? That’s the sweet spot. If you prefer your yolk cooked through, cover the pan with a lid for a minute or two. Have you tried flipping your fried egg? It’s tricky but worth practicing for an evenly cooked surface.
Scrambled Eggs Tips
Use fresh eggs and beat them well before pouring into a hot, lightly greased cast iron skillet. Keep the heat low to avoid rubbery texture. Stir gently and continuously, scraping the pan’s surface to form soft curds.
Adding a splash of milk or cream can make your scrambled eggs creamier. What about seasoning? Salt your eggs only after they start to firm up to keep them tender. Try finishing with fresh herbs or cheese for an extra flavor boost.
Making Omelets
Whisk your eggs until smooth and heat your cast iron skillet with butter over medium heat. Pour the eggs in and tilt the pan to spread them evenly. When the edges start to set, add your fillings like cheese, veggies, or ham.
Use a spatula to gently fold one side over the other. Let it cook for another minute until the cheese melts and the omelet holds its shape. Wondering how to avoid sticking? Make sure your pan is well-seasoned and preheated before adding eggs.
Common Mistakes To Avoid
Cooking eggs in a cast iron skillet can elevate your breakfast game, but a few common mistakes can turn your perfect eggs into a sticky mess. Avoiding these pitfalls will save you time and frustration. Let’s look at what to watch out for so your eggs come out just right every time.
Overheating The Pan
Heating your cast iron pan too much can cause eggs to burn or stick stubbornly. Cast iron holds heat exceptionally well, so moderate your heat and preheat the pan slowly. Have you noticed how your eggs sometimes brown too fast? That’s a sign your pan is too hot.
Try starting on medium or medium-low heat and adjust as needed. This control helps your eggs cook evenly without turning rubbery or crispy on the edges.
Skipping Seasoning
Seasoning is the secret behind cast iron’s natural non-stick surface. If your pan isn’t well-seasoned, eggs will cling to it no matter what. I once skipped this step and ended up scraping stuck egg bits off for 15 minutes!
Make sure your skillet has a good layer of seasoning built up from regular oiling and heating. A well-seasoned pan makes cooking and cleaning much easier.
Using Too Little Fat
Eggs need a bit of fat to glide smoothly in the pan. Using too little oil or butter often leads to sticking and tearing. Even if your pan is seasoned, a thin layer of fat creates a barrier that protects your eggs.
Don’t be shy—add enough oil or butter to coat the bottom of the skillet evenly. This simple step will give you beautifully cooked eggs that lift easily with a spatula.
Cleaning And Maintaining Cast Iron
Cleaning and maintaining your cast iron pan is key to keeping it in great shape for cooking eggs and many other dishes. Proper care helps the seasoning last longer and prevents rust. You might think cleaning cast iron is tricky, but with the right steps, it’s straightforward and even enjoyable.
Post-cooking Cleaning
After cooking, let your pan cool slightly but don’t let food sit in it for long. Use hot water and a soft brush or non-metal scrubber to remove stuck bits. Avoid soap or harsh detergents since they can strip away the seasoning.
If food is stubborn, pour some coarse salt into the pan and scrub gently. The salt acts like a natural abrasive without damaging the surface. Rinse with warm water and dry your pan thoroughly with a towel or on low heat on the stove to prevent rust.
Re-seasoning Your Pan
Have you noticed your eggs sticking more than usual? That’s a sign your pan needs re-seasoning. After cleaning and drying, apply a thin layer of vegetable oil or flaxseed oil all over the pan’s interior.
Place it upside down in a preheated oven at 375°F (190°C) for about an hour. This process bonds the oil to the cast iron, creating a smooth, non-stick surface. Let it cool completely in the oven before storing.
Storage Tips
Store your cast iron pan in a dry place to avoid moisture buildup. Placing a paper towel inside the pan helps absorb any leftover moisture and protects the seasoning. Avoid stacking heavy cookware on top of it unless you use a protective layer.
Do you keep your pan in a cabinet or hang it? Hanging allows air circulation and can reduce rust risks. Whatever you choose, make sure your cast iron is completely dry and lightly oiled before putting it away.
Frequently Asked Questions
How Do You Prevent Eggs From Sticking In Cast Iron?
To prevent sticking, always preheat the cast iron skillet well. Add enough oil or butter to coat the surface. Use moderate heat and avoid moving the eggs too soon. Proper seasoning of the cast iron also helps create a natural non-stick layer.
What Is The Best Heat Setting For Cooking Eggs In Cast Iron?
Use medium-low to medium heat for cooking eggs in cast iron. High heat may cause sticking and uneven cooking. Moderate heat ensures gentle cooking, preventing eggs from burning or sticking to the pan’s surface.
Can You Cook Scrambled Eggs Directly In Cast Iron?
Yes, scrambled eggs cook well in cast iron when using moderate heat. Stir continuously to avoid sticking and cook evenly. Adding butter or oil improves texture and prevents eggs from sticking to the pan.
How Do You Clean Cast Iron After Cooking Eggs?
Clean cast iron with warm water and a non-abrasive sponge immediately after use. Avoid soap or harsh detergents to protect seasoning. Dry thoroughly and apply a light oil layer to maintain the pan’s surface and prevent rust.
Conclusion
Cooking eggs in cast iron brings a rich, tasty result every time. The pan holds heat well, helping eggs cook evenly and stay warm longer. With a little oil or butter, eggs won’t stick and clean-up is easy. Cast iron lasts long and improves with use.
Try simple tips to avoid burning or sticking. Enjoy soft, fluffy eggs with a nice, golden finish. Cast iron makes breakfast simple and delicious. Give it a try and see the difference in your eggs today.

Hi, I’m Daniel Brooks—a food lover and kitchen gear enthusiast. I enjoy testing cookware, utensils, and gadgets to see what really works in everyday cooking. At PlugChef.com, I share honest reviews, comparisons, and simple guides to help you choose the best tools for a safer, smarter, and more enjoyable kitchen.
Related posts:
 What Type of Cooking Utensils are Safe: Expert Picks
 What Innovations Could Blenders Make: Unleashing Future Tech
 Smart Strategies to Organize a Small Kitchen: Maximize Space
 How to Organize a Kitchen Cabinet: Expert Tips & Tricks
 How to Organize Kitchen Drawers: Expert Tips and Tricks
 How to Organize a Corner Kitchen Cupboard: Expert Tips

