
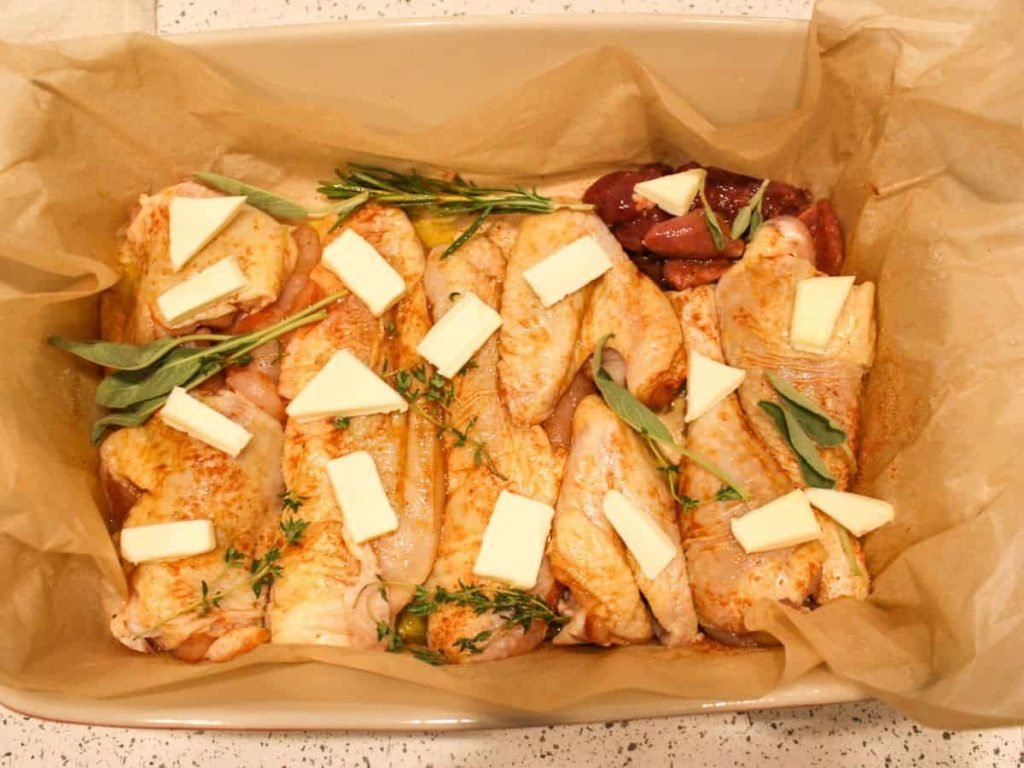
Are you looking for a simple way to make juicy, flavorful chicken without the mess or stress? Baked chicken in parchment paper is your secret weapon.
This easy method locks in moisture and spices, giving you tender, delicious chicken every time. Plus, cleanup is a breeze since everything cooks right inside the parchment. Keep reading to discover how you can transform your meals with this quick, healthy, and tasty cooking trick.
Your taste buds—and your schedule—will thank you!
Benefits Of Baking In Parchment Paper
Baking chicken in parchment paper offers several benefits that can elevate your cooking experience. This simple technique helps keep your dish moist, flavorful, and easy to clean up after. If you want to prepare a delicious meal without the hassle, parchment paper is a tool you should definitely consider.
Retains Moisture And Juiciness
Wrapping chicken in parchment paper creates a sealed environment that locks in steam. This prevents the chicken from drying out during baking, ensuring each bite stays juicy and tender. Have you noticed how some baked chicken can turn out dry? Using parchment paper helps avoid that problem effortlessly.
Enhances Flavor Infusion
The sealed pouch traps the aromas and juices released during cooking. This allows spices, herbs, and marinades to deeply penetrate the chicken. You might be surprised how much more vibrant and rich the flavors become when cooked this way. It’s like the chicken cooks in its own flavorful steam.
Easy Cleanup And Healthier Cooking
Cooking in parchment paper means less mess in your baking dish or tray. You simply discard the paper after use, saving you time on scrubbing. Plus, since you don’t need to add extra oil or butter to prevent sticking, your meal ends up healthier without sacrificing taste.
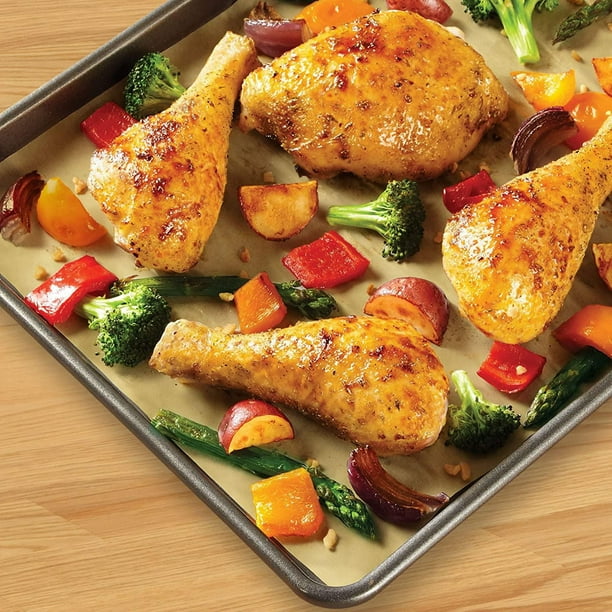
Credit: www.walmart.ca
Choosing The Right Chicken Cut
Choosing the right chicken cut can change the entire experience of your baked chicken in parchment paper. Each cut offers unique flavors, textures, and cooking needs that impact the final dish. Think about what you want from your meal—juicy tenderness, lean protein, or quick cooking—and that will guide your choice.
Breast Vs Thighs: Which Works Best?
Chicken breasts are lean and mild, perfect if you prefer a lighter, firmer bite. They absorb marinades well but can dry out quickly if overcooked. On the other hand, thighs have more fat and connective tissue, which keeps them juicy and flavorful even if you cook them a bit longer.
If you like a richer taste and tender texture, thighs might be your best bet. But if you want something quick and lean, breasts will work better. Ask yourself: do you prefer a delicate, neutral canvas or a robust, savory punch in your baked chicken?
Portion Sizes And Cooking Times
The size and thickness of your chicken pieces affect how long they need to bake in parchment. Thinner breasts cook faster, usually around 20 minutes at 400°F (200°C). Thicker thighs can take 25 to 30 minutes to reach that perfect juicy doneness.
Cutting chicken into uniform pieces helps ensure even cooking. If you’re in a hurry, smaller portions are your friend—they bake quickly and evenly. Remember, undercooked chicken is unsafe, but overcooked chicken loses its charm. Investing a few extra minutes to check doneness with a meat thermometer (165°F/74°C) pays off every time.
Essential Ingredients For Flavor
Creating a delicious baked chicken in parchment paper dish hinges on selecting the right ingredients to infuse flavor. The magic lies in the combination of herbs, spices, vegetables, aromatics, and marinades. These elements not only enhance taste but also ensure your chicken remains juicy and tender.
Herbs And Spices To Use
The right herbs and spices can elevate your chicken to new heights. Consider using rosemary, thyme, or oregano for a classic flavor profile. Paprika and cayenne pepper add a spicy kick, while garlic powder and onion powder offer a savory depth.
Don’t shy away from experimenting with your own favorite blends. Mixing cumin and coriander can impart a warm, earthy note. Think about what flavors you love and how they can complement the chicken.
Adding Vegetables And Aromatics
Vegetables and aromatics are not just side players—they’re essential to building flavor. Sliced bell peppers, onions, and zucchini can infuse the chicken with their juices and sweetness.
Lemon slices and garlic cloves add bright and pungent tones. Consider what vegetables are in season for the freshest flavors.
Have you ever tried adding a splash of white wine or a few olives for a Mediterranean twist? These small additions can transform your dish.
Selecting The Right Marinade
Marinades are crucial in tenderizing and flavoring your chicken. A simple mix of olive oil, lemon juice, salt, and pepper can do wonders. For a more complex taste, try soy sauce, honey, and ginger.
Think about marinating your chicken for at least an hour before cooking. This allows the flavors to penetrate deeply, ensuring each bite is packed with taste.
What’s your go-to marinade? Sometimes, the simplest mix can produce the most profound results.
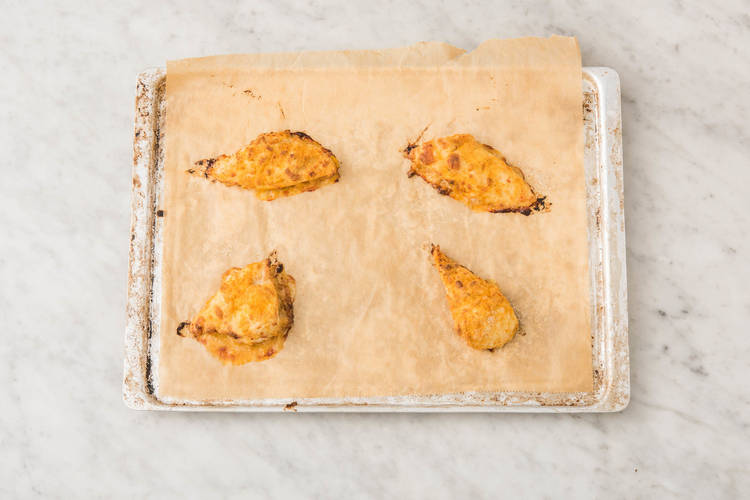
Credit: www.hellofresh.ca
Step-by-step Baking Process
Baking chicken in parchment paper is a simple technique that locks in moisture and flavor. The process might seem straightforward, but each step plays a crucial role in delivering tender, juicy results. Let’s break down the baking process so you can master this method with ease.
Preparing The Parchment Paper Packet
Start by cutting a large piece of parchment paper—about 12 to 15 inches square works well. Fold it in half to create a crease, then open it back up. This crease will guide you when folding the packet later, making it easier to seal tightly.
Make sure your paper is strong enough to hold all the ingredients without tearing. If you’re unsure, double layering the parchment can prevent leaks and keep your oven clean.
Arranging Ingredients Inside
Place your chicken in the center of one side of the parchment. Add vegetables, herbs, and seasonings around and on top of the chicken. This arrangement allows the steam to circulate evenly, infusing every bite with flavor.
Try not to overcrowd the packet; too many ingredients can trap excess moisture, making the chicken less crispy. Have you ever noticed how some baked dishes turn soggy? This step helps you avoid that problem.
Sealing Techniques For Steam Retention
Fold the parchment paper over the chicken and start making small overlapping folds along the open edge. Press firmly to seal the packet tightly, ensuring no steam escapes during cooking.
You can also fold the ends of the packet like a candy wrapper to lock in moisture. A well-sealed packet creates a mini steam chamber that cooks the chicken gently and keeps it juicy.
Optimal Oven Temperature And Timing
Set your oven to 400°F (200°C) for a balance of thorough cooking and gentle steaming. Bake the packet for about 25 to 30 minutes, depending on the thickness of your chicken.
Check the chicken’s internal temperature with a meat thermometer—it should read 165°F (75°C). Don’t rush this step; proper temperature ensures safety and perfect texture every time.
Tips For Juicy And Tender Chicken
Getting perfectly juicy and tender chicken wrapped in parchment paper isn’t just luck—it’s about technique. Small details during cooking can make a huge difference in texture and flavor. Let’s look at key tips that will help you avoid dry chicken and enjoy every bite.
Avoiding Overcooking
Overcooking is the main reason chicken turns dry and tough. Keep an eye on the cooking time and temperature to prevent this. Using parchment paper helps trap moisture, but you still need to bake at moderate heat—around 375°F (190°C) is ideal.
Check your recipe’s suggested time, then reduce it slightly if your chicken pieces are smaller. You can always cook it a bit longer if needed, but you can’t undo overcooking once it happens. Have you ever pulled chicken out too late and regretted it? This is why timing matters.
Resting Time After Baking
Resting your chicken after baking is often overlooked, but it’s crucial for juiciness. Let the chicken sit, wrapped in parchment or foil, for about 5 to 10 minutes before cutting. This pause allows the juices to redistribute inside the meat instead of spilling out on your cutting board.
This simple step can transform dry chicken into tender, flavorful bites. If you’re impatient like I used to be, try this once and notice how much better the texture becomes. It’s a small wait with a big payoff.
Checking For Doneness
Don’t guess when your chicken is done—check it properly. The safest and most reliable way is using a meat thermometer. Insert it into the thickest part of the chicken; it should read 165°F (74°C).
If you don’t have a thermometer, cut into the chicken and look for clear juices and no pink color inside. However, this can cause juice loss and dryness, so a thermometer is a worthwhile investment. How confident are you in judging doneness without tools? Trying a thermometer might surprise you.

Credit: whereismyspoon.co
Serving Suggestions And Pairings
Serving baked chicken in parchment paper opens up a world of delicious pairing possibilities. The gentle steaming inside the parchment keeps the chicken tender and juicy, making it perfect to complement with vibrant sides and flavorful sauces. How you choose to accompany this dish can elevate the entire meal, turning a simple recipe into a memorable dining experience.
Side Dishes To Complement The Chicken
Think about sides that add texture and balance to the softness of the baked chicken. Roasted vegetables like carrots, zucchini, and bell peppers bring natural sweetness and a slight crunch. You might also want to try creamy mashed potatoes or a light quinoa salad with fresh herbs for a refreshing contrast.
- Garlic roasted green beans – crisp and flavorful
- Lemon herb couscous – bright and zesty
- Steamed asparagus with a drizzle of olive oil
- Sweet potato wedges with a pinch of paprika
- Simple mixed greens with a light vinaigrette
Choosing sides that don’t overpower the chicken allows its delicate flavors to shine. Which side dish will make your meal feel complete?
Sauces And Garnishes
A good sauce can make your baked chicken even more irresistible. Consider a light pan sauce made from the juices left in the parchment for a rich, savory touch. Fresh herbs like parsley, thyme, or basil add a burst of color and freshness right before serving.
- Classic lemon butter sauce – bright and silky
- Garlic yogurt dip – cool and tangy
- Honey mustard glaze – sweet with a kick
- Chimichurri – herbaceous and zesty
- Chopped toasted almonds or pine nuts for crunch
Would you try a bold sauce or keep it simple with fresh herbs? Experimenting with different garnishes can turn each meal into a new adventure.
Common Mistakes To Avoid
Baked chicken in parchment paper is a simple and healthy way to prepare a flavorful meal. However, even this straightforward technique can go wrong if you’re not careful. Avoiding some common mistakes can make a big difference in the texture, taste, and presentation of your dish.
Using Too Much Liquid
Adding too much liquid inside the parchment packet can turn your chicken into a soggy mess instead of a tender, juicy dish. The steam created should be just enough to cook the chicken and keep it moist, not drown it. Think about the natural juices from the chicken and vegetables—they usually provide enough moisture.
Try to limit additional liquids like broth or wine to a few tablespoons. This small amount enhances flavor without overpowering the cooking environment. Have you noticed watery sauces ruin your meals before? This is often why.
Improper Sealing Of Parchment
Sealing the parchment paper properly is crucial. If the packet isn’t tightly closed, steam escapes, and your chicken can dry out. On the other hand, a loose seal prevents the flavors from mingling fully.
When folding the parchment, make sure to crimp the edges well and fold them over several times. You want a secure pouch that traps heat and steam efficiently. Have you ever had a baking bag burst in the oven? That usually points to poor sealing.
Ignoring Cooking Time Adjustments
Oven temperatures and chicken cuts vary, so sticking rigidly to one cooking time can lead to undercooked or overcooked results. Thicker pieces need more time, while thin cuts cook faster.
Always check the chicken’s internal temperature with a meat thermometer—it should read 165°F (74°C). Don’t rely solely on the clock. Have you ever bitten into chicken only to find it underdone? Adjusting cooking time based on your specific situation helps avoid that.
Frequently Asked Questions
What Is The Benefit Of Baking Chicken In Parchment Paper?
Baking chicken in parchment paper seals in moisture and flavor. It creates a steam pocket that keeps chicken tender. This method reduces the need for added fats, making it healthier. It also simplifies cleanup by preventing food from sticking to the pan.
How Long Should Chicken Bake In Parchment Paper?
Bake chicken in parchment paper at 375°F (190°C) for 25-30 minutes. Cooking time varies by chicken thickness and oven type. Use a meat thermometer to check for 165°F internal temperature. This ensures chicken is safely cooked and juicy.
Can I Add Vegetables Inside The Parchment Packet?
Yes, adding vegetables inside the parchment packet is ideal. Vegetables steam alongside chicken, enhancing flavor and nutrition. Use quick-cooking veggies like zucchini, bell peppers, or cherry tomatoes. They cook evenly without drying out, creating a balanced and delicious meal.
Is Parchment Paper Baking Healthier Than Other Methods?
Yes, baking in parchment paper is healthier as it requires less oil. It locks in moisture, reducing the need for butter or sauces. This method retains nutrients better than frying or grilling. It also avoids harmful chemicals from non-stick pans.
Conclusion
Baking chicken in parchment paper keeps it juicy and tender. It also helps lock in flavors and makes cleanup easy. This simple method suits busy cooks and beginners alike. Try it with your favorite herbs and vegetables. Enjoy a healthy, tasty meal with little effort.
Cooking this way saves time and reduces mess. Give baked chicken in parchment paper a try soon!

Hi, I’m Daniel Brooks—a food lover and kitchen gear enthusiast. I enjoy testing cookware, utensils, and gadgets to see what really works in everyday cooking. At PlugChef.com, I share honest reviews, comparisons, and simple guides to help you choose the best tools for a safer, smarter, and more enjoyable kitchen.
Related posts:
 What Type of Cooking Utensils are Safe: Expert Picks
 What Innovations Could Blenders Make: Unleashing Future Tech
 Smart Strategies to Organize a Small Kitchen: Maximize Space
 How to Organize a Kitchen Cabinet: Expert Tips & Tricks
 How to Organize Kitchen Drawers: Expert Tips and Tricks
 How to Organize a Corner Kitchen Cupboard: Expert Tips

