
Are you looking for a simple way to bake soft, fluffy bread right at home? Using potato flakes in your bread recipe might be the secret you never knew you needed.
This easy trick not only adds moisture but also gives your bread a tender texture that will keep you coming back for more. Imagine slicing into a warm loaf with a perfect crust and a melt-in-your-mouth crumb—sounds delicious, right? Keep reading, and you’ll discover how to make this potato flakes bread recipe step by step, even if you’re new to baking.
Your next favorite homemade bread is just a few ingredients away!
Benefits Of Using Potato Flakes
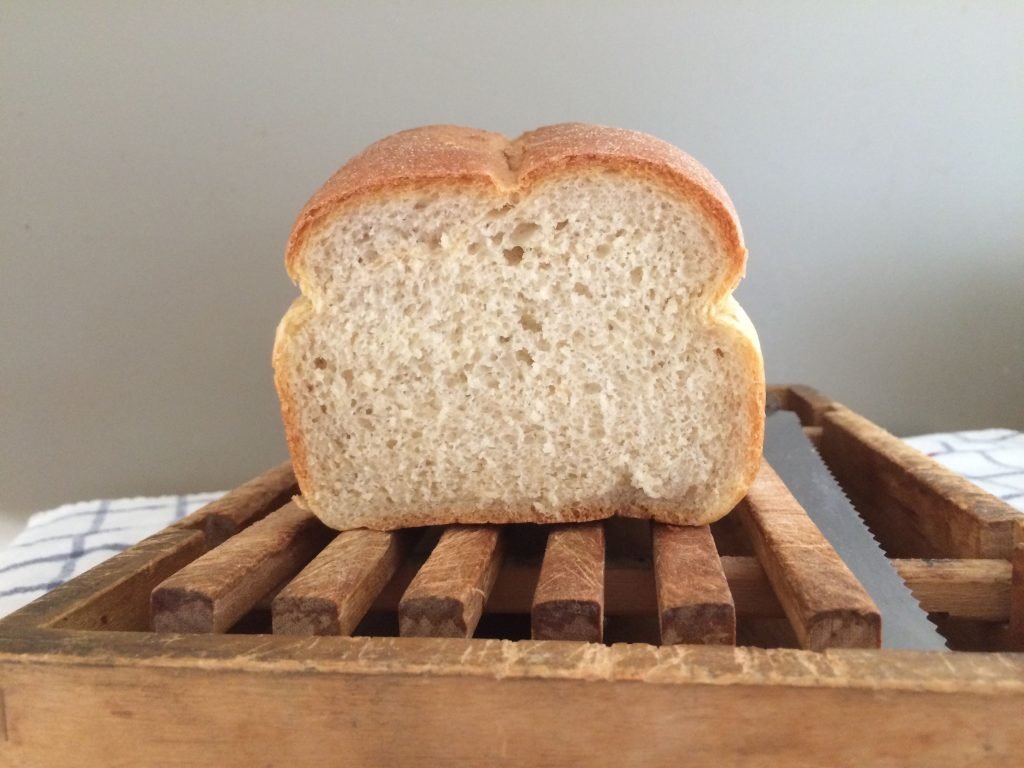
Potato flakes add unique qualities to bread that improve the overall baking experience. They blend well with flour, creating dough that is easier to handle. Potato flakes also boost the bread’s softness and moisture. These benefits make potato flakes a popular choice in many bread recipes.
Improving Bread Texture
Potato flakes help make bread softer and lighter. They absorb water quickly, which keeps the dough moist. This moisture creates a tender crumb and a smooth texture. The bread feels less dense and more pleasant to eat.
Extending Freshness
Potato flakes slow down the bread’s staling process. They hold moisture inside the bread longer than regular flour. This means bread stays fresh and soft for days. You waste less bread and enjoy it longer.
Enhancing Flavor
Potato flakes add a mild, slightly sweet taste to bread. This natural flavor improves the bread’s overall taste without overpowering it. The subtle flavor blends well with both savory and sweet bread recipes.

Credit: littletennesseehome.com
Essential Ingredients
Getting the ingredients right is key to baking great bread with potato flakes. Each component plays a specific role that affects texture, flavor, and rise. Knowing what to choose can make your bread soft, moist, and flavorful every time.
Potato Flakes And Flour
Potato flakes add moisture and softness to the bread. They help keep the crumb tender longer than bread made with just flour. You can use all-purpose or bread flour; bread flour gives a chewier texture due to higher protein content.
Have you ever wondered why some breads stay fresh longer? Potato flakes slow down staling by retaining moisture. Try using about 1/4 cup of potato flakes for every 3 cups of flour to get that perfect balance.
Yeast And Sweeteners
Yeast is the powerhouse that makes your bread rise. Active dry yeast or instant yeast both work well, but instant yeast can save you time since it doesn’t require proofing.
Sweeteners like sugar, honey, or molasses feed the yeast and add a subtle sweetness. I find that a tablespoon of honey enhances flavor without making the bread too sweet. What sweetener do you prefer in your bread?
Liquids And Fats
Water or milk hydrates the dough and activates the yeast. Using milk can add richness and improve the crust’s color. Warm liquids (around 110°F) help the yeast activate faster.
Fats like butter or oil enrich the bread and make it softer. Butter adds flavor, while oil keeps the bread tender and moist longer. I usually add 2 tablespoons of melted butter for a nicely flavored loaf.
Step-by-step Preparation
Mix potato flakes with warm water and yeast until smooth. Combine with flour and knead the dough well. Let the dough rise in a warm place before shaping and baking.
Creating the perfect loaf of bread with potato flakes can be a delightful kitchen adventure. With these easy-to-follow steps, even a beginner can craft a loaf that is both fluffy and flavorful. Let’s dive into the preparation process, where every step is a chance to enhance your baking skills and produce something delicious.Mixing Dry Ingredients
Start by gathering all your dry ingredients. This includes flour, potato flakes, yeast, sugar, and salt. Mixing these ingredients thoroughly is crucial as it ensures a consistent texture and flavor throughout your bread. Use a large mixing bowl to combine them. Make sure the yeast is evenly distributed, which is key for a well-risen loaf. Ask yourself: is everything mixed well? A quick visual check can save you from dough disasters later on.Incorporating Liquids
Now, it’s time to add liquids. Warm water and melted butter are your go-to here. The temperature of the water is vital—lukewarm, not hot—so you don’t kill the yeast. Pour the liquids gradually into your dry mix. Stir as you go to create a sticky dough. Remember, the dough should be sticky but not soupy. Have you ever wondered why some breads turn out dry? Often, it’s due to not enough liquid.Kneading The Dough
Kneading is where the magic happens. This process develops the gluten, giving your bread its structure and chewy texture. Turn your sticky dough onto a floured surface. Knead with the heels of your hands, pushing away and folding back. Do this for about 8-10 minutes until the dough is smooth and elastic. Feel the transformation under your hands? That’s when you know it’s ready for rising. With these steps, you’re well on your way to a homemade bread masterpiece. Each stage is an opportunity to refine your technique and explore the nuances of baking. Now, are you ready to let your dough rise and see what unfolds next?Shaping And Proofing
Shaping and proofing are key stages that set the foundation for your bread’s texture and rise, especially when using potato flakes. These steps help create the perfect crumb and crust by allowing the dough to develop its structure and flavor. Paying attention to how you shape and proof your dough can make a noticeable difference in your homemade bread.
Forming The Loaf
After your dough has risen, gently punch it down to release excess gas. Then, shape it into a tight, smooth loaf by folding the edges underneath. This technique traps air inside, which helps the bread rise evenly during baking.
Try to keep your hands slightly floured but avoid adding too much extra flour, as that can make the dough tough. When I first started baking with potato flakes, I found that shaping the loaf with care prevented it from collapsing during proofing.
Have you noticed how a well-shaped loaf holds its shape better in the oven? This step is crucial for a consistent rise and an attractive final product.
Optimal Proofing Conditions
Proofing is the resting period where your shaped dough doubles in size. For potato flake bread, a warm, humid environment works best to encourage yeast activity without drying the surface.
You can create an ideal proofing spot by placing your dough in a bowl covered with a damp cloth inside a slightly warm oven or near a radiator. Avoid temperatures above 85°F (29°C), as heat can kill the yeast or cause over-proofing.
Keep an eye on your dough—proofing times vary but usually take between 45 minutes to 1.5 hours. When the dough springs back slowly to the touch, it’s ready to bake. Have you tried adjusting proofing times based on your kitchen’s temperature? It often changes the bread’s final texture significantly.
Baking Tips
Baking bread with potato flakes can give you a wonderfully soft texture and subtle flavor. But nailing the baking process is just as important as the ingredients. Here are some baking tips to help you get the perfect loaf every time.
Setting The Right Temperature
Oven temperature plays a crucial role in how your bread turns out. Too hot, and the crust will burn before the inside cooks; too low, and the bread might come out dense and doughy.
Try preheating your oven to 375°F (190°C) for a balanced bake. If your oven runs hot, consider lowering the temperature by 10-15 degrees and watch closely during baking.
Have you ever noticed your bread browns unevenly? Rotating the pan halfway through baking can fix that issue and ensure even cooking.
Determining Doneness
How do you know when your bread is done? Relying on baking time alone can be tricky because ovens vary.
Tap the bottom of the loaf—if it sounds hollow, your bread is ready. You can also use a digital thermometer; the internal temperature should be around 190°F (88°C) for soft bread.
Don’t cut into your bread immediately. Waiting for it to cool slightly helps the crumb set and prevents a gummy texture.
Cooling And Storage
Cooling your bread properly is just as important as baking. Place your loaf on a wire rack to allow air circulation and prevent sogginess.
Wrap the bread in a clean cloth or paper bag once cooled to maintain its crust. Avoid plastic wrap right away as it traps moisture and softens the crust too much.
If you don’t plan to eat the bread within two days, freezing slices can keep it fresh longer. Just toast or warm the slices to bring back that fresh-baked feel.

Credit: amygannett.com
Variations And Additions
Adding variety to your bread recipe with potato flakes can transform a simple loaf into something truly special. Small changes can bring new flavors, textures, and even nutritional benefits. Experimenting with different ingredients lets you tailor your bread to suit your taste and occasion.
Adding Herbs And Seeds
Fresh or dried herbs like rosemary, thyme, or oregano add a burst of flavor to your bread. Seeds such as sunflower, sesame, or flaxseed contribute a nice crunch and boost nutrition. Try mixing a tablespoon or two directly into the dough before baking to see how the aromas develop.
Have you ever noticed how a sprinkle of seeds on top creates a beautiful crust? It’s a simple step that makes your bread look bakery-worthy. Imagine serving a warm slice with a hint of garlic and rosemary—how would that elevate your meal?
Using Different Flours
Swap all or part of the all-purpose flour with whole wheat, rye, or spelt for a unique taste and texture. Whole wheat adds a nutty flavor and more fiber, while rye gives a slightly tangy note. You can even try gluten-free flours like oat or chickpea, but adjust liquid amounts carefully.
Mixing flours can be fun—try half white and half whole wheat to keep the bread soft but more wholesome. Changing flours also affects how the potato flakes interact, sometimes making the crumb denser or lighter. Which flour blend will you try first?
Sweet Or Savory Twists
Adding a bit of sweetness with honey, dried fruit, or cinnamon turns your bread into a delightful snack or breakfast option. On the savory side, olives, sun-dried tomatoes, or caramelized onions bring complexity and depth. You can even add cheese for a rich, gooey surprise inside.
Think about your favorite flavors—do you prefer a touch of sweet or a punch of savory in your bread? Combining potato flakes with these additions can make your loaf stand out in unexpected ways. What new twist will you bake into your next batch?
Troubleshooting Common Issues
Baking bread with potato flakes can be a rewarding experience, but sometimes things don’t go as planned. You might find your bread turning out dense, the crust uneven, or the dough refusing to rise. These common issues can be frustrating, but understanding the causes can help you fix them quickly and improve your baking results.
Dense Or Heavy Bread
If your bread feels heavy or dense, check how much potato flakes you added. Using too many can weigh down the dough, making it hard for it to rise properly. Try reducing the amount slightly and see if the texture improves.
Also, be mindful of the flour type and measurement. Too much flour can create a stiff dough that doesn’t rise well. Measure your ingredients carefully and consider weighing them for accuracy.
Another factor is the kneading process. Insufficient kneading means gluten doesn’t develop enough to trap air, resulting in a dense loaf. Knead until the dough is smooth and elastic to encourage a lighter texture.
Uneven Crust
An uneven crust often points to inconsistent oven temperature or improper baking time. Use an oven thermometer to confirm your oven’s heat matches the recipe’s requirement.
Placing the bread too close to the heating element can cause parts of the crust to burn while others remain pale. Try positioning your loaf in the center of the oven for even heat distribution.
Sometimes, not scoring the dough properly leads to uneven expansion and crust formation. Make clean, deep cuts before baking to guide the bread’s rise and create a uniform crust.
Dough Not Rising
If your dough doesn’t rise, the yeast might be the culprit. Check the expiration date and test it by mixing with warm water and a pinch of sugar; if it doesn’t foam within 10 minutes, it’s time to replace it.
Water temperature is critical too. Water that’s too hot can kill yeast, and cold water won’t activate it. Aim for water around 105-110°F (40-43°C) for the best results.
Lastly, the environment affects rising. Dough needs a warm, draft-free place to rise properly. If your kitchen is too cold, try placing the dough in a slightly warmed oven or near a warm spot.
:max_bytes(150000):strip_icc()/5596375-70ff80bd229d4c5ebf0af84cf9176f69.jpg)
Credit: www.allrecipes.com
Frequently Asked Questions
What Are The Benefits Of Using Potato Flakes In Bread?
Potato flakes improve bread texture and moisture. They extend freshness and add subtle flavor. This ingredient also enhances softness and shelf life naturally.
How Much Potato Flakes To Add In Bread Recipe?
Use about 1/4 to 1/2 cup of potato flakes per loaf. Adjust quantity based on dough consistency and desired softness. Too much may affect the bread’s structure.
Can Potato Flakes Replace Potatoes In Bread Dough?
Yes, potato flakes can replace fresh potatoes in bread dough. They provide similar moisture and texture without extra preparation. Use them as a convenient, shelf-stable alternative.
Does Potato Flakes Bread Require Different Baking Time?
Baking time remains almost the same. Potato flakes do not significantly alter the dough’s baking properties. Monitor bread for a golden crust and thorough cooking.
Conclusion
Potato flakes add softness and a light texture to bread. This recipe makes baking easy and fun for everyone. You get a tasty loaf with a nice crust and soft inside. Try it at home to enjoy fresh, homemade bread anytime.
Simple ingredients, simple steps, great results. Baking bread can be a relaxing and rewarding experience. Your kitchen will smell amazing, and your family will love it. Give this potato flakes bread recipe a try soon.

Hi, I’m Daniel Brooks—a food lover and kitchen gear enthusiast. I enjoy testing cookware, utensils, and gadgets to see what really works in everyday cooking. At PlugChef.com, I share honest reviews, comparisons, and simple guides to help you choose the best tools for a safer, smarter, and more enjoyable kitchen.
Related posts:
 What Type of Cooking Utensils are Safe: Expert Picks
 What Innovations Could Blenders Make: Unleashing Future Tech
 Smart Strategies to Organize a Small Kitchen: Maximize Space
 How to Organize a Kitchen Cabinet: Expert Tips & Tricks
 How to Organize Kitchen Drawers: Expert Tips and Tricks
 How to Organize a Corner Kitchen Cupboard: Expert Tips

