
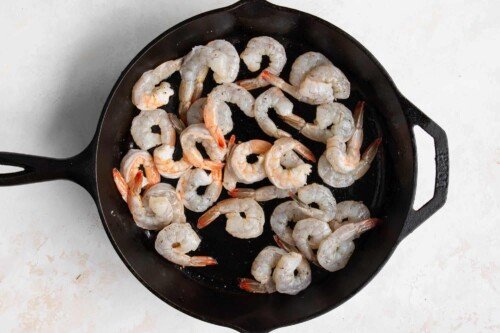
Are you ready to transform raw shrimp into a delicious, mouthwatering meal right on your stove? Cooking shrimp might seem tricky, but with the right steps, you can make it quick, easy, and absolutely tasty.
Imagine biting into perfectly cooked shrimp that’s juicy, tender, and full of flavor every single time. In this guide, you’ll discover simple tips and tricks to cook raw shrimp on your stove like a pro. Keep reading, and you’ll be serving up seafood dishes that impress both your taste buds and your guests!
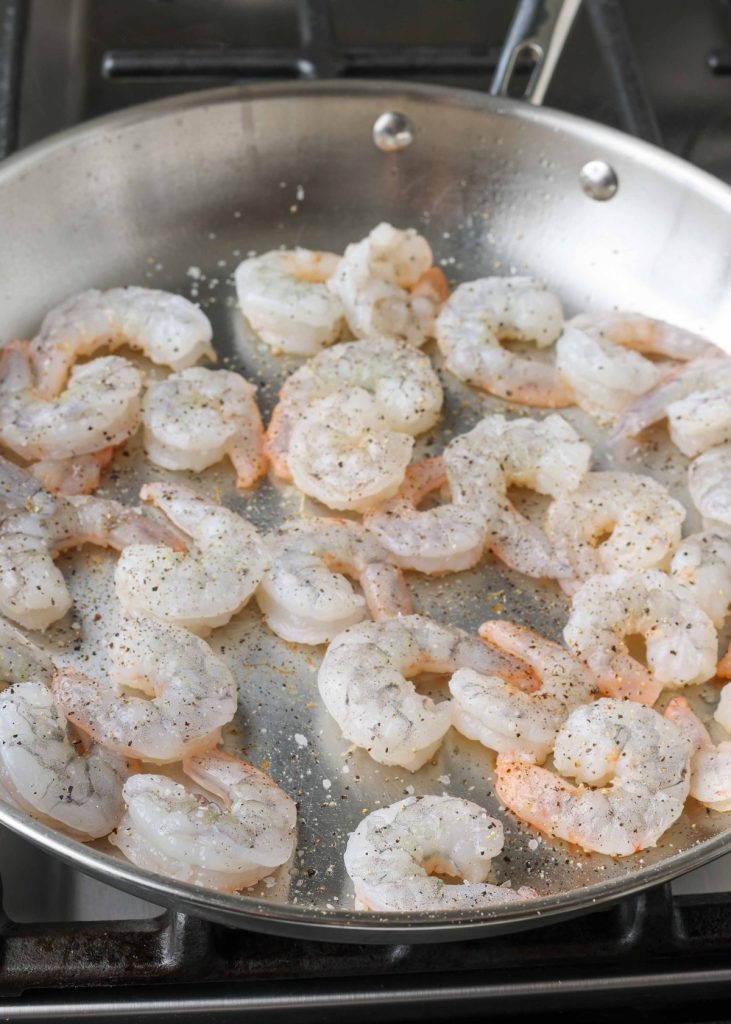
Credit: vegetablerecipes.com
Choosing Fresh Shrimp
Choosing fresh shrimp is the foundation for a delicious shrimp dish cooked on the stove. The quality of your shrimp affects taste, texture, and overall satisfaction. Knowing how to pick the right shrimp can save you from a disappointing meal and elevate your cooking experience.
Types Of Shrimp
Shrimp come in various types, each with unique flavors and sizes. You’ll find options like white shrimp, tiger shrimp, and pink shrimp in most markets. White shrimp have a mild, sweet taste, while tiger shrimp offer a firmer texture and a slightly stronger flavor.
Decide what fits your recipe best. For quick stove-top cooking, medium-sized shrimp are easier to handle and cook evenly. If you want a more intense shrimp flavor, try wild-caught varieties instead of farmed ones.
Fresh Vs Frozen
Fresh shrimp might sound ideal, but frozen shrimp often retain better quality because they’re frozen immediately after being caught. This locks in freshness and prevents spoilage. If you buy frozen shrimp, look for those labeled “flash-frozen” or “IQF” (individually quick frozen).
Fresh shrimp sold at the market could have been sitting out for hours or even days. If you don’t have access to high-quality fresh shrimp, frozen shrimp can be just as good or better. Always thaw frozen shrimp properly in the refrigerator or under cold running water to keep texture intact.
Checking Quality
How do you know if shrimp are truly fresh? Start by checking their smell. Fresh shrimp should smell like the ocean—clean and briny—but never fishy or ammonia-like. If the shrimp have an off-putting odor, it’s a clear sign to walk away.
Look at the shrimp’s appearance. The shell should be firm and translucent, not slimy or discolored. Avoid shrimp with black spots or yellowing, which indicate age or poor handling. Also, press the flesh lightly; it should bounce back quickly, showing freshness.
Trust your senses when selecting shrimp. Your nose and eyes will tell you more than the label. Have you ever bought shrimp that looked fine but tasted bland? Quality matters more than price here.

Credit: www.acouplecooks.com
Preparing Shrimp For Cooking
Preparing shrimp before cooking is a key step for a tasty meal. Clean shrimp cook evenly and taste fresh. Taking time to prepare shrimp correctly improves the texture and flavor. This section covers peeling, deveining, rinsing, drying, and marinating shrimp.
Peeling And Deveining
Start by removing the shell from the shrimp. Peel from the legs and pull off the hard shell. Leave the tail on for presentation or remove it for easier eating. Deveining means removing the dark line along the shrimp’s back. Use a small knife or shrimp deveiner to cut and lift out the vein. This step removes grit and improves taste.
Rinsing And Drying
Rinse peeled and deveined shrimp under cold running water. This removes any leftover shell bits or impurities. After rinsing, pat the shrimp dry with paper towels. Dry shrimp cook better and develop a nice sear on the stove. Avoid soaking shrimp too long to keep texture firm.
Marinating Options
Marinating adds flavor and tenderness to shrimp. Use simple mixes like:
- Olive oil, lemon juice, garlic, and herbs
- Soy sauce, ginger, and a touch of honey
- Chili powder, lime juice, and cumin for spice
Marinate shrimp for 15 to 30 minutes. Avoid longer times to prevent mushy texture. Short marinating boosts flavor without overpowering the shrimp’s natural taste.
Selecting The Right Pan
Choosing a pan with a thick bottom helps cook shrimp evenly without burning. Non-stick pans prevent sticking and make cleaning easier. A medium-sized pan offers enough space to cook shrimp in a single layer for better results.
Selecting the Right Pan Cooking raw shrimp on the stove is an art that requires the right tools, and one of the most crucial choices you’ll make is selecting the right pan. The pan you choose can greatly affect the texture and flavor of your shrimp. A well-chosen pan ensures even cooking and prevents sticking, making your cooking experience more enjoyable.Non-stick Vs Stainless Steel
Non-stick pans are popular for cooking shrimp because they prevent sticking and require less oil. This can be particularly useful if you’re aiming for a healthier dish. However, they might not give you the same sear and caramelization that a stainless steel pan can provide. Stainless steel pans, on the other hand, are fantastic for achieving a crispy exterior. They can handle high heat better, making them ideal for getting that perfect golden-brown crust. You might need to use a bit more oil and keep a close watch to prevent sticking.Pan Size And Heat Distribution
The size of the pan matters more than you might think. Too small, and your shrimp will crowd together, causing them to steam rather than sear. Aim for a pan that allows each shrimp to sit flat on the surface without overlapping. Heat distribution is another key factor. Pans with even heat distribution ensure that all shrimp cook uniformly. Consider pans with a heavy bottom for better heat retention, which helps avoid hot spots that can lead to uneven cooking. What’s your pan preference for cooking shrimp—non-stick or stainless steel? Share your thoughts in the comments below!Cooking Techniques On Stove
Cooking raw shrimp on the stove offers quick results and flavorful dishes if you use the right techniques. Understanding how to handle shrimp properly during cooking can make a huge difference in texture and taste. Let’s break down some effective stove-top methods that bring out the best in shrimp.
Sautéing Shrimp
Sautéing shrimp is a fast and efficient way to cook them evenly while locking in moisture. Heat a pan over medium-high heat and add a small amount of oil or butter. Once the fat shimmers, add the shrimp in a single layer, making sure not to crowd the pan.
Cook shrimp for about 2 minutes on each side or until they turn pink and opaque. Overcooking can make them rubbery, so keep an eye on the color change. I’ve found that tossing shrimp with garlic or chili flakes during sautéing adds a quick flavor punch without extra effort.
Pan-frying Tips
Pan-frying shrimp creates a slightly crisp exterior with a tender inside. Use a heavy-bottomed skillet to maintain even heat. Preheat the pan well before adding the shrimp to get that perfect sear.
- Pat shrimp dry before seasoning to avoid steaming.
- Don’t overcrowd the pan; cook in batches if needed.
- Flip shrimp only once to develop a golden crust.
Try adding a splash of lemon juice or a sprinkle of fresh herbs just before finishing. This brightens the dish and keeps your taste buds curious.
Using Butter And Oil
Choosing between butter and oil affects the flavor and cooking process. Butter adds richness and a nutty aroma but burns quickly at high heat. Oil, especially olive or avocado oil, has a higher smoke point, allowing you to cook shrimp at higher temperatures without burning.
A combination works well: start with oil for heat tolerance, then add butter toward the end for flavor. This way, you get the best of both worlds. Have you experimented with different fats? They can change your shrimp from simple to sensational.
Timing And Temperature
Cooking raw shrimp on the stove demands careful attention to timing and temperature to achieve the perfect texture and flavor. Shrimp cook quickly, so knowing the right heat settings and duration can prevent overcooking and a rubbery bite. Let’s break down how to get these details just right for your next shrimp dish.
Optimal Heat Settings
Use medium to medium-high heat for cooking shrimp on the stove. Too high a temperature will cook them unevenly and risk burning the outside before the inside is done. Conversely, too low heat extends cooking time and can make shrimp soggy rather than crisp.
In my experience, setting the burner to about 350°F (175°C) works well if you’re using a skillet. This temperature allows the shrimp to cook swiftly and develop a nice sear without toughening up.
Cooking Duration
Shrimp usually take only 2 to 3 minutes per side to cook, depending on their size. Smaller shrimp cook faster, so keep an eye on them to avoid overcooking. Cooking them longer than necessary turns them chewy and less enjoyable.
If you’re cooking a pound of shrimp, expect the total stove time to be around 4 to 6 minutes. It’s always better to check early; you can always cook a bit longer, but you can’t undo overcooking.
Signs Shrimp Are Done
Look for these clear signs to know when your shrimp are perfectly cooked:
- The color changes from translucent gray to a pinkish white.
- The shrimp curl into a loose “C” shape; a tight “O” shape usually means overcooked.
- The texture becomes firm but still tender to the bite.
Have you ever bitten into shrimp that felt rubbery and tough? That’s a sure sign they were cooked too long or at too high heat. Paying attention to these visual and tactile cues can help you serve shrimp that’s juicy and flavorful every time.
Flavor Enhancements
Enhancing the flavor of raw shrimp cooked on the stove elevates the entire dish. Simple additions can boost taste and aroma without masking the shrimp’s natural sweetness. Flavor enhancements create layers of interest and make meals more enjoyable. Experiment with spices, herbs, garlic, citrus, and finishing sauces to find your perfect combination.
Spices And Herbs
Spices and herbs bring depth and warmth to shrimp. Use paprika for a smoky touch or cayenne for heat. Dried oregano and thyme add earthiness. Fresh herbs like parsley, cilantro, or basil brighten the dish. Sprinkle them during cooking or as a garnish for fresh flavor.
Garlic And Citrus
Garlic adds a savory punch that pairs well with shrimp. Mince or crush garlic cloves and sauté briefly in oil before adding shrimp. Citrus juices, such as lemon or lime, offer a fresh, tangy contrast. Squeeze juice over shrimp during or after cooking to balance richness.
Finishing Sauces
Finishing sauces bring moisture and extra flavor. Try a simple butter sauce with garlic and herbs melted together. A light soy sauce glaze gives a salty, umami boost. Drizzle sauces just before serving to keep shrimp tender and juicy.
Serving Suggestions
Serving cooked shrimp straight from the stove offers many tasty options. The right sides and presentation can make the dish special. Proper storage keeps shrimp fresh for another meal.
Side Dishes
- Steamed white rice or jasmine rice for a simple base
- Garlic butter noodles for a rich, savory touch
- Fresh garden salad with lemon vinaigrette for lightness
- Roasted vegetables like asparagus or bell peppers for color and crunch
- Crusty bread to soak up flavorful sauces
- Coleslaw for a cool, creamy contrast
Plating Ideas
Arrange shrimp in a circle or fan shape on the plate. Place sides neatly beside the shrimp. Garnish with fresh parsley or lemon wedges. Use colorful plates to highlight the pink shrimp. Drizzle a little olive oil or garlic sauce on top. Keep portions balanced for a clean look.
Storage Tips For Leftovers
- Cool shrimp quickly before storing in the fridge
- Use airtight containers to keep shrimp fresh
- Store shrimp with a paper towel to absorb moisture
- Eat leftovers within 2 days for best taste
- Reheat gently on the stove or microwave to avoid overcooking

Credit: skinnyms.com
Frequently Asked Questions
How Long To Cook Raw Shrimp On Stove?
Cook raw shrimp on medium heat for 2-3 minutes per side. Shrimp turn pink and opaque when done. Avoid overcooking to keep them tender and juicy.
What Is The Best Stove Method For Shrimp?
Sautéing shrimp in a skillet with oil or butter is best. This method cooks shrimp evenly and quickly, enhancing their natural flavor.
How To Know When Shrimp Is Fully Cooked?
Shrimp are fully cooked when they turn pink and opaque. The flesh should be firm but still tender. Avoid a rubbery texture by not overcooking.
Should I Peel Shrimp Before Cooking On Stove?
Peeling shrimp before cooking depends on your recipe. For quick stove cooking, peeled shrimp cook faster and absorb flavors well. Leave tails on for presentation if desired.
Conclusion
Cooking raw shrimp on the stove is simple and quick. Keep the heat medium to avoid overcooking. Watch the shrimp turn pink and curl up—that means they are done. Use fresh shrimp for the best taste and texture. Season well to add flavor.
Serve immediately for the best experience. Cooking shrimp this way fits many dishes perfectly. Try it often to enjoy easy, tasty meals.

Hi, I’m Daniel Brooks—a food lover and kitchen gear enthusiast. I enjoy testing cookware, utensils, and gadgets to see what really works in everyday cooking. At PlugChef.com, I share honest reviews, comparisons, and simple guides to help you choose the best tools for a safer, smarter, and more enjoyable kitchen.
Related posts:
 What Type of Cooking Utensils are Safe: Expert Picks
 What Innovations Could Blenders Make: Unleashing Future Tech
 Smart Strategies to Organize a Small Kitchen: Maximize Space
 How to Organize a Kitchen Cabinet: Expert Tips & Tricks
 How to Organize Kitchen Drawers: Expert Tips and Tricks
 How to Organize a Corner Kitchen Cupboard: Expert Tips

