
There’s no worse kitchen disappointment than lifting the lid of your favorite Dutch oven—whether it’s a heirloom enameled Le Creuset or a well-seasoned bare cast iron Lodge—to find a layer of charred, stuck-on food baked onto the bottom. A burnt bottom doesn’t just ruin your meal: it turns a 10-minute cleanup into a 30-minute scrubbing session, and if left unaddressed, can permanently damage your cookware’s finish or seasoning. The good news? Most burnt bottoms are fully fixable with simple, low-cost methods, no special tools required. In this guide, we’ll break down exactly why Dutch ovens burn, step-by-step fixes for every type of cookware, and proven tips to prevent burnt bottoms for good, so you can get back to making sourdough, braises, and stews without the hassle.
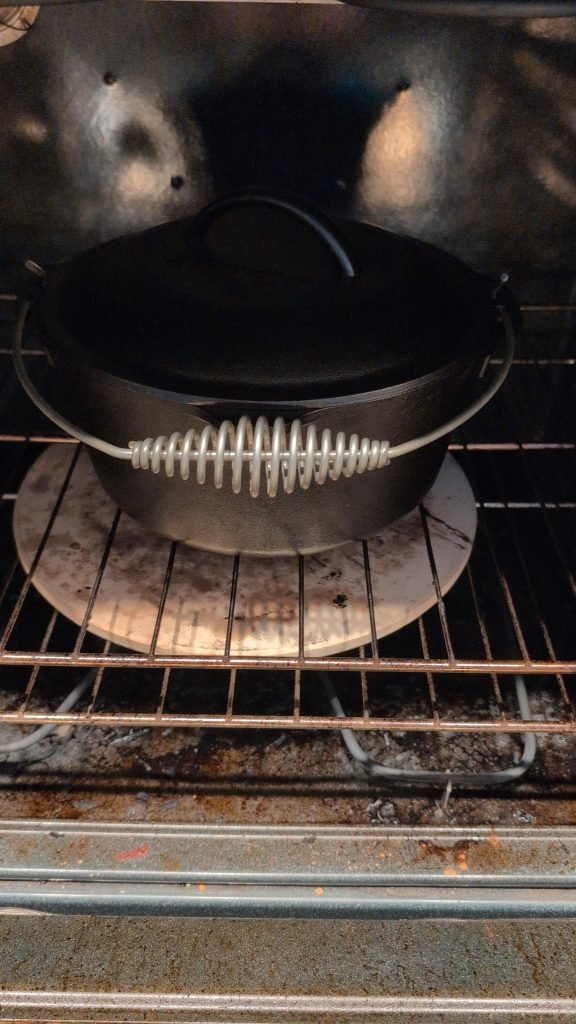
 Credit: www.reddit.com
A burnt enameled Dutch oven bottom is a common but fixable issue for home cooks.
Credit: www.reddit.com
A burnt enameled Dutch oven bottom is a common but fixable issue for home cooks.
What Causes a Burnt Dutch Oven Bottom?
Burnt bottoms are rarely a random accident: they almost always stem from avoidable cooking habits or wear and tear on your cookware. Understanding the root cause will help you fix the current burn and prevent it from happening again.
High Heat and Hot Spots
Dutch ovens are designed for slow, even cooking, not searing on maximum heat. Electric coil burners can reach 600°F on their highest setting, while gas burners with licking flames heat the sides of the pot as well as the bottom, creating hot spots 2–3 times hotter than the rest of the cooking surface. In as little as 2 minutes, these hot spots can carbonize food stuck to the bottom, creating a bond that’s extremely difficult to remove. Enameled Dutch ovens are especially vulnerable to thermal shock from rapid high heat, which can crack the finish and create rough spots that attract future burnt residue.
Insufficient Oil or Liquid
Fat and liquid act as a heat conductor between your food and the pot’s surface. Without enough of either, the Maillard reaction (the browning process that gives food flavor) occurs directly between food proteins and the hot metal, causing sticking and burning before your dish is fully cooked. For example, searing chicken thighs without a thin, even layer of oil will cause the skin to stick and burn long before the meat reaches a safe internal temperature.
Lack of Stirring or Unattended Cooking
Even with proper heat and oil, thick dishes like stews, risotto, or chili settle to the bottom of the pot over time, where they are exposed to constant, direct heat. Stirring every 5–10 minutes moves food away from the hottest spot and ensures even cooking. Leaving a pot unattended for more than 15 minutes on the stovetop is one of the most common causes of preventable burnt bottoms.
Damaged or Worn Cookware Surfaces
Over time, both enameled and bare cast iron Dutch ovens can develop surface damage that leads to sticking. Enamel chips expose the porous cast iron underneath, which rusts easily and creates rough patches that food bonds to. Bare cast iron that has been stripped of its seasoning (from harsh scrubbing or soaking in soapy water) loses its natural non-stick layer, making it just as prone to sticking as a damaged enameled pot. Warped bottoms (from drops or extreme temperature changes) also prevent even heat distribution, creating persistent hot spots that burn food no matter what heat setting you use.
Mismatched Pot Size or Cookware Type
Using a small Dutch oven for a large batch of food is a frequent, overlooked cause of burnt bottoms. When a pot is more than 3/4 full, liquid evaporates quickly, and food has less room to move, so it settles and burns before the rest of the dish cooks. Thin, low-budget Dutch ovens also heat unevenly far more quickly than heavy, thick-walled models, making them prone to hot spots even on low heat.
| Dutch Oven Material | Safe Cleaning Methods | Methods to Avoid |
|---|---|---|
| Enameled cast iron | Baking soda paste, vinegar soak, mild dish soap soak, non-abrasive scrubbers | Steel wool, harsh chemical cleaners, metal scrapers, prolonged boiling water soaking |
| Bare cast iron | Baking soda paste, salt scrub, boiling water + salt method, stiff natural fiber brush | Soap (strips seasoning), harsh acids, steel wool, prolonged water soaking |
Immediate Steps to Tackle Fresh Burnt Residue
Acting quickly after you notice a burnt bottom makes all the difference between a 5-minute cleanup and a 30-minute scrub session. Follow these steps as soon as you’ve finished cooking to avoid letting burnt residue harden into a carbonized layer.
Soaking Techniques for All Cookware Types
Start by letting your Dutch oven cool completely, then fill it with warm (not boiling) water and 1–2 drops of mild dish soap. For fresh burns (less than 2 hours old), soak for 30 minutes to loosen residue. For older, harder burns, add 1/2 cup of baking soda per quart of water and soak overnight. For bare cast iron, skip the soap and use only hot water to avoid stripping the pot’s seasoning. Per FDA safe cookware guidelines, never leave cookware soaking for more than 24 hours, as prolonged water exposure can cause rust on bare cast iron and weaken enamel finishes over time.
Safe Scrubbing Tools That Won’t Damage Finishes
Once the residue is loosened, scrub with a soft sponge or nylon scrubber for enameled Dutch ovens, or a stiff natural fiber brush for bare cast iron. Skip the steel wool and reach for a non-abrasive scrubber set designed for delicate cookware surfaces — these won’t scratch enamel or strip cast iron seasoning. For stubborn stuck-on bits, use a flat plastic or wooden scraper to lift residue without scratching. Never use metal spatulas, steel wool, or sharp metal brushes, as even fine-grit steel wool can leave permanent scratches on enamel finishes that cause future sticking.
Cleaners to Avoid to Protect Your Dutch Oven
Harsh chemical cleaners like oven spray, bleach, and undiluted vinegar can etch enamel finishes, leaving them dull and porous, and may leave toxic residues that leach into food when the pot is reheated, per FDA guidance. Stick to gentle, food-safe cleaning tools like our all-purpose kitchen scrubbers that won’t leave harmful residues on cookware that contacts food. For extra tough residue, stick to the DIY or commercial cookware-safe cleaners outlined below.
Proven DIY Cleaning Methods for Stubborn Burns
Most burnt bottoms can be fully restored with common household items, no expensive products required. Choose the method below that matches your cookware material and the severity of the burn.
Baking Soda Paste for Light to Medium Burns
Baking soda is a mild alkali that breaks down burnt food bonds without scratching surfaces. Mix 3 parts baking soda with 1 part warm water to form a thick paste, then spread it 1/4 inch thick over the burnt area. Let it sit for 15–30 minutes for fresh burns, or 2 hours for older, carbonized residue. Scrub gently with a non-abrasive sponge in circular motions, then rinse thoroughly. This method works for both enameled and bare cast iron, but for bare cast iron, dry the pot immediately after rinsing to prevent rust.
Vinegar Soak for Mineral Deposits and Light Burns
White vinegar is a natural acid that dissolves burnt food and hard water stains that often accompany burnt residue. Mix equal parts white vinegar and warm water, fill the Dutch oven, and bring to a gentle simmer (never a rolling boil, which can damage enamel) for 10 minutes. Let the mixture cool completely before scrubbing with a soft sponge. This method is best for light burns and mineral buildup, not heavy, carbonized residue.
Coarse Salt Scrub for Gentle Abrasion
Coarse kosher salt is softer than both enamel and cast iron, making it a safe abrasive for stuck-on grime. Sprinkle 2 tablespoons of coarse salt over the burnt area, add 1 teaspoon of warm water to form a gritty paste, then scrub with a damp cloth in circular motions. The salt lifts residue without scratching, and it’s safe for all Dutch oven materials. Rinse thoroughly after scrubbing to remove any remaining salt.
Overnight Dish Soak for Enameled Dutch Ovens
For enameled Dutch ovens with thick, hardened burnt residue, fill the pot with hot (not boiling) water and 2–3 drops of mild dish soap, then let it soak for 8–12 hours. The soap and warm water loosen burnt particles without damaging the enamel finish. In the morning, scrub with a soft sponge and rinse. This method is not recommended for bare cast iron, as soap can strip the pot’s protective seasoning.
Boiling Water and Salt Method for Bare Cast Iron
For bare cast iron Dutch ovens with heavy, carbonized burnt residue, this method lifts grime without stripping seasoning. Fill the pot with enough water to cover the burnt area, add 2 tablespoons of kosher salt, and bring to a rolling boil for 10 minutes. Use a flat wooden spatula to scrape the burnt residue off the bottom while the water is still hot. The salt and boiling water loosen carbonized food and old seasoning buildup without damaging the cast iron’s natural non-stick layer. Dry the pot immediately and re-season if needed.
Using Commercial Cleaners for Tough Residue
If DIY methods don’t fully remove burnt residue, a cookware-safe commercial cleaner can save time and elbow grease. The key is choosing a product formulated for your Dutch oven’s material to avoid damage.
Choosing a Cleaner Safe for Your Dutch Oven Material
For enameled Dutch ovens, opt for non-abrasive, bleach-free cleaners like Bar Keepers Friend Soft Clean or Bon Ami, which are formulated to lift grime without etching enamel. For bare cast iron, stick to cleaners approved by cast iron manufacturers like Lodge Cast Iron’s official care instructions, which recommend avoiding acidic or bleach-based products to preserve seasoning and prevent rust. Avoid generic oven cleaners, scouring powders, and any product labeled "abrasive," as these will scratch or dull your cookware’s finish.
Proper Application to Avoid Damage
Always read the product label before use, and work in a well-ventilated area while wearing gloves to avoid skin irritation. Apply a small amount of cleaner only to the burnt area, let it sit for the recommended time (usually 1–2 minutes, never longer), then scrub gently with a non-abrasive sponge. Never leave commercial cleaner on cookware for extended periods, as this can cause permanent discoloration or etching of enamel finishes. Rinse the pot thoroughly with warm water after cleaning to remove all cleaner residue.
Post-Cleaning Care to Extend Cookware Life
After cleaning, dry your Dutch oven completely with a clean towel to prevent rust, especially for bare cast iron. For bare cast iron, rub a thin layer of neutral cooking oil (like canola or grapeseed) over the entire surface to restore its protective seasoning. Store the pot with the lid off or slightly ajar to allow air circulation and prevent moisture buildup, which can cause mold or rust. For extra tough grime that won’t budge, a heavy-duty cleaning brush with stiff, non-scratch bristles can lift residue without damaging the finish.
How to Prevent Burnt Bottoms Long-Term
Preventing burnt bottoms is far easier than fixing them. Follow these habits to keep your Dutch oven performing like new for decades.
Master Heat Control for Stovetop and Oven Use
Dutch ovens are designed for low to medium heat cooking. For stovetop use, preheat the pot on low for 2–3 minutes before adding oil or food to avoid thermal shock that can crack enamel. Adjust gas burners so the flame only touches the bottom of the pot, not the sides, which causes uneven heating and burnt spots. For oven use, never preheat an empty enameled Dutch oven above 400°F, as rapid temperature changes can cause the enamel to crack. Most Dutch oven recipes call for oven temperatures between 300°F and 375°F, which is hot enough to cook food evenly without burning the bottom.
Follow Proper Preheating Protocols
Never add cold liquid or food to a piping hot Dutch oven, as the sudden temperature change can crack enamel or warp cast iron. For oven use, place the Dutch oven in the oven while it preheats, rather than preheating it empty on the stovetop, to ensure even heat distribution. For stovetop use, let the pot heat gradually on low for 2–3 minutes before adding ingredients.
Routine Maintenance to Avoid Residue Buildup
Clean your Dutch oven after every use, while it is still warm (not hot) to make residue removal effortless. For enameled Dutch ovens, a quick wipe with a soft sponge and mild dish soap is all that’s needed for most messes. For bare cast iron, wipe out excess food with a paper towel while warm, then rinse with hot water and dry immediately to prevent rust. For more kitchen care best practices that extend the life of all your cookware, browse our full blog archive for guides on everything from cast iron care to baking sheet maintenance.
Use Protective Layers to Eliminate Hot Spots
A 1/4-inch thick aluminum heat diffuser is the best $10–$20 investment you can make to prevent burnt bottoms on the stovetop. It sits between the burner and the pot, spreading heat evenly across the entire bottom surface to eliminate hot spots. For baking, a silicone baking mat or parchment paper liner works well for sticky dishes like bread, cinnamon rolls, or casseroles that tend to stick to the bottom. Note that heat diffusers are only safe for gas and electric stovetops; they will not work with induction cooktops unless labeled induction-safe.
Season Bare Cast Iron Correctly (Skip for Enameled)
Enameled Dutch ovens do not require seasoning, as the enamel finish acts as a built-in non-stick surface. For bare cast iron, regular seasoning builds a protective layer that prevents sticking and burning. To season, rub a thin layer of neutral oil (like canola or grapeseed) over the entire interior and exterior of the pot, place it upside down in a 450°F oven for 1 hour, then let it cool completely. Repeat this process 2–3 times for a durable, non-stick finish. Re-season your bare cast iron Dutch oven every 2–3 months, or any time food starts to stick more than usual.
When to Replace Your Dutch Oven Instead of Fixing It
Most burnt bottoms are fixable, but some damage is beyond repair. Continuing to use a severely damaged Dutch oven can not only ruin your meals, but also pose minor health risks from bacteria growth in rough, chipped surfaces.
Irreparable Damage to Look For
For enameled Dutch ovens, chips larger than a quarter, deep cracks, or widespread pitting of the enamel are signs the pot is no longer safe to use. Bacteria can grow in the crevices of chipped enamel, and rough, exposed cast iron will cause food to stick and burn no matter how well you care for the pot. For bare cast iron, deep cracks, holes in the metal, or rust that has eaten through the surface are irreversible, and the pot will no longer be able to hold liquid safely. A warped bottom that no longer sits flat is also a sign to replace the pot, as it will create persistent hot spots that burn food no matter what heat setting you use.
Cost-Benefit Analysis of Repair vs. Replacement
Minor enamel chips can be fixed with a $10–$15 enamel repair kit, but professional refinishing costs $50–$150, which is often more expensive than replacing a budget Dutch oven. High-end heirloom brands like Le Creuset offer lifetime warranties for manufacturing defects, so check your warranty before replacing, as you may be eligible for a free repair or replacement. For most home cooks, a new 5.5-quart enameled Dutch oven costs $100–$400, while a bare cast iron model costs $30–$100, making replacement a more cost-effective option for damaged budget models. After cleaning and drying, store your Dutch oven in a cabinet with adjustable safety latches to keep young children away from hot or heavy cookware.
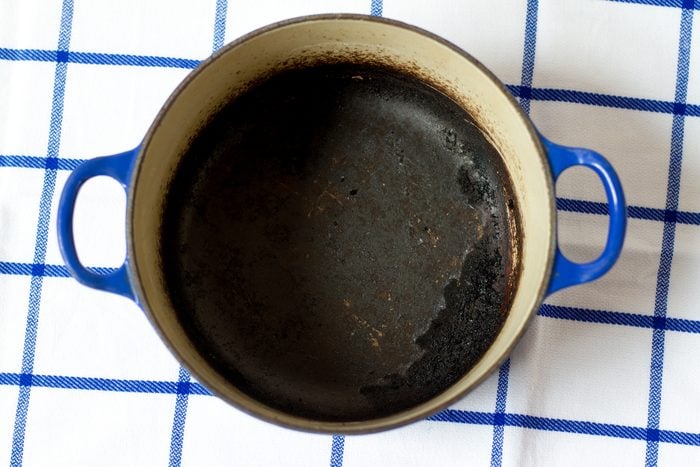 Credit: www.rd.com
Deep chips or cracks in enamel coating are a sign your Dutch oven needs to be replaced.
Credit: www.rd.com
Deep chips or cracks in enamel coating are a sign your Dutch oven needs to be replaced.
Frequently Asked Questions
Why does my Dutch oven bottom burn food even on low heat?
This is usually caused by a warped bottom (from drops or extreme temperature changes) or a thin, low-quality pot that doesn’t distribute heat evenly. A heat diffuser can fix uneven heating, but if the pot is warped, it will need to be replaced.
How do I clean a burnt Dutch oven bottom without scrubbing?
For light burns, let a baking soda and water paste sit overnight, then rinse with warm water—no scrubbing needed. For heavier burns, boil a mixture of water, vinegar, and 2 tablespoons of baking soda for 10 minutes, then let cool and wipe clean.
Can burnt residue on a Dutch oven make me sick?
Small amounts of burnt food are not harmful, but damaged cookware with chips, cracks, or rust can harbor bacteria that cause foodborne illness. Burnt starchy foods can also contain small amounts of acrylamide, a compound formed when cooking at high heat, so it’s best to remove all burnt residue before cooking again.
Is it safe to use commercial cookware cleaner on my Dutch oven?
Only use cleaners labeled safe for your Dutch oven’s material (enameled or bare cast iron). Avoid cleaners with bleach, ammonia, or harsh abrasives, as they can damage the finish and leave toxic residues. Always rinse thoroughly after use to remove all cleaner residue.
Conclusion
A burnt Dutch oven bottom is a common kitchen headache, but it’s rarely a reason to toss your trusty cookware. By addressing the root cause of burning—whether it’s high heat, insufficient oil, or damaged seasoning—and using the right cleaning method for your pot’s material, you can restore even the most severely burnt surface in under an hour. To keep your Dutch oven performing like new for decades, prioritize gentle heat, regular maintenance, and proper storage. Ready to keep your cookware in top shape for years to come? Explore more kitchen maintenance tips and product reviews on our dedicated kitchen guide hub today.

I’m Abby Lu, a passionate home cook who loves simplifying everyday meals. At PlugChef.com, I share product reviews and cooking guides to help you find the best tools for your kitchen.
Related posts:
 3 Shelf Hanging Closet Organizer: Maximize Your Space
 Do It Yourself Pantry Organizers: Transform Your Space
 How to Organize a Pantry With Wire Shelves: Expert Tips
 How to Organize Snacks in Pantry: Smart Tips
 Small Walk in Pantry Organization Ideas: Transform Spaces
 Under Cabinet Pot And Pan Organizer: Maximize Your Space

