
Are you ready to discover a dessert that’s both easy to make and absolutely delicious? Chocolate Cherry Dump Cake Recipes are your new secret weapon for quick, mouthwatering treats that impress every time.
Imagine rich chocolate blending perfectly with sweet cherries, all coming together with minimal effort. If you love desserts that satisfy your sweet tooth without hours in the kitchen, this is exactly what you need. Keep reading, and you’ll find simple recipes that turn your cravings into reality—fast!
Credit: www.msn.com
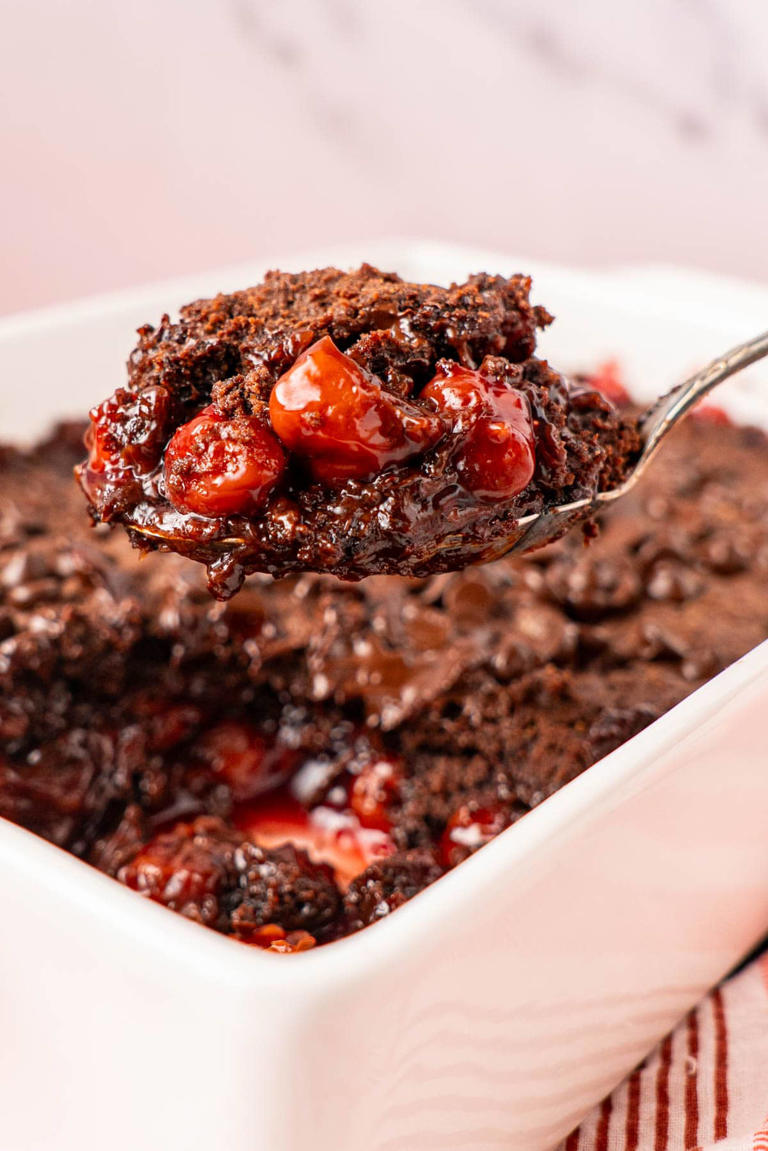
Classic Chocolate Cherry Dump Cake
The Classic Chocolate Cherry Dump Cake is a simple yet irresistible dessert that brings together rich chocolate and tart cherries in a quick, no-fuss recipe. It’s perfect for those moments when you want a homemade treat without spending hours in the kitchen. You’ll find that this cake delivers deep flavor and satisfying texture with minimal effort.
Ingredients Needed
- 1 can (21 oz) cherry pie filling
- 1 box chocolate cake mix
- 1/2 cup butter, melted
- 1 cup semi-sweet chocolate chips (optional for extra chocolate punch)
These ingredients are easy to find and often already sitting in your pantry. Cherry pie filling provides a juicy, fruity base, while the chocolate cake mix acts as the sweet, cakey topping.
Step-by-step Preparation
- Preheat your oven to 350°F (175°C).
- Spread the cherry pie filling evenly at the bottom of a greased 9×13-inch baking dish.
- Sprinkle the dry chocolate cake mix evenly over the cherries.
- Scatter chocolate chips over the cake mix layer for added richness.
- Drizzle the melted butter evenly on top, allowing it to soak through the mix.
- Bake uncovered for 45-50 minutes, or until the top is golden and bubbly.
- Let it cool slightly before serving to let the flavors set.
This approach keeps things simple and mess-free. You literally “dump” everything together, yet the outcome is far from ordinary.
Tips For Perfect Texture
- Use room temperature butter to ensure it spreads evenly over the cake mix.
- Don’t stir the layers after adding; the magic happens when they bake separately but blend perfectly.
- Check your oven’s temperature with an oven thermometer to avoid over-baking or drying out the cake.
- If you like a crunchier topping, add a handful of chopped nuts before baking.
- Allowing the cake to rest for 10 minutes before serving lets the juices thicken and the cake firm up for easier slicing.
Have you noticed how a quick rest can turn a good dessert into a great one? Texture matters as much as flavor, and these small adjustments can make your dump cake stand out every time.
Credit: www.bettycrocker.com
Quick No-bake Chocolate Cherry Dump Cake
The Quick No-Bake Chocolate Cherry Dump Cake is perfect for those moments when you crave a rich, fruity dessert but don’t want to spend hours in the kitchen. This recipe skips the oven and simplifies the process without sacrificing flavor. Imagine the ease of mixing a few ingredients and having a delicious cake ready to chill and enjoy.
Essential Ingredients
- Cherry pie filling:The star of the dessert, bringing sweet and tart flavors.
- Chocolate chips or chunks:Adds a rich, gooey texture and deep cocoa taste.
- Crushed graham crackers or vanilla wafer crumbs:Provides a crunchy, cake-like base.
- Butter:Helps bind the crumbs and adds richness.
- Powdered sugar or sweetener:Optional, for extra sweetness if desired.
Choosing high-quality chocolate makes a noticeable difference. I once used semi-sweet chips for a batch, and the balance of tart cherry and smooth chocolate blew everyone away. Do you prefer your chocolate dark or milk? This is your chance to tailor the cake to your taste.
Simple Assembly Process
Start by mixing the crushed crackers or wafers with melted butter until the texture resembles wet sand. Press this mixture firmly into the bottom of your serving dish to create the crust.
Spread the cherry pie filling evenly over the crust layer. Next, sprinkle the chocolate chips generously on top of the cherries. There’s no need to bake—just cover and refrigerate for a few hours to let the flavors meld and the chocolate soften.
This no-bake approach saves time and keeps your kitchen cool—ideal for hot days or last-minute gatherings. Have you tried a dessert this simple that still impresses your guests?
Serving Suggestions
- Serve chilled with a dollop of whipped cream or a scoop of vanilla ice cream for extra creaminess.
- Garnish with fresh cherries or a sprinkle of cocoa powder to enhance the presentation.
- Pair with a cup of coffee or a glass of cold milk to complement the rich flavors.
This dessert also works well in individual cups or jars for easy portioning and sharing. Offering it at a casual get-together can spark conversations about how surprisingly easy and delicious no-bake cakes can be. What’s your favorite way to serve a quick dessert that feels special?
Gluten-free Chocolate Cherry Dump Cake
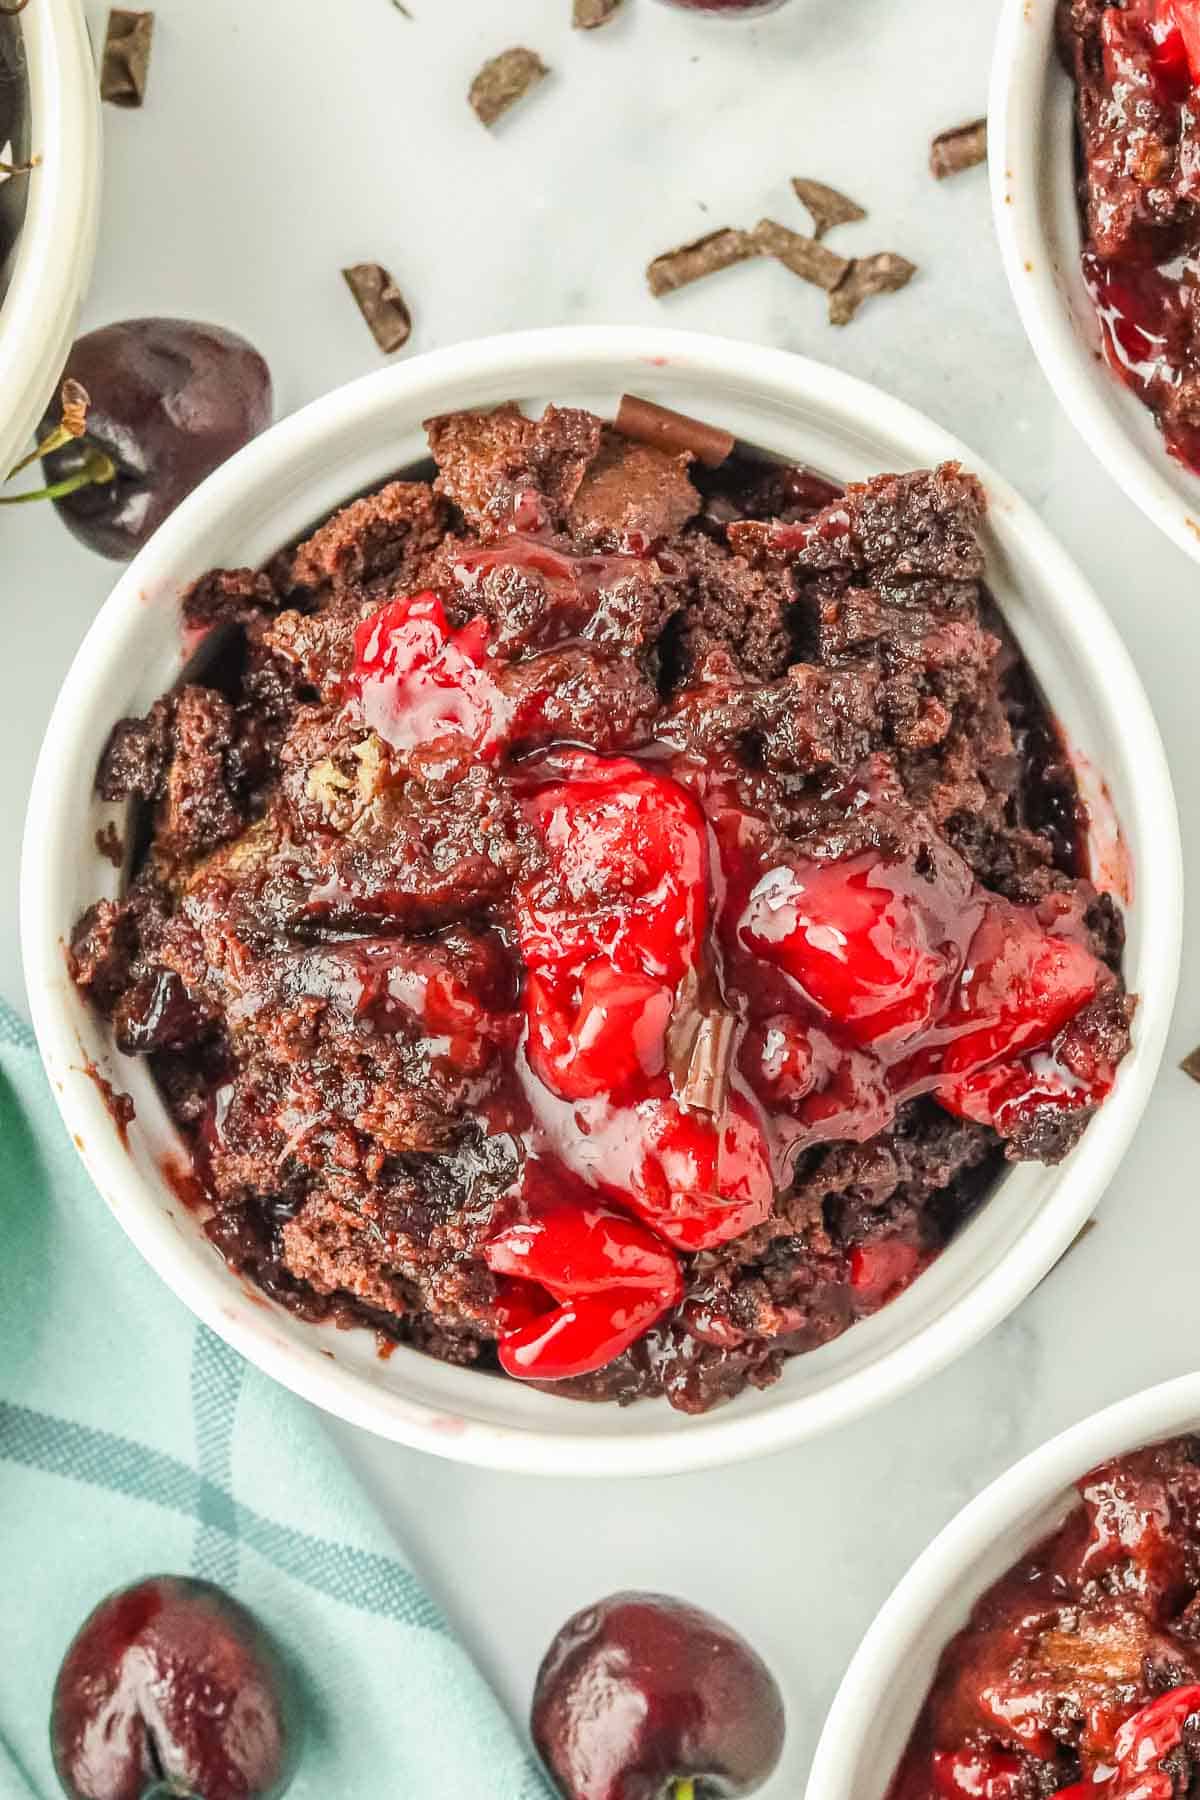
Chocolate Cherry Dump Cake offers a delightful dessert experience. The gluten-free version ensures everyone can enjoy its rich flavors. This cake is simple, requiring minimal effort. Just mix, dump, and bake for a sweet treat. Let’s explore how to make this gluten-free delight.
Choosing Gluten-free Ingredients
Start by selecting a gluten-free cake mix. Check labels for gluten-free certification. Choose high-quality cherry pie filling. It enhances the cake’s texture and flavor. Use unsweetened cocoa for a rich chocolate taste. Ensure all ingredients are cross-contamination free. This keeps the cake safe for gluten-sensitive individuals.
Baking Instructions
Preheat your oven to 350°F (175°C). Grease a baking dish lightly. Pour the cherry pie filling into the dish. Spread it evenly with a spatula. Sprinkle the gluten-free cake mix over the cherries. Cover the entire surface without mixing. Add cocoa powder on top for extra flavor. Drizzle melted butter evenly over the dry mix. Bake for 35-40 minutes. The top should be golden and bubbly.
Flavor Enhancements
Enhance the cake with some simple additions. Add chocolate chips before baking for more richness. Chopped nuts can give a crunchy texture. Serve with a scoop of vanilla ice cream for contrast. A dollop of whipped cream adds lightness. Dust with powdered sugar for a sweet finish. Experiment with these enhancements to suit your taste.
Credit: www.tosimplyinspire.com
Vegan Chocolate Cherry Dump Cake
The Vegan Chocolate Cherry Dump Cake is a simple dessert full of rich flavors. It uses plant-based ingredients without sacrificing taste. This cake blends the sweetness of cherries with smooth chocolate. The recipe suits those who prefer vegan or dairy-free options. It is quick to prepare and perfect for sharing.
Plant-based Ingredient Alternatives
- Use vegan butter or coconut oil instead of regular butter.
- Choose dairy-free chocolate chips or chunks for the chocolate layer.
- Swap regular cake mix with a vegan-friendly cake mix.
- Opt for fresh or frozen cherries without added sugar.
- Use almond milk or oat milk in place of cow’s milk if needed.
Mixing And Baking Tips
- Spread the cherry filling evenly in the baking dish.
- Sprinkle the vegan cake mix over the cherries without stirring.
- Dot the top with small pieces of vegan butter for crispiness.
- Bake at 350°F (175°C) for about 40-45 minutes until golden.
- Check with a toothpick to ensure the cake is fully baked.
Garnishing Ideas
- Top with fresh cherries or sliced almonds for texture.
- Dust with powdered sugar for a light sweetness.
- Drizzle melted vegan chocolate over each serving.
- Add a scoop of vegan vanilla ice cream for extra creaminess.
- Sprinkle chopped dark chocolate or cocoa nibs for crunch.
Creative Twists On Chocolate Cherry Dump Cake
Chocolate cherry dump cake is already a delicious treat, but adding your own creative touches can make it unforgettable. Small changes can bring new flavors and textures that surprise and delight. Are you ready to experiment with ingredients that can elevate this classic dessert?
Adding Nuts And Spices
Adding nuts like pecans, walnuts, or almonds gives your dump cake a satisfying crunch. Toast them lightly before adding to boost their flavor. Spices such as cinnamon, nutmeg, or a pinch of cayenne pepper introduce warmth and complexity.
Think about how a sprinkle of cinnamon enhanced my last batch—I was amazed at how it balanced the sweetness perfectly. Would you try a little heat with cayenne to contrast the cherries?
Incorporating Different Fruits
Mixing other fruits with cherries adds freshness and variety. Blueberries, raspberries, or even sliced peaches work well alongside cherries. You can either substitute part of the cherry filling or mix them all together for a fruit medley.
Try combining tart cherries with sweet peaches for a flavor combo that keeps each bite exciting. What fruit would you add to make this your signature dump cake?
Using Various Chocolate Types
Switching up the chocolate can transform the cake’s richness. Dark chocolate adds depth, milk chocolate offers a creamy sweetness, and white chocolate brings a smooth, buttery touch. Chunks, chips, or even shaved chocolate can change the texture.
I once used bittersweet chocolate chips and noticed how they highlighted the cherry’s tartness beautifully. How do you prefer your chocolate—melty or chunky?
Storing And Reheating Tips
Keeping your Chocolate Cherry Dump Cake fresh and delicious after baking requires a bit of care. How you store and reheat it can make a big difference in taste and texture. Here are some practical tips to help you enjoy every bite as if it were freshly made.
Best Storage Practices
Store your dump cake in an airtight container to prevent it from drying out and absorbing other fridge odors. If you plan to eat it within two days, keeping it in the refrigerator is your best bet. Make sure the cake has cooled completely before sealing it to avoid condensation, which can make the topping soggy.
Have you ever noticed how leftover cake sometimes loses its charm? Keeping it properly covered and chilled preserves that moist and rich texture you love.
Reheating Without Drying Out
Reheating dump cake can be tricky—heat it too much and it dries out; too little and it stays cold in the center. Warm it in the oven at 300°F (150°C) for about 10-15 minutes. Cover the cake loosely with foil to trap moisture but prevent the topping from burning.
If you’re in a hurry, a microwave works too. Heat individual portions for 20-30 seconds, then check and repeat if needed. Adding a small dab of butter or a scoop of ice cream can bring back that fresh-baked feel instantly.
Freezing Guidelines
Freezing is a great option when you want to save your dump cake for later. Wrap it tightly in plastic wrap, then add a layer of aluminum foil to protect against freezer burn. Label your package with the date—ideally, consume it within 2-3 months for best flavor.
Thaw frozen dump cake overnight in the fridge, then warm it gently before serving. Have you tried freezing individual portions? It makes grab-and-go desserts a breeze for busy days.
Pairing Chocolate Cherry Dump Cake
Pairing Chocolate Cherry Dump Cake enhances its rich and fruity flavors. Choosing the right accompaniments creates a balanced taste experience. The right pairings complement the moist texture and deep chocolate notes. This section explores drinks, creamy toppings, and presentation ideas to elevate your dessert.
Beverage Pairings
- Hot coffee or espresso brings out the chocolate depth.
- A glass of cold milk softens the sweetness.
- Cherry or berry herbal teas match the fruitiness.
- Red wine like Merlot adds a rich contrast.
- Chocolate or cherry-flavored milkshakes enhance dessert flavors.
Ice Cream And Whipped Cream Options
- Vanilla ice cream offers a creamy, neutral balance.
- Cherry or black cherry ice cream boosts fruit flavors.
- Chocolate ice cream intensifies the chocolate taste.
- Whipped cream adds lightness and a fluffy texture.
- Try cinnamon-spiced whipped cream for a warm twist.
Presentation Ideas
- Serve in clear glass bowls to show the layers.
- Top with fresh cherries or chocolate shavings.
- Dust with powdered sugar for a delicate look.
- Use colorful plates to brighten the dessert display.
- Pair with a sprig of mint for fresh contrast.
Frequently Asked Questions
What Ingredients Are Needed For Chocolate Cherry Dump Cake?
You need canned cherry pie filling, boxed chocolate cake mix, butter, and optional nuts. These simple ingredients create rich flavors and a moist texture in the cake.
How Long Does A Chocolate Cherry Dump Cake Bake?
Bake the cake at 350°F (175°C) for about 45-50 minutes. The top should be golden brown and bubbly around the edges when done.
Can I Use Fresh Cherries Instead Of Canned?
Yes, fresh cherries can be used but require additional sugar and thickener. Canned filling is easier and guarantees consistent sweetness and texture.
Is Chocolate Cherry Dump Cake Gluten-free?
Not usually, as most boxed cake mixes contain gluten. For gluten-free options, choose a certified gluten-free chocolate cake mix.
Conclusion
Chocolate cherry dump cake recipes bring sweet joy to any table. They are easy to make and taste delicious. You only need a few ingredients and little time. Perfect for family dinners or special treats. Try different chocolate types or add nuts for texture.
This dessert always pleases both kids and adults. Give it a try, and enjoy a warm, tasty dessert tonight. Simple, quick, and full of flavor—what’s not to love?

I’m Abby Lu, a passionate home cook who loves simplifying everyday meals. At PlugChef.com, I share product reviews and cooking guides to help you find the best tools for your kitchen.
Related posts:
 What Type of Cooking Utensils are Safe: Expert Picks
 What Innovations Could Blenders Make: Unleashing Future Tech
 Smart Strategies to Organize a Small Kitchen: Maximize Space
 How to Organize a Kitchen Cabinet: Expert Tips & Tricks
 How to Organize Kitchen Drawers: Expert Tips and Tricks
 How to Organize a Corner Kitchen Cupboard: Expert Tips

