
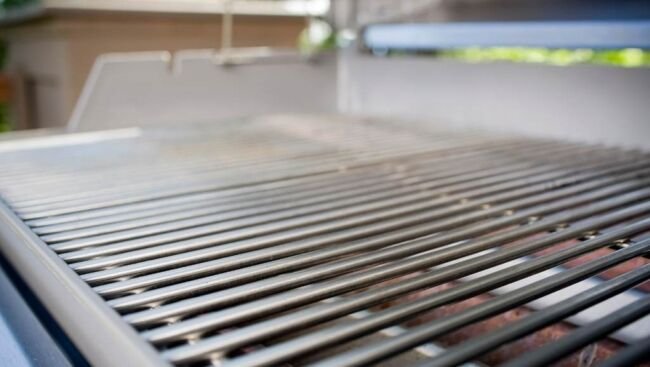
If you love grilling, you know how important clean grill grates are for perfect-tasting food. But scrubbing off burnt bits and grease can be tough and time-consuming.
What if there was a simple, natural way to make your grill grates shine without harsh chemicals or endless elbow grease? Soaking grill grates in vinegar might be the secret trick you’ve been missing. You’ll discover how this easy method can save you time, protect your grill, and even improve the flavor of your meals.
Keep reading to learn how to make your grill grates spotless with something as common as vinegar.

Credit: www.yahoo.com
Why Vinegar Works
Vinegar is a simple household item that works wonders for cleaning grill grates. Its effectiveness comes from a few key qualities that make it tough on grime but gentle on your equipment. Understanding why vinegar works can help you appreciate its power and encourage you to use it regularly for a cleaner grill.
Acidic Properties
Vinegar contains acetic acid, which breaks down tough deposits on grill grates. This acid loosens burnt-on food and rust, making it easier to scrub away. Have you noticed how vinegar can dissolve mineral buildup on your kettle? The same principle applies to grills.
Removing Grease And Residue
Grease and food residue can be stubborn, but vinegar tackles them effectively. It cuts through oily layers without harsh chemicals, leaving your grill fresh. If you’ve ever spilled vinegar on a greasy pan, you know how quickly it starts working—imagine that power on your grill grates.
Safe And Natural Cleaner
Vinegar is a safe alternative to chemical cleaners, especially if you cook often. It’s non-toxic and won’t leave harmful residues on your grill. Plus, it’s eco-friendly and inexpensive, so why not give your grill a natural clean that you can trust?

Credit: www.familyhandyman.com
Preparing Grill Grates
Preparing grill grates properly is key to effective cleaning with vinegar. Start by clearing away any loose dirt or food bits. This step helps vinegar reach the metal surface better. Choosing the right vinegar matters for safety and cleaning power. Finally, pick a container that fits the grates and holds vinegar without leaks. These preparations make the soaking process easier and more efficient.
Removing Loose Debris
Remove large food chunks and rust flakes from grill grates. Use a grill brush or a scraper for this task. Cleaning loose debris first prevents vinegar from getting dirty quickly. It also helps vinegar clean the grates more deeply. Make sure to shake off any crumbs or ashes too.
Choosing The Right Vinegar
Pick white distilled vinegar for soaking grill grates. It is safe and effective for breaking down grime. Avoid flavored or colored vinegars as they may stain or leave residue. Use vinegar with about 5% acidity for best results. This vinegar type is common and easy to find in stores.
Setting Up A Soaking Container
Choose a container large enough to hold your grill grates flat or standing. Plastic tubs, buckets, or old sinks work well. Make sure the container is clean and free of chemicals. Pour enough vinegar to fully cover the grates. This setup ensures the vinegar cleans every part of the metal.
Soaking Process
The soaking process is a simple way to clean grill grates. Vinegar is a natural cleaner. It loosens grime and makes scrubbing easier. This method is effective and budget-friendly.
Duration For Soaking
Soak grill grates for at least two hours. For better results, soak overnight. This ensures the vinegar penetrates deep into the buildup.
Tips To Maximize Effectiveness
- Use equal parts of vinegar and water for the soaking solution.
- Ensure grates are fully submerged for thorough cleaning.
- Cover the container to prevent evaporation.
- Use warm water to mix with vinegar.
Handling Stubborn Buildup
After soaking, scrub grates with a wire brush. For tough spots, sprinkle baking soda on the brush. Rinse with warm water to remove all residue. Repeat soaking if needed for persistent grime.

Credit: www.reddit.com
Post-soaking Cleaning
After soaking grill grates in vinegar, the cleaning process continues to ensure they are spotless and ready for use. This stage removes loosened debris and vinegar residue. Proper cleaning also helps maintain the grates’ condition and prevents rust.
Scrubbing Techniques
Use a stiff wire brush or non-abrasive scrub pad to clean the grates. Focus on areas with stuck-on food or rust spots. Scrub in circular motions to lift grime effectively. Avoid using steel wool, which can damage the surface. For stubborn spots, apply a paste of baking soda and water, then scrub gently.
Rinsing And Drying
Rinse the grill grates thoroughly under warm running water. Ensure all vinegar and loosened debris wash away. Use a clean cloth or paper towels to dry the grates completely. Leaving them wet can cause rust and corrosion. For best results, dry the grates outdoors or in a well-ventilated area.
Seasoning Grates After Cleaning
Seasoning protects the grill grates from rust and keeps food from sticking. Apply a thin layer of cooking oil using a cloth or brush. Heat the grates on the grill for 15 to 20 minutes at medium heat. This process helps the oil bond with the metal surface. Regular seasoning extends the life of your grill grates.
Additional Vinegar Cleaning Hacks
Vinegar is not just great for soaking grill grates; it offers several other cleaning advantages around your grill. Its natural acidity helps break down grease and grime effortlessly. Let’s look at some practical vinegar hacks that can make your entire grill cleaning routine easier and more effective.
Cleaning Other Grill Parts
Vinegar works well on more than just the grates. You can use it to clean drip pans, burners, and even the exterior surfaces of your grill. Simply spray undiluted vinegar on these parts and let it sit for a few minutes before scrubbing with a brush or cloth.
This approach cuts through stubborn grease without harsh chemicals. Have you tried wiping your grill hood with vinegar? It removes smoke stains and leaves a fresh scent behind.
Combining Vinegar With Baking Soda
For tougher buildup, mixing vinegar with baking soda creates a powerful cleaning reaction. Sprinkle baking soda on greasy surfaces, then spray vinegar on top. The fizzing action loosens grime, making it easier to scrub away.
This combo is perfect for stubborn spots on your grill or its accessories. You’ll find it’s a safe and effective alternative to chemical cleaners that can harm your grill’s finish.
Preventing Future Buildup
Using vinegar regularly can help keep your grill cleaner longer. After each use, wipe down your grates and other parts with a vinegar spray to prevent grease and residue from hardening.
Think about it like this: a quick vinegar wipe is easier than scrubbing weeks of buildup. Do you want to spend more time cooking or cleaning? A simple vinegar routine could save you hours in the long run.
Safety And Maintenance Tips
Soaking grill grates in vinegar helps clean them effectively. Safety and maintenance matter most to keep your grill in good shape. Proper care extends the life of your grill and keeps it safe to use. Follow these tips to avoid damage and maintain performance.
Avoiding Corrosion
Vinegar is acidic and can cause rust if left too long on grates. Always rinse grates thoroughly after soaking. Dry them completely with a clean cloth. Avoid soaking for more than 30 minutes. Use a brush to remove any vinegar residue. This prevents metal corrosion and keeps grates strong.
Proper Storage
Store grill grates in a dry place after cleaning. Moisture causes rust and damage. Use a grill cover to protect from rain and dust. Keep grates off the ground to avoid dirt and moisture. Proper storage helps maintain the grates’ condition and readiness.
Regular Cleaning Schedule
Clean grill grates regularly to prevent buildup and rust. After each use, brush off food particles while grates are warm. Deep clean monthly with vinegar or grill cleaner. Rinse and dry well after cleaning. A regular schedule keeps the grill safe and working well.
Frequently Asked Questions
How Long Should I Soak Grill Grates In Vinegar?
Soak grill grates in vinegar for 30 minutes to 1 hour. This time softens grease and grime, making cleaning easier. Avoid soaking longer to prevent damage to the metal surface.
Can Vinegar Remove Rust From Grill Grates?
Yes, vinegar effectively dissolves rust on grill grates. Soak or scrub with vinegar to loosen rust particles. Rinse thoroughly and dry to prevent further corrosion.
Is Soaking Grill Grates In Vinegar Safe For All Materials?
Vinegar is safe for cast iron and stainless steel grates. Avoid soaking aluminum grates, as vinegar may cause damage. Always check manufacturer guidelines before applying vinegar.
What Is The Best Vinegar Type For Soaking Grill Grates?
White distilled vinegar is best for soaking grill grates. It is inexpensive, effective, and leaves no residue. Avoid flavored or colored vinegars that may stain the grates.
Conclusion
Soaking grill grates in vinegar cleans them well and saves time. The acid breaks down grease and food bits easily. This simple step keeps your grill ready for cooking. Use vinegar often to avoid tough buildup later. Clean grates mean better tasting food and longer grill life.
Give this easy method a try before your next barbecue. You’ll see how much easier grill cleaning can be. Simple, safe, and effective—vinegar works wonders for your grill.

Hi, I’m Daniel Brooks—a food lover and kitchen gear enthusiast. I enjoy testing cookware, utensils, and gadgets to see what really works in everyday cooking. At PlugChef.com, I share honest reviews, comparisons, and simple guides to help you choose the best tools for a safer, smarter, and more enjoyable kitchen.
Related posts:
 What Type of Cooking Utensils are Safe: Expert Picks
 What Innovations Could Blenders Make: Unleashing Future Tech
 Smart Strategies to Organize a Small Kitchen: Maximize Space
 How to Organize a Kitchen Cabinet: Expert Tips & Tricks
 How to Organize Kitchen Drawers: Expert Tips and Tricks
 How to Organize a Corner Kitchen Cupboard: Expert Tips

