
Are your trusty tools starting to show signs of rust? You know how frustrating it can be when your favorite wrench or garden shears lose their shine.
Rust not only mars the appearance of your tools but can also affect their performance. But don’t worry—there’s a simple solution right in your kitchen: baking soda! Imagine the satisfaction of seeing your tools restored to their former glory with an easy, affordable fix.
No need for harsh chemicals or expensive products. With just a few steps, you can have your tools looking as good as new. Curious how baking soda can tackle rust effectively? Stick around, because you’re about to discover a powerful, yet gentle method to revive your tools. Your toolbox will thank you, and you’ll feel more accomplished with every sparkling result. Let’s dive into the details and get those tools back in shape!
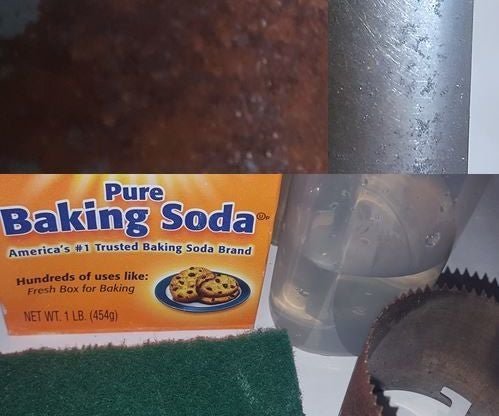
Gathering Necessary Supplies
Cleaning rusty tools with baking soda is effective. It requires specific supplies. Gathering the right materials ensures the process is smooth. It also maximizes results. Let’s explore what you need.
Tools And Materials Needed
Start with baking soda. It’s a natural rust remover. You’ll also need water. This helps form a paste. A soft-bristle brush is useful for scrubbing. Have a container or bowl ready. It holds the mixture. Gather some old rags or towels. They dry the tools after cleaning. Finally, keep some rubber gloves on hand. They protect your skin.
Safety Precautions
Safety is crucial during cleaning. Wear gloves to avoid skin irritation. Baking soda is mild, but it’s best to be careful. Ensure the area is well-ventilated. This minimizes inhalation of any dust particles. Keep children and pets away. They might accidentally ingest materials. Lastly, wear old clothes. Cleaning can get messy.

Credit: www.youtube.com
Preparing The Tools
Preparing your rusty tools for cleaning is an essential step. It ensures you achieve the best results with baking soda. A few simple actions make all the difference. Start by gathering your tools and assessing their rust severity.
Assessing The Rust Severity
Examine each tool closely. Check how deep the rust goes. Light rust is easier to clean. Heavy rust requires more effort. Use a flashlight to see clearly. Inspect all sides of the tool. Look for areas that need special attention. This step helps you decide how much baking soda to use.
Cleaning And Drying Tools
Begin by wiping off loose dirt. Use a clean cloth. Remove dust and debris. A clean surface helps baking soda work better. Wash the tools with mild soap and water. Use a brush for stubborn dirt. Rinse thoroughly with clean water.
Dry each tool completely. Moisture leads to more rust. Use a dry cloth or towel. Ensure no water remains on the surface. Now, your tools are ready for baking soda treatment. Proper preparation makes cleaning easier.
Mixing The Baking Soda Solution
Creating a baking soda solution is simple. Mix baking soda with water to make a paste. Apply to rusty tools, scrub gently, and rinse for effective rust removal.
Cleaning rusty tools can be a satisfying task, especially when you see the transformation from dull and corroded to shiny and functional. One of the most effective yet simple methods involves using baking soda. Let’s dive into the process of mixing the baking soda solution, a crucial step to restore your tools to their former glory.Creating The Paste
Begin by gathering your ingredients. You’ll need baking soda and water. Measure out about a half cup of baking soda into a bowl. Gradually add water to the baking soda, stirring constantly. The goal is to create a thick paste that can cling to the rusty surfaces of your tools. Think of the paste as your secret weapon against rust. In my experience, finding the right balance between baking soda and water can make all the difference. Avoid adding too much water at once, as this can result in a watery mixture that won’t adhere properly to the rust. As you stir, watch for the texture to become smooth and thick—similar to toothpaste.Adjusting Consistency
Consistency is key when mixing your baking soda solution. If the paste is too thick, it won’t spread easily. If it’s too thin, it won’t be effective against the rust. Adjust the consistency by adding small amounts of water or baking soda as needed. You should aim for a paste that holds its shape but spreads smoothly. Try spreading a bit on a flat surface; it should stay put without sliding off. A well-mixed paste sticks to the rusty tool, making the cleaning process much more efficient. Have you ever tried to clean with a solution that’s too runny? It often feels like trying to catch air—frustrating and ineffective. So take your time to get the consistency just right. Mixing the baking soda solution is not just about following steps; it’s about understanding the texture and feeling the paste in your hands. With the right mix, you’re well on your way to restoring your tools to their pristine condition. What challenges have you faced when mixing solutions like this? Sometimes, the simplest tasks can teach us patience and precision.Applying The Baking Soda Paste
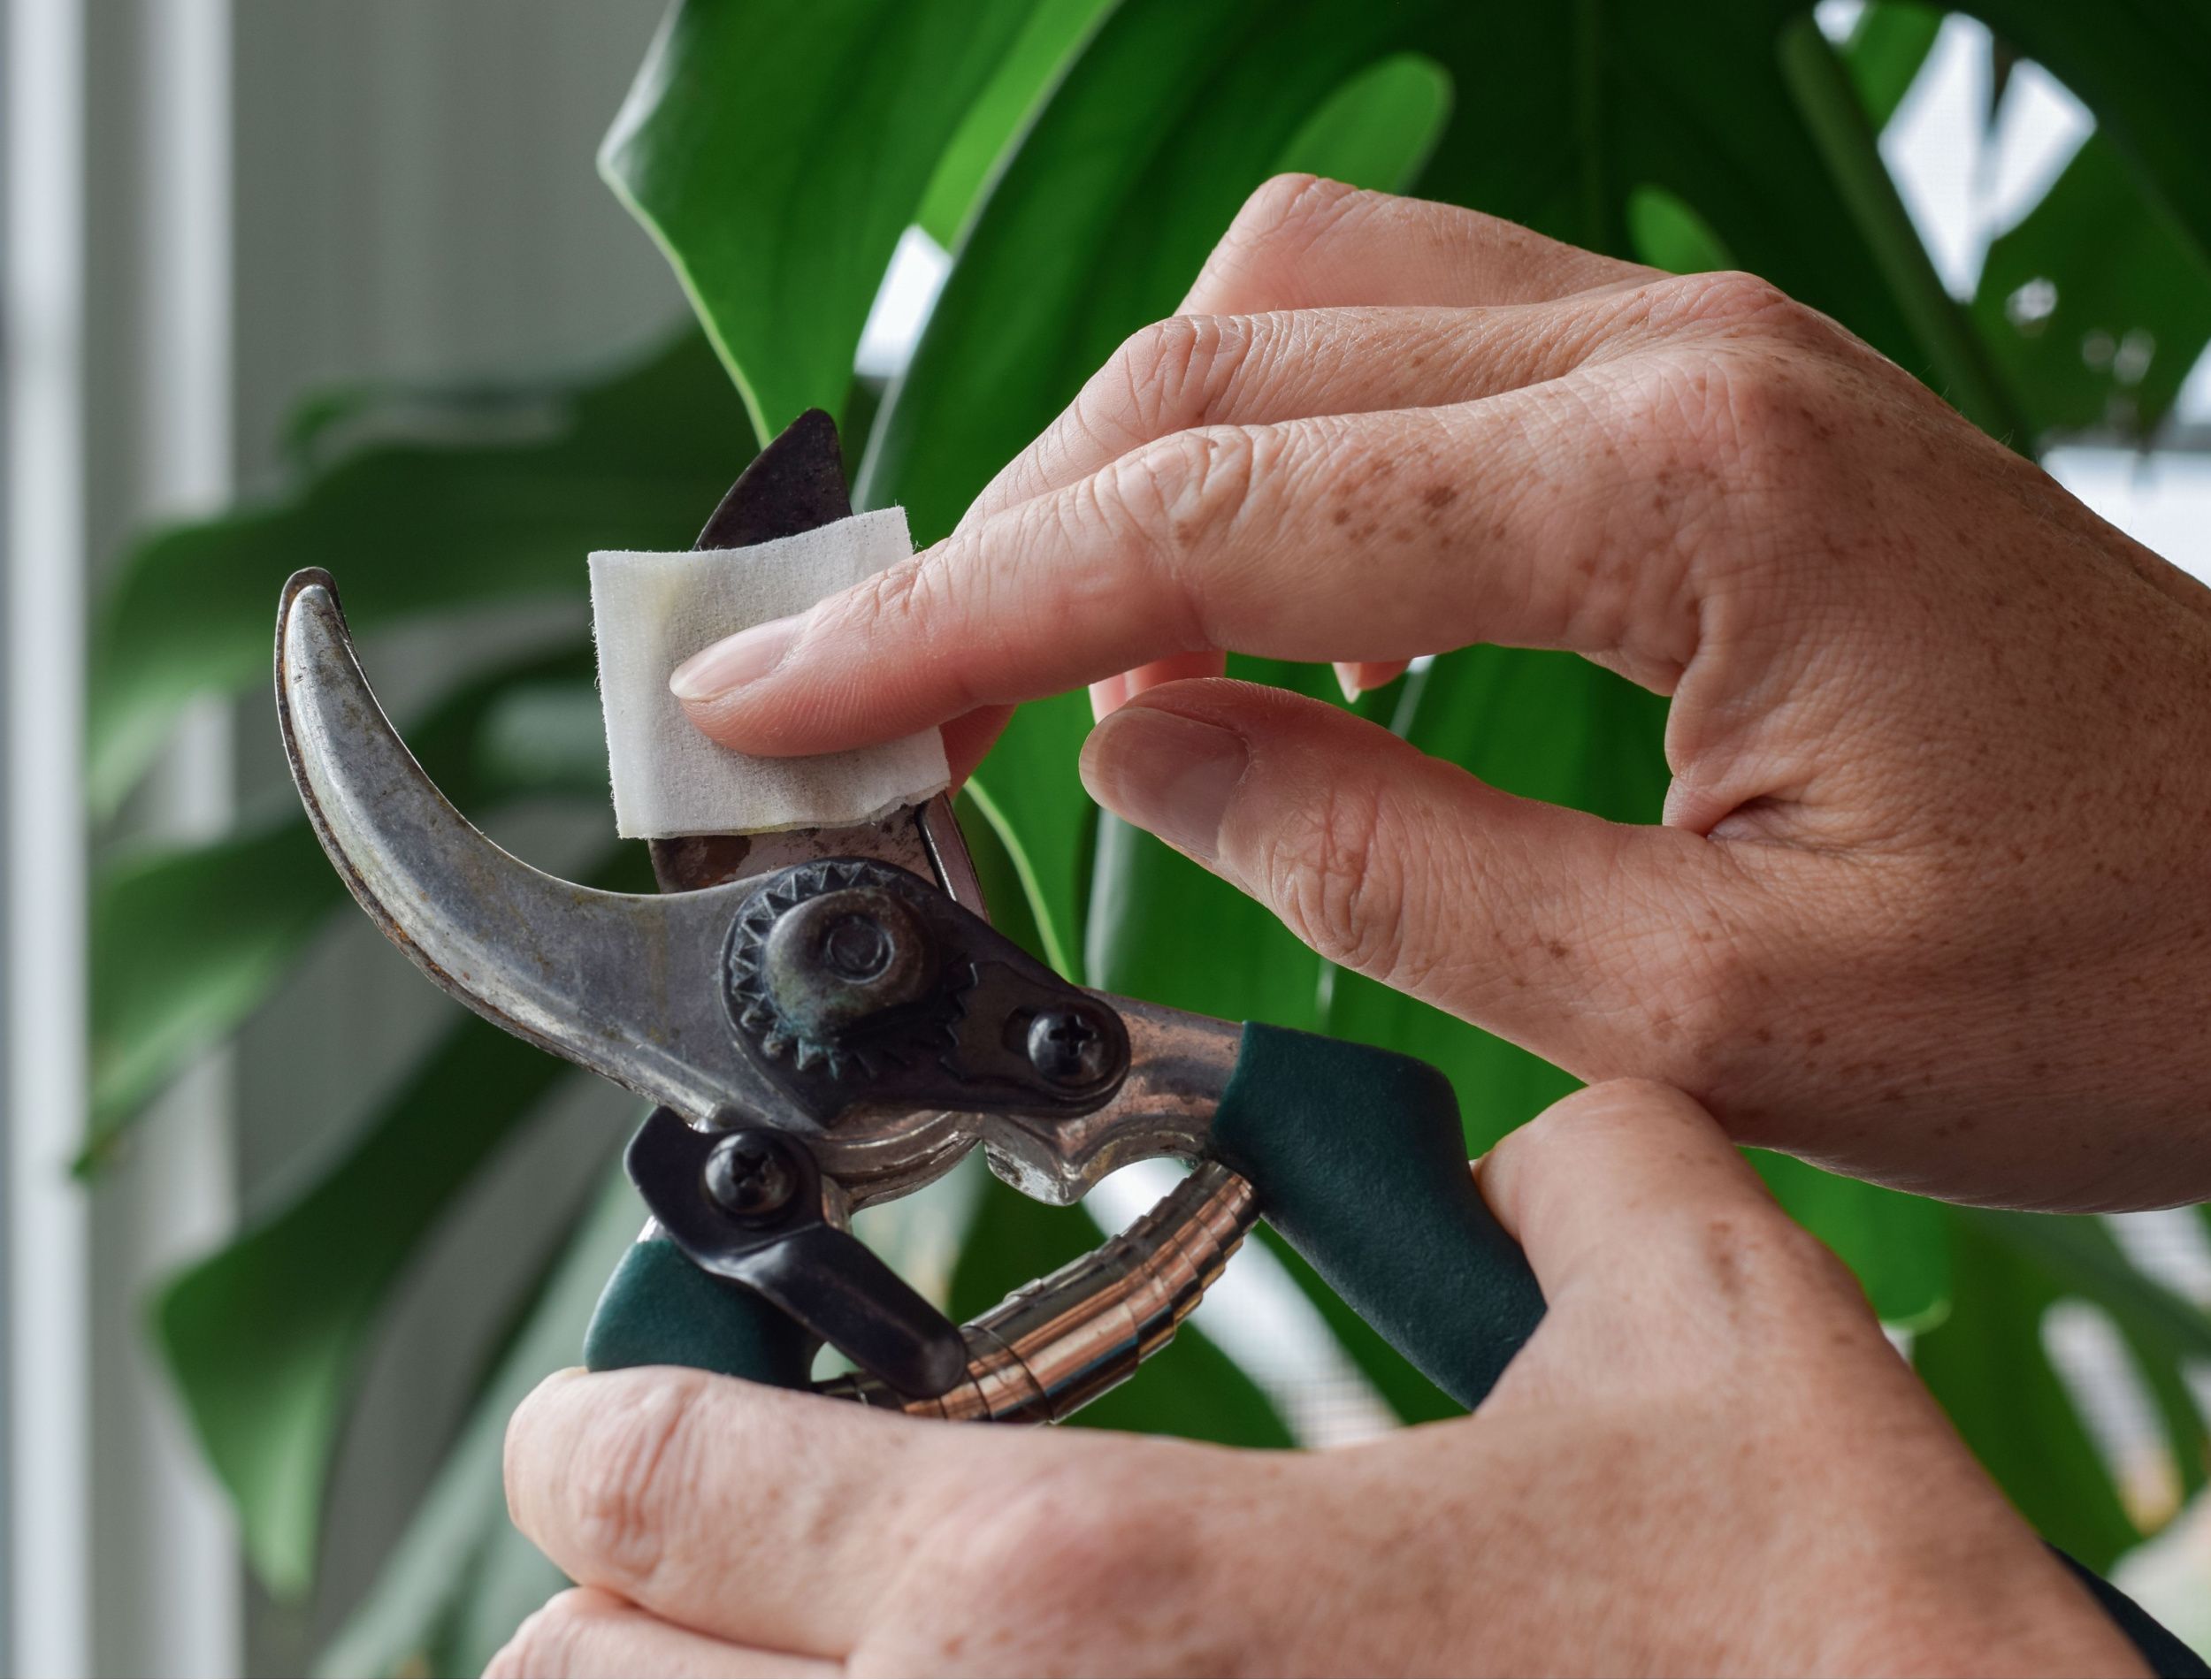
Spread a paste of baking soda and water onto rusty tools. Let it sit for 15 minutes. Scrub with a brush to remove rust, then rinse and dry the tools thoroughly.
Applying the baking soda paste is a crucial step in cleaning rusty tools. Baking soda, a natural abrasive, helps to lift rust from metal surfaces effectively. Creating a paste with water and baking soda is simple. This paste works to break down the rust, making it easier to remove. Follow these steps to ensure the paste application is thorough and effective.Coating Rusty Areas
Start by applying the paste directly to the rusty spots. Use a brush or cloth for this task. The paste should cover the rust completely. Make sure the paste is thick enough to stick to the metal. This allows the baking soda to interact with the rust. It helps break down the rust particles. Leave no area untreated for best results.Ensuring Even Coverage
Even coverage is key to effective rust removal. Spread the paste uniformly across the rusty surface. Check for areas where the paste is too thin. Add more paste as needed to cover these spots. Use a circular motion to spread the paste evenly. This ensures all parts of the rust are addressed. Proper coverage enhances the rust-removing power of baking soda.Scrubbing And Removing Rust
Baking soda offers a simple solution for cleaning rusty tools. Mix soda with water to create a paste. Apply to rust, scrub gently, and rinse. This method is effective and eco-friendly, restoring tools to their former shine without harsh chemicals.
Perfect for maintaining your workshop essentials.
Cleaning rusty tools can feel like a tedious chore, but with baking soda, scrubbing and removing rust becomes a straightforward process. Baking soda’s gentle abrasiveness and alkaline nature make it an effective solution for rust removal without damaging your tools. Here’s how you can scrub and remove rust effectively, ensuring your tools are spotless and ready for use.Using A Brush Or Sponge
To start, grab a brush or sponge—these are your allies in fighting rust. A brush with stiff bristles will help you tackle larger surfaces and get into grooves. A sponge is perfect for smaller tools or less stubborn spots. Dip your chosen tool into a paste made from baking soda and water. Apply it generously on the rusty areas. Think about how satisfying it will be when you see the rust lifting off with every stroke.Focusing On Tough Spots
Rust can be stubborn, especially in hard-to-reach areas. Zero in on those tough spots with extra attention. Use a toothbrush for precision cleaning. Apply more baking soda paste and scrub with determination. You might need to repeat this process a few times. Ever wondered why rust loves hiding in corners and grooves? It’s a challenge, but persistence is key. Remember, the goal is not just to remove rust but to restore your tools to their former glory. Seeing the shine return is rewarding. Have you noticed how a small effort can lead to big results? Your tools will thank you for it!Rinsing And Drying Tools
Once you’ve scrubbed away the rust with baking soda, rinsing and drying are crucial. Proper cleaning ensures your tools remain functional and rust-free. Follow these simple steps to rinse and dry your tools effectively.
Thorough Rinse Process
First, place your tools under running water. This washes away any remaining baking soda. Ensure every part of the tool is rinsed. Use warm water for better results. Check for any leftover rust or residue. If found, repeat the scrubbing process. A clean tool surface ensures better drying.
Proper Drying Techniques
After rinsing, dry your tools immediately. Use a clean cloth or towel. Wipe down each tool thoroughly. Pay attention to crevices and joints. Moisture left can cause new rust. For better results, air dry the tools in a warm area. Ensure they are completely dry before storing. This prevents moisture buildup and future rusting.
Preventing Future Rust
Rust on tools can be a persistent issue. But with proper care, you can keep your tools in top shape. Preventing rust is not just about cleaning. It’s also about smart maintenance and storage. Let’s dive into some easy tips.
Regular Maintenance Tips
Keep your tools dry after use. Moisture is rust’s best friend. Wipe them down with a clean cloth. Use a light coat of oil to protect metal surfaces. This creates a barrier against moisture. Check your tools regularly for signs of rust. Early detection means easier cleaning. Sharp tools are less prone to rust. Sharpen blades and edges when they become dull.
Storage Suggestions
Store tools in a dry place. A toolbox with ventilation works best. Avoid damp basements or garages. Use silica gel packs to absorb moisture. These are great for tool drawers. Consider using a dehumidifier in storage areas. This helps keep the air dry.
Hang tools on a pegboard. Hanging prevents tools from trapping moisture. Use tool wraps or cases for added protection. These keep dust and moisture at bay.
Credit: www.backyardboss.net
:max_bytes(150000):strip_icc()/homemade-rust-remover-recipes-1387936_FINAL-6c6543826627420ba5152b7ad0ea67c7.png)
Credit: www.thespruce.com
Frequently Asked Questions
What Is The Best Way To Clean Rusty Tools?
Use white vinegar to soak rusty tools for several hours. Scrub with a brush to remove rust. Dry thoroughly.
Will Baking Soda And Vinegar Remove Rust From Tools?
Yes, baking soda and vinegar can remove rust from tools. Apply the mixture, scrub, and rinse thoroughly. This method is cost-effective and eco-friendly, making it a popular choice for rust removal. Regular maintenance with this solution can keep your tools rust-free and in good condition.
How Long To Leave Baking Soda To Remove Rust?
Leave baking soda on rust for 15 to 20 minutes. Scrub gently with a brush and rinse. Repeat if necessary for stubborn rust.
What Should Not Be Cleaned With Baking Soda?
Avoid using baking soda on aluminum cookware, gold-plated items, and marble surfaces. It can cause scratches or discoloration. Always test a small area first.
Conclusion
Cleaning rusty tools with baking soda is simple and effective. This method saves time and money. Baking soda gently removes rust without harsh chemicals. Regular cleaning keeps your tools in good shape. Always dry them well to prevent future rust.
Proper care extends the life of your tools. Clean tools work better and last longer. Remember, a little effort goes a long way. Try this baking soda trick for your rusty tools today. Enjoy the satisfaction of restoring them to their former glory.
Your tools deserve the best care. Keep them clean and ready for use.

I’m Abby Lu, a passionate home cook who loves simplifying everyday meals. At PlugChef.com, I share product reviews and cooking guides to help you find the best tools for your kitchen.
Related posts:
 What Type of Cooking Utensils are Safe: Expert Picks
 What Innovations Could Blenders Make: Unleashing Future Tech
 Smart Strategies to Organize a Small Kitchen: Maximize Space
 How to Organize a Kitchen Cabinet: Expert Tips & Tricks
 How to Organize Kitchen Drawers: Expert Tips and Tricks
 How to Organize a Corner Kitchen Cupboard: Expert Tips

