
You’ve got a delicious ham ready to enjoy, but it’s cold and needs reheating. How do you warm it up without drying it out or losing that juicy flavor?
Reheating a ham in the oven is the best way to bring back its tenderness and taste. In this guide, you’ll discover simple steps to heat your ham perfectly every time. Keep reading to make sure your next meal is as tasty as the first bite.
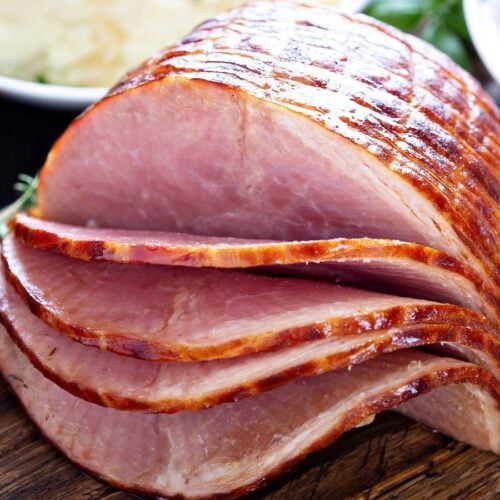
Choosing The Right Ham
Choosing the right ham is key to a delicious reheated meal. Different hams react differently to reheating. Knowing which type suits your oven method helps keep flavor and texture. This section explains the types of ham and important factors for reheating.
Types Of Ham Suitable For Reheating
Some hams are better for reheating than others. Cooked hams usually reheat well and stay moist. Fresh or raw hams need careful cooking to avoid dryness. Bone-in hams keep more flavor but take longer to heat. Boneless hams heat faster and slice easily after reheating.
- Cooked ham: Ready to eat, simply warm through.
- Smoked ham: Adds rich flavor, great for reheating.
- Fresh or raw ham: Requires full cooking before eating.
- Bone-in ham: Juicier but slower to heat.
- Boneless ham: Convenient and quick to reheat.
Pre-cooked Vs. Raw Ham Considerations
Pre-cooked hams save time and reheat safely at lower temperatures. Overheating can dry them out, so gentle warming is best. Raw hams need thorough cooking to ensure safety. They require higher oven heat and longer cooking times. Always check the ham’s packaging for specific instructions.
- Pre-cooked ham: Warm slowly, avoid drying.
- Raw ham: Cook fully to safe temperature.
- Use a meat thermometer to check doneness.
- Follow package directions for best results.
Preparing The Ham For Reheating
Remove any packaging and place the ham in a baking dish. Cover it with foil to keep moisture inside. Let the ham sit at room temperature for about 30 minutes before reheating.
Preparing the ham for reheating is a crucial step. It ensures the flavors remain intact and the meat stays juicy. Proper preparation also enhances the taste and aroma. Begin with careful attention to detail.Removing Packaging And Glaze
Start by removing all packaging from the ham. If there’s a plastic covering, discard it. Inspect the ham for any glaze residues. Wash off any sticky glaze under running water. This helps in achieving an even reheating process. Pat the ham dry with paper towels. A dry surface allows better flavor absorption.Scoring And Adding Flavor
Score the ham with a sharp knife. Make shallow cuts in a crisscross pattern. This scoring lets flavors penetrate deeper into the meat. Choose your favorite spices or herbs to enhance taste. Rub these seasonings into the scored lines. Common choices include mustard, honey, or brown sugar. Allow the ham to sit for a few minutes. This resting period helps the flavors infuse well.Setting Up The Oven
Setting up the oven correctly ensures your ham reheats evenly and stays juicy. The right temperature and tools make a big difference. Preparing the oven before placing the ham inside helps maintain flavor and texture.
Optimal Temperature Settings
Set the oven temperature between 275°F and 300°F (135°C to 150°C). This low heat gently warms the ham without drying it out. Avoid high temperatures that can toughen the meat. Slow heating keeps the ham moist and tender.
Using A Roasting Pan And Foil
Place the ham in a roasting pan to catch any drips. Cover the ham with aluminum foil to lock in moisture. Foil prevents the ham from drying during reheating. Remove the foil in the last 10 minutes for a slight caramelized finish.

Credit: farmhouseharvest.net
Step-by-step Reheating Process
Reheating a ham in the oven keeps it juicy and flavorful. The process requires attention to time and temperature. Following clear steps helps avoid drying out the meat. Use the right techniques to warm the ham evenly. This section breaks down the reheating process for best results.
Calculating Reheating Time
Check the weight of your ham before reheating. Use this simple guide to estimate the time needed:
| Ham Weight | Reheating Time (at 325°F / 165°C) |
|---|---|
| 1 to 2 pounds | 10 to 15 minutes |
| 3 to 4 pounds | 20 to 30 minutes |
| 5 to 7 pounds | 35 to 45 minutes |
Use a meat thermometer to check the internal temperature. The ham is ready when it reaches 140°F (60°C).
Covering And Uncovering The Ham
Cover the ham with foil to keep moisture inside. This prevents the ham from drying out. Remove the foil in the last 10 minutes to brown the surface. Watch closely to avoid burning the glaze or crust.
- Wrap loosely with aluminum foil for even heat.
- Keep the oven temperature steady at 325°F (165°C).
- Remove foil near the end for a crispy finish.
Adding Glaze For Extra Flavor
Adding glaze to your ham before reheating can transform it from ordinary to unforgettable. A glaze not only adds sweetness and tang but also creates a beautiful, caramelized crust that enhances the ham’s natural flavors. Think of it as the final touch that makes your dish stand out and invites everyone to dig in eagerly.
Have you ever noticed how a simple glaze can turn leftover ham into a festive centerpiece? It’s a quick way to boost flavor without much effort, and it’s incredibly satisfying to see that shiny, golden finish. Plus, experimenting with different glazes lets you tailor the taste to your mood or the occasion.
Popular Glaze Recipes
- Honey Mustard Glaze:Combine honey, Dijon mustard, and a splash of apple cider vinegar for a sweet and tangy punch.
- Brown Sugar and Pineapple:Mix brown sugar, crushed pineapple, and a bit of ground cloves for a tropical, caramelized crust.
- Maple and Bourbon:Use pure maple syrup with a dash of bourbon and a pinch of cinnamon to add warmth and depth.
- Orange Marmalade:Blend orange marmalade with soy sauce and minced garlic for a citrusy, umami-packed glaze.
- Spicy Apricot:Combine apricot preserves, hot sauce, and a little grated ginger for a sweet heat that wakes up your palate.
When To Apply The Glaze
Timing your glaze application is key to getting that perfect sticky layer without burning it. You should apply the glaze about 15-20 minutes before your ham finishes reheating. This allows the sugars to caramelize nicely without drying out the meat.
If you add the glaze too early, it can burn and develop a bitter taste. Too late, and the glaze won’t have enough time to set and develop flavor. Keep an eye on the ham in the oven, and brush the glaze on during the last part of cooking for best results.
Credit: www.centercutcook.com
Checking Doneness And Juiciness
Checking the doneness and juiciness of reheated ham ensures a tasty, safe meal. Overcooking dries out the meat. Undercooking leaves it cold or unsafe. Use simple tools and senses to know when it’s just right.
Using A Meat Thermometer
A meat thermometer shows the ham’s internal temperature. Insert it into the thickest part, avoiding the bone. The safe temperature for reheated ham is 140°F (60°C) for fully cooked ham. Keep the temperature steady for even heating.
This tool prevents guesswork. It helps avoid overcooked or underheated ham. Clean the thermometer before and after use. It keeps your food safe.
Signs Of Perfectly Reheated Ham
Look for these signs to check if ham is reheated well:
- Warm all the way through without cold spots
- Juices appear slightly moist but not running
- Meat feels tender, not tough or dry
- Surface has a slight glaze or light browning
- A pleasant aroma, not burnt or raw smell
Touch the ham gently. It should give a little but stay firm. Slice a small piece to check warmth and texture. These signs help enjoy ham at its best.
Serving And Storing Leftover Ham
After you’ve reheated your ham in the oven, how you serve and store the leftovers can make a big difference in taste and safety. Proper handling keeps your ham delicious for days and prevents food waste. Let’s dive into the best ways to enjoy and preserve your leftover ham.
Best Serving Tips
Serve your ham warm or cold, depending on your dish. Warm slices go perfectly with mashed potatoes or steamed veggies, while cold ham works well in sandwiches or salads.
Don’t forget to add a little moisture if reheating again. A splash of broth or a light glaze can keep the ham juicy and flavorful. Have you tried honey mustard or pineapple glaze? They add a surprising twist that brightens the flavor.
Cut the ham into even slices for consistent reheating and easy serving. Thinner slices heat quickly and are great for quick meals, while thicker pieces make a hearty main dish.
Safe Storage Practices
Store leftover ham in an airtight container or wrap it tightly with foil or plastic wrap. This keeps the ham fresh and prevents it from absorbing other fridge odors.
Place the ham in the refrigerator within two hours after reheating to avoid bacterial growth. Aim to consume the leftovers within 3 to 5 days for the best taste and safety.
If you want to keep ham longer, freeze it in portions. Use freezer-safe bags or containers, and label them with the date. When ready to eat, thaw in the fridge overnight to maintain texture and flavor.

Credit: kentuckylegend.com
Frequently Asked Questions
How Long To Reheat Ham In The Oven?
Reheat ham at 325°F (165°C) for 10-15 minutes per pound. Cover with foil to retain moisture. Check internal temperature reaches 140°F before serving.
Should I Cover Ham When Reheating In Oven?
Yes, covering ham with foil prevents drying out. It keeps the moisture in, ensuring a juicy, tender result when reheated.
Can I Reheat Ham Without Drying It Out?
To avoid dryness, reheat ham covered at low heat. Adding a bit of water or broth helps maintain moisture during reheating.
What Temperature Is Best To Reheat Ham?
Set the oven to 325°F (165°C) for even reheating. This temperature warms ham without cooking it further or drying it out.
Conclusion
Reheating ham in the oven keeps it juicy and tasty. Set the right temperature and watch the time closely. Cover the ham to avoid drying out. Check the meat’s warmth before serving. Enjoy a warm, delicious meal every time. Simple steps make reheating easy and quick.
Try this method for your next ham dish. Perfectly heated ham brings smiles to the table.

Hi, I’m Daniel Brooks—a food lover and kitchen gear enthusiast. I enjoy testing cookware, utensils, and gadgets to see what really works in everyday cooking. At PlugChef.com, I share honest reviews, comparisons, and simple guides to help you choose the best tools for a safer, smarter, and more enjoyable kitchen.
Related posts:
 What Type of Cooking Utensils are Safe: Expert Picks
 What Innovations Could Blenders Make: Unleashing Future Tech
 Smart Strategies to Organize a Small Kitchen: Maximize Space
 How to Organize a Kitchen Cabinet: Expert Tips & Tricks
 How to Organize Kitchen Drawers: Expert Tips and Tricks
 How to Organize a Corner Kitchen Cupboard: Expert Tips

