
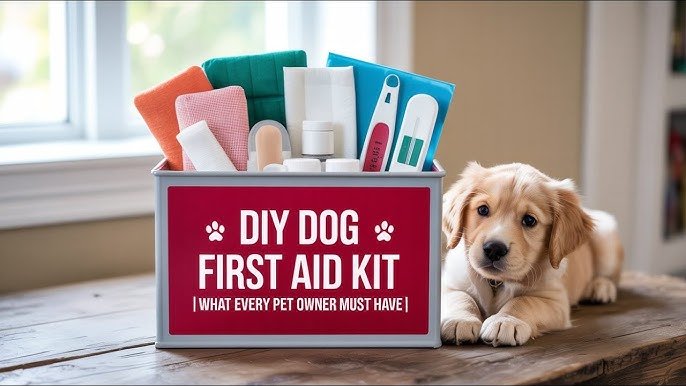
Accidents happen when you least expect them—whether your dog cuts a paw on a hiking trail, gets stung by a bee at the park, or shows signs of choking during a car ride. A custom DIY dog first aid kit lets you act fast to reduce pain, prevent infections, and avoid minor issues escalating into costly, life-threatening emergencies. Unlike generic pre-made kits, which often include human supplies toxic to dogs or miss items tailored to your pet’s unique breed, age, and lifestyle, a DIY kit is affordable, customizable, and built to match your dog’s specific needs. This guide covers every essential supply, emergency response protocol, storage tip, and maintenance hack you need to build a kit that keeps your furry friend safe at home and on the go.
Why a Custom DIY Kit Outperforms Pre-Made Options
Pre-made pet first aid kits are convenient, but they rarely meet the specific needs of individual dogs. Most include human-focused supplies like alcohol wipes, which are too harsh for sensitive canine skin, or over-the-counter pain relievers that are highly toxic to dogs even in small doses. They also often miss critical dog-specific items like styptic powder for nail cuts, paw balm for cracked pads, or breed-specific supplies for brachycephalic dogs prone to heatstroke.
Building your own kit lets you tailor every item to your dog’s routine: add extra cooling supplies for summer hikes, tick removal tools for forest adventures, or soft padding for senior dogs with thinning skin. It also cuts costs significantly—most DIY kits cost half the price of pre-made equivalents, and you can reuse durable supplies like tweezers and thermometers for years. Per the American Veterinary Medical Association’s official guidance, immediate, appropriate first aid can significantly reduce recovery time and prevent minor injuries from escalating into life-threatening emergencies, making a few hours of kit assembly a small investment for long-term peace of mind.
Core Wound Care & Medical Supplies
The foundation of any dog first aid kit is supplies to treat the most common minor injuries: cuts, scrapes, burns, and insect bites. Prioritize vet-approved, dog-safe items, and avoid human-focused products that could harm your pet.
Wound Cleaning & Dressing
- Sterile non-stick gauze pads in multiple sizes: Use to cover wounds without sticking to healing tissue. Keep small pads for facial cuts and larger 4×4 pads for body wounds.
- Hypoallergenic adhesive medical tape: Secure bandages without irritating sensitive skin. Avoid standard plastic tape, which can pull at fur when removed.
- Elastic bandages: Provide light compression for sprains or to hold gauze in place on limbs.
- Sterile saline solution: The safest option for flushing dirt and debris from wounds. Unlike hydrogen peroxide, saline does not damage healthy tissue or delay healing—a common mistake many owners make when cleaning cuts.
- Non-stick sterile dressings: Ideal for paw pad injuries, which are prone to rubbing against bandages and reopening.
Topical Medications & Pain Management
- Vet-approved antihistamines: Consult your veterinarian first to confirm the correct dosage for your dog’s weight, then add these to treat mild allergic reactions to insect bites or environmental allergens.
- Styptic powder: Stops bleeding quickly from torn nails or small superficial cuts. Apply a small amount directly to the injury and hold for 30 seconds.
- Pet-safe burn cream: Soothes minor paw pad burns from hot pavement or hot surfaces.
- Eye wash solution: Rinses dirt, dust, or chemicals from your dog’s eyes without causing irritation. Critical safety note: Never use human pain relievers like ibuprofen, acetaminophen, or aspirin without explicit veterinary approval. These are highly toxic to dogs, even in small doses, and can cause kidney failure or death.
Essential Tools & Instruments
- Digital thermometer: A dog’s normal body temperature ranges from 101–102.5°F. A fever above 103°F requires immediate vet care. Lubricate the tip with petroleum jelly before inserting it 1 inch into the rectum for an accurate reading.
- Rounded-tip scissors: Cut bandages and gauze without risking accidental cuts to your dog’s skin or your own.
- Fine-point tweezers: Remove splinters, ticks, or debris from wounds safely.
- Disposable nitrile gloves: Prevent bacterial contamination when treating open wounds.
- Instant cold packs: Reduce swelling from sprains, strains, or insect stings. Activate by squeezing the pack when needed.
- Small LED flashlight: Check ears, wounds, and mouths in low-light conditions.
- Emergency thermal blanket: Prevent hypothermia if your dog goes into shock after a serious injury.
Dog-Specific Additions for Your Pet’s Unique Needs
Generic first aid supplies aren’t enough for every dog. Customize your kit to match your pet’s breed, age, health status, and daily routine to ensure you’re prepared for their most likely risks.
Breed & Age-Specific Items
- Brachycephalic breeds (French bulldogs, pugs, Boston terriers): Add extra cooling supplies like cooling bandanas, instant cold packs, and a portable water bowl, as these dogs are at high risk for heatstroke even in mild weather.
- Senior dogs: Include extra soft padding for bandages to avoid irritating thin, fragile skin, plus vet-approved joint support supplements for sprains or strains. Add extra supplies for common age-related issues like dry skin or ear infections.
- Puppies: Pack smaller, adjustable bandages for their tiny limbs, plus vet-approved teething pain relief gel for mouth injuries from chewing on hard objects.
Lifestyle-Based Additions
- Hiking and outdoor dogs: Add a tick removal tool (designed to grasp ticks close to the skin without squeezing their body, which reduces the risk of disease transmission), snake bite kit if you live in snake-prone areas, paw balm for cracked pads, and dog booties to protect against hot pavement, sharp rocks, or ice.
- Dogs with chronic conditions: Include extra vet-prescribed medications for issues like diabetes, epilepsy, or heart disease, plus relevant supplies like glucose monitoring strips or seizure rescue meds (if prescribed by your vet).
What Not to Include
Avoid these common, dangerous additions:
- Human pain relievers (ibuprofen, acetaminophen, aspirin)
- Alcohol wipes (too harsh for canine skin)
- Human cough and cold medicines (many contain xylitol, a sweetener that is highly toxic to dogs)
- Cotton balls (they stick to open wounds and are difficult to remove)
- Expired medications or sterile supplies (they lose effectiveness and can cause infection)
Emergency Response Protocols for Common Canine Incidents
Having supplies is only half the battle—knowing how to use them correctly during an emergency can save your dog’s life. Practice these protocols before a crisis hits so you can act calmly under pressure.
Severe Bleeding
- Apply firm, direct pressure with sterile gauze for 5–10 minutes without lifting the gauze to check the wound, as this can disrupt clotting.
- If blood soaks through the gauze, add more layers on top—do not remove the original gauze.
- Elevate the injured area above your dog’s heart if possible to slow blood flow.
- Once bleeding slows, apply a loose pressure bandage and transport your dog to the vet immediately. Never use a tourniquet unless explicitly directed by a veterinary professional, as this can cause permanent tissue damage.
Choking
- Open your dog’s mouth and look for visible obstructions. If you can see the object, carefully remove it with tweezers—never push it further down the throat.
- If the object is not visible, place your dog on their side and give 5 sharp thrusts to the upper abdomen (just below the rib cage) for small dogs, or the chest for large dogs, to dislodge the blockage.
- If your dog becomes unconscious, begin CPR and transport them to the vet immediately.
Heatstroke
- Move your dog to a cool, shaded area immediately.
- Apply cool (not cold) water to their paw pads, groin, and neck to lower their core temperature. Never submerge their head or use ice water, as this can cause shock.
- Offer small sips of cool water, but do not force them to drink, as this can lead to aspiration.
- Transport to the vet immediately, even if your dog seems to recover—organ damage from heatstroke can occur hours after symptoms subside.
Allergic Reactions
- Administer vet-approved antihistamine at the correct dosage for your dog’s weight if you have it in your kit.
- Remove the suspected allergen: for bee stings, scrape the stinger away with a credit card or tweezers (do not squeeze it, as this releases more venom).
- Monitor for signs of anaphylaxis: swelling of the face or throat, difficulty breathing, vomiting, or collapse. If these occur, transport to the vet immediately, as anaphylaxis can be fatal within minutes.
Poisoning
- Remove your dog from the source of the poison immediately.
- Do not induce vomiting unless explicitly directed by a vet or the ASPCA Animal Poison Control Center, as this can cause additional harm for certain toxins like corrosives or petroleum products.
- Call poison control or your local emergency vet immediately, and follow their instructions exactly. Bring the packaging of the toxic substance with you to the vet if possible.
Storing & Transporting Your Kit for Every Scenario
A first aid kit is only useful if you can access it quickly during an emergency. Proper storage ensures supplies stay intact and are easy to find when you need them most.
At-Home Storage
Keep your kit in a central, easily accessible location—like a low kitchen shelf or entryway closet—so every family member can reach it in an emergency. Avoid hot, humid areas like garages or attics, which can degrade medications and sterile supplies. Label the container clearly with a red cross and "Dog First Aid" so it’s easy to identify during high-stress moments. Keep tiny items like styptic powder, tick removal tools, and sterile gauze rolls tidy with compartmentalized storage to avoid fumbling through a messy pile.
Travel & Outdoor Kits
For hikes, road trips, or dog park visits, pack a smaller portable version of your kit in your car or hiking bag. Use a spill-proof storage container to protect supplies from temperature swings and accidental spills. Add extra water, treats, and a printed copy of your vet’s contact info for longer trips. For multi-day hiking trips, add extra paw balm, cooling supplies, and a tick remover to address common outdoor hazards.
Organizing Supplies Efficiently
Separate supplies into categories: wound care, medications, and tools, so you can find what you need in seconds. Keep frequently used items like antiseptic wipes and tweezers in the top compartment for quick access. If you keep extra bulk supplies like roll gauze, cold packs, and disposable gloves on hand, store them in a bulk supply storage container to keep them dry and protected from pests.
Training & Prep to Maximize Your Kit’s Usefulness
Even the best-stocked kit is useless if you don’t know how to use it. Spending 30 minutes learning basic first aid skills will help you stay calm and act effectively during an emergency.
Basic Skills to Master
Practice these core skills before a crisis occurs:
- How to apply a pressure bandage to stop heavy bleeding
- How to safely administer oral medications
- How to check your dog’s vital signs (temperature, heart rate, gum color)
- How to safely move an injured dog without worsening spinal injuries A common mistake owners make is panicking and moving a dog too quickly after a fall or car accident, which can cause permanent nerve damage. Always stabilize the head and neck first if you suspect a spinal injury.
Hands-On Training
For structured, hands-on learning, consider a certified pet first aid course through a local animal shelter, vet clinic, or organization like the American Red Cross. These courses teach CPR, wound care, and emergency response in a controlled setting, and many offer certification valid for two years.
Desensitizing Your Dog to Handling
Regularly handle your dog’s paws, ears, and mouth during calm, positive moments so they are comfortable with you examining them during an emergency. Reward them with treats for staying still, so they don’t panic when you’re treating a wound or administering medication.
Kit Maintenance & Restocking Schedule
A neglected first aid kit is useless when you need it most. Follow this simple schedule to keep your supplies effective and ready for use:
Quarterly Inspection Checklist
Every 3 months, go through your kit and:
- Check expiry dates on all medications, ointments, and sterile supplies. Discard anything expired, and note replacements needed.
- Restock any items used immediately after an emergency, so your kit is always fully stocked.
- Check that tools like tweezers and scissors are clean and in good working order. Keep your cutting tools sharp with a proper blade angle to avoid snagging or injuring your dog.
- Update emergency contact info if your vet’s number, address, or hours have changed.
Long-Term Storage Tips
Store medications in a cool, dark place away from direct sunlight, which can degrade their effectiveness over time. Schedule your kit inspections alongside other routine home checks like smoke detector tests to make sure you never miss a restock or expiry date.
Aligning With Your Dog’s Changing Needs
As your dog ages or their health status changes, update your kit accordingly. For example, if your dog is diagnosed with diabetes, add extra glucose monitoring supplies and vet-prescribed glucose gel. If they develop seasonal allergies, add extra antihistamines approved by your vet.
Frequently Asked Questions
What essential items should be in a DIY dog first aid kit?
A well-stocked DIY dog first aid kit should include wound care supplies (sterile gauze, hypoallergenic tape, saline solution), vet-approved medications (antihistamines, styptic powder), tools (rounded-tip scissors, fine-point tweezers, digital thermometer), and emergency contact information for your vet and local poison control. Always customize the kit to your dog’s breed, age, and health needs, and avoid human medications like ibuprofen which are toxic to dogs.
How do I safely clean my dog's wounds at home?
First, put on disposable gloves to avoid introducing bacteria. Flush the wound gently with sterile saline solution to remove dirt and debris—avoid using hydrogen peroxide, rubbing alcohol, or human antibiotic ointments, as these can damage healthy tissue or cause irritation if licked. Apply a sterile non-stick dressing and a loose bandage, then monitor for signs of infection (redness, swelling, pus) over the next 24–48 hours. If the wound is deep, bleeding heavily, or shows signs of infection, see your vet immediately.
When should I use my DIY dog first aid kit vs. going to the vet?
Use your kit for minor, stable injuries like small cuts, superficial scrapes, insect bites, or torn nails that stop bleeding quickly with styptic powder. Seek immediate veterinary care for any of the following: heavy bleeding that doesn’t stop after 10 minutes of pressure, signs of shock (pale gums, lethargy, rapid breathing), suspected broken bones, poisoning, choking that doesn’t resolve quickly, or any injury where your dog is in severe pain.
Can I make my dog's first aid kit with household items?
You can start with basic household items like clean cloths for pressure, rounded-tip scissors, and a flashlight, but you will need to add pet-specific supplies like styptic powder, sterile saline, and vet-approved medications. Avoid using household items like hydrogen peroxide, alcohol, or human pain relievers, as these can harm your dog. Always check with your vet before using any household product on your pet.
How often should I update my DIY dog first aid kit?
Inspect your kit at least once every 3 months to check for expired medications, used or damaged supplies, and to update emergency contact information. Restock any items you use immediately after an emergency, so your kit is always fully stocked and ready to use.
Conclusion
A DIY dog first aid kit is one of the simplest, most impactful investments you can make in your pet’s safety. By tailoring supplies to your dog’s unique needs, learning basic emergency response skills, and maintaining your kit regularly, you can handle minor injuries calmly and provide critical care in the minutes before you can reach a vet. Start building your custom kit this weekend, and schedule a quick check-in with your vet to confirm any pet-specific medications or supplements are safe for your dog’s unique health status. A small amount of prep now can make all the difference when your furry friend needs you most.

I’m Abby Lu, a passionate home cook who loves simplifying everyday meals. At PlugChef.com, I share product reviews and cooking guides to help you find the best tools for your kitchen.
Related posts:
 How Does a Certified Organic Kitchen Clean Dishware Efficiently?
 Preventing Sticking And Grease Buildup: Expert Tips & Tricks
How to Detach Air Fryer Basket: Easy Step-by-Step Guide
Preventing Sticking And Grease Buildup: Expert Tips & Tricks
How to Detach Air Fryer Basket: Easy Step-by-Step Guide
 Slate Kitchen Appliances With White Cabinets: Style Upgrade
 Small Electrical Appliances: Maximize Your Home Efficiency
 Blue Kitchen Cabinets With Stainless Steel Appliances: Modern Elegance

