
When you’re out on the trail, a small accident can quickly turn into a big problem. That’s why having the right first aid kit is not just smart—it’s essential.
But buying one off the shelf might leave you with stuff you don’t need or miss items you do. What if you could build your own backpacking first aid kit, perfectly tailored to your adventure? In this guide, you’ll discover exactly what to include, how to pack it light, and why each item matters.
By the end, you’ll feel confident knowing you’re prepared for whatever the trail throws your way. Ready to create your ultimate DIY first aid kit? Let’s dive in.
Choosing The Right Container
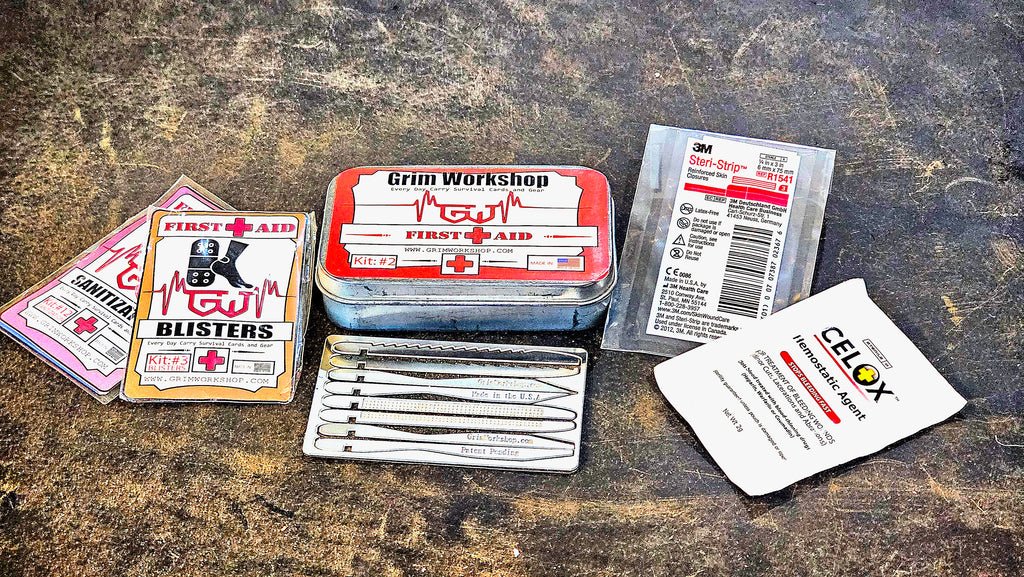
A sturdy, lightweight container keeps your first aid supplies safe and dry on the trail. Choose one that fits your gear and is easy to carry. Small compartments help keep items organized and accessible during emergencies.
Choosing the Right Container Selecting the right container for your DIY backpacking first aid kit is crucial for ensuring your supplies are safe and accessible during your adventures. While it might seem like a simple decision, the container you choose can significantly impact your backpacking experience. It’s not just about fitting everything in; it’s about finding the perfect balance between functionality and convenience.Size And Weight Considerations
When choosing a container, think about the size and weight. Backpacking demands lightweight gear, and your first aid kit is no exception. A bulky container can weigh you down and take up valuable space. Consider a compact container that can snugly fit all essentials without excess room. You want something that can easily slide into your backpack without being a burden. Imagine you’re out on a trail, tired and needing a quick bandage. A lightweight, easily accessible container can make all the difference.Waterproof And Durable Options
Your adventures might lead you through rain-soaked forests or across rivers. A waterproof container ensures your supplies remain dry and usable. Look for options made from materials like plastic or treated fabric that resist water penetration. Durability is equally important. Your container should withstand bumps and falls without cracking. Think of it as your first line of defense against the elements. Have you ever had a zipper break on a pouch, spilling contents everywhere? Opt for sturdy closures like strong zippers or snap locks to avoid such mishaps. Choosing the right container is more than just storage—it’s about safeguarding your health and peace of mind.
Credit: www.youtube.com
Basic Medical Supplies
Basic medical supplies are essential for any backpacking first aid kit. They help manage common injuries and prevent infections on the trail. Packing these items ensures quick response to cuts, scrapes, and aches.
A well-stocked kit supports safety and comfort during outdoor adventures. Focus on compact, lightweight supplies that cover various situations.
Bandages And Dressings
Bandages protect wounds from dirt and bacteria. Include different sizes for small cuts and larger wounds.
- Adhesive bandages (various sizes)
- Sterile gauze pads
- Elastic bandage wrap
- Medical tape
- Butterfly closures for small cuts
Dressings help stop bleeding and keep wounds clean. Change them regularly to avoid infection.
Antiseptics And Ointments
Antiseptics kill germs on wounds and prevent infection. Use liquids, wipes, or sprays for ease.
- Antiseptic wipes
- Hydrogen peroxide or iodine solution
- Antibacterial ointment
- Burn cream
Apply ointments after cleaning wounds. This speeds healing and reduces pain.
Pain Relievers And Medications
Pain relievers ease headaches, muscle aches, and minor injuries. Carry a small supply of common medicines.
- Ibuprofen or acetaminophen
- Antihistamines for allergies
- Anti-diarrheal tablets
- Motion sickness tablets
Store medications in a waterproof container. Check expiration dates before each trip.
Tools And Equipment
Choosing the right tools and equipment for a backpacking first aid kit is vital. These items help handle common injuries and small emergencies on the trail. Compact, lightweight, and multi-purpose tools save space and weight in your pack. Proper equipment makes treatment easier and faster.
Tweezers And Scissors
Tweezers remove splinters, ticks, and debris from wounds. Choose stainless steel tweezers with a fine tip for precision. Scissors cut bandages, tape, and clothing in emergencies. Opt for small, sharp scissors with blunt tips for safety. Both tools must be durable and rust-resistant.
Thermometer And Safety Pins
A thermometer helps check for fever, a sign of infection or illness. Digital thermometers are quick and easy to read. Safety pins secure bandages, slings, or torn gear. Pick various sizes to handle different tasks. These pins are lightweight and useful in many situations.
Emergency Blanket And Gloves
An emergency blanket keeps you warm in cold or wet weather. It is compact and reflects body heat to prevent hypothermia. Gloves protect your hands from germs and dirt during treatment. Disposable gloves are best to avoid infection. Carry at least one pair in your kit.
Personalized Additions
Personalized additions make your backpacking first aid kit truly yours. They fit your health needs and the places you visit. Carrying the right items helps avoid big problems on the trail. Personal touches mean you stay safe and ready for anything.
Allergy And Prescription Medications
Carry any allergy medicine you need, like antihistamines or epinephrine. Keep your prescription medications in original containers. Pack a small list with your doctor’s name and dosage instructions. This helps in emergencies and when asking for help.
Include extra doses for longer trips or delays. Store medicines in a waterproof bag to keep them dry. Check expiration dates before you go. Your body needs familiar medicines to stay strong.
Insect Repellent And Sunscreen
Insect bites cause itching and infections. Choose a repellent with DEET or natural oils that suit you. Carry sunscreen with at least SPF 30 for skin protection. Apply often, especially during long hikes.
Pick travel-sized bottles to save space and weight. A small mirror or applicator helps reach hard spots. Protect your skin and avoid pain from sunburn and bugs. These simple items make your journey more comfortable.
Packing Tips For Accessibility
Making your first aid kit easy to access can be a lifesaver on the trail. When you’re dealing with a cut or sudden allergy, fumbling through a disorganized bag wastes precious time. Packing with accessibility in mind means arranging your supplies so you can grab what you need quickly, even in stressful situations.
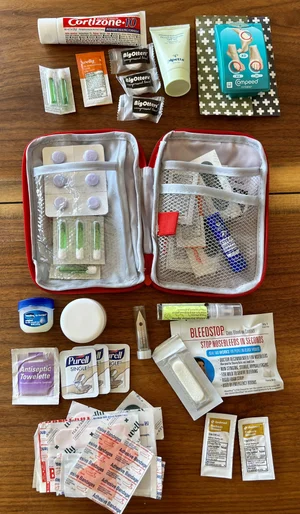
Organizing Supplies By Use
Group your first aid items based on how you’ll use them. Keep wound care materials like bandages, antiseptic wipes, and gauze together. Place pain relievers, allergy meds, and any personal prescriptions in another section.
This separation helps you find what you need fast without digging through everything. Think about your past hikes—did you ever struggle to find a bandage quickly? Organizing by use prevents that frustration.
- Use small pouches or ziplock bags to separate categories.
- Keep frequently used items near the top of your kit.
- Reserve a specific spot for emergency items like tweezers or a CPR mask.
Labeling And Storage Solutions
Labels can be a game-changer, especially if you’re in a hurry or helping someone else. Write clear, simple labels on each pouch or container. You can use waterproof markers or printed stickers to avoid smudging.
Consider transparent bags or containers so you can see the contents at a glance. Storing your kit in a compact, sturdy case protects supplies from damage and keeps everything together.
- Color-code labels for quick recognition—red for emergencies, blue for medications, etc.
- Add a mini inventory list inside the kit to track what’s inside.
- Choose lightweight, water-resistant containers to keep gear dry.
Have you ever opened your first aid kit only to find it messy or missing essentials? Taking a few extra minutes to organize and label can save you from that stress and keep you prepared for any situation on your backpacking adventure.

Credit: www.amazon.com
Maintaining Your Kit
Keeping your backpacking first aid kit ready means more than just packing it once. Regular maintenance ensures that every item inside works when you need it the most. You’ll avoid unpleasant surprises like expired medications or missing essentials during your adventure.
Regular Checks And Replacements
Set a schedule to inspect your kit at least every three months. Check expiration dates on medicines and ointments—expired items can lose effectiveness or even become harmful. Make it a habit to open the kit and count items to spot anything missing or damaged.
Think about how you use your kit on each trip. Did you run out of bandages or antiseptic wipes last time? Replace those immediately so your kit is always complete. Remember, even packaging can fail, so look for torn wrappers or crushed containers.
Adapting To Trip Duration And Location
Not all trips are the same. A weekend hike requires fewer supplies than a two-week trek through remote areas. Adjust your kit by adding extra supplies like blister care products or allergy medication based on where you’re going and how long you’ll be out.
Consider the environment too. If you’re heading to a humid jungle, include insect repellent and antifungal cream. For cold, snowy areas, add items like heat packs or lip balm with SPF. Ask yourself: Does my kit match the specific risks of my next destination?
Essential First Aid Skills
Knowing essential first aid skills can make a huge difference when you’re out on a backpacking trip. You might have the best DIY first aid kit, but without the right skills, it won’t help much. Learning how to handle injuries properly can keep you safe and even save lives.
Basic Wound Care
Start by cleaning wounds immediately with clean water to prevent infection. Use sterile gauze or cloth from your kit to gently pat the area dry. Apply an antibiotic ointment and cover the wound with a bandage to protect it from dirt.
Remember, changing the dressing regularly helps wounds heal faster and reduces the risk of infection. If you notice redness, swelling, or pus, it’s a sign you might need extra care. Have you ever ignored a small cut only to have it worsen later?
Handling Common Injuries
Sprains and strains are common when hiking. Rest the injured area, apply ice from your kit, and elevate it to reduce swelling. Use an elastic bandage to provide support but avoid wrapping it too tightly.
For insect bites or stings, clean the area and apply a cold compress to ease swelling. Antihistamines in your kit can help with allergic reactions. Know how to spot signs of severe allergies like difficulty breathing or swelling of the face—these require urgent attention.
When To Seek Professional Help
Some situations require more than your DIY skills. If bleeding doesn’t stop after applying pressure for 10 minutes, it’s time to get help. Deep wounds, broken bones, and severe burns also need professional treatment.
Pay attention to symptoms like dizziness, confusion, or chest pain—they can indicate serious problems. Don’t hesitate to call for rescue or visit a medical facility if your gut tells you something’s wrong. How confident are you in deciding when to ask for help?
Credit: www.soivethoughtalotaboutthis.com
Frequently Asked Questions
What Are Essential Items In A Backpacking First Aid Kit?
Essential items include bandages, antiseptic wipes, pain relievers, tweezers, and blister treatment. These basics handle common injuries and infections during backpacking.
How Do I Customize A Diy First Aid Kit For Backpacking?
Customize based on your trip length, destination, and personal health needs. Include allergy meds, insect repellent, and any prescription drugs you require.
How Much Space Should A Backpacking First Aid Kit Occupy?
A compact kit fits in a small pouch or side pocket. Aim for lightweight, portable, but comprehensive supplies to save space and weight.
Can I Use Household Items In A Backpacking First Aid Kit?
Yes, items like tape, scissors, and painkillers can be household-sourced. Ensure they are clean and safe for outdoor use.
Conclusion
A DIY backpacking first aid kit keeps you ready for small injuries. Carrying essential items saves time and worry on the trail. You can customize the kit to fit your trip needs. Simple supplies can handle cuts, scrapes, and minor pains.
Pack smart, check your kit often, and stay safe outdoors. Being prepared helps you enjoy your adventure with peace of mind. A well-made first aid kit is a small step that makes a big difference. Stay healthy, stay ready, and keep exploring confidently.

I’m Abby Lu, a passionate home cook who loves simplifying everyday meals. At PlugChef.com, I share product reviews and cooking guides to help you find the best tools for your kitchen.
Related posts:
 What Type of Cooking Utensils are Safe: Expert Picks
 What Innovations Could Blenders Make: Unleashing Future Tech
 Smart Strategies to Organize a Small Kitchen: Maximize Space
 How to Organize a Kitchen Cabinet: Expert Tips & Tricks
 How to Organize Kitchen Drawers: Expert Tips and Tricks
 How to Organize a Corner Kitchen Cupboard: Expert Tips

