
You’ve invested in a self-healing cutting mat, a trusty tool that makes your crafting and sewing projects smoother and more enjoyable. But, over time, you might notice it’s not performing like it used to.
Dust, fabric fibers, and adhesive residues can accumulate, affecting its self-healing properties. If you’ve been wondering how to restore your cutting mat to its former glory, you’re in the right place. You’ll discover simple yet effective techniques to keep your mat clean and in perfect shape.
Imagine slicing through fabric effortlessly, every cut precise and smooth, just like when you first bought it. Stick around to learn how to extend the life of your cutting mat and enhance your crafting experience. Your projects deserve the best tools, and with these tips, you’ll ensure your mat stays as reliable as ever.

Credit: www.bluesusanmakes.com
Essential Tools And Materials
Cleaning a self-healing cutting mat is crucial for its longevity. To achieve this, you need the right tools and materials. Using the correct items ensures that the mat retains its self-healing properties. Below are the essential tools and materials you will need.
1.Soft Bristle BrushA soft bristle brush is gentle on the mat surface. It helps remove debris without causing scratches. Use it to clean between the mat’s grooves.
2.Mild Dish SoapMild dish soap cleans without damaging the mat. It removes oils and dirt efficiently. Avoid using harsh chemicals that can harm the mat.
3.Lukewarm WaterLukewarm water helps dissolve soap and dirt. It is gentle and effective. Ensure the water is not hot to prevent warping.
4.Soft Cloth or SpongeA soft cloth or sponge is essential for wiping. It absorbs water without scratching. Use it to gently scrub the mat.
5.Lint RollerA lint roller picks up loose fibers and lint. Roll it over the mat to collect debris. It is quick and effective for surface cleaning.
6.Old ToothbrushAn old toothbrush reaches tight spaces. Use it to clean stubborn areas. Its small size makes it very handy.
7.Paper TowelsPaper towels help in drying the mat. They absorb excess moisture. Pat the mat dry to prevent watermarks.

Credit: m.youtube.com
Preparing The Work Area
Clear the table. Remove all items from the work area. This prevents damage and ensures effective cleaning of your self-healing cutting mat.
Cleaning your self-healing cutting mat is essential for maintaining its longevity and ensuring your craft projects stay precise. Before you dive into the cleaning process, it’s crucial to set up your work area properly. A well-prepared space not only makes the task easier but also helps prevent any accidental damage to your mat or other surfaces. Here’s how you can get your work area ready for the job.Choosing The Right Location
Picking the right spot is the first step. You want a location that is spacious and well-lit. This allows you to see all the nooks and crannies of your cutting mat. Consider using your kitchen table or a large desk. These surfaces are typically flat and sturdy, providing a stable base for cleaning. Make sure you have enough room to maneuver around your mat comfortably. Avoid areas prone to dirt or clutter. You don’t want to add more grime to the mat you’re trying to clean.Gathering Necessary Supplies
Having all your supplies at hand streamlines the process and saves time. You’ll need a few basic items: a soft brush, mild detergent, a sponge, and a towel. A soft brush helps remove any stubborn debris lodged in the mat without scratching it. A mild detergent mixed with warm water works wonders for cleaning. Remember to use just enough to avoid over-soaking the mat. A sponge is great for applying the solution evenly, and a towel will help with drying. Keep a small bucket nearby to rinse your sponge as needed. Do you have everything you need? Organizing your supplies before you start makes the process smoother and more efficient. By thoughtfully preparing your work area, you set the stage for a successful cleaning session. It’s amazing how much easier the task becomes when your space is ready and supplies are within arm’s reach. Have you ever noticed how a well-prepared workspace can make even the most mundane tasks more enjoyable?Basic Cleaning Steps
Keeping your self-healing cutting mat clean helps extend its lifespan. Regular cleaning ensures smooth cutting and prevents damage. Follow these basic cleaning steps to maintain your mat.
Removing Loose Debris
Start by gently shaking the mat to remove loose debris. This includes dust and small paper scraps. Use your hand or a soft brush to sweep away dirt. Avoid using anything sharp that might scratch the surface.
Wiping With A Damp Cloth
Next, take a soft, damp cloth. Wipe the entire surface of the mat. Focus on areas with visible stains or ink marks. Ensure the cloth is not too wet to prevent soaking the mat.

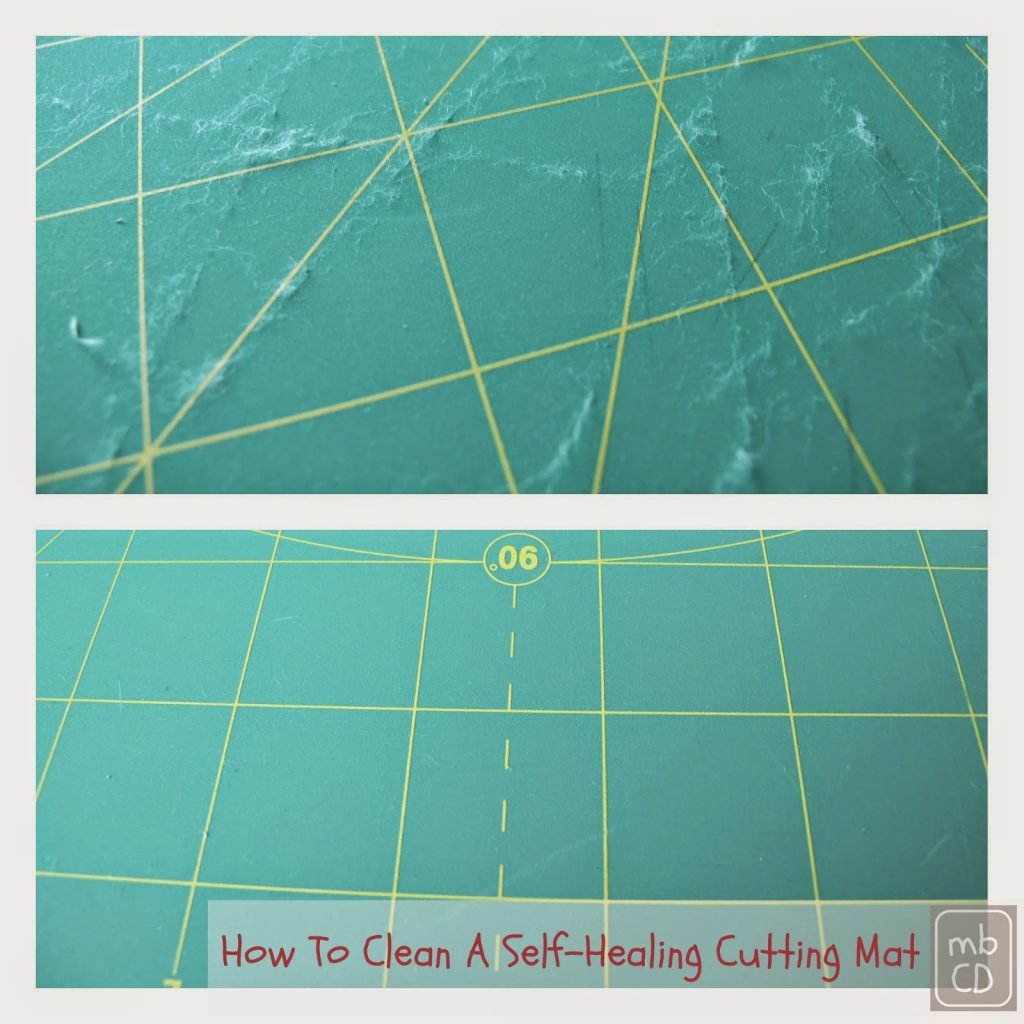
Credit: madebychrissied.blogspot.com
Deep Cleaning Techniques
Self-healing cutting mats are essential tools for crafters and quilters. Over time, debris and stains can accumulate. Regular cleaning can keep your mat in top condition. Deep cleaning helps restore its surface and prolong its life. Here’s a guide on how to clean your mat thoroughly.
Using A Mild Soap Solution
Fill a basin with lukewarm water. Add a small amount of mild dish soap. Mix until the soap dissolves completely. Submerge your cutting mat in the soapy water. Allow it to soak for about 20 minutes. This helps loosen dirt and grime.
After soaking, gently scrub the surface. Use a soft cloth or sponge. Focus on areas with stubborn stains. Rinse the mat thoroughly with clean water. Ensure no soap residue remains. Wipe it dry with a clean towel. Let it air dry completely before use.
Scrubbing With A Soft Brush
Stubborn stains may require gentle scrubbing. Use a soft brush for this task. Avoid hard brushes that can damage the mat. Dip the brush in the soapy solution. Gently scrub in a circular motion. Pay attention to the cutting lines and grooves.
Rinse the mat to remove any soap. Check for remaining stains. Repeat the scrubbing process if necessary. Once clean, pat the mat dry with a towel. Let it air dry naturally. Ensure the mat is flat during drying to prevent warping.
Dealing With Stubborn Stains
Easily tackle stubborn stains on your self-healing cutting mat with warm soapy water and a soft brush. Gently scrub in circular motions to lift residue without damaging the surface. Rinse thoroughly and pat dry to maintain the mat’s quality.
Dealing with stubborn stains on your self-healing cutting mat can be frustrating. These mats are designed to last, but stains can make them look worn. Regular cleaning helps maintain their appearance and function. For stubborn stains, try natural cleaning solutions. They are effective and won’t harm your mat.Applying A Vinegar Solution
Vinegar is a natural cleaner with many uses. It can help remove tough stains. Mix equal parts of vinegar and water in a spray bottle. Spray the solution on the stained area. Let it sit for a few minutes. The vinegar will break down the stain. Use a soft cloth to gently rub the area. The stain should start to lift. Rinse the mat with water and dry it thoroughly.Utilizing Baking Soda
Baking soda is another great cleaning agent. It tackles stubborn stains easily. Create a paste with baking soda and water. Apply the paste to the stained area. Let it sit for about 15 minutes. This allows the baking soda to work its magic. Use a damp cloth to scrub the stain gently. Rinse the mat with water. Make sure to dry it completely. Baking soda can refresh your mat without causing any damage.Drying And Storing
Proper drying and storing of your self-healing cutting mat is essential. It prolongs its lifespan and maintains its effectiveness. Many overlook these steps, but they are crucial. Let’s explore how to dry and store your mat efficiently.
Air Drying Tips
Air drying is the safest method for your cutting mat. After cleaning, lay the mat flat on a clean surface. Choose a well-ventilated area to speed up drying. Avoid direct sunlight. It can warp or discolor the mat. Ensure both sides are dry before storing.
Proper Storage Methods
Store your cutting mat flat to prevent warping. If space is limited, hang it vertically. Use a sturdy hook. Keep it away from heat sources. Store in a cool, dry place to maintain its integrity. Avoid stacking heavy objects on top. This can cause permanent damage.
Maintenance Tips
Keep your self-healing cutting mat in top shape by using a soft brush to remove debris. Gently wash with mild soap and lukewarm water to clear stains. Dry flat to maintain its smooth surface.
Maintaining your self-healing cutting mat ensures its longevity and optimal performance. Regular care prevents warping and keeps your mat clean, prolonging its life. Here are some practical maintenance tips to keep your cutting mat in top shape.Regular Cleaning Schedule
A consistent cleaning routine is essential. Aim to clean your mat every few weeks, depending on usage. This not only keeps it looking fresh but also maintains its self-healing properties. Use a gentle mixture of lukewarm water and mild dish soap. Avoid harsh chemicals as they can damage the mat’s surface. Gently scrub using a soft brush and rinse thoroughly. After cleaning, lay your mat flat to dry. Hanging it can lead to warping, especially if it’s exposed to heat or sunlight.Avoiding Common Mistakes
One common mistake is using abrasive materials for cleaning. These can scratch and damage the surface. Stick to soft brushes or cloths for a gentle clean. Never use hot water. It can warp and ruin the mat’s integrity. Always opt for lukewarm water to avoid this pitfall. Resist the urge to store your mat rolled up. This might seem space-saving but can cause permanent bends. Keep it flat or standing upright if space is an issue. Have you ever found your mat not healing as well as it used to? This might be due to cutting too deeply. Always adjust your blade to just cut through the fabric, not into the mat itself. Taking time to care for your cutting mat ensures it continues to serve you well. What other tips have you found helpful in maintaining your crafting tools? Share your thoughts in the comments below!When To Replace Your Cutting Mat
Knowing when to replace your self-healing cutting mat is essential for maintaining precision in your crafting projects. While these mats are designed to withstand numerous cutting sessions, they do eventually wear out. Recognizing the signs early can save you from frustrating mishaps and ensure your tools remain in top condition. But how do you determine when it’s time to say goodbye to your trusty mat?
Signs Of Wear And Tear
Start by inspecting the surface of your cutting mat. Are there deep grooves or scars that don’t seem to heal? These are clear indicators that the mat’s self-healing properties are diminishing. You might also notice areas where the mat doesn’t lay flat anymore, causing uneven cuts.
Another sign is fading grid lines. If the measurements are no longer visible, it can lead to inaccurate cuts, disrupting your creative flow. Furthermore, if the mat feels rough or sticky, it’s losing its smoothness, making it hard for your blade to glide effortlessly.
Assessing Mat Performance
Consider the quality of your recent projects. Are your cuts clean and precise, or are they starting to look jagged? A worn-out mat can affect the performance of your cutting tools, leading to less-than-perfect results. An easy test is to make a few cuts on scrap material. Are the edges smooth, or do they require additional trimming?
You should also assess how often you need to replace your blades. If the frequency has increased, your mat might be dulling them faster than expected. An efficient cutting mat should prolong the life of your blades, not reduce it.
Think about your crafting habits. If you find yourself constantly adjusting the mat to ensure stability, it’s likely time for a replacement. Stability is crucial for maintaining accuracy in your work.
Regularly evaluating your cutting mat’s condition will help you decide when it’s time for an upgrade. A well-maintained mat can be the difference between a frustrating crafting session and a satisfying one. So, what’s your mat telling you? Listen closely and act accordingly.
Frequently Asked Questions
How Can I Clean My Cricut Cutting Mat?
To clean your Cricut cutting mat, gently remove debris with a scraper. Wash with mild soap and warm water. Let it air dry completely. Avoid using harsh chemicals to maintain stickiness. Regular cleaning extends mat life and enhances cutting precision.
Can You Wash Your Cutting Mat?
Yes, you can wash your cutting mat gently. Use mild soap and lukewarm water for cleaning. Avoid harsh chemicals or scrubbing. Dry it flat to prevent warping. Regular cleaning keeps your mat in good condition, ensuring precision and longevity for your crafting projects.
How Long Does A Self-healing Cutting Mat Last?
A self-healing cutting mat typically lasts several years. Proper care and usage extend its lifespan. Avoid direct sunlight, excessive heat, and sharp tools. Regularly clean the mat with mild soap and water to maintain its condition. Quality mats can endure frequent use without significant wear, ensuring long-lasting performance.
How To Clean A Self-absorbing Mat?
To clean a self-absorbing mat, shake off debris first. Use mild soap and warm water to scrub. Rinse thoroughly and let it air dry completely. Avoid using harsh chemicals or bleach to maintain its absorbency and longevity.
Conclusion
Cleaning a self-healing cutting mat is simple and important. Regular care extends its life. Start by wiping it with a damp cloth. Use mild soap for tougher stains. Avoid harsh chemicals to prevent damage. Keep the mat out of direct sunlight.
This prevents warping and fading. Store it flat to maintain its shape. A clean mat ensures precise cutting. So, follow these steps for a reliable tool. Happy crafting!

I’m Abby Lu, a passionate home cook who loves simplifying everyday meals. At PlugChef.com, I share product reviews and cooking guides to help you find the best tools for your kitchen.
Related posts:
 What Type of Cooking Utensils are Safe: Expert Picks
 What Innovations Could Blenders Make: Unleashing Future Tech
 Smart Strategies to Organize a Small Kitchen: Maximize Space
 How to Organize a Kitchen Cabinet: Expert Tips & Tricks
 How to Organize Kitchen Drawers: Expert Tips and Tricks
 How to Organize a Corner Kitchen Cupboard: Expert Tips

