
Have you ever wondered how to keep your cutting board in top-notch condition? Sealing it is the key to ensuring its longevity and maintaining its pristine appearance.
Imagine slicing your favorite fruits and vegetables on a beautifully maintained surface that enhances your kitchen experience. If you’re tired of dealing with warped or cracked boards, this guide is for you. You’ll discover simple, effective techniques that will transform your cutting board into a durable and visually appealing tool.
By the end of this article, you’ll have the knowledge and confidence to seal your cutting board like a pro, making it last for years to come. Dive in and unlock the secrets to a perfect cutting board!

Credit: www.youtube.com
Choosing The Right Oil
Sealing your cutting board is essential to maintain its durability and hygiene. The right oil can make all the difference in protecting the wood and ensuring your food remains safe. But how do you choose the best oil for your cutting board?
Food-safe Options
When picking oil for your cutting board, safety should be your priority. You want an oil that’s not only effective but also food-safe. Mineral oil is a popular choice because it’s odorless, tasteless, and won’t go rancid. It’s specifically designed for use in kitchens, making it a safe bet.
Another option is walnut oil. It’s natural and penetrates deeply into the wood. Walnut oil provides a rich finish and is safe for food preparation areas. Just ensure you’re not allergic to nuts before using it.
Avoiding Harmful Oils
Not all oils are created equal, and some can be harmful. Vegetable oils, like olive or corn oil, can go rancid over time. This can lead to unpleasant smells and potentially unsafe surfaces.
Additionally, some oils, such as linseed oil, may contain additives that aren’t food-safe. These oils can pose a risk if they come into contact with your food. Always check labels and opt for oils specifically labeled as food-safe.
Have you ever picked an oil that seemed perfect, only to find out it wasn’t right for your needs? Picking the wrong oil can lead to disappointment and waste. Making an informed choice can save you time and protect your culinary creations. Choose wisely, and your cutting board will thank you.

Credit: tulipsandtwill.com
Preparing The Cutting Board
Sealing a cutting board helps protect it from moisture and stains. Start by applying food-grade mineral oil evenly. Allow it to soak for a few hours, then wipe off excess. Repeat this process monthly to maintain your cutting board’s durability and appearance.
Preparing your cutting board is a crucial step to ensure its longevity and effectiveness. A well-sealed cutting board not only enhances its durability but also provides a safe, hygienic surface for food preparation. Before diving into sealing, it’s essential to prepare the board correctly. This involves cleaning the surface and sanding it for smoothness. These steps might seem simple, but they are vital for a perfect finish that lasts.Cleaning The Surface
Start by thoroughly cleaning your cutting board. Use warm, soapy water and a sponge to remove all food residues and oils. Rinse well and dry with a clean towel. Don’t skip this step, as any leftover debris can affect the sealing process. You want your board to be as clean as possible before moving forward. A clean surface ensures that the sealant adheres properly, providing a long-lasting protective layer.Sanding For Smoothness
Once your cutting board is clean and dry, it’s time to sand it. Use fine-grit sandpaper, around 220-grit, to achieve a smooth finish. Sand along the grain of the wood to avoid scratches. Sanding removes any rough spots and opens up the wood pores for better sealant absorption. Remember to wipe away the sanding dust with a damp cloth before proceeding. Have you ever noticed how a smooth surface enhances the board’s appearance? More importantly, it ensures even sealing, allowing you to enjoy a cutting board that’s both functional and beautiful. Preparing a cutting board might seem like a lot of work, but each step contributes to a superior finish. By dedicating a little time to preparation, you ensure that your cutting board will serve you well for years to come. Are you ready to see the difference it makes?Applying The Oil
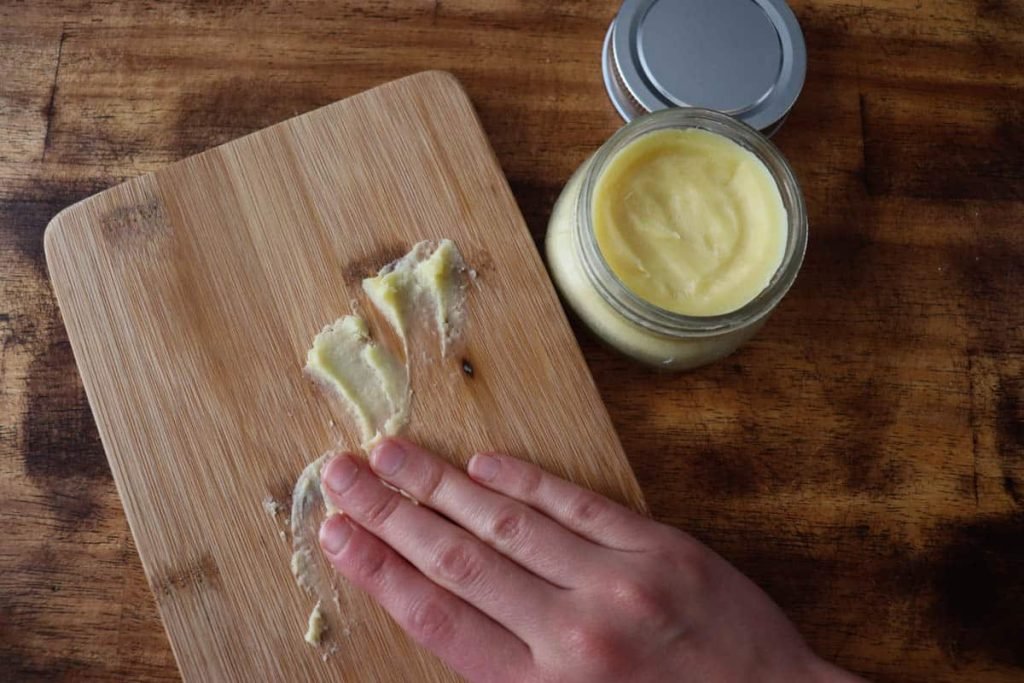
When you think about extending the life of your cutting board, applying oil is a crucial step. Not only does it protect the board from absorbing moisture and unwanted odors, but it also enhances its appearance. Imagine a cutting board that’s both functional and beautiful, complementing your kitchen aesthetic. But how do you do it effectively? Let’s dive into the details.
Tools And Materials Needed
Before you begin, gather your essentials. You’ll need food-grade mineral oil, a clean cloth, and a brush. Mineral oil is preferred because it’s safe for food contact and deeply penetrates the wood. A brush helps you apply the oil evenly, while the cloth is perfect for buffing and polishing the surface.
Consider having a dedicated space for this task. You wouldn’t want oil splatters on your kitchen counter. A newspaper or an old towel can be helpful to catch any excess oil and keep your workspace tidy.
Step-by-step Application
Start by ensuring your cutting board is clean and dry. This prevents trapping any dirt or moisture under the oil.
Pour a small amount of mineral oil onto the board. Use the brush to spread it evenly, covering every inch. Feel free to apply more oil if the board appears dry.
Let the oil soak in for at least 20 minutes. This allows the board to absorb the oil and create a protective barrier.
After the soaking period, take your cloth and gently buff the board. This removes excess oil and adds a polished finish.
Repeat this process monthly or as needed, especially after heavy use or washing. Have you ever noticed that your board starts to look dull or cracked? Regular oiling can prevent this and keep it looking fresh.
Doesn’t it feel rewarding to maintain something yourself? By investing time in oiling your cutting board, you’re preserving its quality and functionality for years to come. Have you tried any different oils or methods? Share your experience and let’s keep our boards in top shape together!
Allowing Proper Absorption
Proper absorption is key to sealing a cutting board effectively. Start by cleaning it thoroughly with soap and water. Apply mineral oil generously, allowing it to soak in overnight for optimal protection.
Sealing a cutting board is more than just a preservation task; it’s about allowing the board to serve you better in the long run. Proper absorption of the sealing oil is crucial. It determines how effective the seal will be and how long it will last. Have you ever noticed water beading up on a well-sealed board? That’s a sign of success. But getting to that point requires patience and a bit of know-how.Time Required For Absorption
The time it takes for a cutting board to absorb sealing oil depends on the type of wood and the oil used. Typically, mineral oil requires about 20 to 30 minutes for each coat to soak in. However, denser woods may need a bit longer. Monitor the board after applying the oil. If it looks dry in certain spots, give it more time. You might need to apply another coat if it absorbs too quickly.Signs Of Proper Sealing
Wondering if your cutting board is properly sealed? Check for these signs. Water should bead on the surface, indicating a good seal. The board should also feel smooth and slightly oily but not greasy. A well-sealed board resists stains and odors. If your board shows these characteristics, you’ve done a great job. But if it starts absorbing water or odors, it’s time for another coat. Allowing proper absorption ensures your cutting board lasts and performs well. Have you considered how often you need to seal your board? Regular maintenance is key to keeping it in top condition.Maintaining The Seal
Sealing a cutting board keeps it safe and durable. Apply food-grade mineral oil evenly across the surface. Allow the oil to soak in, then wipe off any excess. Repeat regularly to maintain a protective layer. This simple routine prevents cracks and extends the board’s life.
Maintaining the seal on your cutting board is crucial for its longevity and hygiene. A well-sealed board is less likely to absorb moisture, which can lead to warping or cracking. Keeping the seal intact also protects against bacteria buildup, ensuring your food prep remains safe.Regular Reapplication
Keeping your cutting board in prime condition means reapplying the seal regularly. Natural oils like mineral oil are great for keeping the wood hydrated. Think of it like moisturizing your skin; it’s a simple act that can prevent a lot of problems. Aim to reapply the oil every few weeks, especially if you notice the board drying out or becoming dull. Imagine the satisfaction of cutting on a board that looks as good as new. A well-maintained seal not only extends the board’s life but also enhances your cooking experience. Have you ever sliced veggies on a board that feels rough and splintered? Regular oiling solves that issue.Storage Tips
How you store your cutting board can affect how well the seal holds up. Keep it in a dry place to prevent moisture from causing damage. Moisture is the enemy of a wood cutting board. Avoid stacking it with other kitchen items that can scratch or wear down the surface. Consider dedicating a space where the board can stand upright, allowing air to circulate. This ensures the board dries evenly after cleaning. Have you ever noticed a cutting board smelling musty? Proper storage can prevent this, keeping your board fresh and ready for its next culinary adventure.Common Mistakes
Improper sanding can leave your cutting board uneven, affecting the sealant’s effectiveness. Applying excess oil might cause sticky residue, leading to bacteria build-up. Using non-food-safe sealants risks contaminating food, compromising safety.
Sealing a cutting board is a crucial step to ensure its longevity and hygiene. However, many people make avoidable mistakes during this process. Let’s dive into some of these common errors and learn how to avoid them, ensuring your cutting board remains in top-notch condition.Over-oiling
Believe it or not, more isn’t always better. Over-oiling your cutting board can lead to a sticky, unpleasant surface. This excess oil doesn’t just sit on top. It can penetrate too deeply, making the board too soft and prone to warping. I once thought oiling my board every day would make it last longer. Instead, I ended up with a board that felt tacky and even attracted dust. The key is moderation. Oil your board sparingly, just enough to keep it hydrated and protected.Neglecting Regular Maintenance
It’s easy to forget about your cutting board until it shows signs of wear. Neglecting regular maintenance can cause cracks and allow bacteria to settle in. This isn’t just a hygiene issue; it’s a safety concern. Imagine cutting fresh vegetables on a board that’s harboring bacteria from last week’s meal. Not pleasant, right? Make it a habit to clean, dry, and oil your board routinely. Set reminders if you have to. Consistent care will save you time and trouble in the long run. Have you ever found yourself making any of these mistakes? If so, don’t worry. There’s always room to improve and keep your kitchen essentials in pristine condition. Your cutting board is an investment in your culinary journey. Treat it with the care it deserves, and it will serve you well for years to come.Expert Tips And Tricks
Sealing a cutting board keeps it looking new and extends its life. Experts have shared tips to make this task simple and effective. Learn how to protect your board with ease. Enhance its beauty while ensuring it lasts longer.
Enhancing Longevity
Wooden cutting boards need protection from water damage. Sealing creates a barrier against moisture. Use food-grade mineral oil for the best results. Apply it generously with a clean cloth. Let the oil soak in overnight. Repeat this process monthly for ongoing protection.
Choose a beeswax finish for extra durability. It offers a thicker protective layer. Mix melted beeswax with mineral oil. Apply it evenly over the board. Let it dry for at least an hour. Buff the surface with a soft cloth for a smooth finish.
Customizing For Aesthetic
Want to personalize your cutting board? Natural oils can enhance the wood’s color. Walnut oil deepens the wood tone. It also adds a rich, warm hue. Before applying, test it on a small area.
To add a touch of elegance, consider lemon oil. It brightens the wood and leaves a fresh scent. Avoid using cooking oils like olive or vegetable. They can turn rancid over time.
Experiment with different finishes. Each oil gives a unique look. Choose the one that matches your kitchen decor. Enjoy a cutting board that is both functional and beautiful.

Credit: www.youtube.com
Frequently Asked Questions
What Is The Best Thing To Seal A Cutting Board With?
Food-grade mineral oil is the best sealant for cutting boards. It penetrates wood, preventing cracks and warping. Regular application maintains the board’s condition, ensuring longevity and safety. Always choose a product labeled safe for food contact to protect against contamination.
Beeswax or coconut oil are also suitable alternatives.
Is It Better To Oil Or Wax A Cutting Board?
Oil is better for cutting boards. It penetrates wood, prevents drying, and maintains the board’s condition. Wax offers surface protection but doesn’t penetrate. Regular oiling ensures longevity and enhances appearance. Use food-grade mineral oil for best results.
Does A Cutting Board Need To Be Sealed?
Sealing a cutting board helps prevent moisture and bacteria buildup. Wooden boards benefit most from sealing. Use food-grade mineral oil to seal. Regular sealing maintains hygiene and extends the board’s lifespan. Plastic boards generally don’t need sealing, but wooden ones do for safety and longevity.
Always ensure food safety standards.
What Kind Of Finish Should You Put On A Cutting Board?
Use food-grade mineral oil for a cutting board finish. It penetrates wood, offering protection and moisture resistance. Beeswax mixed with mineral oil can provide added sealing and shine. Avoid vegetable oils as they can turn rancid. Reapply the finish every few weeks for optimal maintenance.
Conclusion
Sealing a cutting board is simple and essential. This process protects the wood and extends its life. First, clean the board thoroughly. Then, apply food-safe mineral oil generously. Let it soak overnight. Repeat monthly for best results. Proper care ensures your cutting board stays beautiful and functional.
A well-sealed board resists stains and cracks, making it a valuable kitchen tool. Remember, regular maintenance keeps it in top condition. Prioritize your board’s health by sealing it regularly. Enjoy cooking with a sturdy and reliable cutting surface. Keep it lasting for years to come.

Hi, I’m Daniel Brooks—a food lover and kitchen gear enthusiast. I enjoy testing cookware, utensils, and gadgets to see what really works in everyday cooking. At PlugChef.com, I share honest reviews, comparisons, and simple guides to help you choose the best tools for a safer, smarter, and more enjoyable kitchen.
Related posts:
 What Type of Cooking Utensils are Safe: Expert Picks
 What Innovations Could Blenders Make: Unleashing Future Tech
 Smart Strategies to Organize a Small Kitchen: Maximize Space
 How to Organize a Kitchen Cabinet: Expert Tips & Tricks
 How to Organize Kitchen Drawers: Expert Tips and Tricks
 How to Organize a Corner Kitchen Cupboard: Expert Tips

